Table of Contents
Advertisement
Available languages
Available languages
Quick Links
Advertisement
Table of Contents

Related Manuals for NUK Electric


Summary of Contents for NUK Electric
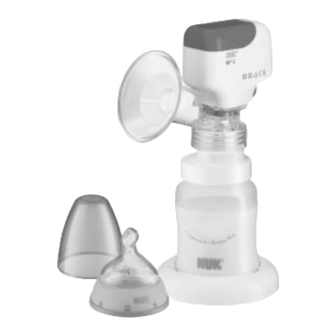
- Page 1 NUK Elektrische Milchpumpe NUK Electric Breast Pump Bedienungsanleitung Operating Instructions Art.Nr.: 10.252.059; 10.252.021, 10.749.030 mit NUK Muttermilchbehälter und Original NUK Sauger with NUK Breast Milk Container and original NUK Vented Teat...
- Page 5 Deutsch ..............2 Bitte Ausklappseite beachten English .
- Page 6 Liebe Mutter, Muttermilch ist für Babys die wichtigste Lebens- Ihr Baby gedacht, wenn das natürliche Stillen vor- quelle überhaupt. Darum unterstützt Sie das NUK übergehend oder dauernd nicht möglich ist. Stillprogramm mit praktischen und komfortablen Bitte nehmen Sie sich 5 Minuten Zeit und lesen Sie Stillhilfen für jeden Bedarf, damit Sie und Ihr Baby...
-
Page 7: Allgemeine Hinweise
Sie bitte unbedingt die Anwei- Gerätes und muss jederzeit verfügbar sein. sungen Ihres Arztes. • Verwenden Sie die NUK Elektrische Milch- 3.2 Kennzeichnungen am Gerät pumpe nur für den beschriebenen Verwen- dungszweck (siehe „2.1 Verwendungszweck“ An der Pumpeneinheit 1 finden Sie diese Kenn- auf Seite 2). -
Page 8: Benennung Der Teile
6 Saugstärkeregler 15 Netzadapter (nicht bei Art.-Nr.- 10.252.025) 7 Dichtungsring 16 Standfuß 8 Verbindungselement (nur für Weithalsflaschen Art.-Nr.- 17 NUK Standardflasche PC 125 ml 10.252.059, 10.749.036) 18 Brustwarzenring 9 NUK First Choice Flasche PC 150 ml / NUK 19 Absaugglocke Muttermilchbehälter... -
Page 9: Tipps Zum Erfolgreichen Abpumpen
In allen anderen Fällen kann ganz individuell und • Legen Sie vor dem Abpumpen ein paar Minu- nach Bedarf gepumpt werden. ten eine warme Kompresse (z.B. das NUK Brustgelkissen) auf die Brust, um das Gewebe 5.2 Durchführung zu entspannen. Abgepumpt wird wechselweise an beiden Brüsten. - Page 10 NUK Muttermilchbehälter: Schrauben Sie zuerst das Verbindungselement 8 2. Setzen Sie den Brustwarzenring 18 in die auf die Absaugglocke und danach die NUK First Absaugglocke ein. Choice Flasche / den NUK Muttermilchbehäl- 3. Legen Sie den Dichtungsring 7 innen in das ter 9 an das Verbindungselement.
- Page 11 Richtung „L“. Schrauben Sie die Absaugglocke mit der Pum- 1. Setzen Sie die Absaugglocke 19 an die Brust, so peneinheit von der NUK Standardflasche 17 ab. dass sich die Brustwarze in der Mitte der Saug- NUK First Choice Flasche / glocke befindet.
-
Page 12: Reinigung Und Desinfektion
Drehung von der Absaugglocke ab. Absaugglocke 19, Dichtungsringe 7, Brustwarzen- 3. Schrauben Sie die Absaugglocke und bei der ring 18, Schraubring 14 und Saugerschutzkappe 12 NUK First Choice Flasche / den NUK Mutter- desinfiziert werden. milchbehälter zusätzlich das Verbindungsele- •... -
Page 13: Tipps Zur Hygiene
Achtung: Muttermilch darf nicht in der geeignet. Mikrowelle aufgetaut werden, da sonst wert- Tipp: volle Inhaltsstoffe zerstört werden und an dem Frieren Sie die Milch im NUK Muttermilchbehälter Behälter Materialschäden auftreten können ein. Zum Auftauen können Sie den Behälter in den (Explosionsgefahr/Materialschäden). Durch Kühlschrank oder, wenn es schnell gehen soll, in... -
Page 14: Technische Daten
EMV-Leitlinien nach EN 60601-1-2:2001: Leitlinien und Herstellererklärung - Elektromagnetische Aussendungen Die NUK Elektrische Milchpumpe BP3 ist für den Betrieb in der unten angegebenen Umgebung bestimmt. Der Kunde oder der Anwender der NUK Elektrische Milchpumpe BP3 sollte sicher- stellen, dass sie in einer derartigen Umgebung benutzt wird. -
Page 15: Garantie
13. Entsorgung Das Symbol der durchgestri- normalen Hausmüll entsorgt werden, son- chenen Abfalltonne auf Rädern dern müssen an einer Annahmestelle für bedeutet, dass das Produkt in das Recycling von elektrischen und elektro- der Europäischen Union einer nischen Geräten abgegeben werden. Recyc- getrennten Müllsammlung ling hilft, den Verbrauch von Rohstoffen zu zugeführt werden muss. -
Page 16: Functional Description
1. Important Information before Using for the First Time Clean and sterilise all parts (except pump unit 1 and mains adapter) before using the NUK Electric Breast Pump for the first time (see "9. Cleaning and Sterilising" on page 18). -
Page 17: General Information
They are an essential part of the NUK Electric Breast Pump and should The following labels are to be found on pump always be to hand. unit 1: • The NUK Electric Breast Pump should only be Symbol Meaning used intended purpose (see "2.1 Purpose"... - Page 18 Uneven heating may cause scald- swallowed. ing to your child therefore please check the temperature before feeding. • NUK bottles and teats are only compatible with the relevant system, for example NUK First Choice. 3.5 NUK Teats •...
-
Page 19: Designation Of Components
17 NUK Standard Bottle PC 125 ml (only for wide-necked bottles Art.-No. 10.252.059, 10.749.036) 18 Nipple ring 9 NUK First Choice Bottle PC 150 ml / 19 Suction part NUK Breast Milk Container 5. Tips for Successful Operation The correct pumping action needs practice. You 5.3 Milk Quantity... -
Page 20: Power Supply
Before commencing, lay a warm compress on • The milk-producing reflex releases the flow of your breasts for a few minutes (e.g. the NUK milk to both breasts simultaneously. Any sur- Breast Compress) to help relax the breast plus milk leaking from the breast not currently tissue. - Page 21 4 upwards towards "ON". the container may burst. 3. Adjust the suction power using rotary knob 6 1. Unscrew the pump unit from the NUK Breast until the optimum suction strength is attained. Milk Container. The suction strength during pump delivery will 2.
-
Page 22: Cleaning And Sterilising
• Use a NUK Steam Steriliser for this purpose, rotating slightly. observing the relevant operating instructions, 3. Unscrew the suction part and with the NUK First Choice Bottle/NUK Breast Milk Con- • Sterilise the components in boiling water for tainer also the connecting element from the at least 5 minutes. -
Page 23: Tips For Handling Breast Milk
+4 ºC in the refrigerator (but not in the refrigerator door). N.B.! Only the bottle with lid should be placed in the refrigerator, not the complete NUK Electric • Maximum storage times are 2 weeks in the Breast Pump. -
Page 24: Technical Data
Guidelines and manufacturers declaration - Electromagnetic emissions The NUK BP3 Electric Breast Pump is designed for use in the environment specified below. The customer or user of the NUK BP3 Electric Breast Pump should ensure that it is used in that type of environment. -
Page 25: Warranty Certificate
14. Guarantee Provided that the device is handled with care and In each case the device must be sent together with used in accordance with these instructions, the this completed warranty form, or failing this, the manufacturer will guarantee the product for purchase receipt or other proof of date of pur- 24 months from the date of purchase. -
Page 26: Notas Importantes Antes Del Primer Uso
(inflamaciones, heridas abiertas) el sacaleches materna. La leche materna extraída puede ser eléctrico de NUK no se debería utilizar, o sólo con recogida, conservada, congelada, calentada y una precaución especial. En el caso concreto, la administrada directamente en el recipiente para decisión sobre el uso del sacaleches eléctrico de... -
Page 27: Indicaciones De Seguridad
De lo contrario se extingue todo momento. derecho de garantía. • Utilice el sacaleches eléctrico de NUK • Si la leche materna está destinada a un niño solamente para el uso previsto descrito (ver prematuro,... - Page 28 ¡Existe peligro de quemaduras debido al calentamiento desigual! • Los biberones y las tetinas NUK sólo son compatibles con el sistema correspondiente, por ejemplo First Choice NUK. 3.5 Tetina NUK • Se tiene que conservar higiénicamente (limpia y seca) y protegida contra la luz a temperatura ambiente.
-
Page 29: Denominación De Las Piezas
4. Denominación de las piezas 1 Unidad de bomba 10 Soporte para el biberón First Choice NUK 2 Compartimiento para las pilas 11 Tubito de limpieza 3 Conexión para el adaptador de red 12 Caperuza de protección de la tetina NUK 4 Interruptor de conexión / desconexión... -
Page 30: Montaje
(p.ej. la leche en ambos pechos a la vez. El fluido de almohadilla de gel para el pecho NUK) sobre leche materna en el pecho que no tiene el pecho para relajar el tejido. -
Page 31: Instrucciones De Uso
8. Biberón estándar NUK: Desenrosque el embudo de succión con la Coloque primero el regulador de fuerza de unidad de bomba del biberón estándar NUK 17 . succión 6 al mínimo. Para ello gire el anillo Biberón First Choice NUK/ exterior hacia la izquierda en dirección "L”. -
Page 32: Limpieza Y Desinfección
Utilice un vaporizador NUK. Tenga en cuenta 3. Desenrosque del biberón el embudo de las instrucciones de uso correspondientes del succión y en el biberón First Choice NUK / el aparato, o recipiente para leche materna NUK además el •... -
Page 33: Consejos Para La Higiene
El FIRST CHOICE NUK y infantil NUK. el biberón estándar NUK no son adecuados para • ¡Atención! La leche materna no debe ello. descongelarse en el microondas, ya que de lo... -
Page 34: Datos Técnicos
Directivas y declaración del fabricante – Emisiones electromagnéticas El sacaleches eléctrico NUK BP3 es apropiado para su funcionamiento en el entorno que se indica a continuación. El cliente o el usuario del sacaleches eléctrico NUK BP3 debe asegurarse de que se utiliza en un entorno de este tipo. -
Page 35: Tarjeta De Garantía
13. Eliminación El símbolo de un contenedor de normal, sino que deben ser entregados en residuos sobre ruedas cruzado un punto de recogida para el reciclaje de significa que en la Unión aparatos eléctricos y electrónicos. El Europea el producto debe ser reciclaje colabora a reducir el consumo de depositado en un colector de materias primas y respetar el entorno. -
Page 36: Indicações Importantes Antes Da Primeira Utilização
Cara mãe, o leite materno é a fonte de vida mais importante a amamentação natural não é possível, de forma para os bebés. Por isso, a NUK dá-lhe uma ajuda temporária ou permanente. com o programa de amamentação NUK, com Dispense 5 minutos do seu tempo e leia este auxiliares de amamentação práticos e confortáveis... -
Page 37: Indicações Gerais
Antes da utilização, leia atentamente o manual de operação. O manual é parte integral do Na unidade de bomba 1 encontra estas aparelho e tem de estar sempre disponível. marcações:: • Use a bomba tira-leite eléctrica NUK apenas Símbolo Significado campo aplicação descrito (ver "2.1 Campo de aplicação"... - Page 38 Devido a um aquecimento não uniforme existe perigo de queimadura. • Somente os biberões e as tetinas NUK são compatíveis com o respectivo sistema, por exemplo NUK First Choice. 3.5 Tetina NUK •...
-
Page 39: Designação Das Peças
(apenas para biberão de gargalo largo 17 Biberão standard NUK PC 125 ml ref.ª - 10.252.059, 10.749.036) 18 Anel para o mamilo 9 Biberão First Choice NUK PC 150 ml/ 19 Funil de sucção recipiente para leite materno NUK 5. Dicas para um bombeamento eficaz O bombeamento correcto tem de ser treinado. -
Page 40: Alimentação De Corrente
O reflexo de ejecção do leite activa o fluxo de alguns minutos uma compressa quente (p. ex. leite simultaneamente em ambos os peitos. O a almofada de gel para o peito NUK) sobre o leite materno que sai pode ser recolhido alter- peito para relaxar o tecido. -
Page 41: Recipiente Para Leite Materno Nuk
Se a capacidade de sucção for muito forte, ente para leite materno NUK. rode o botão para a esquerda, sentido "L" 2. Feche o recipiente para leite materno NUK 4. Para interromper o processo de bombea- com o anel de rosca e a respectiva chapa de mento, carregue no botão 5 (Push) e largue-o. -
Page 42: Limpeza E Desinfecção
Importante! A unidade de bomba 1 nunca pode no caso do biberão First Choice NUK/recipi- ser desinfectada para não danificar a parte eléctrica. ente para leite materno NUK, também o ele- Só estes acessórios podem ser desinfectados: mento de ligação. -
Page 43: Dicas Sobre A Higiene
O leite materno só pode ficar armazenado até Atenção! Não ponha no frigorífico toda a bomba 72 horas a +4 °C no frigorífico (não na porta tira-leite eléctrica NUK, só o biberão com tampa. do frigorífico). • O tempo máximo para guardar o leite é de 11.1 Biberão standard NUK... -
Page 44: Dados Técnicos
Directivas e declaração do fabricante - emissões electromagnéticas A bomba tira-leite eléctrica NUK BP3 destina-se à utilização nos seguintes ambientes. A cliente ou a utilizadora da bomba tira-leite eléctrica NUK BP3 tem de se assegurar de que a utilização é feita nesse tipo de ambiente. -
Page 45: Certificado De Garantia
13. Eliminação O símbolo do contentor de lixo lixo doméstico normal, mas sim encaminha- sobre rodas riscado significa dos para reciclagem de aparelhos eléctricos que o produto tem de ser e electrónicos. A reciclagem ajuda a reduzir encaminhado para reciclagem o consumo de matéria-prima e a poupar o dentro da União Europeia. -
Page 46: Description De L'appareil
Chère maman, Le lait maternel est la source de vie la plus pré- naturel est temporairement impossible ou pendant cieuse pour les bébés. Dès lors, NUK vous assiste une période prolongée. en vous proposant le programme d’allaitement Prenez 5 minutes de votre temps pour lire attenti- NUK ainsi que des accessoires d’allaitement prati-... -
Page 47: Consignes Générales
Dans le cas moment. contraire, la garantie ne sera pas appliquée. • Utilisez le tire-lait électrique de NUK unique- • Si le lait maternel est destiné à un prématuré, ment pour l’usage prévu et conformément à la respectez attentivement les consignes de notice d’emploi (voir «... - Page 48 à cause du réchauffe- ment. La chaleur inégalement répartie com- porte un risque de brûlure. • Les biberons et tétines NUK sont exclusive- ment compatibles avec le système correspon- dant, notamment NUK First Choice. 3.5 Tétine NUK •...
-
Page 49: Nom Des Éléments
à col large n° de réf. 10.252.059, 17 Biberon NUK standard PC 125 ml 10.749.036) 18 Coussinet 9 Biberon NUK First Choice PC 150 ml / 19 Cloche d’aspiration Pot de conservation NUK 5. Conseils pour un prélèvement efficace au tire-lait Il faut prélever le lait correctement. -
Page 50: Montée De Lait
3. Placez la bague d’étanchéité 7 à l’intérieur du NUK First Choice / le pot de conservation filetage de la cloche d’aspiration. NUK 9 sur l’élément de jonction. Veillez à ce 4. Biberon NUK standard : que le biberon / pot de conservation NUK soit Vissez le biberon NUK standard 17 sur la correctement vissé... -
Page 51: Pot De Conservation Nuk
Si elle est trop élevée, tournez le bouton vers 2. Fermez correctement le pot de conservation la gauche en position « L ». NUK à l’aide de la bague fournie et du petit couvercle de fermeture correspondant. 4. Appuyez et relâchez le bouton 5 (Push) pour interrompre le prélèvement au tire-lait. -
Page 52: Nettoyage Et Stérilisation
3. Dévissez la cloche d’aspiration du biberon, ainsi que l’élément de jonction si un biberon NUK 2. plongez les éléments dans l’eau bouillante First Choice / un pot de conservation NUK est pendant au moins 5 minutes. utilisé. Attention ! La stérilisation ne peut pas être 4. -
Page 53: Conseils Pour L'hygiène
Astuce : • Attention ! le lait maternel ne peut pas être Congelez le lait dans le pot de conservation NUK. décongelé dans le four à micro-ondes, sous Pour décongeler le lait, vous pouvez poser le pot peine de détruire des éléments nutritifs essen- de conservation dans le réfrigérateur ou dans de... -
Page 54: Caractéristiques Techniques
Directives et déclaration du fabricant – Émissions électromagnétiques Le tire-lait électrique BP3 de NUK est conçu pour être utilisé dans l’environnement spécifié ci-après. Le client ou l’utilisateur du tire-lait électrique BP3 de NUK doit s’assurer que l’appareil est utilisé dans un environnement adéquat. -
Page 55: Certificat De Garantie
14. Garantie Le fabricant accorde une garantie de 24 mois à Dans tous les cas, l’appareil doit être renvoyé compter de la date d’achat de l’appareil, sous accompagné du certificat de garantie dûment com- réserve que ce dernier soit manipulé avec soin et plété... -
Page 56: Descrizione Dell'apparecchio
In questo importante com- nea o in modo permanente. pito, NUK ti affianca con una gamma di prodotti Soffermati qualche istante sulle presenti istruzioni, per l’allattamento pratici e comodi, da utilizzare leggendole nella loro interezza, prima di utilizzare per qualsiasi necessità, affinché... -
Page 57: Avvertenze Generali
3.2 Contrassegni sull’apparecchio • Utilizzare il tiralatte elettrico NUK solo per la destinazione d’uso descritta (si veda “2.1 Sul gruppo aspirante 1 sono presenti i seguenti Destinazione d’uso” a pagina 52). - Page 58 Il riscaldamento diso- mogeneo del latte comporta il pericolo di ustioni! • I biberon e le tettarelle NUK sono compatibili esclusivamente con il relativo sistema abbina- bile, ad esempio NUK First Choice. 3.5 Tettarella NUK •...
-
Page 59: Denominazione Dei Componenti
18 Adattatore per capezzolo 10.252.059, 10.749.036) 19 Coppa di aspirazione 9 Biberon NUK First Choice in PC da 150 ml/ contenitore per latte materno NUK 5. Suggerimenti per una corretta estrazione Occorre un po’ di pratica per estrarre il latte in •... -
Page 60: Alimentazione Elettrica
Il riflesso di emissione del latte può essere cuscino in gel per il seno NUK) sul seno, in ulteriormente stimolato da parte della madre: modo da distendere il tessuto mammario. • Accertarsi di stabilire inoltre un contatto • Sistemarsi in un luogo tranquillo, in cui ese- visivo con il proprio bebè. - Page 61 "L”. 2. Chiudere accuratamente il contenitore per latte materno NUK mediante la ghiera fornita 4. Premendo e rilasciando il pulsante 5 (Push) il in dotazione e il relativo dischetto sigillante. pompaggio può essere interrotto. Queste brevi pause simulano la naturale procedura di 3.
-
Page 62: Pulizia E Disinfezione
3. Svitare la coppa di aspirazione e nel caso del operazione, attenersi alle istruzioni per l’uso biberon NUK First Choice/del contenitore per dell’apparecchio oppure latte materno NUK svitare anche l’elemento di • fare bollire i componenti per almeno 5 minuti collegamento del biberon. -
Page 63: Conservazione Del Latte
è possibile congelare il latte all'interno dei conteni- rebbe la distruzione di preziosi componenti tori per latte materno NUK. Per scongelare il latte nutritivi oltre che possibili danni al contenitore porre il contenitore in frigorifero oppure, in caso (danni al materiale/pericolo di esplosione). -
Page 64: Dati Tecnici
Linee guida e dichiarazione del produttore - emissioni elettromagnetiche Il tiralatte elettrico NUK BP3 è destinato all’uso negli ambienti indicati di seguito. La cliente o utente del tiralatte elettrico NUK BP3 deve accertarsi di trovarsi in un ambiente di questo tipo. -
Page 65: Certificato Di Garanzia
13. Smaltimento Il simbolo del cassone portari- ma devono essere consegnati presso un fiuti su ruote cancellato signi- punto di raccolta per il riciclaggio di appa- fica che il prodotto deve essere recchi elettrici ed elettronici. Il riciclaggio smaltito in una discarica sepa- contribuisce a ridurre il consumo di materie rata nell’Unione Europea. - Page 66 φυσικός θηλασµός δεν είναι προσωρινά ή µόνιµα σηµαντική πηγή ζωής για τα βρέφη. Για το λόγο εφικτός. αυτό η NUK σας υποστηρίζει µε το πρόγραµµα Παρακαλούµε αφιερώστε 5 λεπτά και διαβάστε NUK µε πρακτικά και κατάλληλα βοηθήµατα προσεκτικά τις οδηγίες χρήσης, πριν...
- Page 67 πρόωρου τοκετού, παρακαλούµε ακολουθήστε • Χρησιµοποιήστε το Ηλεκτρικό Θήλαστρο οπωσδήποτε τις συµβουλές του ιατρού σας. Στήθους NUK µόνο για το σκοπό χρήσης 3.2 Σηµάνσεις στη συσκευή όπως αυτός περιγράφεται (βλέπε "2.1 Σκοπός χρήσης" στη σελίδα 62). Πάνω στη µονάδα θήλαστρου 1 θα συναντήσετε...
- Page 68 8 Συνδετικό στοιχείο (µόνο για µπιµπερό µε 19 Κώνος αναρρόφησης µεγάλο στόµιο αρ. τεµ.- 10.252.059, 10.749.036) 9 Μπιµπερό ΝUK First Choice PC 150 ml / δοχείο συλλογής µητρικού γάλακτος NUK 10 Βάση στήριξης για µπιµπερό NUK First Choice 11 Σωληνάκι καθαρισµού...
- Page 69 γάλακτος, µπορείτε να το συλλέξετε µε το • ∆εξιά 5 - 7 λεπτά, αριστερά 5 - 7 λεπτά κύπελλο συλλογής γάλακτος NUK. ∆εξιά 3 - 5 λεπτά, αριστερά 3 - 5 λεπτά ∆εξιά 2 - 3 λεπτά, αριστερά 2 - 3 λεπτά...
- Page 70 Βιδώστε πρώτα το συνδετικό στοιχείο 8 στο κώνο αναρρόφησης. στο κώνο αναρρόφησης και στη συνέχεια 3. Τοποθετήστε το στεγανοποιητικό δακτύλιο 7 το µπιµπερό NUK First Choice / το δοχείο εσωτερικά µέσα στο σπείρωµα του κώνου συλλογής µητρικού γάλακτος NUK 9 στο αναρρόφησης.
- Page 71 στο κέντρο του κώνου αναρρόφησης. Πιέστε µονάδα θήλαστρου από το κλασικό µπιµπερό ελαφρά το κώνο αναρρόφησης για να διασφαλίσετε τη στεγανότητα κατά την Μπιµπερό NUK First Choice / δοχείο αναρρόφηση. Κρατάτε πάντα σε κάθετη συλλογής µητρικού γάλακτος NUK: θέση το θήλαστρο.
- Page 72 δακτύλιος 7, δακτύλιος θηλής στήθους 18, 3. Ξεβιδώστε το κώνο αναρρόφησης και σε επιστόµιο 14 και προστατευτικό κάλυµµα θηλής 12. µπιµπερό NUK First Choice / δοχείο µητρικού 1. Χρησιµοποιήστε ένα αποστειρωτήρα NUK. γάλακτος NUK και το συνδετικό στοιχείο από Λάβετε υπόψη σας τις οδηγίες χρήσης της...
- Page 73 πόρτα του ψυγείου). ολόκληρου του Ηλεκτρικού Θήλαστρου Στήθους • Ο µέγιστος χρόνος διατήρησης στην NUK µέσα στο ψυγείο, αλλά µόνο του µπιµπερό κατάψυξη του ψυγείου ανέρχεται σε 2 µε το πώµα. εβδοµάδες, και στον καταψύκτη σε 6 µήνες σε – 8 °C.
- Page 74 Οδηγίες ηλεκτροµαγνητικής συµβατότητας σύµφωνα µε EN 60601-1-2:2001: Οδηγίες και δήλωση κατασκευαστή – ηλεκτροµαγνητικές εκποµπές Το Ηλεκτρικό Θήλαστρο Στήθους NUK BP3 προορίζεται για τη λειτουργία στο περιβάλλον που αναφέρεται παρακάτω. Είτε ο πελάτης ή ο χρήστης θα πρέπει να διασφαλίσει το γεγονός ότι...
- Page 75 14. Εγγύηση Σε περίπτωση προσεκτικού χειρισµού της Η αποστολή της συσκευής θα πρέπει να συσκευής σας και λαµβάνοντας υπόψη τις πραγµατοποιείται µε την αποστολή της οδηγίες χρήσης ο κατασκευαστής σας παρέχει παρούσας εγγύησης ή της απόδειξης ταµειακής εγγύηση 24 µηνών από τη στιγµή αγοράς της µηχανής, η...
- Page 76 (zapalenia, otwarte rany) używanie laktatora pokarmu kobiecego. Pojemnika na mleko elektrycznego NUK jest zabronione lub matki NUK można używać do zbierania, dopuszczalne tylko przy zachowaniu przechowywania, zamrażania, podgrzewania i szczególnej ostrożności. W poszczególnych podawania dziecku odciągniętego pokarmu.
- Page 77 śmieci, ale oddać je do specjalnego punktu zbiórki. • Aby uniknąć infekcji, zakażeń bakteryjnych i uszkodzenia laktatora NUK zapoznaj się • Pamietaj, że używanie akcesoriów, które z punktem "9. Czyszczenie i dezynfekcja" nie są zalecane w tej instrukcji obsługi, lub na stronie 78.
- Page 78 Przed każdym użyciem należy sprawdzić • Butelki i smoczki NUK są dostosowane smoczek do karmienia przez pociąganie w wyłącznie do akcesoriów NUK z tej samej różnych kierunkach, szczególnie w serii, na przykład NUK First Choice. przypadku ząbkujących dzieci. Przy pierwszych oznakach uszkodzenia lub...
- Page 79 4. Nazwy elementów składowych pompka podstawka do butelki NUK First Choice (10) komora baterii rurka do czyszczenia (11) gniazdo zasilacza osłona smoczka NUK (12) włącznik/ wyłącznik smoczek NUK (13) przycisk przerywający ssanie nakrętka NUK (14) regulator siły ssania zasilacz (15) (nie dotyczy art.
- Page 80 • Przed odciąganiem na kilka minut przyłóż zbierać do muszli laktacyjnej NUK. do piersi ciepły kompres (na przykład żelową poduszeczkę na piersi NUK), aby rozluźnić tkankę piersi. 6. Montaż (Rysunek 1. Nałóż pompkę na kapturek ssący...
- Page 81 1. Odkręć pompkę od pojemnika na mleko Jeżeli siła ssania jest zbyt duża, obracać matki NUK. pokrętło w lewo w kierunku litery ”L”. 2. Mocno zamknij pojemnik na mleko NUK za 4. Naciśnięcie i zwolnienie przycisku pomocą załączonej nakrętki i krążka (Push) przerywa odciąganie. Regularne zabezpieczającego.
- Page 82 (18) (14) (12) 3. Odkręć od butelki kapturek ssący, a w W tym celu: przypadku butelki NUK First Choice/ pojemnika na mleko matki NUK również • zastosuj sterylizator parowy NUK, element łączący. przestrzegając przy tym instrukcji obsługi urządzenia lub 4. Umyj i wypłucz pod bieżącą wodą...
- Page 83 Butelka standardowa prowadzi to do zniszczenia cennych NUK nie nadaje się jednak do tego celu. składników odżywczych pokarmu i grozi Wskazówka: uszkodzeniem pojemnika Zamrażaj pokarm w pojemniku na mleko matki (niebezpieczeństwo wybuchu/uszkodzenia...
- Page 84 Wytyczne dotyczące kompatybilności elektromagnetycznej wg EN 60601-1-2:2001: Wskazówki i deklaracja producenta – emisje elektromagnetyczne Laktator elektryczny NUK BP3 przeznaczony jest do pracy w podanych poniżej warunkach otoczenia. Klient lub użytkownik laktatora elektrycznego NUK BP3 powinien upewnić się, że urządzenie stosowane będzie w takim otoczeniu.
- Page 85 13. Utylizacja W Unii Europejskiej symbol elektronicznych. Prawidłowa utylizacja przekreślonego śmietnika na umożliwia zmniejszenie zużycia surowców, kółkach oznacza, że produkt tym samym przyczyniając się do ochrony należy oddać do specjalnego środowiska naturalnego. punktu zbiórki. Dotyczy to Baterii nie wolno wyrzucać do domowego produktu i wszystkich części oznaczonych kosza na śmieci.
- Page 86 « ») NUK 15) ( . . “9. ” . 88). NUK, • • • • NUK, NUK First Choice...
- Page 87 • • • • • . . "2.1 " . 82). • • , . . • • , . . • • • , . “9. ” . 88 • • • •...
- Page 88 NUK FIRST CHOICE, • • • • • • • • • • • • • , NUK First Choice. • • . N - 10.252.025) NUK PC 125 . N - 10.252.059, 10.749.036) NUK First Choice PC 150 NUK First Choice...
- Page 89 • • • • • NUK. • 5 - 7 ; 5 - 7 3 - 5 ; 3 - 5 2 - 3 ; 2 - 3 • •...
- Page 90 First Choice / NUK: NUK 17 NUK First Choice / AA, 1,5 . AD-35-0350 ( AD-35-0350BS). Mapa GmbH...
- Page 91 5 (Push), "10. " . 89. “OFF”. 16, . . NUK: NUK 17. NUK First Choice / “L”. . "11. " . 89. “ON”. (L). “H”. “L”. 5 (Push),...
- Page 92 – . "9.2 ". • 1, . . • • NUK. • NUK First Choice /...
- Page 93 11.3 • +4 °C ( • 11.1 - 8 °C. • • 37 °C, . NUK FIRST CHOICE NUK. • 11.2 • •...
- Page 94 93/42/EWG – 0 °C +40 °C – 0 °C +40 °C – 230 , 50 500 A, +/-, 5 x 2,1 – AA, 1,5 V EN 60601-1-2:2001: NUK BP3 NUK BP3 3 NUK CISPR 14 IEC 61000-3-2 IEC 61000-3-3...
- Page 95 , . . LOT.
- Page 96 • Ayak sayesinde, bir yere sağlam bir Buna rağmen beklenmedik bir reaksiyon şekilde oturtturulabilir. meydana gelirse, doktorunuza başvurun. Göğüs Pompası, isteğe bağlı olarak NUK Standart Biberon, NUK First Choice Biberon ve NUK Süt Saklama Şişesi ile birlikte kullanılabilir.
- Page 97 üretici tarafından onarılabilir. Aksi zaman hazır bulundurulmalıdır. takdirde, her türlü garanti geçerliliğini • NUK Elektrikli Göğüs Pompası'nı, sadece kaybeder. kullanım kılavuzunda belirtilen amaçlar • Anne sütü, erken doğan bir bebek için için kullanın (bakın "2.1 Kullanım amacı", sağıldığı...
- Page 98 (patlama tehlikesi/ edildiğinde artık emziği kullanmayın. malzemenin zarar görmesi). Biberonun içindeki besin maddesi, ısınma nedeniyle patlama şeklinde taşabilir. Dengesiz ısınma haşlanma tehlikesi yaratabilir. • NUK Biberonları ve Emzikleri, sadece ilgili sistem (örneğin NUK First Choice) ile uyumludur.
- Page 99 NUK Standart Biberon PC 125 ml (sadece NUK First Choice biberonlar ve NUK Süt Saklama Şişesi) Meme ucu halkası NUK First Choice Biberon PC 150 ml / Koni meme başlığı NUK Anne Sütü Şişesi 5. Başarılı pompalama için öneriler 5.3 Süt miktarı...
- Page 100 Öncelikle birleştirme elemanını koni 2. Meme ucu halkasını koni meme meme başlığına takın ve ardından NUK başlığına yerleştirin. First Choice Biberonu / NUK Süt Saklama 3. Contayı , koni meme başlığının iç Şişesini birleştirme elemanına takın. NUK tarafındaki dişli kısma yerleştirin.
- Page 101 150 ml seviyesinden daha fazla doldurmayın düşük kademeye (L) ayarlanmıştır. (çatlama tehlikesi!). Emme gücünün çok zayıf olması 1. Pompa ünitesini, NUK Süt Saklama durumunda, döner düğmeyi sağ tarafa "H" Şişesi'ni çevirerek sökün. yönüne doğru çevirin. 2. NUK Süt Saklama Şişesi’ni teslimat Emme gücünün çok fazla olması...
- Page 102 çıkarın. dezenfekte edilebilir. 3. Koni meme başlığını ve NUK First Choice • Bir NUK Sterilizatörü kullanmanız tavsiye Biberon / NUK Süt Saklama Şişesi edilir. Dezenfekte sırasında cihaza ilişkin kullanımında ek olarak birleştirme kullanım kılavuzunu dikkate alın, veya...
- Page 103 • Yaklaşık 37 °C’lik doğru içme sıcaklığını Bu işlem için NUK Standart Biberon ve First elde etmek için, biberonu NUK Mama Choice biberon uygun değildir. Isıtıcısı’na koyun. Öneri: •...
- Page 104 2 adet pil AA, 1,5 V EN 60601-1-2:2001 Avrupa Standardları uyarınca EMC yönetmelikleri: Yönetmelikler ve üretici beyanı – Elektromanyetik yayınlar NUK Elektrikli Göğüs Pompası BP3’ün, aşağıda belirtilen koşullar altında kullanılması öngörülmektedir. NUK Elektrikli Göğüs Pompası BP3'ün müşterisi veya kullanıcısı, pompanın belirtilen koşullarda kullanılmasını sağlamalıdır.
- Page 105 13. Elden çıkarma Üzeri çizili tekerlekli çöp kutusu ve elektronik cihazların geri dönüşüm işlemini işareti, ürünün Avrupa Birliği yapan toplama tesislerine teslim edilmelidir. sınırları dahilinde, ilgili Geri dönüşüm, ham maddelerinin kategorideki çöplerin toplandığı tüketilmesinin azaltılmasını ve çevreye daha yere teslim edilmesi gerektiğini az zarar verilmesini sağlamaktadır.
- Page 107 Contact addresses * DEU – Germany GRC - GREECE (North) QAT - QATAR * AUT – Austria Pharmapro Ahmed Khalil Al Baker&Sons MAPA GmbH 36, Prox. Koromila St P.O. Box no. 9 Industriestraße 21-25 54622 Thessaloniki Doha 27404 Zeven +30 2 310 751.525 +974 4 621 062 +49 180 1 62 72 46 Fax: +30 2 310 789.621...
- Page 108 Emme gücü oldukça yüksektir • • Emme gücünü isteğinize göre ayarlayabilirsiniz • Ara verme veya emmeyi kesme düğmesi • sayesinde, bebeğin normal emme faaliyeti taklit edilir Art.-Nr. 10.520.106 27404 Zeven Germany REV 100 www.nuk.de NUK is a registered trademark owned by MAPA GmbH...
Need help?
Do you have a question about the Electric and is the answer not in the manual?
Questions and answers