Table of Contents
Advertisement
Quick Links
Advertisement
Table of Contents

Subscribe to Our Youtube Channel
Related Manuals for RAMSET RAM 30


Summary of Contents for RAMSET RAM 30
- Page 1 FOR CLASS I VEHICULAR GATE OPERATORS...
- Page 2 www.ramsetinc.com...
-
Page 3: Table Of Contents
Sensor Installation ………………………………………………………………………………………..10 Pushbutton Controls & Master/Slave Installation ……………………………………………………..11 Dip Switch Configuration ……………………………………………………………………………. 12-13 Terminal Strip Connections for Optional Accessories …....………………………………14-15 Ramset "Intelligate" Control Board ………………………………………………………..…………. 16 Wire Board Connections ………………………………………………………………………………... 17 Exploded View ……………………………………………………………………………………….…...18 Bill of Materials ………………………………………………………………………………………. 19-20 Troubleshooting Table …………………………………………………………………………….. -
Page 4: Responsibilities Of Installers And Technicians
RAMSET RESPONSIBILITIES OF INSTALLERS AND TECHNICIANS INSTALLATION: • READ AND UNDERSTAND THE INSTRUCTION MANUAL BEFORE ATTEMPTING ANY INSTALLATION. • DO NOT EXCEED THE EQUIPMENT SPECIFICATIONS. • INSURE A SAFE AND PROPER INSTALLATION. • INSTALL THIS EQUIPMENT IN ACCORDANCE WITH THE UL 325 SPECIFICATIONS. -
Page 5: Important Safety Requirements By Ul Standards
RAMSET IMPORTANT SAFETY REQUIREMENTS BY UL STANDARDS Prior to installation of a Ramset gate operator, All warning signs and placards must be installed the following must be observed: where visible in the area of the gate. (per UL 325.51.8.4). For Vehicular Gate Operators utilizing a non- Install the vehicular gate operator only when: contact sensor in accordance with 30A.1.1 Type... -
Page 6: Classes Of Vehicular Gate Operators/Recommended Electrical Connection
RAMSET CLASSES OF VEHICULAR GATE OPERATORS Vehicular horizontal slide-gate operator (or system) - A vehicular gate operator (or system) that controls a gate which slides in a horizontal direction that is intended for use for vehicular entrance or exit to a drive, parking lot, or the like. -
Page 7: General Specifications
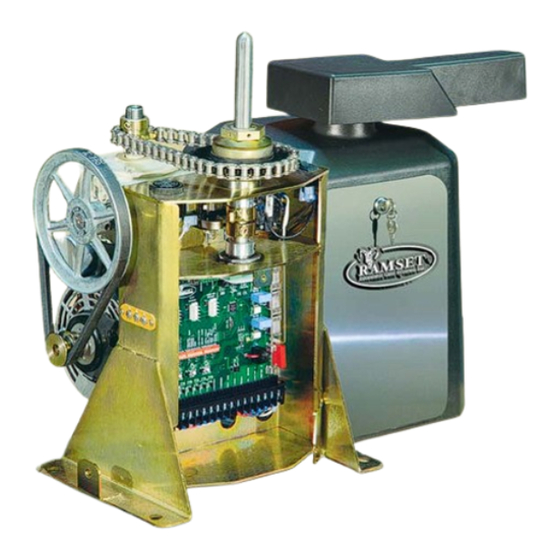
1. Remove knob from top cap 2. Loose knob from clamp arm. Limit Switches: For accurate gate stop settings. Ramset "Intelligate" Control Board It is controlled by a programmable microprocessor that reds and precisely executes all functions. 3. Slightly bend the arms at 4. -
Page 8: Installation Specifications
RAMSET INSTALLATION SPECIFICATIONS CONCRETE PAD CONSTRUCTION: Dimensions given for the pad are based on soil bearing shear of 2000 P.S.F. These figures may have to be adjusted depending on local soil conditions. STANDARD INSTALLATION 1. Construct form for mounting pad according to Gates from: 4' to 12' [ 23"... -
Page 9: Hookup Electrical Power - Gate Travel Adjustment
RAMSET HOOKUP ELECTRICAL POWER Figure 3 Outlet Leads NOTE: Hookup your electrical 15 amp wires direct to outlet. GATE TRAVEL ADJUSTMENT Figure 4 Limit Slams Switches Gate travel is adjusted by loosening the limit Cams and positioning them until proper gate travel has been achieved. -
Page 10: Standard Installation In Closed And Opened Position
RAMSET STANDARD INSTALLATION FOR GATES FROM 4' TO 12' IN LENGTH Figure 5 SPACE REQUIRED FOR A STANDARD GATE IN THE OPEN POSITION Figure 6 www.ramsetinc.com... -
Page 11: Compact Installation In Closed And Opened Position
RAMSET COMPACT INSTALLATION FOR GATES UP TO 10' IN LENGTH Figure 7 MINIMUM SPACE REQUIRED FOR COMPACT INSTALLATION 20" minimum space required between, open gate and wall for this compact installation. Figure 8 www.ramsetinc.com... -
Page 12: Sensor Installation
RAMSET SENSOR INSTALLATION Ramset Gate Operators should not be installed without non-contact sensing devices such as Loop Detectors, photo electric sensors or the equivalent. A non-contact sensor (photoelectric sensor or equivalent) and a contact sensor (edge device or equivalent) is required on each individual installation to comply with UL325. -
Page 13: Pushbutton Controls & Master/Slave Installation
RAMSET PUSHBUTTON CONTROLS Three pushbuttons are located under the dip switches for operation of the gate (see Figure 11). The opening, stop and closing buttons can be utilized to set limit switches and verify proper system operation when installing or servicing an operator. -
Page 14: Dip Switch Configuration
RAMSET DIP SWITCH CONFIGURATION Figure 12 Dip Switch Up for "ON" Dip Switch Down for "OFF" DIP SWITCH "A" Dip Switch "B" 3; “CONSTANT WARN” Dip Switch "A" 1, 2 & 3; AUTOMATIC TIMER TO CLOSE GATE (Constant warning when gate is in motion). - Page 15 RAMSET DIP SWITCH "C" Dip Switch "C" 1; “SECURE CLOSE” Dip Switch "C" 7; “LEFT / RIGHT” Function: Function: OFF Normal Operation OFF Left hand installations - All operators come factory set for left hand operation. When power is lost, then regained, control board Right hand installations - Reverses motor &...
-
Page 16: Terminal Strip Connections For Optional Accessories
RAMSET TERMINAL STRIP CONNECTION FOR OPTIONAL ACCESSORIES Figure 13 www.ramsetinc.com... - Page 17 RAMSET TERMINAL STRIP CONNECTIONS sound for 6 minutes and the control board will not accept any commands. After the 6 minutes the 24 VDC is removed from the alarm connection Terminal # 1 - COMMON: and the board resets to normal operation.
-
Page 18: Ramset "Intelligate" Control Board
RAMSET RAMSET “INTELLIGATE” CONTROL BOARD Introduction: sary board modifications between 110 VAC and Ramset’s “Intelligate” Control Board works 220 VAC single-phase applications. Some of the with Sliding, Swinging and Overhead vehicular functions of the Control Board are: 0 - 60 seconds gate operators. -
Page 19: Wire Board Connections
Use with ILD-24 Loop wires should be connected to this plug. Reverse, Exit & Phantom JP4, JP5 & JP8 Sensor: Used with the Ramset ILD-24 plug-in loop detector. The Loop wires should be connected into the “LOOP INPUTS” plug. www.ramsetinc.com... -
Page 20: Exploded View
RAMSET RAM 30 Exploded View Figure 15 www.ramsetinc.com... -
Page 21: Bill Of Materials
RAMSET BILL OF MATERIAL FOR: RAM 30 ITEM PART # PART DESCRIPTION RAM 30 50-027 Gear Reducer Size 40 60:1 50-039 20 Pin Edge Connector 50-050 40 b 12 7/8" Sprocket 50-069 Limit Switch 00h-3 50-084 # 40 Drive Chain 50-091 # 6 x 1"... -
Page 22: Bill Of Materials
RAMSET BILL OF MATERIAL FOR: RAM 30 ITEM PART # PART DESCRIPTION RAM 30 50-304 120/240 Intelligate Transformer 50-337 1/2" x 1-1/2" Hex Head Bolt 50-339 1" x 2" Plastic Cap 50-401 10 Ga Heavy Duty Metal Chassis 50-402 Board Lexan Glass Cover... -
Page 23: Troubleshooting Table
1. Faulty accessory connected 1. Disconnect all accessories, including 'ON' plug-ins, using the "Exit" input. to the "Exit". If problem persist, contact Ramset. 1. Faulty accessory connected "REV LOOP" L.E.D. ALWAYS 1. Disconnect all accessories, including 'ON' plug-ins, using the "Rev Loop" input. -
Page 24: Gate Entrance Safety Precautions
RAMSET GATE ENTRANCE SAFETY PRECAUTIONS WARNING: 1. Never let children operate or play with gate controls. Keep the controls away from children. 2. The entrance is for vehicles only. Pedestrians should use a separate entrance. 3. Always keep people, children and objects away from the gate while the gate is in operation. -
Page 25: Important Information For The Homeowner
Opening the way… Important information for the homeowner Ask your technician about all the features of our new Ramset operator. Safety devices, such as reverse loops, phantom loops, photo eyes, or miller edges must be installed on your gate before the operator may be used. Ask your technician which safety devices best suit your safety needs. -
Page 26: Optional Ramset Accessories
RAMSET RAMSET OPTIONAL ACCESSORIES 20-05 Ramset Mounting Post for Access Control 50-40 Ramset Ramset Remote Control Radio Receiver Transmitter Ramset ILD-24 Plug-in Loop Detectors Ramset Ramset Fire Box Key Switch Box EMERGENCY ENTRY BOX RKLE Ramset Ramset Magnetic Ramset Keyless... - Page 27 www.ramsetinc.com...
Need help?
Do you have a question about the RAM 30 and is the answer not in the manual?
Questions and answers
I am trying to replace the key way in 3/4 in by 10 in limit swift shatft. The torque limit arbor does not look like the one you display on the parts page. It is just a hexagon nut. How do I replace the key way. I cannot loosen the torque limit arbor. There are threaded holes for set screws if the arbor but no sets screws are present?
To replace the key way in a RAMSET RAM 30 limit switch shaft when the torque limit arbor appears different and cannot be loosened, follow these steps:
1. Identify the Key Way: The parts list includes two key ways:
- 1/4" x 5" Key Way (Part #50-263)
- 3/16" x 3/4" Key Way (Part #50-265)
2. Access the Torque Limit Arbor: The arbor is listed as "Limited Arbor" (Part #50-128). If it appears different or cannot be loosened:
- Check if any locking mechanism (e.g., Torque Limited Nut #50-131 or Tension Washer #50-130) is preventing movement.
- Remove the Torque Limited Nut and associated washers carefully.
- If the arbor is stuck, check for corrosion or damage and apply appropriate tools to extract it without forcing.
3. Remove the Old Key Way:
- Once the arbor is removed or moved enough to expose the shaft, slide or tap out the existing key way.
4. Install the New Key Way:
- Align the new key way (correct size as per your shaft) with the shaft slot.
- Slide or gently tap it into place.
5. Reassemble:
- Reinstall the torque limit arbor, nut, washers, and other components in reverse order.
Ensure all parts are aligned and secured properly before operating the gate.
This answer is automatically generated