
Related Manuals for Scale House MB1


Summary of Contents for Scale House MB1
- Page 1 ELETTRONIC SCALES KOMPAKTWAAGEN BALANCE COMPACTE BILANCE ELETTRONICHE OPERATING MANUAL BENUTZERHANDBUCH MODE D’EMPLOI OPERATEUR MANUALE OPERATIVO MB_1.6_14.02_EN_DE_FR_IT...
- Page 2 LANGUAGES SPRACHEN LANGUES LINGUE ENGLISH ............................3 DEUTSCH ............................3 FRANÇAIS............................3 ITALIANO ............................13...
-
Page 3: Table Of Contents
ENGLISH INDEX 1. INTRODUCTION .............................. 4 2. MAIN TECHNICAL SPECIFICATIONS ......................5 3. INSTALLATION ..............................6 3.1 POWER SUPPLY AND START-UP ......................6 3.2 BATTERY POWERED ..........................6 4. FRONT PANEL KEYS AND INDICATORS ..................... 6 4.1 FUNCTION OF THE KEYS ........................7 4.2 FUNCTION OF THE SYMBOLS ON LCD DISPLAY ................. -
Page 4: Introduction
1. INTRODUCTION This manual was created to help you install and learn all about the functional possibilities of the MB scale. WARNINGS The scales should be sited in a location that will not degrade the accuracy. Avoid extremes of temperature. Do not place in direct sunlight or near air conditioning vents. Avoid unsuitable tables. -
Page 5: Main Technical Specifications
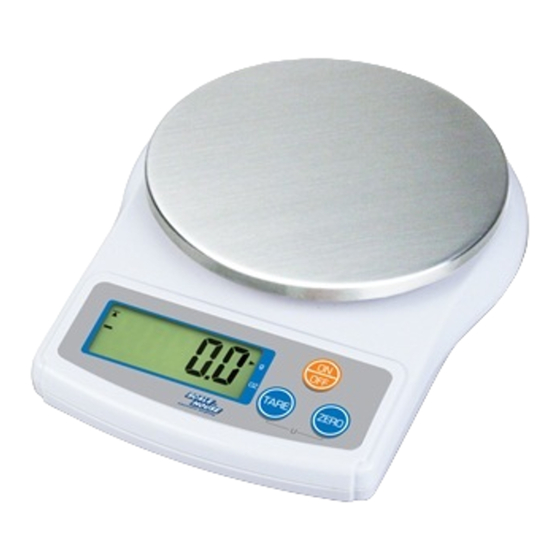
2. MAIN TECHNICAL SPECIFICATIONS Model Plate Capacity kg Division g (dimensions in mm) Ø 120 Ø 120 Operative Temperature: 0°C - 40°C / 32°F - 104°F. Power supply: 2pcs 1,5V AA battery. Display : LCD backlit with 5 digits 15 mm high. -
Page 6: Installation
3. INSTALLATION 3.1 POWER SUPPLY AND START-UP The indicator can be powered 2 pcs 1,5V AA batteries. TO TURN ON/TURN OFF the instrument press the ON/OFF key. 3.2 BATTERY POWERED When the batteries needs replacing or charging the symbol on the display will turn on. 4. -
Page 7: Function Of The Keys
4.1 FUNCTION OF THE KEYS - It turns on or turns off the scale. - Clears the displayed gross weight if it’s within +/- 2% of the total capacity. - A secondary function of parameter confirmation when in setting mode. - If pressed for an instant it executes the semiautomatic tare;... -
Page 8: Operations
5. OPERATIONS 5.1 AUTOMATIC ZERO UPON START-UP The indicator has an “auto zero at start-up” function: in other words it means that if at start-up a weight within +/- 50% of the capacity is detected, it will be zeroed; if the weight is not within this tolerance, the display shows “Err 4”... -
Page 9: Tare Function
5.3 TARE FUNCTION Zero the scale by pressing the ZERO key if necessary. The zero symbol will be on. Place a container on the platform, a value for its weight will be displayed. Press the TARE key to tare the scale when the “stable” is light. The weight that was displayed is stored as the tare value and that value is subtracted from the display, leaving zero on the display. -
Page 10: Calibration
6. CALIBRATION 6.1 STANDARD CALIBRATION - Turn off the power, empty the pan, hold the ON/OFF key and the TARE key together until, display will show “88888”, now release the ON/OFF key; - When the display will shows “F1 CAL”, release also the TARE key; - Press ZERO key to enter setting, display will show “UNLD”... -
Page 11: Linear Calibration
6.2 LINEAR CALIBRATION - Turn off the power, empty the pan, hold the ON/OFF key and the TARE key together until, display will show “88888”, now release the ON/OFF key; - When the display will shows “F1 CAL”, release also the TARE key; - Press TARE key until the display will show “F6 l-c”, at this point press the ZERO key to enter;... -
Page 12: Visualisation Of A/D Converter Points
7. VISUALISATION OF A/D CONVERTER POINTS - Turn off the power, empty the pan, hold the OFF/ON key and the TARE key together until, display will show “88888” at this point will be necessary to release the OFF/ON key; - When the display will show “F1 CAL”, release also the TARE key; - Press TARE key, display will show “F2 INP”;... -
Page 13: Error Messages
8. ERROR MESSAGES ERROR DESCRIPTION SOLUTION MESSAGES 0-ERR Over range Remove weight from the scale. b-ERR Low battery Change the batteries. Err 4 Zero Setting Upon start-up or when the ZERO key is pressed, the weight Error on the scale exceeds the percentage programmed on the max. -
Page 14: Declaration Of Conformity
WARRANTY Scale House products are guaranteed for a period of twelve months from delivery, excluding the parts classified as expendable materials such as mechanical printing heads, batteries, electric motors and wheels. The warranty for these expendable materials is three months. The warranty refers to breakdowns resulting from any construction defect or material defect of the product supplied and covers the cost of labor and spare parts. - Page 15 DEUTSCH INHALT 1. EINLEITUNG ..............................16 2. TECHNISCHE SPEZIFIKATIONEN ....................... 17 3. INSTALLATION .............................. 18 3.1 SPANNUNGSVERSORGUNG UND INBETRIEBNAHME ..............18 3.2 BATTERIEBETRIEB ..........................18 4. FRONTPANEL TASTER UND ANZEIGEN ....................18 4.1 TASTENFUNKTIONEN ..........................19 4.2 SYMBOLE DES LCD DISPLAYS ......................19 5.
-
Page 16: Einleitung
1. EINLEITUNG Diese Beschreibung erklärt Ihnen den Einsatz und die Funktionen der MB Waage. HINWEISE Die Waage sollte an einem Ort eingesetzt werden, welcher die Genauigkeit nicht beeinträchtigt. Extreme Temperaturen vermeiden. Nicht in direktem Sonnenlicht oder bei Ventilatoren betreiben. Achten Sie auf eine stabile Auflage. Tisch oder Boden muss eben und frei von Vibrationen sein. Nicht in der Nähe von vibrierenden Maschinen betreiben. -
Page 17: Technische Spezifikationen
2. TECHNISCHE HAUPTEIGENSCHAFTEN Version Schale Wägebereich Ziffernschritt [g] (Abmessungen mm) Ø 120 Ø 120 Umgebungstemperatur: 0°C - 40°C / 32°F - 104°F. Stromversorgung: 2 austauschbare Batterien Typ AA mit 1,5V (inbegriffen). Display: Hintergrundbeleuchtetes LCD-Display mit 5 Ziffern mit 15 mm Höhe. Gehäuse: ABS Plastic. -
Page 18: Installation
3. INSTALLATION 3.1 SPANNUNGSVERSORGUNG UND INBETRIEBNAHME Der Indikator kann mit 2 austauschbaren Batterien Typ AA mit 1,5V betrieben werden. Zum Ein-/ Ausschalten des Gerätes die Taste ON/OFF drücken. 3.2 BATTERIEBETRIEB Muss die Batterie geladen werden, so erscheint das Symbol im Display. 4. -
Page 19: Tastenfunktionen
4.1 FUNKTIONEN DER TASTER - Netztaste. - Löschen des Brutto-Gewichts, bis +/-2% des max. Wägebereichs. - Als zweite Funktion als “ENTER”-Taste beim Setzen der Parameter oder anderen Funktionen. - Kurz gedrückt zum halbautomatischen Tarieren;; - Als zweite Funktion zum Erhöhen der aktiven Einheit beim Setzen der Parameter oder anderen Funktionen. -
Page 20: Funktionen
5. FUNKTIONEN 5.1 AUTOMATISCHE NULLEINSTELLUNG BEIM EINSCHALTEN Der Indikator hat eine “Auto-NULL beim Start” Funktion: Das bedeutet, sollte beim Start ein Gewicht bis +/-10% des max. Wägebereichs ermittelt werden, so wird dieses GENULLT; sollte dieses Gewicht NICHT innerhalb der Grenzen sein, wird im Display “Err 4” angezeigt und nach einem Augenblick, der Gewichtswert angezeigt. -
Page 21: Tarafunktion
5.3 TARAFUNKTIONEN NULLEN Sie die Waage, falls nötig, durch Drücken der ZERO Taste. Das ZERO Symbol wird erscheinen. Legen Sie einen Behälter auf die Waage und dessen Gewicht wird angezeigt. Drücken Sie die TARE Taste zum Tarieren, wenn das Gewicht stabil ist. Das angezeigte Gewicht wird als Tarawert gespeichert und vom Anzeigewert abgezogen;... -
Page 22: Kalibrierung
6. KALIBRIERUNG - Waage mit der ON/OFF Taste ausschalten. - Tasten ON/OFF und TARE drücken und ca. 10 sec. gedrückt halten bis im Display „F1 CAL“ erscheint. - Drücken Sie die Taste ZERO. Das Display zeigt “UNLD”; - Entladen Sie die Waage, warten Sie bis die Gewichtsanzeige stabil ist und drücken Sie dann ZERO, Das Display zeigt das Mustergewicht;... -
Page 23: Fehlermeldungen
8. FEHLERMELDUNGEN FEHLER- BESCHREIBUNG LÖSUNG MELDUNGEN - - - - - - Überlast Entfernen Sie das Gewicht von der Waage Err 4 Nulleinstellungs- Beim Hochfahren oder wenn ZERO gedrückt wird, fehler überschreitet das Gewicht einen Prozentsatz des Wägebereiches. Entfernen Sie das Übergewicht und wiederholen Sie den Vorgang Err 6 Eingangssignal ist... -
Page 24: Konformitätserklärung
KONFORMITÄTSERKLÄRUNG Dieses Gerät entspricht den Anforderungen und Normen der zuständigen EU Richtlinien. Die Konformitätserklärung befindet sich auf der Website www.scalehouse.it. GARANTIE Die Gewährleistung beläuft sich auf zwoelf Monate ab Lieferdatum, ausgenommen sind Verschleißteile wie: Druckköpfe, Batterien, Räder und elektrische Motoren. Für dieses Verbrauchsmaterial beträgt die Gewährleistungsdauer drei Monate. Die Gewährleistung betrifft die eventuellen Schaden, der von Baumangel oder Produktfehler herkommen und sie deckt die Kosten der Arbeitsleistung und der ersetzten Bauteilen. - Page 25 FRANÇAIS INDEX 1. INTRODUCTION ............................26 2. CARACTERISTIQUES TECHNIQUES PRINCIPALES ................. 27 3. INSTALLATION .............................. 28 3.1 ALIMENTATION ET MISE EN MARCHE ....................28 3.2 ALIMENTATION A BATTERIE ........................28 4. TOUCHES DU CLAVIER ET INDICATEURS ....................28 4.1 FONCTION DES TOUCHES ........................29 4.2 FONCTION DES SYMBOLES .........................
-
Page 26: Introduction
1. INTRODUCTION Ce manuel a été créé pour vous aider à installer et à connaître les possibilités de fonctionnement de la balance série MB. MISES EN GARDE La balance doit être positionnée dans un endroit permettant de la garder en bon état. Eviter les températures extrêmes. -
Page 27: Caracteristiques Techniques Principales
2. CARACTERISTIQUES TECHNIQUES PRINCIPALES Modèle Plateau Capacité kg Division g (dimensions en mm) Ø 120 Ø 120 Conditions ambiantes 0°C - 40°C / 32°F - 104°F. autorisées : Branchement secteur : 2 piles AA de 1,5 V (incluses). Afficheur : LCD rétro éclairé... -
Page 28: Installation
3. INSTALLATION 3.1 ALIMENTATION ET MISE EN MARCHE L’indicateur peut être alimenté par 2 piles AA de 1,5 V. POUR ALLUMER / ETEINDRE l’instrument, appuyez longuement sur la touche ON/OFF. 3.2 ALIMENTATION A BATTERIE Si la batterie est déchargée, l’écran affiche le voyant DEL pour indiquer que la batterie doit être rechargée 4. -
Page 29: Fonction Des Touches
4.1 FONCTION DES TOUCHES - Allume / éteint la balance. - Met à zéro le poids brut affiché si le poids est compris entre +/- 2% de la portée total. - Fonction secondaire de confirmation de la valeur dans la configuration d’un paramètre ou d’autres fonctions. -
Page 30: Operations
5. OPERATIONS 5.1 AUTOZERO A L’ALLUMAGE L’indicateur est équipé d'une fonction d'“auto-zéro à l'allumage”: cela veut dire que si à l'allumage un poids se trouvant entre +/- 10% de la portée, il est mis à zéro; si le poids est hors des limites de cette tolérance, l'afficheur affiche le message “Err 4”... -
Page 31: Fonction De Tare
5.3 FONCTION DE TARE Mettez à zéro l’écran en appuyant sur ZERO s’il est nécessaire (voir paragraphe 5.2). Le symbole s’allume. Mettez le conteneur sur la balance et, quand le poids est stable, appuyez sur la touche TARE : le poids est mis en tare et l’indicateur “NET”... -
Page 32: Étallonage
6. ÉTALLONAGE - Éteint la balance, décharger la balance, maintenir enfoncée la touche ON/OFF et TARE pendant env. 10 sec., jusqu’à ce que “ F1 CAL ” apparaisse à l’écran de visualisation. - Appuyer sur ZERO key, les afficheurs affichent “UNLD”; - Décharger la balance, attendre la stabilité... -
Page 33: Messages D'erreur
8. MESSAGES D’ERREUR MESSAGES DESCRIPTION RESOLUTION D’ERREUR - - - - - - Hors capacité Enlever le poids de la balance. Err 4 Erreur de Zero A l’allumage ou quand’on appuye la touche ZERO, le poids sur la balance excéde la pourcentage programmée dans la capacité. -
Page 34: Declaration De Conformite
GARANTIE Les produits Scale House sont garantis pendant une durée de douze mois à compter de la date de livraison, exclus les consommables (par exemple têtes d’impression, batteries, roues et moteurs électriques) pour les quels la durée de la garantie est de trois mois. - Page 35 ITALIANO INDICE 1. INTRODUZIONE ............................36 2. PRINCIPALI CARATTERISTICHE TECNICHE ..................... 37 3. INSTALLAZIONE ............................38 3.1ALIMENTAZIONE E ACCENSIONE ......................38 3.2 ALIMENTAZIONE A BATTERIA ....................... 38 4. TASTI E INDICATORI DEL PANNELLO FRONTALE ................... 38 4.1 FUNZIONE DEI TASTI ..........................39 4.2 FUNZIONE DEI SIMBOLI SUL DISPLAY LCD ..................
-
Page 36: Introduzione
1. INTRODUZIONE Questo manuale è stato creato per aiutarla nell'installazione e nella conoscenza delle possibilità funzionali della bilancia serie MB. AVVERTENZE La bilancia deve essere situata in un luogo che non diminuisce la sua accuratezza. Evitare le temperature estreme. Non esporre lo strumento alla luce diretta del sole o vicino a fonti di calore. -
Page 37: Principali Caratteristiche Tecniche
2. PRINCIPALI CARATTERISTICHE TECNICHE Modello Piatto Portata kg Divisione g (dimensioni in mm) Ø 120 Ø 120 Temperatura di 0°C - 40°C / 32°F - 104°F. funzionamento: Alimentazione: 2 batterie AA da 1,5V. Display: LCD retroilluminato a 5 cifre da 15 mm. Contenitore: Involucro in plastica ABS. -
Page 38: Installazione
3. INSTALLAZIONE 3.1 ALIMENTAZIONE E ACCENSIONE L’indicatore può essere alimentato con 2 batterie AA da 1,5V. PER ACCENDERE/SPEGNERE lo strumento premere il tasto ON/OFF. 3.2 ALIMENTAZIONE A BATTERIA Quando la batteria sta per scaricarsi si accende il simbolo di segnalazione ad indicare che le batterie devono essere ricaricate o sostituite. -
Page 39: Funzione Dei Tasti
4.1 FUNZIONE DIE TASTI - Accende o spegne la bilancia. - Azzera il peso lordo visualizzato, se esso rientra nel +/- 2% della portata totale. - Funzione secondaria di conferma del parametro in configurazione. - Premuto un istante esegue la tara semiautomatica; - Funzione secondaria di selezione del parametro in configurazione. -
Page 40: Funzione Dei Simboli Sul Display Lcd
4.2 FUNZIONE DEI SIMBOLI SUL DISPLAY LCD INDICATORE FUNZIONE g/OZ Indica l’unita di misura in uso (grammo o OZ). Indica che il peso è stabile. Indica che il livello di carica della batteria si sta esaurendo: vedere paragrafo 3.2 Indica che il valore visualizzato è un peso netto. Indica che il peso rilevato dal sistema di pesatura si trova in prossimità... -
Page 41: Operazioni
5. OPERAZIONI 5.1 AUTOZERO ALL’ACCENSIONE L’indicatore è dotato di una funzione di “autozero all’accensione”: ciò significa che se all’accensione viene rilevato un peso rientrante nel +/- 50% della portata, esso viene azzerato; se il peso non rientra in questa tolleranza, il display visualizza il messaggio “Err 4” e dopo qualche istante visualizza il peso presente. -
Page 42: Funzione Di Tara
5.3 FUNZIONE DI TARA Azzerare il display premendo ZERO se necessario. Si accende il simbolo di zero. Mettere il contenitore sulla bilancia e, quando il peso è stabile, premere il tasto TARE: il peso viene messo in tara e si accende l’indicatore “NET”; quando occorre rimuovere la tara, scaricare la bilancia e premere di nuovo TARE. -
Page 43: Calibrazione
6. CALIBRAZIONE 6.1 CALIBRAZIONE NORMALE - Spegnere la bilancia, scaricare il piatto, tenere premuti contemporaneamente i tasti ON/OFF e TARE fino a quando il display visualizza “88888” e a quel punto rilasciare il tasto ON/OFF; - Alla visualizzazione del passo “F1 CAL” rilasciare il tasto TARE; - Premere ZERO per entrare nella procedura di calibrazione, il display visualizzerà... -
Page 44: Calibrazione Lineare
6.2 CALIBRAZIONE LINEARE - Spegnere la bilancia, scaricare il piatto, tenere premuti contemporaneamente i tasti ON/OFF e TARE fino a quando il display visualizza “88888” e a quel punto rilasciare il tasto ON/OFF; - Alla visualizzazione del passo “F1 CAL” rilasciare il tasto TARE; - Premere TARE fin quando il display non visualizza “F6 l-c”... -
Page 45: Messaggi Di Errore
8. MESSAGGI DI ERRORE MESSAGGI DESCRIZIONE SOLUZIONE DI ERRORE Peso superiore Rimuovere il peso in eccesso dalla bilancia. 0-ERR alla portata b-ERR Batteria scarica Sostituire le batterie. Err 4 Errore autozero All’accensione o quando viene premuto il tasto di ZERO, il all’accensione / peso sulla bilancia supera la percentuale programmata sulla zero manuale... -
Page 46: Dichiarazione Di Conformita
GARANZIA I prodotti Scale House sono assistiti da garanzia per dodici mesi dalla data di acquisto, con esclusione delle parti classificate come materiale di consumo come testine di stampa, batterie, ruote e motori elettrici e materiale di consumo. La garanzia su questo materiale è...
Need help?
Do you have a question about the MB1 and is the answer not in the manual?
Questions and answers