
Related Manuals for Philips HDP2510


Summary of Contents for Philips HDP2510
-
Page 1: User Manual
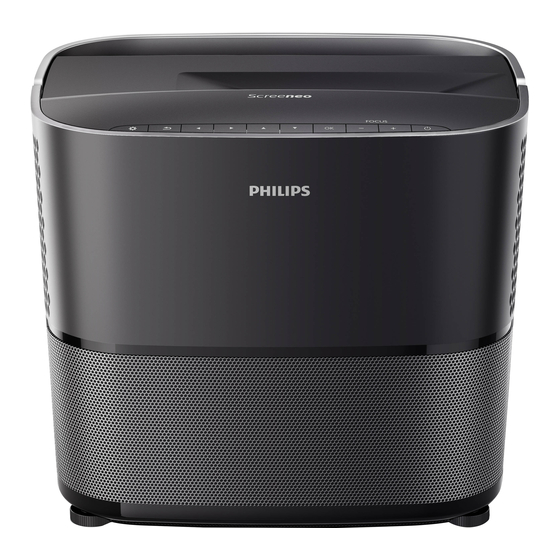
User Manual Screeneo 2.0 Full HD projector HDP2510 Register your product and get support at www.philips.com/welcome... -
Page 2: Table Of Contents
Table on Contents Overview ............3 7 Settings ...........25 Dear customer ............3 Overview of the menu functions ......25 About this user manual ..........3 Reset functions ............27 What's in the box ............3 8 Service .............29 Customer service centre .......... 3 Cleaning ..............29 1 General safety information ....4 Replacing the lamp ..........29... -
Page 3: Overview
You can find the support hotline in the warranty This symbol gives warning of damage to card or online: the device and possible loss of data. Web: www.philips.com/support This damage can result from improper handling. Mail: support.service@xgem.com International Phone: +43 1 66155 5129 ... -
Page 4: General Safety Information
If the device gets too hot or emits smoke, shut it down immediately and unplug the power cable. Arrange for your device to be investigated by a technical service centre. To minimize the risk of fire, keep the device away from open flames. Philips · HDP2510... -
Page 5: Power Supply
Power supply 3D glasses use Before turning on your device, check that the When using 3D glasses at home, keep in mind: outlet that you are going to plug it into con- • 3D glasses must be kept out of reach from forms to the indications shown on the informa- small children, due to risk of small parts tion plate (voltage, current, power network fre-... -
Page 6: Overview
Long press (three seconds): Starts Pairing mode. Long press (ten seconds): Resets the pro- jector. CAUTION! Always use the B button to turn off the projector. This is essential to allow the necessary cooling-down time for the UHP lamp! ƒ Lens Philips · HDP2510... -
Page 7: Rear View
Rear view g h i 1 TRIG OUT Remote screen connection. 2 ý USB port for firmware update. 3 AUDIO AUDIO OUT: Connection for external speakers. AUDIO IN: Connection for external audio devices – only with VGA input. 4 SPDIF OPTICAL Digital audio connector. -
Page 8: Remote Control
9 VOLUME Adjusts the volume level (decreases/increas- es and mutes the sound). ‚ FORMAT Changes the aspect ratio. ƒ SMART Displays the Smart settings menu. „ 3D Displays the 3D menu. … Colour keys Changes on-screen options. Philips · HDP2510... -
Page 9: Browsing The User Interface
Browsing the user interface Option menu 1 Select the Option menu using the OPTION/ Ă button. Navigation for menu Source settings 1 Navigation can be done by navigation keys (¡,¢, À,Á), OK and ¿ on the panel Source HDMI1 HDMI2 Image control of your device or on the remote HDMI3... -
Page 10: Overview Of The Main Menu Functions
Displays the image setting related functions. Displays all settable 3D functions. Sound Displays the sound functions. System Displays the content of all system related functions. Information Displays an overview of the status and ver- sion of the device. Philips · HDP2510... -
Page 11: Initial Operation
3 Initial operation Setting up the device The size of the screen (b) is comprised between 0.1 and 0.42 metres depending on the projec- Before installing your device, make sure that tion distance (a), as described in the following the projector is turned off and the power cable table. -
Page 12: Installing Or Changing The Batteries Of The Ir Remote Control
Make sure the polarities (+ and -) are aligned correctly. Notice You can purchase Screeneo 3D glasses on the Philips website: www.philips.com The 3D glasses are equipped with a battery, which has to be charged before first use. Charg-... - Page 13 Activate 3D glasses 1 Press the ON / OFF button on the top of the glasses. 2 On the remote control, press the 3D key. 3 The 3D menu appears, select your choice and press OK. 4 Press the ON/OFF button on the top of the glasses for one and a half seconds....
-
Page 14: Initial Installation
In this mode default settings are made and can’t be changed. Notice The shop mode can be activated or deactivated on the Option menu (see Shop Mode Switches the shop mode On and Off., page 27). Philips · HDP2510... -
Page 15: Turning Off The Projector
Turning off the projector 1 To turn off the projector, press the B button on the panel control of the device or on the remote control twice. 2 A message displays asking if you really want to turn off the device. Confirm with the B button or stop shutting down with any other key. -
Page 16: Connect To The Playback Device
2 Connect the HDMI plug to the HDMI socket of 1280 x 720 60 Hz the playback device. FULL HD 1920 x 1080 60 Hz 3 In the Options menu, select HDMI 1,2 or 3 depending on which outlet is being used for the external device Philips · HDP2510... -
Page 17: Connecting A Screen Using The Automatic Trigger Input
1 Connect the A/V adapter to the projector's Notice AV-IN socket. Screen Resolution The projector supports the following resolutions: VGA/SVGA/WXGA, HD and FULL HD. For best results, please check the best resolution. 4 In the Option menu, select VGA. Connecting a screen using the automatic Trigger input Use a Trigger cable to connect the projector to a screen. -
Page 18: Connecting To A Home Cinema Amplifier
Before connecting the headphones, turn down the volume on the device. 1 Connect the headphones to the headphone slot on the side of the device. The device speakers deactivate automatically when the headphones are connected. Philips · HDP2510... - Page 19 3 In the search bar, type the device Screeneo A message displays asking if you want to and your model HDP2510. update the new firmware. Confirm with OK 4 The Screeneo HDP2510 projector screen (YES). appears. In the new screen, research Support and click on Software & drivers.
-
Page 20: Bluetooth Speaker
1 Press the SOURCE/ÿ button and use ¡/¢ to select Bluetooth speaker. 2 Confirm with OK. 3 Press the RED key to start the connec- tion. The projector is now visible for the near exter- nal Bluetooth devices. Philips · HDP2510... -
Page 21: Media Playback (Optional)
6 Media playback (optional) Navigation by colour keys Notice Read the informations on the best set- Keys Action tings for optimal use of your device RED key Music and movie player: (see Settings, page 25). Allows to set the repeat mode: off, song, direc- Navigation for media tory, all... -
Page 22: Activating Media Player
3 Press the BACK/¿ button to end the play- back and return to the overview. 4 When you press the BACK/¿ button again or the HOME/Î button, you will return to the media player main screen. Philips · HDP2510... -
Page 23: Photo Playback (Optional)
5 Press OK on the remote control to show the Photo playback (optional) status bar again. The movie pauses. Notice Supported file formats Fast forward/rewind (2x, 4x, 8x with Supported file formats are JPEG, BMP, PNG and each click) using :/;. Press OK or GIF. -
Page 24: Music Playback (Optional)
During playback you can adjust the volume using the VOLUME buttons N/O. Press ÷ or Music Music Music Music N repeatedly to shut off the volume com- pletely. Notice Only those songs that are compati- ble with the projector will be dis- played. Philips · HDP2510... -
Page 25: Settings
7 Settings 1 Select the Option menu using the OPTION/ Image settings Ă button. Image settings 2 Use ¡/¢ to select from the main settings. Source Smart settings Standard 3 Confirm with OK. Format Original Image 4 Modify the settings in the Sub menu using Brightness Contrast À/Á. - Page 26 Front – normal projection; the device is L/R Swap located in front of the projection surface/ Changes the side of the screen display. screen. Rear – rear projection; the device is located behind the projection surface; the image is reflected horizontally. Philips · HDP2510...
-
Page 27: Reset Functions
MCU version V1.11111 Screen saver Model HDP2510 Adjusts the time until the system should power down the lamp if no source is con- nected to system. The followings options are available: Off, 1 min., 2 min., 5 min., 10 min., ... - Page 28 À/Á to select NO and confirming with OK. 7 The device turns off and on again. After a short time the Language selection screen appears. The resetting process is now com- pleted. Philips · HDP2510...
-
Page 29: Service
8 Service Cleaning DANGER! DANGER! Instructions for cleaning! • To reduce the risk of electrical Instructions for cleaning! shock, always turn the projector off Use a soft, lint-free cloth. Never use liq- and disconnect the power cable uid or easily flammable cleansers before changing the lamp. -
Page 30: Resetting The Lamp Timer
• Do not insert your hands into the projector after the lamp is removed. • If you touch the optical compo- nents inside, it could cause colour unevenness and distortion of the projected images. Philips · HDP2510... -
Page 31: Troubleshooting
1 Turn the device off by pressing the B button Troubleshooting twice. 2 Wait at least ten seconds. Power cycling 3 Turn the device on by pressing the B button If a problem occurs that cannot be corrected once. with the instructions in this user manual, follow 4 If the problem persists, please contact our the steps given here. - Page 32 The device does not support the exFAT file system. • Format the USB key in FAT format, then use it. The projector does not react to remote control • Check the batteries of the remote control. commands Philips · HDP2510...
-
Page 33: Appendix
Display technology ..Single 0.65” DarkChip3 ........47–63Hz for EU and UK 1080p DLP® Technology by Texas Instruments Light source .... Philips UHP Image life lamp Logistic data Lamp type ............ 250 watt Packaging dimensions ..packed (W x D x H): UHP light source ... - Page 34 The declaration of compliance can be con- 2 this device must accept any interference sulted on the site www.screeneo.philips.com. received, including interference that may cause undesired operation. FCC RF Radiation Exposure Statement: This Preservation of the environment as part of a...
- Page 35 X-GEM SAS / PHILIPS package recovery and recycling infrastructures. products or X-GEM SAS / PHILIPS approved Please respect the sorting rules set up locally products.
- Page 36 PHILIPS and the PHILIPS’ Shield Emblem are registered trademarks of Koninklijke Philips N.V. used under license. This product was brought to the market by X-GEM SAS, further referred to in this document as X-GEM SAS, and is the manufacturer of the product.
Need help?
Do you have a question about the HDP2510 and is the answer not in the manual?
Questions and answers