Table of Contents
Advertisement
Advertisement
Table of Contents

Related Manuals for AEE magicam s50


Summary of Contents for AEE magicam s50
-
Page 2: Table Of Contents
Contents Main Functions and features ........1 List of accessories ..............3 Component guideline..........5 Front view ................5 Rear view: ................6 Description of indicators ............7 Preparations before use ........8 Charging .................8 Remove the battery ..............9 Install TFT display ..............10 Insert and remove the memory card ........11 Startup ..................12 Setting the date and time .............13 Language ................14... - Page 3 Basic operations of video recording ........15 Start video recording via G-SENSOR mode .......16 Parameter setting for video recording ........17 Audio recording ..........21 Enter audio recording mode ..........21 Operating procedures for audio recording ......22 Exit audio recording mode ............23 Photo shooting............24 Parameter settings for photo shooting ........25 Playback ............28 Operating procedure for playback ........28...
- Page 4 Trim Videos ................44 Change WiFi Connection Name and Password ....45 Other basic setting..........46 Warning tone ................46 status indicators ..............46 OSD ..................47 Video content loop ...............47 Auto to standby ..............47 TV output format ..............48 Recover factory settings ............48 Accessory application .........49 Water-proof housing .............49 Mount plug bracket components ..........50 Use convex sticker and flat sticker ........50...
-
Page 5: Main Functions And Features
Main Functions and features 1 175° wide-angle lens. 2 High-definition video recording with multiple interchangeable recording modes. 3 Automatic white balance and automatic exposure. 4 External scalable power supply and GPS module. 5 Support external TF card up to 64GB. - Page 6 14 100m wireless remote control allows you to control the video camera functions remotely. 15 Built-in G-Sensor can function as automobile black box. 16 Burst mode can take 10 photos in 1 second to record every detail in high-speed motion.
-
Page 7: List Of Accessories
List of accessories S50 main unit TFT display Water-proof housing Remote control Lithium-ion battery Back clip (optional) Vertical-horizontal Waterproof plug Lens protective cap joint... - Page 8 Flat sticker Convex sticker Plug bracket unit Extended adjusting Moisture-proof foam USB data cable bolt unit Power supply Cloth bag Hand strap terminal CD-ROM User manual The actual items may be different from the pictures. Package is subject to change without prior notice.
-
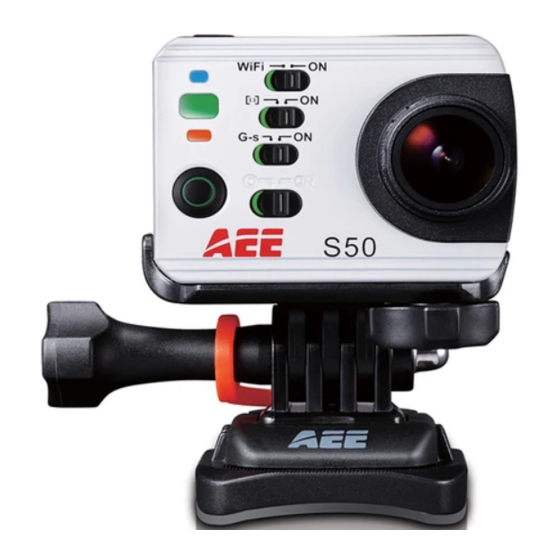
Page 9: Component Guideline
Component guideline Front view WiFi key Lens Light meter mode key WiFi status indicator Working status indicator Power status indicator G-Sensor key Video/audio recording button Power on/off key Green Green indicator indicator Battery lock Microphone tripod mount... -
Page 10: Rear View
Rear view: Microphone Green indicator Red indicator LCD segment display Shutter button Down button Stop button Up button HDMI interface OK button Right arrow button Green indicator USB interface Red indicator Left arrow button TF card slot TFT display... -
Page 11: Description Of Indicators
Description of indicators Green Tricolor indicator indicator indicator Indicator Quantity Quantity Quantity 1 at 1 at front/ front/top top cover/ cover/TFT Position Front Position Position TFT display display cover each each; 2 at Status bottom side Startup Stay on... -
Page 12: Preparations Before Use
Preparations before use Charging Start up the unit to check the battery power. If the battery level is low, charge it. Use the supplied power adapter or USB port of a PC to charge S50: S50 USB interface S50 power adapter... -
Page 13: Remove The Battery
Remove the battery Battery lock Before removing the battery, ensure that the battery "lock key" at the bottom of S50 is unlocked. Dent Place the figure at the battery dent and press down the battery in the direction of arrow to detach it from the camera. -
Page 14: Install Tft Display
Install TFT display S50 supports external dedicated 2″ TFT display, which can perform Setup, Playback and Delete, etc. on the camera to preview or play back the video. Install the display as shown below:... -
Page 15: Insert And Remove The Memory Card
Insert and remove the memory card S50 supports external TF card up to 64G. Though all SD cards above Class 6 can be used on S50, high-speed card is recommended to perform high-definition shooting. When shooting during dynamic motion, brand SDHC cards are recommended for use in order to ensure smooth shooting. -
Page 16: Startup
3 red indicators will be lit up (one at front cover, top cover and display each) • The startup picture shows "AEE LOGO" and S50 enters recording standby mode. Now TFT display is shown as below: Working mode Battery level... -
Page 17: Setting The Date And Time
Setting the date and time Set time and date by following these steps: 1 Turn on S50 to enter recording standby mode; 2 Press "M" button to enter the camera setting menu; 3 Press "<" / ">" button to select "... -
Page 18: Language
Language 1 Turn on S50 to enter recording standby mode; 2 Press "M" button to enter the camera setting menu; 3 Press "<" / ">" button to select " "; 4 Press "-" / "+" button to select language setting option and press "OK"... -
Page 19: Video Recording
Video recording Basic operations of video recording 1. Turn on S50 to enter recording standby mode; 2. Aim the lens to the subject and preview it in TFT display; 3. Press "Video recording button" once to start video recording;... -
Page 20: Start Video Recording Via G-Sensor Mode
LCD segment display is shown as below for video recording: Working mode (video recording) Resolution for video recording 1 0 8 0 P 2 5 0 0 : 0 0 : 2 8 Recording time Battery level Remaining video recording time... -
Page 21: Parameter Setting For Video Recording
The system will automatically start video recording in case of shock or tilting, etc. Especially when this mode is applied in fixed installation, for example, mounted on the vehicle or helmet, it can start video recording timely without the need to start the recording in advance. - Page 22 • Resolution setting The optional resolutions for video recording are listed as below: PAL System NTSC System 1920×1080i 50f 16:9 1920×1080i 60f 16:9 1920×1080P 25f 16:9 1920×1080P 30f 16:9 1280×960P 25f 4:3 1280×960P 30f 4:3 1280×720P 50f 16:9 1280×720P 60f 16:9 1280×720P 25f 16:9...
- Page 23 Narrow Small • Bit rate This unit provides two bit rate options: high " " and normal " ". (If high bit rate is selected, you will get clearer picture with increased file size). • Auto video Set the video recording mode as "Auto video": Exe.: Auto video...
- Page 24 • 180°rollover When this function is activated, upright video file can be obtained when using S50 to shoot video upside down. OFF: upside-down video file can be obtained when using S50 to shoot video upside down. ON: upright video file can be obtained when using S50 to shoot video upside down.
-
Page 25: Audio Recording
Audio recording Enter audio recording mode 1. Turn on S50 to enter recording standby mode; 2. Press "M" button to enter the camera setting menu; 3. Press "<" / ">" button to select " "; 4. Press "-" / "+" button to select "Record Mode" and press "OK"... -
Page 26: Operating Procedures For Audio Recording
Operating procedures for audio recording 1. Enter audio recording mode and press "Video Recording" button to start audio recording. • The system will tick once to indicate the effective of video recording; • The green indicators will flash slowly;... -
Page 27: Exit Audio Recording Mode
Exit audio recording mode 1. Press "M" button to enter the camera setting menu; 2. Press "<" / ">" button to select " "; 3. Press "-" / "+" button to select "video recording" mode and press "OK" button to confirm;... -
Page 28: Photo Shooting
Photo shooting Operating procedure for photo shooting 1. Turn on S50 to enter recording standby mode; 2. Cast the lens to the subject and preview it on the display; 3. Press the "Shutter" button once to switch the working mode to "photo shooting";... -
Page 29: Parameter Settings For Photo Shooting
Working mode (photo shooting) Resolution for photo shooting 1 0 0 - 1 0 5 Number of photos that can Battery level 0231 be taken with free space of memory card Parameter settings for photo shooting Perform the following steps to set the parameters for video recording: 1. - Page 30 • Resolution for photo shooting Three optional resolutions include: 8.0M (3200x2400 4:3) 5.0M (2592x1944 4:3) 3.0M (2048x1536 4:3) • Caputre mode Single shot: default, take one photo when the photo shooting button is pressed; Fast shot: S50 takes several photos within one second;...
- Page 31 When the "Shutter" button is pressed once under recording standby mode, S50 will start countdown and take a photo at the set time. : Take one photo 3 seconds after the "Shutter" button is pressed. : Take one photo 5 seconds after the "Shutter" button is pressed.
-
Page 32: Playback
Playback Operating procedure for playback 1. Press the "playback" button to enter playback interface; 2. Press "<" / ">" button to select the file type and press "OK" button to confirm; • View video files • View photo files •... - Page 33 Reset to play it from the beginning. Press i t a g a i n t o r e t u r n Play/pause. to the file preview interface; When reviewing photos, the functions of various buttons are listed as below:...
-
Page 34: Delete Files
W h e n a p h o t o i s In zoom-in mode, press it displayed in its actual to restore the photo to its size, press "OK" to actual size; rotate it; I n z o o m - i n m o d e , when you press "OK",... -
Page 35: File Protection And Unlocking
3. Press "OK" button to confirm; 4. Move the cursor to "delete single"/"delete all" and press "OK" button to delete the file(s). : Delete single : Delete all File protection and unlocking Move the cursor to "file protection" and press "OK" button to enter file protection interface. -
Page 36: Upload Audio/Video/Photo Files To Pc
Upload audio/video/photo files to PC 1. Use USB line to connect the camera to a PC; 2. Switch on S50; 3. Click the "My Computer" icon on the desktop and find the "Removable Disc". If the camera is not detected, close "My Computer"... -
Page 37: View Video / Photo On Hdtv
View video / photo on HDTV The recorded files can also be played on TV or display with HDMI interface. Ensure that your camera is properly configured to NTSC (North America) or PAL (Non-North America) video format; otherwise, the video and images on S50 cannot be properly displayed on TV. -
Page 38: Wifi
TFT display: • Turn on your camera,wait until the blue WiFi indicator flashes slowly. Search for WiFi hot spot on a mobile receiving device,select "AEE Magicam" network and connect it (default password:00000000).Then the camera and the mobile device are connected. - Page 39 • Click the App icon " " on the mobile device to display the icon ( ) shown in Fig. 1. Enter the interface shown in Fig. 2 to remotely view your camera’s screen and set up parameters. Note: In case of WiFi connection failure, the icon "...
- Page 40 Fig. 1 WiFi Connection Interface Total number of files Maximize preview WiFi status Current state icon / Start/Stop button Battery status Parameter settings Remaining recording Zoom out time or number of shots Zoom in Auto continuous Video recording mode...
-
Page 41: Operating Instructions For Wifi Control Interface
Operating Instructions for WiFi Control Interface 1. Video Recording Click the Video recording mode icon " ". The current state icon will dispaly as " ", click it to start / stop video recording. Click the icon " " to maximize the preview (See Fig. 3). - Page 42 2. Single shot Click the Single shot mode icon " " ,it will turn blue " ". The current state icon will dispaly as " ", click it to take one picture. Click the icon " " to maximize the preview (See Fig. 4).
- Page 43 3. Fast Shot Click the Fast shot mode icon " " ,it will turn blue " ". The current state icon will dispaly as " ", click it to take pictures within one second. Click the icon " " to maximize the preview (See Fig. 5).
- Page 44 4. Playback Click the icon " " to enter the interface shown in Fig. 7 to remotely play videos and photos. Camera Mobile Device Slide the icon " ". If you select Storage Storage "Camera Storage", you can replay the files stored on the camera.
- Page 45 In the large preview mode: Click the icon " " to return to the thumbnail preview interface. Click the icon " " to share the current file to a social networking website or send it by E-mail. Click the icon "...
-
Page 46: Download Files To Mobile Device
Download Files to Mobile Device Return to the thumbnail preview interface and click the icon " " to enter the Download interface. Click the desired files to download them to your mobile device. Files downloaded Files in waiting Files in... - Page 47 In the thumbnail preview mode, slide the icon " " to view local files. Click the icon " " to enter the interface shown in the figure below, and then click the desired files to share them to social networking websites or send them by E-mail.
-
Page 48: Trim Videos
Trim Videos When viewing the downloaded files on the mobile device, you can click the icon " " at the bottom of the screen to enter the video trimming interface shown in the figure below: Menu Storyboard Current frame... -
Page 49: Change Wifi Connection Name And Password
Change WiFi Connection Name and Password 1. Change the WiFi connection name: Connect your camera (with TF card installed) to the computer and turn on your camera. On the computer, double click "My Computer" to find and enter the removable disk, and then open the "... -
Page 50: Other Basic Setting
Note: if the TF card is formatted, you need to reconnect AEE S50 to your camera in order to find the folder "MISC" and change the name and password. Note: Above images for reference only, subject to our available App. -
Page 51: Osd
Display or hide the recording icons or information on the display screen. : OFF : ON Video content loop You can activate or deactivate loop recording function. If ON, video file will be automatically stored in segment of 15 minutes; If OFF, video file will be stored in segment of 30 minutes. -
Page 52: Tv Output Format
: 2 minutes : 5 minutes : 10 minutes TV output format This setting is designed to ensure that the frame rate of video recording matches with the playback format of on TV. Please select NTSC in North America. -
Page 53: Accessory Application
Accessory application S50 is suitable for handhold use or hand-free use at most places by using appropriate accessories. S50 fitted with water-proof housing can be used to record videos underwater. Water-proof housing S50 water-proof housing up to IP68 can protect the camera 100 meters underwater. -
Page 54: Mount Plug Bracket Components
Mount plug bracket components The plug bracket can fix S50 firmly onto the sticky seat. Use convex sticker and flat sticker S50 comes with sticker fitting and flat sticker for installation on different surfaces. - Page 55 You can easily attach the camera onto helmet, vehicles or the surface of other devices. M08 convex sticker M15 flat sticker Precautions for the use of 3M double-sided foam tape 1. Before fixing 3M double-sided foam tape, please select an appropriate curved or flat surface where the tape can fit with the surface.
-
Page 56: Specifications
Specifications Description Specifications Visual angle 175 ° Aperture f/2.8 Digital zoom ratio 10 x Pixel 8 million Video recording format Audio recording format Photo format JPG (JPEG) WiFi transmission distance About 100 meter (MAX) 64MB Built-in flash memory (not for photo shooting or video Storage medium recording);... - Page 57 L59.4 × W43.3 × H43.5MM (including TFT screen) dimension L59.4 × W43.3 × H32MM (excluding TFT screen) 113.6g (including TFT screen and battery) Unit weight 53.7g (excluding TFT screen and battery) Note: As our products undergo continuous development, the...
-
Page 58: Tips
Tips 1. When the unit is in used for long period, it is natural that its surface temperature will rise. 2. If you will not use the unit for long period, it is suggested that you charge it once every 6th month to maintain the performance of battery.
Need help?
Do you have a question about the magicam s50 and is the answer not in the manual?
Questions and answers