
Related Manuals for Tuncmatik NEWTECH PRO II X9


Summary of Contents for Tuncmatik NEWTECH PRO II X9
-
Page 1: User Manual
NEWTECH PRO II X9 1-2-3 KVA ONLINE UNINTERRUPTIBLE POWER SUPPLY USER MANUAL info@tuncmatik.com / www.tuncmatik.com... -
Page 2: Table Of Contents
Table of Contents 1. Important Safety Warning ......................... 2 Transportation ..........................2 Preparation ..........................2 Installation ........................... 2 Operation ............................3 Maintenance, service and faults ................... 3 Symbols used in this guide ..................... 4 2. Installation and setup .......................... 4 Unpack checking ........................ -
Page 3: Important Safety Warning
1. Important Safety Warning Important safety instructions – Save these instructions Please comply with all warnings and operating instructions in this manual strictly. Save this manual properly and read carefully the following instructions before installing the unit. Do not operate this unit before reading through all safety information and operating instructions carefully There exists dangerous voltage and high temperature inside the UPS. -
Page 4: Operation
Please use only VDE-tested, CE-marked mains cable (e.g. the mains cable of your computer) to connect the UPS system to the building wiring outlet (shockproof outlet). Please use only VDE-tested, CE-marked power cables to connect the loads to the UPS system. -
Page 5: Symbols Used In This Guide
-use only tools with insulated grips and handles. When changing batteries, install the same number and same type of batteries. Do not attempt to dispose of batteries by burning them. This could cause battery explosion. Do not open or destroy batteries. Escaping electrolyte can cause injury to the skin and eyes. -
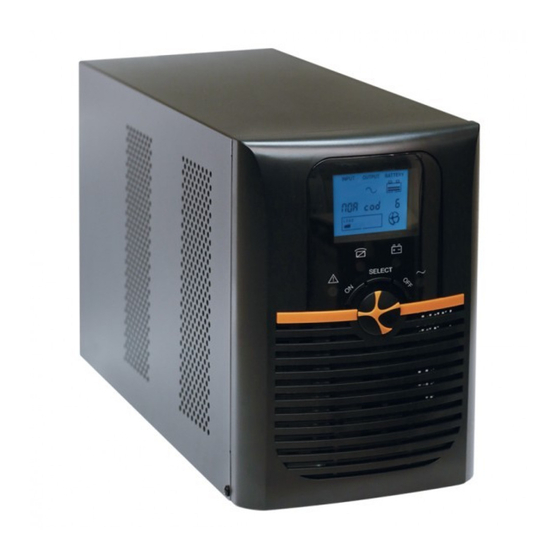
Page 6: Real Panel View
2-2 Real panel view 1kVA standart: 1kVA Ex. Batt: 2kVA Standart:... - Page 7 2-3kVA Ex Batt: 3KVA Standart: AC input Network / Fax / Modem Surge Protection(option) Input circuit breaker EPO(option) USB communication port(option) RS-232 communication port SNMP intelligent slot (option) Output receptacles Battery Terminal 10. Output Terminal...
-
Page 8: Lcd Control Panel
2-3 LCD control panel LCD control panel introduction (1) LED (from top to bottom: “alarm”, “bypass”, “battery”, “inverter”) (2) LCD display (3) Select button:enter to next item (4)Off button (5)On button 2-4 Setup the UPS Step 1: UPS input connection Plug the UPS into a two-pole, three-wire, grounded receptacle only. - Page 9 Step 3 Communication connection Communication port: To allow for unattended UPS shutdown/start-up and status monitoring, connect the communication cable one end to the USB/RS-232 port and the other to the communication port of your PC. With the monitoring software installed, you can schedule UPS shutdown/start-up and monitor UPS status through PC.
-
Page 10: Operations
3. Operations 3-1 Button operation Button Function Turn on the UPS: Press and hold ON button for at least 2 seconds to turn on the UPS. Down key: Press this button to display next selection ON Button in UPS setting mode. ... -
Page 11: Lcd Display
3-2 LCD display There are 8 interfaces available in the LCD display 1) Input information display area: input voltage and frequency; 2) Output information display area: output voltage and frequency 3) Battery information display area: battery status and capacity; 4) Load information display area: UPS load 5) Logo... - Page 12 Item Interface Description Content Displayed Input voltage Battery voltage Output voltage Load...
- Page 13 Temperature (Heatsink Temperature & Environment Temperature) : Note UDC9101 only has Heatsink Temperature. Firmware Version & UPS model. CODE (Operational status and mode) Alarm Code(Warming Message) All alarm codes are present when abnormal behavior(s) occur(s)
-
Page 14: Ups Setting
The charging status can also be shown on the screen as below while the charger is on. 3-3 UPS setting The setting fuction is controled by 3 buttons (Select ,Off, On): Select + Off---goes into the setting page, Select --- value adjustment; Off & On ---for choosing different pages(Off ▲ & On ▼). After the UPS turn ON, press buttons Select &... - Page 15 Frequency setting Press select button to change the setting (50 or 60Hz). Press UP button ▲ to select the previous setting. Press DOWN ▼ button to select the next setting. Battery capacity setting Press select button to change the setting (Battery capacity range is 1-200Ah).
-
Page 16: Operating Mode Description
Voice setting Press select button to change the setting(ON or OFF). Press UP button ▲ to select the previous setting. Press DOWN ▼ button to save and exit the setup. 3-4 Operating Mode Description Operating mode Description Display When the input voltage is within acceptable range, UPS will provide pure and Online mode... -
Page 17: Operational Status And Mode(S)
UPS is powered off and no output supply power, but Standby mode All LEDs turn off still can charge batteries. When input voltage is within acceptable range but UPS is overload, UPS will enter bypass mode or bypass mode Bypass mode Bypass led light can be set by front panel. -
Page 18: Alarm Or Fault Reference Code
3-6 Alarm or Fault reference code Event log UPS Alarm Warning Buzzer Rectifier Fault Beep continuously Fault LED lit Inverter fault(Including Inverter Beep continuously Fault LED lit bridge is shorted) Fan fault Beep continuously Fault LED lit Battery Charger fault Beep continuously Fault LED lit DC Bus over voltage... -
Page 19: Troubleshooting
4. Troubleshooting If the UPS system does not operate correctly, please solve the problem by using the table below. Symptom Possible cause Remedy No indication and alarm even The AC input power is not Check if input power cord though the mains is normal. connected well. -
Page 20: Storage And Maintenance
occurred. Battery backup time is Batteries fully Charge the batteries for at shorter than nominal value charged least 5 hours and then check capacity. If the problem still persists, consult your dealer. Batteries defect Contact your dealer to replace the battery. 5. -
Page 21: Specification
6. Specification MODEL 1kVA 2kVA 3kVA PHASE Single phase with ground 2000VA / 1800W 3000VA / 2700W Capacity (VA/Watts) 1000VA / 900W INPUT Nominal voltage 200/208/220/230/240VAC 160Vac±5% @100%-80% load; 140Vac±5% @80%-70% load; Low line transfer 120Vac±5% @70%-60% load; 110Vac±5% @60%-0% load; ( <35℃) 175Vac±5% @100%-80% load;... - Page 22 ≤3% THD with linear load Harmonic distortion (THDv) ≤6% THD with non linear load Waveform Pure Sinewave AC mode <-> Batt. Zero Transfer time Inverter <-> bypass 4ms(Typical) >88%(AC mode) >89%(AC mode) >90%(AC mode) Efficiency >83%(DC mode) >87%(DC mode) >88%(DC mode) BATTERY depends on 12V9AH...
- Page 23 PHYSICAL 144*209*29 144*209*29 144*209*39 144*209*3 191*337* 144*209*3 Dimension W×H×D (mm) Net Weight (kg) 16.2 24.8 STANDARDS IEC/EN62040-1,IEC/EN60950-1 Safety IEC/EN62040-2,IEC61000-4-2,IEC61000-4-3,IEC61000-4-4, IEC61000-4-5,IEC61000-4-6,IEC61000-4-8 * Derate to 80% of capacity when the output voltage is adjusted to 100/200/208VAC ** Product specifications are subject to change without further notice.
Need help?
Do you have a question about the NEWTECH PRO II X9 and is the answer not in the manual?
Questions and answers