Lifetime 60072 Assembly Instructions Manual
Dual composter
Hide thumbs
Also See for 60072:
- Manual (35 pages) ,
- Assembly instructions manual (36 pages) ,
- Assembly instructions manual (36 pages)
Table of Contents
Advertisement
Para español, vea la página 2.
Pour français, voyez la page 3.
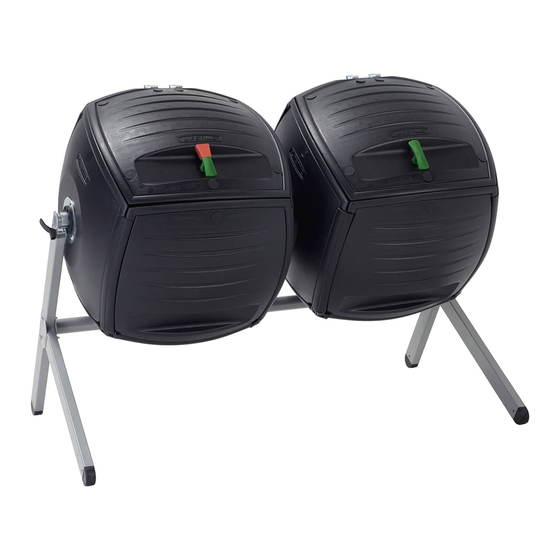
DUAL
COMPOSTER
ITM./ART. 811622
Lifetime composters are designed to be strong and
durable. We strive to make assembly as easy as
possible without compromising quality. If you
get stuck, we have tools to help:
• Assemble on a Flat Surface
• Recruit a Friend or Family Member
Assembly should take 2 people about 2
hours to complete.
Importado por:
Importadora Primex S.A. de C.V.
Blvd. Magnocentro No. 4
San Fernando La Herradura
Huixquilucan, Estado de México
C.P. 52765
RFC: IPR-930907-S70
Ninguna garantía ofrecida por el fabricante es válida en México.
FOR DOMESTIC USE ONLY!
IMPORTANT: RETAIN FOR FUTURE REFERENCE. READ CAREFULLY.
TOOLS REQUIRED
NEED HELP? TALK TO US!
Call: 1-800-225-3865
7:00 am - 5:00 pm (Monday - Friday) MST
and 9:00 am - 1:00 pm Saturday MST
Lifetime's Shed Assembly Experts offer quick responses and great customer service.
Web: www.lifetime.com/instructions
Live Chat: www.lifetime.com/instructions
TABLE OF CONTENTS
Icon Legend...............................4
Warnings & Notices.....................5
Parts Identifi er............................6
Bin Assembly..............................8
Frame Assembly........................17
Lid Assembly............................25
Additional Warnings..................28
Cleaning & Care........................29
Registration.........................30
Warranty..............................31
MODEL# AND PRODUCT ID
(you will need both when contacting us)
Model Number:
Product ID:
60072
Advertisement
Table of Contents

Related Manuals for Lifetime 60072


Summary of Contents for Lifetime 60072
- Page 1 Lid Assembly......25 Additional Warnings....28 Cleaning & Care......29 Registration......30 Warranty......31 Lifetime’s Shed Assembly Experts offer quick responses and great customer service. NEED HELP? TALK TO US! MODEL# AND PRODUCT ID (you will need both when contacting us) Call: 1-800-225-3865 Web: www.lifetime.com/instructions...
- Page 2 Ensamblaje del armazón....17 Ensamblaje de la tapa....25 Advertencias adicionales...28 Limpieza y Cuidado....29 Registro......30 Garantía......32 Los expertos de ensamblaje Lifetime ofrecen respuestas rápidas y servicio valorado. ¿NECESITA AYUDA? ¡LLÁMENOS? © MODELO E ID DEL PRODUCTO (necesitará los dos al contactarnos) Llame al 1.800.225.3865 Web: www.lifetime.com/instructions...
-
Page 3: Para Español, Vea La Página
For English, see page 1. Para español, vea la página 2. DOUBLE COMPOSTEUR © Les composteurs Lifetime sont conçus pour être solide et durable. Nous nous efforçons de rendre l’assemblage aussi facile que possible sans compromettre la qualité. Si vous êtes coincé, nous avons les outils nécessaires pour vous aider :... -
Page 4: Icon Legend
ICON LEGEND / LEYENDA DE ÍCONOS / LÉGENDE DES ICÔNES • indicates special heed should be taken when reading. • indica que uno debe prestar atención al leer. • ceci indique que l’on doit faire attention à ce que vous lisez. •... -
Page 5: Warnings & Notices
WARNINGS & NOTICES / ADVERTENCIAS & NOTIFICACIONES / AVERTISSEMENTS & NOTIFICATIONS English: • Failure to follow these warnings may result in serious injury or property damage and will void warranty. • To ensure safety, do not attempt to assemble this product without following the instructions carefully. •... - Page 6 PARTS IDENTIFIER / IDENTIFICADOR DE PIEZAS / IDENTIFICATEUR DE PIÈCES PLASTIC PARTS / PIEZAS DE PLÁSTICO PIÈCES EN PLASTIQUE DBR (x2) DBS (x2) DBV (x2) DCX (x16) DBU (x2) DBT (x4) METAL PARTS / PIEZAS DE METAL PIÈCES EN MÉTAL DEI (x1) DUQ (x1) DEK (x1)
- Page 7 PARTS IDENTIFIER / IDENTIFICADOR DE PIEZAS / IDENTIFICATEUR DE PIÈCES SMALL PARTS BOX / CAJA DE PIEZAS PEQUEüAS BOÎTE DE PETITES PIÈCES DDC (x4) DDG (x6) DEY (x1) DDO (x2) DDI (x2) DDJ (x4) DCW (x4) DDE (x4) DDW (x8) DDS (x6) HARDWARE REQUIRED FOR SECTION 1 / LOS ELEMENTOS DE FIJACIÓN REQUERIDOS PARA LA SECCIÓN 1...
-
Page 8: Bin Assembly
BIN ASSEMBLY / ENSAMBLAJE DE LOS BARRILES / ASSEMBLAGE DES BACS HARDWARE REQUIRED / ACCESORIOS REQUERIDOS / ACCESSOIRES REQUIS Hardware / Elementos de fijación Accessoires BIR (x12) AAN (x12) DEG (x8) BHO (x12) BBO (x16) PARTS REQUIRED / PIEZAS REQUERIDAS / PIÈCES REQUISES Small Parts / Piezas pequeñas Petites Pièces... - Page 9 u SECTION 1 (CONTINUED) / SECCIÓN 1 (SIGUE) SECTION 1 (SUITE) Tools and Hardware required / HerramienTas y accesorios requeridos ouTils eT accessoires requis 1/2” (13 mm) AAN (x12) BIR (x12) BHO (x12) • assemble a Side Panel (DBT) as shown. •...
- Page 10 u SECTION 1 (CONTINUED) / SECCIÓN 1 (SIGUE) SECTION 1 (SUITE) Tools and Hardware required / HerramienTas y accesorios requeridos ouTils eT accessoires requis • slide the top edge of the Bottom Panel (DBS)—note the orientation of the Panel—onto the Panel connector.
- Page 11 u SECTION 1 (CONTINUED) / SECCIÓN 1 (SIGUE) SECTION 1 (SUITE) Tools and Hardware required / HerramienTas y accesorios requeridos ouTils eT accessoires requis • slide the side edge of a Side Panel (DBT) onto the Panel connector—note the orientation of the Panels. you may need to use a rubber mallet to gently tap the Panel into place.
- Page 12 u SECTION 1 (CONTINUED) / SECCIÓN 1 (SIGUE) SECTION 1 (SUITE) Tools and Hardware required / HerramienTas y accesorios requeridos ouTils eT accessoires requis • slide a Panel Connector (DCX) onto the edge of the rear Panel. you may need to use a rubber mallet to gently tap the connector into place.
- Page 13 u SECTION 1 (CONTINUED) / SECCIÓN 1 (SIGUE) SECTION 1 (SUITE) Tools and Hardware required / HerramienTas y accesorios requeridos ouTils eT accessoires requis • slide a Panel Connector (DCX) onto the edge of the side Panel. you may need to use a rubber mallet to gently tap the connector into place.
- Page 14 u SECTION 1 (CONTINUED) / SECCIÓN 1 (SIGUE) SECTION 1 (SUITE) Tools and Hardware required / HerramienTas y accesorios requeridos ouTils eT accessoires requis DEG (x8) BBO (x16) 1.11 • slide the last two Panel Connectors (DCX) onto the edges of the Panels one at a time. you may need to use a rubber mallet to gently tap the connector into place.
- Page 15 u SECTION 1 (CONTINUED) / SECCIÓN 1 (SIGUE) SECTION 1 (SUITE) Tools and Hardware required / HerramienTas y accesorios requeridos ouTils eT accessoires requis 1.13 • insert the lips of the two bottom clips of a Corner Cap (DDW) down behind the two lower Panel corners. •...
- Page 16 u SECTION 1 (CONTINUED) / SECCIÓN 1 (SIGUE) SECTION 1 (SUITE) Tools and Hardware required / HerramienTas y accesorios requeridos ouTils eT accessoires requis 1.14 • after inserting the two lower clips behind the corners of the Panels, gently press done on the upper clip with a screwdriver to help slip it behind the upper corner of the Panel.
-
Page 17: Frame Assembly
FRAME ASSEMBLY / ENSAMBLAJE DEL ARMAZÓN / ASSEMBLAGE DE LA CHARPENTE HARDWARE REQUIRED / ACCESORIOS REQUERIDOS / ACCESSOIRES REQUIS Hardware / Elementos de fijación Accessoires DEN (x6) DFG (x4) BFY (x6) BHJ (x1) ADJ (x10) AAN (x6) BHO (x12) PARTS REQUIRED / PIEZAS REQUERIDAS / PIÈCES REQUISES Metal Parts / Piezas de metal Pièces en métal... - Page 18 u SECTION 2 (CONTINUED) / SECCIÓN 2 (SIGUE) SECTION 2 (SUITE) Tools and Hardware required / HerramienTas y accesorios requeridos ouTils eT accessoires requis • slide an Aeration Tube (DCV) into one of the drums as shown. This drum will be on the right side. •...
- Page 19 u SECTION 2 (CONTINUED) / SECCIÓN 2 (SIGUE) SECTION 2 (SUITE) Tools and Hardware required / HerramienTas y accesorios requeridos ouTils eT accessoires requis 7/16” (11 mm) (x2) DFG (x1) ADJ (x1) • insert a 1/4” x 2 5/8” Hex Bolt (DFG) through the holes in an Internal Drum Glide (DDE), the sleeve, and aeration Tube.
- Page 20 u SECTION 2 (CONTINUED) / SECCIÓN 2 (SIGUE) SECTION 2 (SUITE) Tools and Hardware required / HerramienTas y accesorios requeridos ouTils eT accessoires requis 7/16” (11 mm) (x2) DFG (x1) ADJ (x1) • insert a 1/4” x 2 5/8” Hex Bolt (DFG) through the holes in an Internal Drum Glide (DDE), the sleeve, and aeration Tube.
- Page 21 u SECTION 2 (CONTINUED) / SECCIÓN 2 (SIGUE) SECTION 2 (SUITE) Tools and Hardware required / HerramienTas y accesorios requeridos ouTils eT accessoires requis 7/16” (11 mm) (x2) DFG (x2) ADJ (x2) • secure the rear leg to the left side of the drums using the hardware provided. •...
- Page 22 u SECTION 2 (CONTINUED) / SECCIÓN 2 (SIGUE) SECTION 2 (SUITE) Tools and Hardware required / HerramienTas y accesorios requeridos ouTils eT accessoires requis 1/2” (13 mm) (x2) BHJ (x1) DEN (x6) AAN (x6) BHO (x12) • orient the two Cross Tubes (DEL and DEM) as shown. use an electric drill to insert the #8 x 1/2” Self-Tapping Screw (BHJ) into the two cross Tubes.
-
Page 23: Composter
u SECTION 2 (CONTINUED) / SECCIÓN 2 (SIGUE) SECTION 2 (SUITE) Tools and Hardware required / HerramienTas y accesorios requeridos ouTils eT accessoires requis 2.10 • Flip the composter upright as shown. • Ponga vertical el compostador como se muestra. •... - Page 24 u SECTION 2 (CONTINUED) / SECCIÓN 2 (SIGUE) SECTION 2 (SUITE) Tools and Hardware required / HerramienTas y accesorios requeridos ouTils eT accessoires requis 7/16” (11 mm) BFY (x6) ADJ (x6) 2.11 • connect the following hardware to the right drum. •...
-
Page 25: Lid Assembly
LID ASSEMBLY / ENSAMBLAJE DE LA TAPA / ASSEMBLAGE DU COUVERCLE HARDWARE REQUIRED / ACCESORIOS REQUERIDOS / ACCESSOIRES REQUIS Hardware / Elementos de fijación Accessoires DDL (x4) DDM (x2) PARTS REQUIRED / PIEZAS REQUERIDAS / PIÈCES REQUISES Metal Parts / Piezas de metal Pièces en métal DDO (x2) - Page 26 u SECTION 3 (CONTINUED) / SECCIÓN 3 (SIGUE) SECTION 3 (SUITE) Tools and Hardware required / HerramienTas y accesorios requeridos ouTils eT accessoires requis DDL (x4) DDM (x2) • slide the large Washer (DDM) in between the metal locking mechanism and the plastic lid as shown. •...
- Page 27 u SECTION 3 (CONTINUED) / SECCIÓN 3 (SIGUE) SECTION 3 (SUITE) Tools and Hardware required / HerramienTas y accesorios requeridos ouTils eT accessoires requis • slide the two lids onto the drums as shown. • deslice las dos Tapas sobre los Barriles como se muestra. •...
-
Page 28: Additional Warnings
ADDITIONAL WARNINGS / ADVERTENCIAS ADICIONALES / AVERTISSEMENTS SUPPLÉMENTAIRES WARNING WARNUNG • do not climb in, on, or around composter. • steigen sie nicht in oder auf den Komposter. • locking pin must be engaged before opening lid. • der sperrstift muss vor dem Öffnen des deckels •... -
Page 29: Cleaning & Care
LIMPEZA E CUIDADOS A TER Parabéns por ter adquirido o seu produto Lifetime®. Ao seguir as instruções abaixo, o seu novo produto Lifetime oferecer-lhe-á anos de serviço e usufruto. os painéis de polietileno são resistentes às manchas e solventes. a maioria das manchas pode ser removida através da aplicação de um produto de limpeza não abrasivo com uma escova de cerda suave. -
Page 30: Registration
® À Lifetime , l’entretien de votre confi dentialité est notre politique de longue date. Et vous pouvez être sûr que Lifetime ne vendra pas ni fournira pas vos données personnelles à d’autres tiers, ou les permettra d’utiliser vos données personnelles à leur propres fi ns. -
Page 31: Warranty
2. This warranty is nontransferable and is expressly limited to the repair or replacement of defective product. if the product is defective within the terms of this warranty, lifetime Products, inc. will repair or replace defective parts at no cost to the purchaser. - Page 32 PIEZAS NO ESTÁN DISPONIBLES O SON OBSOLETAS. 1. el comprador original recibe la garantía de que los contenedores de composta lifetime estarán libres de defectos de material o de mano de obra por un período de 5 años a contar desde la fecha de la compra original. la palabra “defectos” se defi ne como imperfecciones que perjudican el uso del producto.
- Page 33 DISPONIBLES OR SONT OBSOLÈTES 1. les composteurs lifetime sont garantis à l’acheteur d’origine contre tous défauts de matériau ou de fabrication pendant une durée de 5 ans à partir de la date d’achat d’origine. le mot « défauts » signifi e des défectuosités qui empêchent l’utilisation du produit.
- Page 34 Para comprar accesorios u otros productos Lifetime ® EUA, visítenos en: www.lifetime.com O llame al: 1.800.424.3865 AMÉLIOREZ VOTRE ACHAT LIFETIME EN AJOUTANT DES ACCESSOIRES OU AUTRES PRODUITS ® Pour acheter des accessoires ou autres produits Lifetime ® , rendez-vous une visite à : www.lifetime.com Ou appelez-nous au 1.800.424.3865...
Need help?
Do you have a question about the 60072 and is the answer not in the manual?
Questions and answers