Lifetime 60072 Assembly Instructions Manual
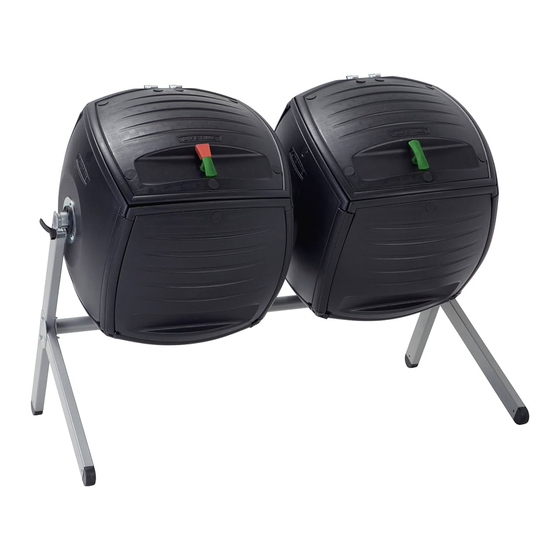
Dual composter tumbler
Hide thumbs
Also See for 60072:
- Assembly instructions manual (35 pages) ,
- Manual (35 pages) ,
- Assembly instructions manual (36 pages)
Table of Contents
Advertisement
Quick Links
DUAL
COMPOSTER TUMBLER
MODEL 60072
ITM./ART. 811622
BEFORE ASSEMBLY:
• Assemble on a level surface
• At least 3 people recommended for setup
For Customer Service in mainland Europe and the United Kingdom:
E-mail: cs@lifetimeproducts.eu
FOR DOMESTIC USE ONLY!
IMPORTANT: RETAIN FOR FUTURE REFERENCE. READ CAREFULLY.
TOOLS REQUIRED
QUESTIONS?
CONTACT LIFETIME CUSTOMER SERVICE:
Dial: 1-800-225-3865
7:00 am–5:00 pm (Monday–Friday) MST
and 9:00 am–1:00 pm Saturday MST
Live Chat: www.lifetime.com
(click on "LIVE CHAT" tab)
ASSEMBLY INSTRUCTIONS
Pour le français, voir la page 2. Para el español, ver la página 3.
Importado por:
Importadora Primex S.A. de C.V.
Blvd. Magnocentro No. 4
San Fernando La Herradura
Huixquilucan, Estado de México
C.P. 52765
RFC: IPR-930907-S70
Tel: 5-5246-5500
Ninguna garantía ofrecida por el fabricante es válida en México.
MODEL# AND PRODUCT ID
Model Number: 60072
Product ID:
TABLE OF CONTENTS
Icon Legend...............................4
Warnings & Notices.....................5
Parts Identifi er............................6
Bin Assembly..............................8
Frame Assembly........................17
Lid Assembly............................26
Additional Warnings..................29
Cleaning & Care........................31
Registration.........................32
Warranty..............................33
(you will need both when contacting us)
Advertisement
Table of Contents

Related Manuals for Lifetime 60072


Summary of Contents for Lifetime 60072
- Page 1 Frame Assembly......17 Lid Assembly......26 Additional Warnings....29 Cleaning & Care......31 Registration......32 Warranty......33 QUESTIONS? CONTACT LIFETIME CUSTOMER SERVICE: MODEL# AND PRODUCT ID Dial: 1-800-225-3865 Live Chat: www.lifetime.com (you will need both when contacting us) (click on “LIVE CHAT” tab) Model Number: 60072 7:00 am–5:00 pm (Monday–Friday) MST...
- Page 2 Nettoyage et entretien....31 Enregistrement....32 Garantie......34 ® QUESTIONS ? CONTACTER LES SERVICES À LA CLIENTÈLE LIFETIME N° DE MODÈLE ET RÉFÉRENCE DU PRODUIT Composer le 1-800-225-3865 t’Chat en direct: www.lifetime.com (vous aurez besoin des deux lorsque vous nous contactez) (cliquer sur la languette « LIVE CHAT ») N°...
-
Page 3: Table Of Contents
Advertencias adicionales...29 Limpieza y cuidado....31 Registro......32 Garantía......35 ¿PREGUNTAS? ® PONERSE EN CONTACTO CON LOS SERVICIOS DE CLIENTES LIFETIME MODEL E ID DEL PRODUCTO Marcar: 1-800-225-3865 Chat en vivo: www.lifetime.com (necesitará los dos al contactarnos) (cliquear en la lengüeta «LIVE CHAT») Número de modelo: 60072... -
Page 4: Leyenda De Íconos
ICON LEGEND / LÉGENDE DES ICÔNES / LEYENDA DE ÍCONOS • Indicates special heed should be taken when reading. • Indique qu’une attention spéciale doit être portée à la lecture. • Indica que uno debe prestar atención al leer. • Indicates the parts to be used for a section. •... -
Page 5: Advertencias Y Avisos
WARNINGS & NOTICES / AVERTISSEMENTS ET AVIS / ADVERTENCIAS Y AVISOS English: • Failure to follow these warnings may result in serious injury or property damage and will void warranty. • To ensure safety, do not attempt to assemble this product without following the instructions carefully. •... -
Page 6: Identifi Cador De Piezas
PARTS IDENTIFIER / IDENTIFICATEUR DE PIÈCES / IDENTIFICADOR DE PIEZAS PLASTIC PARTS / PIÈCES EN PLASTIQUE PIEZAS DE PLÁSTICO DBS (x2) DBR (x2) DBV (x2) DCX (x16) DBU (x2) DBT (x4) METAL PARTS / PIÈCES EN MÉTAL PIEZAS DE METAL DEI (x2) DEK (x1) DCV (x2) - Page 7 PARTS IDENTIFIER / IDENTIFICATEUR DE PIÈCES / IDENTIFICADOR DE PIEZAS SMALL PARTS BOX / BOÎTE DE PETITES PIÈCES CAJA DE PIEZAS PEQUEÑAS BIN (x2) DDO (x2) DEY (x1) DDC (x4) AAH (x2) DDG (x6) DDS (x6) DEZ (x2) DDI (x2) DDJ (x4) DDE (x4) DDW (x8)
-
Page 8: Ensamble De Los Barriles
BIN ASSEMBLY / ASSEMBLAGE DES BACS / ENSAMBLE DE LOS BARRILES HARDWARE REQUIRED / QUINCAILLERIE REQUISE / HERRAJE REQUERIDO Hardware / Quincaillerie Herraje BIR (x12) AAN (x12) DEG (x8) BHO (x12) BBO (x16) PARTS REQUIRED / PIÈCES REQUISES / PIEZAS REQUERIDAS Small Parts / Petites pièces Piezas pequeñas... - Page 9 u SECTION 1 (CONTINUED) / SECTION 1 (SUITE) SECCIÓN 1 (CONTINUACIÓN) TOOLS AND HARDWARE REQUIRED / OUTILS ET QUINCAILLERIE REQUIS INSTRUMENTAL Y HERRAJE REQUERIDOS 1/2 in/po (13 mm) AAN (x12) BIR (x12) BHO (x12) • Assemble a Side Panel (DBT) as shown. •...
- Page 10 u SECTION 1 (CONTINUED) / SECTION 1 (SUITE) SECCIÓN 1 (CONTINUACIÓN) TOOLS AND HARDWARE REQUIRED / OUTILS ET QUINCAILLERIE REQUIS INSTRUMENTAL Y HERRAJE REQUERIDOS • Slide the top edge of the Bottom Panel (DBS)—note the orientation of the Panel—onto the Panel Connector.
- Page 11 u SECTION 1 (CONTINUED) / SECTION 1 (SUITE) SECCIÓN 1 (CONTINUACIÓN) TOOLS AND HARDWARE REQUIRED / OUTILS ET QUINCAILLERIE REQUIS INSTRUMENTAL Y HERRAJE REQUERIDOS • Slide the side edge of a Side Panel (DBT) onto the Panel Connector—note the orientation of the Panels. If necessaray, use a rubber mallet to gently tap the Panel into place.
- Page 12 u SECTION 1 (CONTINUED) / SECTION 1 (SUITE) SECCIÓN 1 (CONTINUACIÓN) TOOLS AND HARDWARE REQUIRED / OUTILS ET QUINCAILLERIE REQUIS INSTRUMENTAL Y HERRAJE REQUERIDOS • Slide a Panel Connector (DCX) onto the edge of the Rear Panel. If necessary, use a rubber mallet to gently tap the Connector into place.
- Page 13 u SECTION 1 (CONTINUED) / SECTION 1 (SUITE) SECCIÓN 1 (CONTINUACIÓN) TOOLS AND HARDWARE REQUIRED / OUTILS ET QUINCAILLERIE REQUIS INSTRUMENTAL Y HERRAJE REQUERIDOS • Slide a Panel Connector (DCX) onto the edge of the Side Panel. You may need to use a rubber mallet to gently tap the Connector into place.
- Page 14 u SECTION 1 (CONTINUED) / SECTION 1 (SUITE) SECCIÓN 1 (CONTINUACIÓN) TOOLS AND HARDWARE REQUIRED / OUTILS ET QUINCAILLERIE REQUIS INSTRUMENTAL Y HERRAJE REQUERIDOS DEG (x8) BBO (x16) 1.11 • Slide the last two Panel Connectors (DCX) onto the edges of the Panels one at a time. You may need to use a rubber mallet to gently tap the Connector into place.
- Page 15 u SECTION 1 (CONTINUED) / SECTION 1 (SUITE) SECCIÓN 1 (CONTINUACIÓN) TOOLS AND HARDWARE REQUIRED / OUTILS ET QUINCAILLERIE REQUIS INSTRUMENTAL Y HERRAJE REQUERIDOS 1.13 • Insert the lips of the two bottom clips of a Corner Cap (DDW) down behind the two lower Panel corners. •...
- Page 16 u SECTION 1 (CONTINUED) / SECTION 1 (SUITE) SECCIÓN 1 (CONTINUACIÓN) TOOLS AND HARDWARE REQUIRED / OUTILS ET QUINCAILLERIE REQUIS INSTRUMENTAL Y HERRAJE REQUERIDOS 1.14 • After inserting the two lower clips behind the corners of the Panels, gently press done on the upper clip with a screwdriver to help slip it behind the upper corner of the Panel.
-
Page 17: Ensamble Del Armazón
FRAME ASSEMBLY / ASSEMBLAGE DE LA CHARPENTE / ENSAMBLE DEL ARMAZÓN HARDWARE REQUIRED / QUINCAILLERIE REQUISE / HERRAJE REQUERIDO Hardware / Quincaillerie Herraje DEN (x6) DFG (x4) BFY (x6) ADJ (x10) AAN (x6) BHO (x12) BHJ (x1) PARTS REQUIRED / PIÈCES REQUISES / PIEZAS REQUERIDAS Small Parts / Petites pièces Piezas pequeñas... - Page 18 u SECTION 2 (CONTINUED) / SECTION 2 (SUITE) SECCIÓN 2 (CONTINUACIÓN) TOOLS AND HARDWARE REQUIRED / OUTILS ET QUINCAILLERIE REQUIS INSTRUMENTAL Y HERRAJE REQUERIDOS • Slide an Aeration Tube (DCV) into one of the Drums as shown. This Drum will be on the right side. •...
- Page 19 u SECTION 2 (CONTINUED) / SECTION 2 (SUITE) SECCIÓN 2 (CONTINUACIÓN) TOOLS AND HARDWARE REQUIRED / OUTILS ET QUINCAILLERIE REQUIS INSTRUMENTAL Y HERRAJE REQUERIDOS 7/16 in/po (11 mm) (x2) DFG (x1) ADJ (x1) • Insert a Hex Bolt (DFG) through the holes in an Internal Drum Glide (DDE), the Sleeve, and Aeration Tube.
- Page 20 u SECTION 2 (CONTINUED) / SECTION 2 (SUITE) SECCIÓN 2 (CONTINUACIÓN) TOOLS AND HARDWARE REQUIRED / OUTILS ET QUINCAILLERIE REQUIS INSTRUMENTAL Y HERRAJE REQUERIDOS BIN (x2) 7/16 in/po (11 mm) (x2) DFG (x1) ADJ (x1) DEZ (x2) • Insert a Hex Bolt (DFG) through the holes in an Internal Drum Glide (DDE), the Sleeve, and Aeration Tube.
- Page 21 u SECTION 2 (CONTINUED) / SECTION 2 (SUITE) SECCIÓN 2 (CONTINUACIÓN) TOOLS AND HARDWARE REQUIRED / OUTILS ET QUINCAILLERIE REQUIS INSTRUMENTAL Y HERRAJE REQUERIDOS AAH (x2) • Compress the Spring, and insert the Cotter Pin (AAH) through the hole of the Locking Pin as shown. AAH (x1) Bend the ends of the Cotter Pin outward to secure the Locking Pin...
- Page 22 u SECTION 2 (CONTINUED) / SECTION 2 (SUITE) SECCIÓN 2 (CONTINUACIÓN) TOOLS AND HARDWARE REQUIRED / OUTILS ET QUINCAILLERIE REQUIS INSTRUMENTAL Y HERRAJE REQUERIDOS 7/16 in/po (11 mm) (x2) DFG (x2) ADJ (x2) • Secure the Rear Leg to the left side of the Drums using the hardware provided. •...
- Page 23 u SECTION 2 (CONTINUED) / SECTION 2 (SUITE) SECCIÓN 2 (CONTINUACIÓN) TOOLS AND HARDWARE REQUIRED / OUTILS ET QUINCAILLERIE REQUIS INSTRUMENTAL Y HERRAJE REQUERIDOS 1/2 in/po (13 mm) (x2) BHJ (x1) DEN (x6) AAN (x6) BHO (x12) 2.10 • Orient the two Cross Tubes (DEL and DEM) as shown. Use an electric drill to insert the Self-Tapping Screw (BHJ) into the two Cross Tubes.
- Page 24 u SECTION 2 (CONTINUED) / SECTION 2 (SUITE) SECCIÓN 2 (CONTINUACIÓN) TOOLS AND HARDWARE REQUIRED / OUTILS ET QUINCAILLERIE REQUIS INSTRUMENTAL Y HERRAJE REQUERIDOS 2.12 • Flip the Composter upright as shown. • Mettre droit le composteur comme indiqué. • Poner vertical el compostador como se muestra.
- Page 25 u SECTION 2 (CONTINUED) / SECTION 2 (SUITE) SECCIÓN 2 (CONTINUACIÓN) TOOLS AND HARDWARE REQUIRED / OUTILS ET QUINCAILLERIE REQUIS INSTRUMENTAL Y HERRAJE REQUERIDOS 7/16 in/po (11 mm) BFY (x6) ADJ (x6) 2.13 • Connect the following parts to the right Drum. •...
-
Page 26: Ensamble De La Tapa
LID ASSEMBLY / ASSEMBLAGE DU COUVERCLE / ENSAMBLE DE LA TAPA HARDWARE REQUIRED / QUINCAILLERIE REQUISE / HERRAJE REQUERIDO Hardware / Quincaillerie / Herraje DDL (x4) DDM (x2) PARTS REQUIRED / PIÈCES REQUISES / PIEZAS REQUERIDAS Small Parts / Petites pièces Piezas pequeñas DDO (x2) - Page 27 u SECTION 3 (CONTINUED) / SECTION 3 (SUITE) SECCIÓN 3 (CONTINUACIÓN) TOOLS AND HARDWARE REQUIRED / OUTILS ET QUINCAILLERIE REQUIS INSTRUMENTAL Y HERRAJE REQUERIDOS DDL (x4) DDM (x2) • Slide the large Washer (DDM) in between the metal Locking Mechanism and the plastic Lid as shown. •...
- Page 28 — qui est presque prêt. Pour voir notre vidéo Comment faire du compost, visiter http://go.lifetime.com/howto • Sujetar el clip indicador (DEY) a uno de los pomos. Este clip indica el barril que contiene la composta más vieja y que está...
-
Page 29: Advertencias Adicionales
ADDITIONAL WARNINGS / AVERTISSEMENTS SUPPLÉMENTAIRES / ADVERTENCIAS ADICIONALES WARNING WARNUNG • Do not climb in, on, or around composter. • Steigen Sie nicht in oder auf den Komposter. • Locking pin must be engaged before opening lid. • Der Sperrstift muss vor dem Öffnen des Deckels •... - Page 30 NOTES / REMARQUES / NOTAS...
-
Page 31: Limpieza Y Cuidado
CLEANING & CARE Congratulations on your Lifetime product purchase. By following the instructions below, your new Lifetime product should provide you with years ® of service and enjoyment. The polyethylene panels are stain and solvent resistant. Most stains can be removed using a mild soap and a soft-bristled brush. -
Page 32: Registro
REGISTER today! ENREGISTRER CE PRODUIT EN LIGNE À WWW.LIFETIME.COM Chez Lifetime®, nous nous engageons à fournir des produits innovateurs de qualité. Lors de votre inscription, vous aurez l’occasion de nous faire parvenir vos commentaires. Votre opinion est importante pour nous. - Page 33 7. This warranty is expressly in lieu of all other warranties, expressed or implied, including warranties of merchantability ® or fi tness for use to extent permitted by Federal and state law. Neither Lifetime Products, Inc., nor any representative assumes any other liability in connection with this product. This warranty gives you specifi c legal rights, and you may also have other rights which vary from state to state.
- Page 34 DISPONIBLES OU SONT OBSOLÈTES 1. Les composteurs Lifetime ® sont garantis à l’acheteur d’origine contre tous défauts de matériau ou de fabrication pendant une durée de 5 ans à partir de la date d’achat d’origine. Le mot « défauts » signifi e des défectuosités qui empêchent l’utilisation du produit.
-
Page 35: Garantía
PIEZAS NO ESTÁN DISPONIBLES O SON OBSOLETAS. 1. El comprador original recibe la garantía de que los composteros Lifetime ® estarán libres de defectos de material o de mano de obra por un período de 5 años a contar desde la fecha de la compra original. La palabra “defectos” se defi ne como imperfecciones que perjudican el uso del producto. - Page 36 Or call: 1-800-424-3865 7:00 am–5:00 pm (M–F) MST and 9:00 am–1:00 pm Saturday MST ® AMÉLIORER L’ACHAT LIFETIME EN AJOUTANT DES ACCESSOIRES OU D’AUTRES PRODUITS Pour acheter des accessoires ou des autres produits Lifetime , visiter le : ® www.lifetime.com (Anglais seulement) Ou composer le 1-800-424-3865 Du lundi au vendredi de 7 h à...
Need help?
Do you have a question about the 60072 and is the answer not in the manual?
Questions and answers