Siemens tk76k573 Instruction Manual
Hide thumbs
Also See for tk76k573:
- Manual (162 pages) ,
- Instruction manual (162 pages) ,
- Instruction manual (29 pages)
Advertisement
Available languages
Available languages
Quick Links
Download this manual
See also:
Instruction Manual
MT Malta
PT Portugal
TR Türkiye, Turkey
Aplan Limited
BSHP Electrodomésticos, Lda.
BSH Ev Aletleri Sanayi
Aplan Centre
Rua Alto do Montijo, nº 15
ve Ticaret A. S.
B - Kara By Pass
2790-012 Carnaxide
Cakmak Mahallesi,
B - Kara BKR
Tel.: 707 500 545
Balkan Caddesi No: 51
Tel.: 021 48 05 90
Fax: 21 4250 701
34770 Ümraniye, Istanbul
Fax: 021 48 05 98
mailto:careline.portugal@
Tel.: 0 216 444 6688
mailto:lapap@aplan.com.mt
bshg.com
Fax: 0 216 528 9188
mailto:careline.turkey@bshg.com
NL Nederlande, Netherlands
RO România, Romania
BSH Huishoudapparaten B.V.
BSH Electrocasnice srl.
UA Ukraine, Україна
Burg. Stramanweg 122
Sos. Bucuresti-Ploiesti,
Київ
1101 EN Amsterdam Zuidoost
nr.17-21, sect.1
ТОВ "Дойчелектросервіс"
13682 Bucuresti
тел.: 044 248 71 54, 55
Storingsmelding:
Tel.: 0801 000 110
СП "Аматі-Сервіс"
Tel.: 070 333 1234
Fax: 021 203 9731
тел.: 044 568 51 50
Fax: 070 333 3978
mailto:service.romania@
ТОВ «Техноофіс»
mailto:contactcenter-nl@
bshg.com
тел.: 044 274 96 72, 74, 76
bshg.com
ТОВ "Побуттехсервіс"
Onderdelenverkoop:
тел. 044 462 50 05
Tel.: 070 333 1234
RU Russia, Россия
OOO "БСХ Бытовая техника"
Fax: 070 333 3980
mailto:siemens-onderdelen@
Сервис от производителя
XK Kosovo
Малая Калужская 19/1
NTP GAMA
bshg.com
119071 Москва
Rruga Mag Prishtine-Ferizaj
тел.: 495 737 2962
70000 Ferizaj
факс: 495 737 2982
Tel.: 038 502 448
NO Norge, Norway
BSH Husholdningsapparater A/S
mailto:mok-kdhl@bshg.com
Fax: 029 021 434
Grensesvingen 9
mailto:gama_mb@yahoo.com
0661 Oslo
SE Sverige, Sweden
BSH Hushållsapparater AB
Tel.: 22 66 06 00
Landsvägen 32
Fax: 22 66 05 50
XS Srbija, Serbia
SZR "SPECIJALELEKTRO"
169 29 Solna
Bulevar Milutina Milankovića 34
5052 Bergen
Tel.: 0771 11 22 77
11070 Novi Beograd
Tel.: 55 59 68 80
mailto:Siemens-Service-SE@
Tel.: 011 2147 110
Fax: 55 59 68 90
bshg.com
Fax: 011 2139 689
7037 Trondheim
mailto:spec.el@eunet.yu
Tel.: 73 95 23 30
SG Singapore, 新加坡
Fax: 73 95 23 40
BSH Home Appliances Pte. Ltd.
37 Jalan Pemimpin
mailto:Siemens-Service-NO@
ZA South Africa
BSH Home Appliances (Pty) Ltd.
Union Industrial Building
bshg.com
15 th Rd., Randjespark
Block A, #01-03
Private Bag X36, Randjespark
577177 Singapore
1685 Midrand - Johannesburg
NZ New Zealand
BSH Home Appliances Ltd.
Tel.: 6751 5000
Tel.: 086 002 6724
Unit F 2, 4 Orbit Drive
Fax: 6751 5005
Fax: 011 265 7852
Mairangi Bay
mailto:bshsgp.service@
mailto:service@bsh.co.za
Auckland 0632
bshg.com
Tel.: 09 477 0492
Fax: 09 477 2647
SI
Slovenija, Slovenia
BSH Hišni aparati d.o.o.
mailto:bshnz-cs@bshg.com
Litostrojska 48
1000 Ljubljana
PL Polska, Poland
BSH Sprzęt Gospodarstwa
Tel.: 01 583 08 87
Domowego Sp. z o.o.
Fax: 01 583 08 89
Al. Jerozolimskie 183
mailto:informacije.servis@
02-222 Warszawa
bshg.com
Centrala Serwisu:
Tel.: 0801 191 534
SK Slovensko, Slovakia
Technoservis Bratislava
Fax: 022 57 27 709
Trhová 38
mailto:Serwis.Fabryczny@
bshg.com
84108 Bratislava - Doubravka
Tel.: 02 6446 3643
Fax: 02 6446 3643
12/09
Downloaded from CoffeeMachineManual.com Manuals
www.siemens-homeappliances.com
5090478002
TK76K573
Inhalt
3
Sicherheitshinweise
14
Informationen und
Einstellungen
4
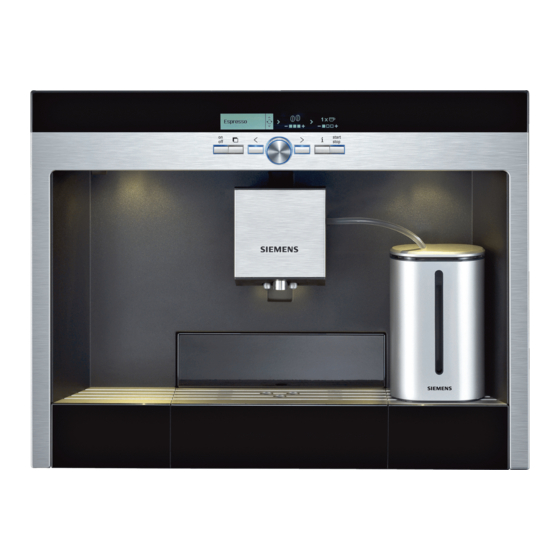
Aufbau und Bestandteile
14
Informationen am Display
14
4
Bedienelemente und
16
Füllmenge einstellen
Anzeige
16
Mahlgrad einstellen
4
Netzschalter O/I
17
4
Menü und Display
17
5
Displaymeldungen
17
6
Auszugssystem
7
Zubehör
17
7
Inbetriebnahme
18
7
Allgemeines
19
Brüheinheit reinigen
7
Sparmodus
20
Serviceprogramme
7
Gerät in Betrieb nehmen
21
Entkalken
8
Getränkezubereitung
21
Entkalken
8
Getränkeauswahl
22
9
aromaDoubleShot
9
Ein Beispiel
23
10
Zubereitung mit Kaffeepulver
11
Zubereitung mit Milch
23
12
Zwei Tassen auf einmal
24
12
My coffee
24
A
13
Milchschaum und
24
warme Milch zubereiten
25
13
Heißwasser beziehen
27
Advertisement
Chapters

Related Manuals for Siemens tk76k573


Summary of Contents for Siemens tk76k573
-
Page 1: Table Of Contents
Fax: 6751 5005 Fax: 011 265 7852 Mairangi Bay Milchschaum und Garantie mailto:bshsgp.service@ mailto:service@bsh.co.za Auckland 0632 bshg.com TK76K573 warme Milch zubereiten Tel.: 09 477 0492 Einfache Probleme selbst Heißwasser beziehen Fax: 09 477 2647 Slovenija, Slovenia beheben BSH Hišni aparati d.o.o. - Page 2 Downloaded from CoffeeMachineManual.com Manuals...
- Page 3 Sicherheitshinweise Stromschlaggefahr! Gerät nur gemäß Angaben auf Lesen Sie diese Gebrauchsanleitung vor dem Typenschild anschließen der Benutzung des Gerätes sorgfältig und betreiben. Gerät nicht benutzen, durch, handeln Sie danach und bewahren wenn Gerät oder Zuleitung beschädigt Sie sie auf. Beachten Sie auch die beilie- ist.
- Page 4 Downloaded from CoffeeMachineManual.com Manuals...
- Page 5 Downloaded from CoffeeMachineManual.com Manuals...
- Page 6 Downloaded from CoffeeMachineManual.com Manuals...
- Page 7 Downloaded from CoffeeMachineManual.com Manuals...
- Page 8 Downloaded from CoffeeMachineManual.com Manuals...
- Page 9 Downloaded from CoffeeMachineManual.com Manuals...
- Page 10 Downloaded from CoffeeMachineManual.com Manuals...
- Page 11 Downloaded from CoffeeMachineManual.com Manuals...
- Page 12 Downloaded from CoffeeMachineManual.com Manuals...
- Page 13 Downloaded from CoffeeMachineManual.com Manuals...
- Page 14 Downloaded from CoffeeMachineManual.com Manuals...
- Page 15 Downloaded from CoffeeMachineManual.com Manuals...
- Page 16 Downloaded from CoffeeMachineManual.com Manuals...
-
Page 17: Einstellungen Am Display
Wasserhärte ermitteln (siehe „Entkalken“), um Kalkablage- rungen zu vermeiden. Kalkrückstände Bei diesem Gerät ist die Wasserhärte ein- führen zu einem höheren Energiever- stellbar. Die richtige Einstellung der brauch. Wasserhärte ist wichtig, damit das Gerät rechtzeitig anzeigt, wenn es entkalkt wer- Tägliche Plege und den muss. -
Page 18: Milchsystem Reinigen
Milchsystem reinigen 6. Der Deckel und die Isolierhülle Milch- behälter dürfen nur mit einem feuchten Tuch leicht abgewischt werden. Nicht in Verbrennungsgefahr! den Geschirrspüler geben. Der Milchschäumer (10) wird 7. Innenraum des Gerätes heiß. Nach Benutzung zuerst (Aufnahme Schalen) auswischen. abkühlen lassen und erst dann berühren. - Page 19 Downloaded from CoffeeMachineManual.com Manuals...
- Page 20 Downloaded from CoffeeMachineManual.com Manuals...
- Page 21 Wichtig: Ist ein Filter in den Behälter unter Milchschäumer stellen Wassertank (12) eingesetzt, – ▸ Start diesen unbedingt vor dem Start Einen Behälter mit 0,5 Liter des Serviceprogramms entfernen Fassungsvermögen unter den und erst nach Beendigung des Milchschäumer (10) stellen. start Programms wieder einsetzen.
-
Page 22: Calc'n'clean
Calc‘n‘Clean Tropfschale einsetzen Tropfschale wieder einsetzen. Wenn ein Filter verwendet wird, diesen jetzt Calc‘n‘Clean kombiniert die Einzelfunktio- wieder einsetzen. Das Gerät ist fertig ent- nen Entkalken und Reinigen. Liegt die kalkt und wieder betriebsbereit. Fälligkeit der beiden Programme nah beiei- nander, schlägt der Espresso-Vollautomat automatisch dieses Serviceprogramm vor. -
Page 23: Zubehör, Lagerung, Entsorgung, Garantie
Anschließend läuft ca. sieben Minuten Reinigungstablette einwerfen das Reinigungsprogramm und spült das Schublade schließen Eine Reinigungstablette in die Gerät: Pulverschublade einwerfen und Reinigungsprogramm läuft Schublade wieder schließen. Tropfschale leeren Tropfschale (20) leeren. Ist der Wasserilter Tropfschale einsetzen aktiviert, erscheint die Meldung: Tropfschale wieder einsetzen. -
Page 24: Lagerung
Lagerung Garantie Um Frostschäden bei Transport und Für dieses Gerät gelten die von unserer Lagerung zu vermeiden, muss das Gerät jeweils zuständigen Landesvertretung her- vorher vollständig entleert werden. ausgegebenen Garantiebedingungen, in dem das Gerät gekauft wurde. Sie können Das Gerät muss dazu betriebs- die Garantiebedingungen jederzeit über bereit sein, der Wassertank (12) Ihren Fachhändler, bei dem Sie das Gerät... -
Page 25: Einfache Probleme Selbst Beheben
Einfache Probleme selbst beheben Problem Ursache Abhilfe Displayanzeige Bohnen fallen nicht ins Eventuell Kaffeesorte wech- Mahlwerk (zu ölige Bohnen). seln. Leeren Bohnenbehälter Bohnenbehälter füllen. Trotz gefüllten Bohnen- mit einem trockenen Tuch behälters mahlt das Gerät auswischen. keine Kaffeebohnen. Kein Heißwasserbezug Der Milchschäumer oder die Milchschäumer oder möglich. - Page 26 Einfache Probleme selbst beheben Problem Ursache Abhilfe Der Kaffee ist zu „bitter“. Der Mahlgrad ist zu fein Mahlgrad gröber stellen oder eingestellt oder das gröberes Kaffeepulver ver- Kaffeepulver ist zu fein. wenden. Ungeeignete Kaffeesorte. Kaffeesorte wechseln. Im Gerät ist ein Fehler. Hotline anrufen (siehe hinte- Displayanzeige Störung...
-
Page 27: Garantiebedingungen
Garantiebedingungen Siemens Info Line DEUTSCHLAND (DE) (Mo-Fr: 8.00-18.00 Uhr erreichbar) Für Produktinformationen sowie Anwendungs- und Bedienungsfragen zu Kleinen Hausgeräten: DE-Tel.: 01805 54 74 36* Die nachstehenden Bedingungen, die Voraussetzungen oder unter und Umfang unserer Garantieleistung beschreiben, lassen siemens-info-line@bshg.com die Gewährleistungsverpflichtungen des Verkäufers aus *) 0,14 €/Min. - Page 28 Downloaded from CoffeeMachineManual.com Manuals...
- Page 29 Contents Safety instructions Information and settings Displaying information The appliance and its parts Displaying settings Set per-cup quantity Controls and display Adjusting the grinding unit Power switch O/I Checking the water hardness Menu and display Tips on energy saving Display messages Daily maintenance Deployment system and cleaning...
-
Page 30: Safety Instructions
Safety instructions Risk of electric shock Connect and operate the appli Please read the operating instructions ance only in accordance with carefully before using the appliance and the speciications on the rating label. keep them for future reference. You should Do not use if either the power cord also note the enclosed quick reference or the appliance is damaged. - Page 31 Downloaded from CoffeeMachineManual.com Manuals...
- Page 32 Downloaded from CoffeeMachineManual.com Manuals...
- Page 33 Downloaded from CoffeeMachineManual.com Manuals...
- Page 34 Downloaded from CoffeeMachineManual.com Manuals...
- Page 35 Downloaded from CoffeeMachineManual.com Manuals...
- Page 36 Downloaded from CoffeeMachineManual.com Manuals...
- Page 37 Downloaded from CoffeeMachineManual.com Manuals...
- Page 38 Downloaded from CoffeeMachineManual.com Manuals...
- Page 39 Downloaded from CoffeeMachineManual.com Manuals...
- Page 40 Downloaded from CoffeeMachineManual.com Manuals...
- Page 41 Downloaded from CoffeeMachineManual.com Manuals...
- Page 42 Downloaded from CoffeeMachineManual.com Manuals...
-
Page 43: Daily Maintenance And Cleaning
Daily maintenance Checking the water hardness and cleaning The water hardness setting can be adjusted on this appliance. It is important to set the Risk of electric shock water hardness correctly, so that the Before cleaning the appliance, appliance indicates accurately when the switch it off at the power switch. - Page 44 Downloaded from CoffeeMachineManual.com Manuals...
- Page 45 Downloaded from CoffeeMachineManual.com Manuals...
- Page 46 Downloaded from CoffeeMachineManual.com Manuals...
- Page 47 Descaling If there is not enough descaling luid in the water tank, the follow- If the prompt ing message is displayed: Service - descale displayed, press and hold down (7) for Not enough descaling fluid at least three seconds. The display shows: Refill fluid Pour lukewarm water into the empty water Please press ‘Start/Stop’...
- Page 48 If the milk frother is not inserted, Open drawer Deploy the appliance and open the the following message is dis- drawer (17). played: Insert cleaning tablet! Close drawer! Set up milk frother Drop a cleaning tablet in the drawer and Insert the milk frother (10).
- Page 49 Storage Clean and refill water tank – ▸ Start Rinse the water tank and reill it with fresh water up to the “max” mark. To avoid frost damage during transport and Press start stop (8). storage, the appliance must be completely The descaling programme will now run emptied irst.
-
Page 50: Simple Troubleshooting
Simple troubleshooting Problem Cause Solution Display shows Beans are not falling into the Change the type of coffee if grinding unit (beans too necessary. Wipe out the Refill bean container Although the bean container oily). empty bean container with a is full, the appliance does dry cloth. - Page 51 Simple troubleshooting Problem Cause Solution Coffee is too “bitter”. The grinding setting is too Adjust the grinding unit to a ine or the pre-ground coffee coarser setting or use is too ine. coarser pre-ground coffee. Unsuitable type of coffee. Change the type of coffee. The appliance has a fault.
- Page 52 Downloaded from CoffeeMachineManual.com Manuals...
- Page 53 de fr Sommaire Consignes de sécurité Informations et réglages Informations à l’écran Coniguration et différents Réglages à l’écran éléments Régler la quantité de remplissage Régler la inesse de la mouture Eléments de commande Déterminer la dureté de l’eau et d’afichage Conseils pour économiser l’énergie Interrupteur électrique O/I Entretien et...
-
Page 54: Consignes De Sécurité
de fr Consignes de sécurité Risque de choc électrique ! Pour le raccordement et l’utili Avant d’utiliser la machine, lisez sation de la machine, respecter attentivement le Mode d’emploi, conformez- impérativement les indications igurant vous à ses indications et conservez-le en sur la plaque signalétique. - Page 55 Downloaded from CoffeeMachineManual.com Manuals...
- Page 56 Downloaded from CoffeeMachineManual.com Manuals...
-
Page 57: Messages À L'écran
de fr Messages à l’écran Invitations à agir : Message à Ce que vous devez En dehors de l’état de fonctionnement l’écran faire actuel, l’écran afiche différents messages Remplir le réservoir Remplir le qui donnent des indications sur l’état de la d’eau réservoir d’eau machine ou vous indiquent quand vous... - Page 58 Downloaded from CoffeeMachineManual.com Manuals...
- Page 59 Downloaded from CoffeeMachineManual.com Manuals...
- Page 60 Downloaded from CoffeeMachineManual.com Manuals...
- Page 61 Downloaded from CoffeeMachineManual.com Manuals...
- Page 62 Downloaded from CoffeeMachineManual.com Manuals...
- Page 63 Downloaded from CoffeeMachineManual.com Manuals...
- Page 64 Downloaded from CoffeeMachineManual.com Manuals...
- Page 65 Downloaded from CoffeeMachineManual.com Manuals...
- Page 66 Downloaded from CoffeeMachineManual.com Manuals...
- Page 67 Downloaded from CoffeeMachineManual.com Manuals...
- Page 68 Downloaded from CoffeeMachineManual.com Manuals...
-
Page 69: Conseils Pour Économiser L'énergie
de fr X Toujours détartrer la machine lorsque Déterminer la dureté de l’eau le message s’afiche Détartrer SVP Il est possible, sur cette machine, de régler (voir « Détartrer ») ain d’éviter les dé- la dureté de l’eau. Le réglage correct de la pôts de calcaire. -
Page 70: Nettoyage Du Mousseur De Lait
de fr Nettoyage du mousseur de lait 6. Essuyer légèrement avec un chiffon humide le couvercle et l’enveloppe iso- lante du réservoir de lait. Ne pas mettre Risque de brûlure ! au lave-vaisselle. Le mousseur de lait (10) devient 7. Essuyer l’intérieur de la machine (bacs brûlant. - Page 71 Downloaded from CoffeeMachineManual.com Manuals...
- Page 72 Downloaded from CoffeeMachineManual.com Manuals...
- Page 73 de fr Important : Si un iltre est inséré Placer récipient sous mousseur lait dans le réservoir d’eau (12), vous – ▸ Start devez impérativement l’enlever Placer un récipient d’une capacité de 0,5 avant de lancer le programme de litre sous le mousseur de lait (10). service et le remettre uniquement Appuyer sur la touche start stop (8).
-
Page 74: Nettoyer
de fr Nettoyer Calc‘n‘Clean Lorsque s’afiche, appuyer Calc‘n‘Clean combine les fonctions indivi- Nettoyer SVP sur la touche (7) et la maintenir duelles Détartrage et Nettoyage. Si le mo- appuyée au moins 3 secondes. Le ment de réaliser chacun des deux pro- message suivant apparaît : grammes est proche, la machine propose automatiquement ce programme de Service. -
Page 75: Accessoires, Stockage, Mise Au Rebut, Garantie
de fr Accessoires, stockage, Si le iltre eau est activé, l’écran mise au rebut, garantie afiche le message suivant : Retirer filtre eau – ▸ Start Retirer le iltre eau et appuyer sur start Accessoires stop (8). Les accessoires suivants sont disponibles 0,5 l eau + détartrant dans le commerce ou auprès du service Remplir –... - Page 76 de fr Mise au rebut Garantie Cet appareil est identiié selon la Directive Les conditions de garantie applicables sont européenne 2002/96/CE relative aux celles publiées par notre distributeur dans déchets d’équipements électriques et le pays où a été effectué l’achat. Le électroniques (DEEE).
-
Page 77: Eliminer Soimême Les Problèmes Simples
de fr Eliminer soimême les problèmes simples Problème Cause Remède Les grains ne tombent pas Changer éventuellement de Afichage de Remplir le dans le broyeur (grains trop café. Une fois que le bac à . Bien que le bac bac à café gras). - Page 78 de fr Eliminer soimême les problèmes simples Problème Cause Remède Le café est trop « acide ». La mouture n’est pas assez Régler une mouture plus ine ou bien le café en ine ou utiliser un café en poudre n’est pas assez in. poudre plus in.
- Page 79 de fr Eliminer soimême les problèmes simples Problème Cause Remède Qualité de la mousse de La machine est entartrée. Détartrer la machine en café ou de lait variable. utilisant deux pastilles de détartrage et en respectant les instructions. Présence d’eau sur le fond Bac collecteur retiré...
- Page 80 Downloaded from CoffeeMachineManual.com Manuals...
- Page 81 de it Indice Istruzioni di sicurezza Informazioni ed impostazioni Informazioni sul display Struttura e componenti Impostazioni sul display Impostare la quantità per tazza Elementi di comando e Regolazione del grado di macinatura indicatori Rilevare la durezza dell’acqua Interruttore di rete O/I Suggerimenti per risparmiare Menu e display energia...
- Page 82 de it Istruzioni di sicurezza Pericolo di scossa elettrica! Collegare e utilizzare l’apparec Prima di utilizzare l’apparecchio, leggere chio solo in conformità con i attentamente il Manuale d’uso, attenetevi a dati indicati sulla targhetta identiicativa. quanto prescritto e conservatelo. Attenersi Usare l’apparecchio solo se il cavo di anche alle allegate Istruzioni brevi.
- Page 83 Downloaded from CoffeeMachineManual.com Manuals...
- Page 84 Downloaded from CoffeeMachineManual.com Manuals...
-
Page 85: Messaggi Sul Display
de it Messaggi sul display Richieste di intervento: Messaggio del Operazione da Oltre all’attuale stato dell’apparecchio, il display eseguire display visualizza diversi messaggi che Riempire il serbatoio Riempire forniscono informazioni di stato oppure che dell’acqua serbatoio acqua comunicano quando è necessario Inserire il serbatoio Inserire l’intervento da parte di un utente. - Page 86 Downloaded from CoffeeMachineManual.com Manuals...
- Page 87 Downloaded from CoffeeMachineManual.com Manuals...
- Page 88 Downloaded from CoffeeMachineManual.com Manuals...
- Page 89 Downloaded from CoffeeMachineManual.com Manuals...
- Page 90 Downloaded from CoffeeMachineManual.com Manuals...
- Page 91 Downloaded from CoffeeMachineManual.com Manuals...
- Page 92 Downloaded from CoffeeMachineManual.com Manuals...
- Page 93 Downloaded from CoffeeMachineManual.com Manuals...
- Page 94 Downloaded from CoffeeMachineManual.com Manuals...
- Page 95 Downloaded from CoffeeMachineManual.com Manuals...
- Page 96 Downloaded from CoffeeMachineManual.com Manuals...
- Page 97 de it Cura e pulizia Suggerimenti per risparmiare giornaliera energia X Dopo un’ora (impostazione predeinita) Pericolo di scossa elettrica! la macchina automatica per espresso Prima della pulizia, spegnere si imposta automaticamente sul “modo l’apparecchio con l’interruttore di rete. Non usare dispositivi a vapore. di risparmio”.
- Page 98 de it Pulizia del sistema latte 8. Pulire l’innesto schiuma (descritto qui di seguito). 9. Reinserire tutte le parti. Pericolo di ustioni! L’innesto schiuma (10) si Importante: il raccogligocce riscalda molto. Dopo l’utilizzo, uscita caffè (25) e il contenitore prima di toccare l’apparecchio, lasciarlo raffreddare.
- Page 99 Downloaded from CoffeeMachineManual.com Manuals...
- Page 100 Downloaded from CoffeeMachineManual.com Manuals...
- Page 101 de it Importante: Se il serbatoio Posizionare recip. sotto innesto dell’acqua (12) è dotato di iltro, schiuma – ▸ Start è necessario toglierlo prima di Posizionare sotto l’innesto schiuma (10) avviare il progarmma di assisten- un recipiente da 0,5 litri. Premere za e reinserirlo solo quando il start stop (8).
- Page 102 de it Calc‘n‘Clean Inserire raccogligocce Reinserire il raccogligocce. Se viene utilizzato un iltro, è il momento di Il programma Calc‘n‘Clean combina le due reinserirlo. L’apparecchio è nuovamente funzioni singole di decalciicazione e di pronto per l’uso. pulizia. Se le scadenze dei due programmi sono ravvicinate, la macchine automatica per espresso, propone automaticamente Pulire...
- Page 103 de it Se il iltro dell’acqua è attivo, Se viene utilizzato un iltro, è il momento di compare il messaggio: reinserirlo. L’apparecchio è nuovamente pronto per l’uso. Eliminare filtro acqua – ▸ Start Togliere il iltro dell’acqua e premere start stop (8). Accessori, deposito, smaltimento, garanzia Versare 0,5 l acqua + decalcificante...
- Page 104 de it Deposito Smaltimento Per evitare che l’apparecchio subisca danni Questo apparecchio è contrassegnato a causa del gelo durante il trasporto ed il conformemente alla Direttiva europea deposito, esso deve venir completamente 2002/96/CE Riiuti di apparecchiature svuotato. elettriche ed elettroniche (waste electrical and electronic equipement –...
- Page 105 de it Soluzione dei problemi più semplici Problema Causa/situazione Soluzione Indicazione sul display I chicchi non cadono nel Cambiare tipo di caffè. macinacaffè (chicchi troppo Pulire il macinacaffè vuoto Riempire serbatoio . Anche se il grassi). con un panno asciutto. chicchi serbatoio dei chicchi è...
- Page 106 de it Soluzione dei problemi più semplici Problema Causa/situazione Soluzione Il caffè è troppo “acido”. Il grado di macinatura è Impostare il grado di troppo grosso oppure il caffè macinatura su un valore più è macinato troppo grosso. ine oppure utilizzare un caffè...
- Page 107 de it Soluzione dei problemi più semplici Problema Causa/situazione Soluzione Forti differenze nella qualità L’apparecchio presenta Procedere alla del caffè o della schiuma del incrostazioni di calcare. decalcificazione latte. dell’apparecchio, secondo le istruzioni, con due compresse di decalcificante. Presenza di gocce d’acqua Il raccogligocce è...
- Page 108 Downloaded from CoffeeMachineManual.com Manuals...
- Page 109 de nl Inhoud Veiligheidsaanwijzing Informatie en instellingen Informatie op het scherm Samenbouw en onderdelen Instellingen via het scherm Hoeveelheid per kopje instellen Bedieningen en meldingen Instellen van de maalijnheid Netspanningschakelaar O/I Waterhardheid bepalen Menu en scherm Tips voor energiebesparing Meldingen op het scherm Dagelijks onderhoud en Uittreksysteem schoonmaken...
- Page 110 de nl Veiligheidsaanwijzing Gevaar voor elektrische schokken! Lees de gebruiksaanwijzing van de Sluit het apparaat aan, en ge machine zorgvuldig door, handel ernaar en bruik het conform de informatie op het bewaar de gebruiksaanwijzing. Let ook op typeplaatje. Gebruik het apparaat niet de bijgesloten korte handleiding.
- Page 111 Downloaded from CoffeeMachineManual.com Manuals...
- Page 112 Downloaded from CoffeeMachineManual.com Manuals...
- Page 113 Downloaded from CoffeeMachineManual.com Manuals...
- Page 114 Downloaded from CoffeeMachineManual.com Manuals...
- Page 115 Downloaded from CoffeeMachineManual.com Manuals...
- Page 116 Downloaded from CoffeeMachineManual.com Manuals...
- Page 117 Downloaded from CoffeeMachineManual.com Manuals...
- Page 118 Downloaded from CoffeeMachineManual.com Manuals...
- Page 119 Downloaded from CoffeeMachineManual.com Manuals...
- Page 120 Downloaded from CoffeeMachineManual.com Manuals...
- Page 121 Downloaded from CoffeeMachineManual.com Manuals...
- Page 122 Downloaded from CoffeeMachineManual.com Manuals...
- Page 123 Downloaded from CoffeeMachineManual.com Manuals...
- Page 124 de nl Dagelijks onderhoud en De hardheid van het water kunt u schoonmaken vaststellen met het meegeleverde teststrookje of opvragen bij het plaatselijke drinkwaterbedrijf. Gevaar voor elektrische Dompel het teststrookje kort in water onder, schokken! schud het voorzichtig af en na een minuut Schakel het apparaat met be...
- Page 125 de nl Melksysteem schoonmaken 6. Het deksel en de isolatiehuls van het melkreservoir mogen slechts voorzich- tig worden schoongeveegd met een Gevaar voor verbranding! vochtige doek. Niet in de vaatwasser De melkschuimer (10) wordt plaatsen. heet. Laat – na gebruik – de 7.
- Page 126 Downloaded from CoffeeMachineManual.com Manuals...
- Page 127 Downloaded from CoffeeMachineManual.com Manuals...
- Page 128 de nl Ontkalken Belangrijk: Is een ilter in het waterreservoir (12) geplaatst, dan dient dit in elk geval voor de Bij het scherm de toets Ontkalken start van het programma te wor- ten minste drie seconden ingedrukt den verwijderd. Het mag pas na houden.
- Page 129 de nl Reinigen Druk op de toets start stop (8), het ontkalkprogramma zal ongeveer 20 minuten draaien: Bij het scherm de toets Reinigen a.u.b. (7) ten minste drie seconden ingedrukt Ontkalkprogr. loopt houden. Er verschijnt: Als er te weinig ontkalkoplossing Druk om te starten op ‘Start/Stop’...
- Page 130 de nl Calc‘n‘Clean Reinigingstablet inleggen! Lade sluiten! Calc‘n‘Clean is een combinatie van de Leg een schoonmaaktablet in de afzonderlijke functies Ontkalken en poederkofielade en sluit de lade weer. Reinigen. Als de noodzaak tot het draaien van beide programma’s in tijd dicht bij Als de waterilter actief is, ver- elkaar ligt, dan stelt de volautomatische schijnt de melding:...
- Page 131 de nl Lekschaal legen Leeg de lekschaal (20). Melkschuim Lekschaal plaatsen Lekschaal weer terugplaatsen. 3. Schakel het apparaat uit met behulp Plaats het ilter terug (als u een ilter van de netspanningschakelaar O/I (1). gebruikt). Het apparaat is weer klaar voor 4.
- Page 132 de nl Zelf eenvoudige problemen verhelpen Probleem Oorzaak Remedie Schermmelding De bonen vallen niet in het Wissel zo nodig van maalwerk (te vette bonen). kofiesoort. Veeg het lege Bonenreservoir vullen. Ondanks gevuld bonenreservoir met een bonenreservoir maalt het droge doek schoon. apparaat geen kofiebonen.
- Page 133 de nl Zelf eenvoudige problemen verhelpen Probleem Oorzaak Remedie De kofie is te “zuur”. De maalgraad is te grof Stel de maalgraad ijner in of ingesteld of de gemalen gebruik ijner gemalen kofie. kofie is te grof. Ongeschikte koffiesoort. Gebruik een donkerder gebrande soort.
- Page 134 Downloaded from CoffeeMachineManual.com Manuals...
- Page 135 Содержание Указания по технике Информация безопасности и настройки Информация на дисплее Конструкция и составные Настройки с помощью дисплея части Установка количества на чашку Установка степени помола Элементы управления Определение жесткости воды и индикация Советы по экономии энергии Сетевой выключатель O/I Ежедневный...
- Page 136 Указания по технике Опасность поражения электри безопасности ческим током! При подключении прибо Перед использованием прибора внима- ра и его эксплуатации соблюдайте тельно прочитайте инструкцию по экс- данные, приведенные на типовой плуатации, сохраните ее и в дальней- табличке. Запрещается использовать прибор в случае его повреждения шем...
- Page 137 Downloaded from CoffeeMachineManual.com Manuals...
- Page 138 Downloaded from CoffeeMachineManual.com Manuals...
- Page 139 Downloaded from CoffeeMachineManual.com Manuals...
- Page 140 Downloaded from CoffeeMachineManual.com Manuals...
- Page 141 Downloaded from CoffeeMachineManual.com Manuals...
- Page 142 Downloaded from CoffeeMachineManual.com Manuals...
- Page 143 Downloaded from CoffeeMachineManual.com Manuals...
- Page 144 Downloaded from CoffeeMachineManual.com Manuals...
- Page 145 Downloaded from CoffeeMachineManual.com Manuals...
- Page 146 Downloaded from CoffeeMachineManual.com Manuals...
- Page 147 Downloaded from CoffeeMachineManual.com Manuals...
- Page 148 Downloaded from CoffeeMachineManual.com Manuals...
- Page 149 Downloaded from CoffeeMachineManual.com Manuals...
- Page 150 Downloaded from CoffeeMachineManual.com Manuals...
- Page 151 Советы по экономии энергии 1. Полностью выдвиньте прибор (см. «Система извлечения»). X Через час работы (заводская на- 2. Выберите в меню выбора напитка вариант стройка) автоматическая кофемаши- Эспрессо 3. Нажмите кнопку start stop (8). на эспрессо переключается в «эко- 4. При работающей кофемолке с помо- номичный...
- Page 152 Ежедневный уход 6. Крышку и изолирующее покрытие и чистка емкости для молока следует только слегка протирать влажной тканью. Опасность поражения Не помещайте их в посудомоечную электрическим током! машину. Перед чисткой прибора 7. Внутреннее пространство прибора выключите его с помощью сетевого (ниши...
- Page 153 Downloaded from CoffeeMachineManual.com Manuals...
- Page 154 Downloaded from CoffeeMachineManual.com Manuals...
- Page 155 Downloaded from CoffeeMachineManual.com Manuals...
- Page 156 Удаление накипи Заполните пустой контейнер для воды (12) теплой водой до отметки При появлении индикации calc (0,5 л) и растворите в ней две Провести нажмите и удерживай- таблетки для удаления накипи. декальцинацию те кнопку (7) не менее трех секунд. Нажмите кнопку start stop (8);...
- Page 157 Очистка Calc‘n‘Clean При появлении индикации В программе Calc‘n‘Clean объединены Необходима нажмите и удерживайте кнопку функции удаления накипи и очистки. чистка (7) не менее трех секунд. Появится: Если сроки выполнения обеих этих про- грамм по времени очень близки друг к Для пуска нажмите 'Start/Stop' другу, автоматическая...
- Page 158 Программа очистка Идет Промыть и заполнить контейнер для воды – ▸ Start Открыть лоток с порошком Выдвиньте прибор и откройте вы- Промойте контейнер для воды и за- движной отсек для молотого кофе полните его свежей водой до отметки (17). «max» (макс.). Нажмите...
- Page 159 Принадлежности, хранение, утилизация, Молочная пена гарантия 3. Выключите прибор с помощью сете- вого выключателя O/I (1). Принадлежности 4. Опорожните контейнер для воды (12) и поддон для капель (20). Следующие принадлежности можно при- обрести в торговой сети или через нашу Утилизация сервисную...
- Page 160 Самостоятельное устранение небольших проблем Проблема Причина Устранение Индикация на дисплее Зерна не проваливаются в Попробуйте использовать кофемолку (слишком мас- другой сорт кофе. Протрите Заполнить отсек для лянистые зерна). пустую емкость для кофей- кофейных зерен. Несмотря на то, что ем- ных зерен сухой тканью. кость...
- Page 161 Самостоятельное устранение небольших проблем Проблема Причина Устранение Кофе без типичной пенки Неподходящий сорт кофе Используйте сорт кофе с («крема»). большим содержанием зерен робусты. Используются не свежеоб- Используйте свежие кофей- жаренные зерна. ные зерна. Степень помола не соот- Установите более тонкий ветствует...
- Page 162 Самостоятельное устранение небольших проблем Проблема Причина Устранение Сообщение на дисплее Загрязнен блок заварива- Очистите блок заваривания. ния. Почистите блок заваривания Слишком много молотого Очистите блок заварива- кофе в блоке заварива- ния. (Следует закладывать ния. не более 2 мерных ложек молотого кофе.) Заедает...
Need help?
Do you have a question about the tk76k573 and is the answer not in the manual?
Questions and answers