Table of Contents
Advertisement
Advertisement
Table of Contents

Subscribe to Our Youtube Channel
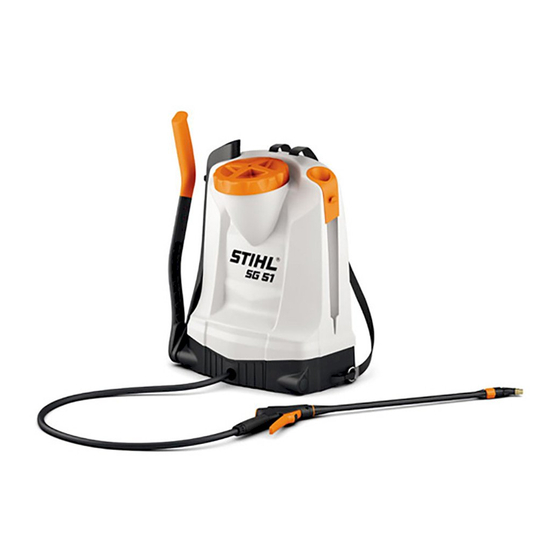
Summary of Contents for Stihl SG 71
- Page 1 STIHL SG 51, 71 Instruction Manual...
-
Page 3: Table Of Contents
Main Parts Specifications Troubleshooting Maintenance and Repairs Dr. Nikolas Stihl Disposal EC Declaration of Conformity This instruction manual is protected by copyright. All rights reserved, especially the rights to reproduce, translate and process with electronic systems. SG 51, SG 71... -
Page 4: Guide To Using This Manual
Safety Precautions and injury to third parties or damage to their Working Techniques property. This instruction manual covers a STIHL Do not lend or rent your sprayer without Pictograms sprayer which is also referred to as the the instruction manual. Be sure that unit in the descriptions. - Page 5 Wear proper protective clothing and Only use parts and accessories that are injuries, wear snug-fitting equipment when using, filling and explicitly approved for this tool by STIHL safety glasses in accord- cleaning the sprayer. Follow the or are technically identical. If you have...
- Page 6 – incorrect mixtures protected from frost. shade may produce toxic fumes or in direct sunlight explosive solutions. – Stand the sprayer on a level surface – – do not fill the tank above the maximum mark. SG 51, SG 71...
- Page 7 Holding and Controlling the Unit changing to a different plant protection (SG 71 only), loosening the shoulder product. straps and setting down the unit. To avoid damage, do not throw the unit to the ground when practicing.
-
Page 8: Assembling The Unit
If you have any questions in this respect, consult a Connecting Hose to Unit servicing dealer. STIHL recommends the use of genuine STIHL replacement parts. They are specifically designed to match your model and meet your performance Push the union nut (1) over the requirements. -
Page 9: Harness
Adjusting Height of Harness Straps right of the unit. Push the lever (2) into the shaft (3). The harness straps can be adjusted to suit your physique. Swing the lever (2) upwards. Lay the unit on its side. SG 51, SG 71... - Page 10 (2). Fit the ends of the harness straps (2) in the lower position. Insert pin (1) and engage it in the backplate. Adjusting the Harness Straps The SG 71 is equipped with a waist/hip belt. SG 51, SG 71...
-
Page 11: Controls
– several strokes are required to build Push locking lever (1) upwards – the up pressure. trigger (2) is unlocked and can be operated. Transport position Move the pump lever to upright position until it engages. SG 51, SG 71... -
Page 12: Filling The Container
– the trigger (2) is locked to reduce the risk of Fit the cap and tighten it down firmly accidental operation. with both hands. Check the O-ring (1) in the cap (2). It must be in good condition. SG 51, SG 71... -
Page 13: Spraying
If the working pressure drops more pressure. than 0.5 bar (7.25 PSI) , restore it by operating the pump handle. Working pressures / spray rates – see "Specifications". SG 51, SG 71... -
Page 14: Inspection And Maintenance By User
Apply a few drops of resin-free, food spray gun and take out the filter (2). safe oil to the pump rod. Lubricate the piston cup seal with a food-safe grease. Rinse the filter under running water. SG 51, SG 71... - Page 15 English Cleaning the Nozzle Unscrew the hollow cone nozzle (1) with spinner insert (2). Rinse out all parts under running water and then reassemble. SG 51, SG 71...
-
Page 16: Maintenance And Care
O-ring in container's cap leaks) Drain Solution container, hose system, wand Clean Nozzle Clean Filter in spray gun Clean Piston cup seal Lubricate with grease Pump rod Lubricate with oil Pump lever bearing Lubricate with grease Safety labels Replace SG 51, SG 71... -
Page 17: Main Parts
Hose Filter Spray gun Spray wand Spinner insert Hollow cone nozzle Container cap 10 Gasket 11 Strainer 12 Solution container 13 Lever 14 Handle 15 Pump barrel 16 Piston cup seal 17 Retaining pin Serial number SG 51, SG 71... -
Page 18: Specifications
SG 71 Specifications Working pressure, max.: 6 bar Flow volume, max.: 1.4 l/min Solution capacity, max.: 18 l Operating temperature, max.: 40°C Residual solution in tank: <0.27 l Recoil force: <20 N Dry weight: 4.8 kg SG 51, SG 71... -
Page 19: Troubleshooting
Clean nozzle / spinner insert / filter Jet only – spray not atomized Spinner insert in nozzle missing Fit spinner insert in the nozzle Nozzle dirty Clean the nozzle STIHL recommends an authorized STIHL servicing dealer. SG 51, SG 71... -
Page 20: Maintenance And Repairs
Directive 2006/42/EC and has been replacement parts which have been accessories and packaging to an developed and manufactured in approved by STIHL for this power tool or approved disposal site for environment- compliance with the following standards are technically identical. Only use high- friendly recycling. - Page 21 English SG 51, SG 71...
- Page 22 English SG 51, SG 71...
- Page 24 0458-597-0121-A englisch www.stihl.com *04585970121A* 0458-597-0121-A...


Need help?
Do you have a question about the SG 71 and is the answer not in the manual?
Questions and answers