
Subscribe to Our Youtube Channel
Related Manuals for Franke T 200


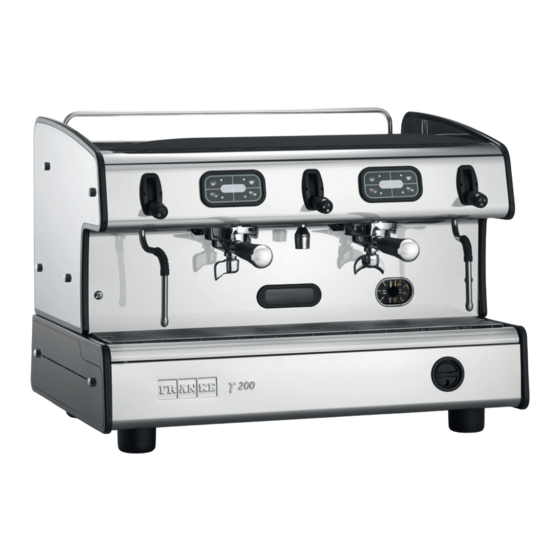
Summary of Contents for Franke T 200
- Page 1 T 200 Original Manual for Use and Maintenance Read the operating instructions and the chapter on safety information before operating the machine. Keep the operating instructions near the machine.
- Page 2 WEEE Disposal of the equipment by the users within the European Community ( WEEE) in compliance with the article 13 of the legislative decree is- sued on 25 July 2005, nr151 ”Implementation of the directives 2002/95/CE,2002/96/CE e 2003/108/CE, concerning the decrease in the usage of dangerous substances in the electrical and electronic equipment and the disposal of waste”.
-
Page 3: Table Of Contents
INDEX GENERAL DESCRIPTION OF THE MACHINE ......... 3 1.1 DEscrIpTIon of DElIvEry coffEE ToUcHpAD ....4 2. GENERAL ADVICE FOR THE INSTALLER ........5 2.1 GENERAL WARNINGS ..............5 2.2 INSTALLATION REQUIREMENTS FOR THE USER...... 7 2.3 WARNING/TECHNICAL DATA LABELS AND NAMEPLATES ..APPLIED TO THE MACHINE. - Page 4 11-03-2014 / LSC 044 / Rev. 00...
-
Page 5: General Description Of The Machine
1 GENERAL DESCRIPTION OF THE MACHINE Fig. 1 LEGEND 1. Top cup grid 7. Drip tray grid 13. 1-cup filter holder 2. steam tap 8. Water drip tray 14. Hot water spout 15. control knob for gas delivery (optional) 3. Touchpad 9. -
Page 6: Description Of Delivery Coffee Touchpad
1.1 DESCRIPTION OF DELIvERy COFFEE TOUCHPAD Touchpad model EK Fig. 2 LEGEND a. 1 short coffee preset delivery button b. 1 long coffee preset delivery button c. 2 short coffees preset delivery button d. 2 long coffees preset delivery button e. -
Page 7: General Advice For The Installer
2. GENERAL ADvICE FOR THE INSTALLER read carefully the instructions and warnings contained in this manual and in the “INSTRUCTION MANUAL FOR THE INSTALLER”, since they provide important indications concerning the installation of the appliance. Attention! The electric system, water supply system, drainage system and gas system (in case the appliance is pre-fitted for gas), MUsT already be put in place by the customer in order to allow the proper installation of the machine. - Page 8 Danger! The electrical safety of the appliance is fully achieved only after it has been correctly connected to an earthing system as required by the laws in force. It is necessary to have the earthing connection checked by professionally qualified personnel. The manufacturer cannot be held liable for any damage caused by the lack or inefficiency of the system’s earthing connection.
-
Page 9: Installation Requirements For The User
• The appliance has class I protection against electric shocks. • The noise emitted by the appliance during normal operation is less than 70 dB. • NOTE: Appliance fitted to operate with gas system. The appliance has been fitted by the manufacturer to operate with LPG under a maximum supply pressure of 30 mbar. Adaptation to operate with any other type of gas must be carried out by personnel authorised by the manufacturer. Attention! failure to comply with the above regulations could jeopardise the correct operation and safety of the appliance as well as its useful lifetime. - Page 10 • Between the water mains and the water inlet pipe of the appliance, there must be a tap to stop the water flow if necessary (2 - pict.3). • The water mains pressure must be within the range of 1 and 6 bar. • If this requirement is not met, please consult the manufacturer. • The appliance is supplied without a plug. It is supposed to be directly connected to the electric mains and therefore, it is necessary to fit a single-pole switch with contact opening of 3 mm or more beforehand, according to the regulations in force (1 - pict.3). • The drainpipe of the appliance must be directly connected to a suitable open drain siphon, previously installed by the customer (3 - pict.3). Do not fit the drain pipe into basins or buckets placed under the counter as this will increase the possibility of forming dirt deposits and as a result, the spread of bacteria.
-
Page 11: Warning/Technical Data Labels And Nameplates Applied To The Machine
2.3 WARNING/TECHNICAL DATA LABELS AND NAMEPLATES APPLIED TO THE MACHINE In the figure below are shown the warning/technical data labels and nameplates positioned on the machine. Warning! Dedicate the time necessary to familiarise yourself with these labels. Ensure that they are readable and keep them clean or replace those that have deteriorated or illegible (both the text and the graphics). -
Page 12: Removing The Packaging
3. REMOvING THE PACKAGING After unpacking the machine, please check its integrity; in case of doubt, do not use it and consult the manufacturer. packaging materials must not be left within children’s reach since they are potentially dangerous. Attention! The appliance weight is more than 30 kg and therefore, it cannot be moved by a single person alone. Take note! Dispose of the packaging as per the norms in force of the country in which the machine is utilised. -
Page 13: Optional Accessories (Supplied Only On Request Of The Customer )
3.2 OPTIONAL ACCESSORIES (Supplied only at the request of the customer) LEGEND I. Water softener L. filter M. pressure reducer N. Detergent 4. COMMISSIONING THE MACHINE a) open the water supply valve as envisaged in the preparations for installation (See Pict. 3 on page 7 - Rif. 2). b) check for any water leaks from the hosing/connections. -
Page 14: Switching On The Machine
5. SWITCHING ON THE MACHINE FILLING THE BOILER A. Turn the knob of the switch on the appliance (9) to 1; at this point the lEDs on the touchpads will switch on to indicate that power is feeding the machine. B. -
Page 15: Coffee Preparation
Take note! The running temperature is the temperature of the boiler during normal operation. 5.1 COFFEE PREPARATION A. remove a filter holder (5 or 13 a according to whether 1 or 2 cups of coffee are required) from the delivery group. B. - Page 16 POURING HOT WATER FOR PREPARING INFUSIONS A. place the pitcher underneath the hot water spout. B. Moving the levers upwards (4) in order to obtain the required amount of water. C. close the tap to stop delivering water by setting the lever (4) to its initial position. Attention! Do not use the lever to deliver hot water before placing the pitcher below the hot water spout, to prevent possible burns.
- Page 17 ELECTRIC CUP WARMER (Optional) The appliances can also be equipped with an electric cup warmer (as optional) for an additional cup heating. To switch on the cup warmer, press the button (17). press the same button to switch it off. Attention! It is allowed to place cups on the special cup grid (1) on the top of the appli- ance as long as the cups have their openings facing upwards (pict.
-
Page 18: Ek Model Alarms Operation
5.2 EK MODEL ALARMS OPERATION LED CORRESPONDING TO THE COFFEE DOSE BUTTON DISPENSING, FLASHING AFTER 5-6 SECONDS: This alarm is viewed when, during the delivery phase, there is a flow meter malfunction for the delivery group, or if the coffee has been too finely ground. -
Page 19: Routine Appliance Maintenance To Be Performed By The User
6 ROUTINE APPLIANCE MAINTENANCE TO BE PERFORMED By THE USER Take note! To grant the efficiency of the appliance and to maintain correct operation, it is necessary to follow the manufacturer’s instruc- tions as to cleaning and regular maintenance. Attention! cleaning and routine maintenance operations must be carried out by the user according to the manufacturer’s instructions given here below. Before carrying out any kind of cleaning operation, disconnect the appliance from the electricity mains and from the gas system (if fitted). - Page 20 Every 3 days After turning off the machine, remove the shower heads using the wrench provided; brush them carefully, making sure that all the holes are clean. Then reassemble the parts following the sequence shown in the picture 6. A. fastening screw B.
-
Page 21: Technical Data
7 TECHNICAL DATA Fig. 7 DIMENSIONS AND WEIGHT POWER SUPPLy RATING AND ABSORPTION T 200 1 GR 2 GR 3 GR COMPACT T 200 1 GR 2 GR 3 GR COMPACT 100/220/240 220/240 220/240/400 110/220/240 volT 50/60 50/60 50/60 50/60... - Page 22 11-03-2014 / LSC 044 / Rev. 00...
- Page 24 Franke Coffee Systems Franke-Strasse 9 | P.O. Box 235 CH-4663 Aarburg – Switzerland Tel. +41 (0) 62 787 36 07 hotline.coffeemachine@franke.com www.franke.com Your distribution partner: 11-03-2014 / order number: LSC 044 / Rev. 00 / item number: 876445 Manufactured by “La Spaziale S.p.A.”...
Need help?
Do you have a question about the T 200 and is the answer not in the manual?
Questions and answers