Table of Contents
Advertisement
Advertisement
Table of Contents

Related Manuals for Electrolux ESF5511LOX


Summary of Contents for Electrolux ESF5511LOX
- Page 1 ESF5511LOX Dishwasher User Manual...
-
Page 2: Table Of Contents
13. TECHNICAL INFORMATION................. 21 WE’RE THINKING OF YOU Thank you for purchasing an Electrolux appliance. You’ve chosen a product that brings with it decades of professional experience and innovation. Ingenious and stylish, it has been designed with you in mind. So whenever you use it, you can be safe in the knowledge that you’ll get great results every time. -
Page 3: Safety Information
ENGLISH SAFETY INFORMATION Before the installation and use of the appliance, carefully read the supplied instructions. The manufacturer is not responsible for any injuries or damages that are the result of incorrect installation or usage. Always keep the instructions in a safe and accessible location for future reference. -
Page 4: Safety Instructions
Put knives and cutlery with sharp points in the cutlery • basket with the points down or in a horizontal position. Do not keep the appliance door open without • supervision to prevent to fall on it. Before any maintenance operation, deactivate the •... - Page 5 ENGLISH • Ensure that there are no visible water • Do not remove the dishes from the leaks during and after the first use of appliance until the programme is the appliance. completed. There can be detergent on • The water inlet hose has a safety the dishes.
-
Page 6: Product Description
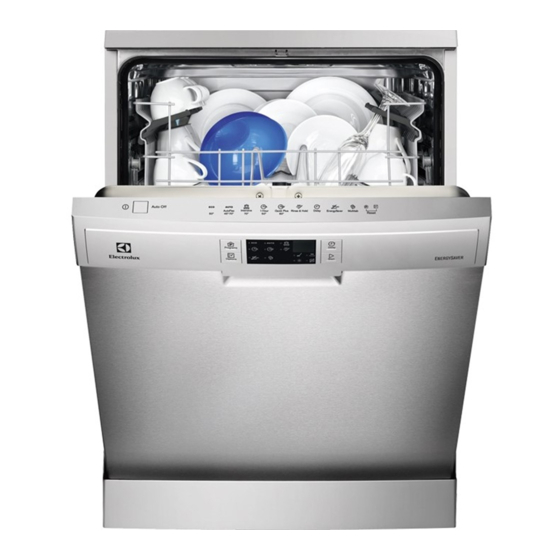
3. PRODUCT DESCRIPTION Worktop Rinse aid dispenser Upper spray arm Detergent dispenser Lower spray arm Cutlery basket Filters Lower basket Rating plate Upper basket Salt container Air vent... -
Page 7: Control Panel
ENGLISH 4. CONTROL PANEL Programs Options On/off button Start button Programs button Indicators Programme indicators Options button Display Delay button 4.1 Indicators Indicator Description Washing phase. It comes on when the washing phase operates. Drying phase. It comes on when the drying phase operates. XtraDry indicator. -
Page 8: Programmes
5. PROGRAMMES Programme Degree of soil Programme pha‐ Options Type of load • Normal soil • Prewash • Hygiene • Crockery and • Wash 50 °C • XtraDry cutlery • Rinses • Dry • All • Prewash • Hygiene •... -
Page 9: Settings
ENGLISH Water Energy Duration Programme (kWh) (min) 13 - 15 1.5 - 1.6 150 - 170 8 - 9 1.1 - 1.3 55 - 65 1) The pressure and the temperature of the water, the variations of the mains supply, the options and the quantity of dishes can change the values. - Page 10 Water hardness German de‐ French de‐ mmol/l Clarke de‐ Water softener grees (°dH) grees (°fH) grees level 47 - 50 84 - 90 8.4 - 9.0 58 - 63 43 - 46 76 - 83 7.6 - 8.3 53 - 57...
-
Page 11: Options
ENGLISH There is also an acoustic signal that How to deactivate the rinse aid sounds when the programme is empty notification completed. By default this acoustic signal is deactivated but it is possible to The appliance must be in programme activate it. -
Page 12: Before First Use
7.2 XtraDry How to activate XtraDry Activate this option when you want to Press Options until the indicator boost the drying performance. With the comes on. use of this option, the duration of some If the option is not applicable to the... -
Page 13: Daily Use
ENGLISH 8.2 How to fill the rinse aid CAUTION! dispenser Only use rinse aid specifically designed for dishwashers. 1. Press the release button (D) to open the lid (C). 2. Pour the rinse aid in the dispenser (A) until the liquid reaches the fill level 'max'. -
Page 14: Delay Start
• The washing phase indicator comes on . • The programme duration starts to decrease with steps of 1 minute. Starting a programme with delay start 1. Set a programme. 2. Press Delay again and again until the display shows the delay time you want to set (from 1 to 24 hours). -
Page 15: Hints And Tips
ENGLISH appliance is in programme selection All buttons are inactive except for the mode. on/off button. Make sure that there is detergent in the 1. Press the on/off button or wait for the detergent dispenser before you start a Auto Off function to automatically new programme. -
Page 16: Care And Cleaning
10.4 Loading the baskets • The filters are clean and correctly installed. • Only use the appliance to wash items • The cap of the salt container is tight. that are dishwasher-safe. • The spray arms are not clogged. -
Page 17: Cleaning The Spray Arms
ENGLISH 7. Reassemble the filters (B) and (C). 8. Put back the filter (B) in the flat filter (A). Turn it clockwise until it locks. 2. Remove the filter (C) out of filter (B). 3. Remove the flat filter (A). 4. -
Page 18: Troubleshooting
• If you regularly use short duration • To maintain the performance of your programmes, these can leave appliance at its best, we recommend deposits of grease and limescale to use monthly a specific cleaning inside the appliance. To prevent this, product for dishwashers. - Page 19 ENGLISH Problem and alarm code Possible cause and solution The appliance does not • Make sure that the sink spigot is not clogged. drain the water. • Make sure that the filter in the outlet hose is not clog‐ ged. The display shows •...
- Page 20 12.1 The washing and drying results are not satisfactory Problem Possible cause and solution Poor washing results. • Refer to "Daily use", "Hints and tips" and basket loading leaflet. • Use more intensive washing programmes. • Clean spray arm jets and filter. Refer to "Care and Cleaning".
-
Page 21: Technical Information
ENGLISH Problem Possible cause and solution There are residues of deter‐ • The detergent tablet got stuck in the dispenser and gent in the dispenser at the therefore was not completely washed away by wa‐ end of the programme. ter. •... -
Page 22: Environmental Concerns
14. ENVIRONMENTAL CONCERNS Recycle the materials with the symbol marked with the symbol with the household waste. Return the product to . Put the packaging in applicable your local recycling facility or contact containers to recycle it. Help protect the your municipal office. - Page 23 ENGLISH...
- Page 24 www.electrolux.com/shop...
Need help?
Do you have a question about the ESF5511LOX and is the answer not in the manual?
Questions and answers