Table of Contents
Advertisement
Quick Links
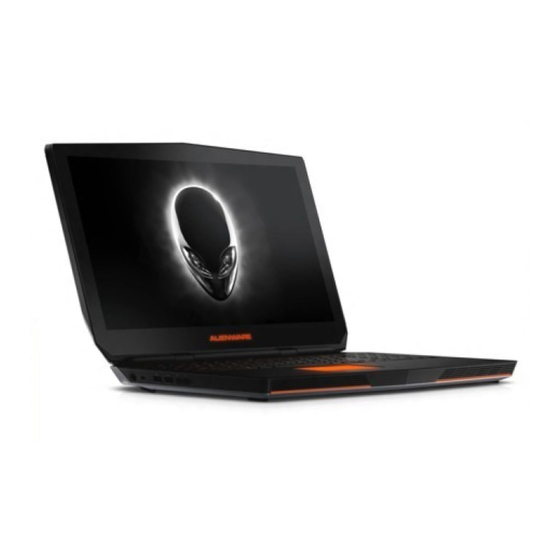
Alienware 15
Quick Start Guide
Snelstartgids
|
Guide d'information rapide
|
Guía de inicio rápido
Connect the power adapter and
press the power button
Sluit de netadapter aan en druk op de aan-uitknop
Connectez l'adaptateur d'alimentation et appuyez sur le bouton d'alimentation
Conecte el adaptador de energía y presione el botón de encendido
UPMIDIAS
Shortcut keys
Sneltoetsen | Touches de fonction
Teclas de acceso directo
Allows to disconnect Alienware Graphics Amplifier
Hiermee kan de Alienware Graphics/versterker worden losgekoppeld
Déconnecter l'amplificateur graphique Alienware
Permite conectar un Alienware Graphics Amplifier
Disable/Enable wireless
Uitschakelen/Inschakelen van draadloos netwerk
Activer/Désactiver le sans fil
Desactivar/activar conexión inalámbrica
Mute audio
Geluid dempen | Couper le son
Silenciar el audio
Decrease volume
Geluidsniveau omlaag | Diminuer le volume
Disminuir el volumen
Increase volume
Geluidsniveau omhoog | Augmenter le volume
Aumentar el volumen
Switch to external display
Naar extern beeldscherm schakelen
Basculer vers un moniteur externe
Cambiar a la pantalla externa
Decrease brightness
Helderheid verminderen | Diminuer la luminosité
Disminuir brillo
Increase brightness
Helderheid vermeerderen | Augmenter la luminosité
Aumentar brillo
Disable/Enable touch pad
Uitschakelen/Inschakelen touchpad
Activer/Désactiver le pavé tactile
Desactivar/activar panel táctil
Disable/Enable AlienFX
Uitschakelen/Inschakelen van ALienFX
Activer/Désactiver AlienFX
Desactivar/activar AlienFX
NOTE: For more information, see Specifications at Dell.com/support.
N.B.: Kijk voor meer informatie in Specificaties op Dell.com/support.
REMARQUE : pour plus d'informations, consultez la section Caractéristiques à l'adresse
Dell.com/support.
NOTA: Para obtener más información, consulte Especificaciones en Dell.com/support.
Product support and manuals
Productondersteuning en handleidingen
Alienware.com
Support produits et manuels
Dell.com/support/manuals
Soporte del producto y manuales
Contact Dell
Neem contact op met Dell | Contacter Dell
Dell.com/contactdell
Póngase en contacto con Dell
Regulatory and safety
Dell.com/regulatory_compliance
Regelgeving en veiligheid | Réglementations et sécurité
Normativa y seguridad
Regulatory model
Wettelijk model | Modèle réglementaire
P42F
Modelo normativo
Regulatory type
Wettelijk type | Type réglementaire
P42F002
Tipo normativo
Computer model
Computermodel | Modèle de l'ordinateur
Alienware 15 R2
Modelo de equipo
Información para NOM, o Norma Oficial Mexicana
La información que se proporciona a continuación se mostrará en los dispositivos que se describen
en este documento, en conformidad con los requisitos de la Norma Oficial Mexicana (NOM):
Importador:
Dell Mexico S.A. de C.V.
AV PASEO DE LA REFORMA NO 2620 PISO 11
COL. LOMAS ALTAS
MEXICO DF CP 11950
Modelo
P42F
Voltaje de alimentación
100 V CA–240 V CA
Frecuencia
50 Hz–60 Hz
Consumo de corriente de entrada
2,34 A/2,5 A/3,5 A
Voltaje de salida
19,50 V CC
Consumo de corriente de salida
9,23 A/12,3 A
País de origen
Hecho en China
Printed in China.
© 2015 Dell Inc.
2015-06
Advertisement
Table of Contents

Related Manuals for Alienware 15 R2


Summary of Contents for Alienware 15 R2
- Page 1 COL. LOMAS ALTAS Allows to disconnect Alienware Graphics Amplifier NOTE: For more information, see Specifications at Dell.com/support. MEXICO DF CP 11950 Hiermee kan de Alienware Graphics/versterker worden losgekoppeld Modelo P42F N.B.: Kijk voor meer informatie in Specificaties op Dell.com/support. Déconnecter l’amplificateur graphique Alienware Voltaje de alimentación...
- Page 2 Features Kenmerken | Caractéristiques | Funciones 4 3 2 1 Rechtermicrofoon Touchpad Micrófono derecho Puerto USB 3.0 Statuslampje camera Toetsenbord met Indicador luminoso de estado de Puerto audífono/micrófono achtergrondverlichting la cámara Camera Puerto para auriculares con micro Mediakaartlezer Cámara Linkermicrofoon Superficie táctil Type C USB-poort Micrófono izquierdo Caps-lock statuslampje...
- Page 3 Dell logo are trademarks of Dell Inc. in the United States and/or other jurisdictions. All other marks and names mentioned herein may be trademarks of their respective companies. 2015 ‑ 08 Rev. A00 Regulatory model: P42F | Type: P42F002 Computer model: Alienware 15 R2...
- Page 4 Views Specifications Back Back Left UPMIDIAS Right External graphics port HDMI port Base Connect an Alienware Graphics Amplifier. Connect a TV or another HDMI‑in enabled device. Provides video and audio output. Display...
- Page 5 Views Specifications Left Back Left UPMIDIAS Power-adapter port USB 3.0 port Right Connect a power adapter to provide power to your Connect peripherals such as storage devices, printers, and computer and charge the battery. so on. Provides data transfer speeds up to 5 Gbps. Security-cable slot Microphone/Headphone port Connect a security cable to prevent unauthorized...
- Page 6 Views Specifications Right Back Left UPMIDIAS Right Media-card reader USB 3.0 port Base Reads from and writes to media cards. Connect peripherals such as storage devices, printers, and so on. Provides data transfer speeds up to 5 Gbps. Thunderbolt 3 (USB Type-C) port Network port Supports USB 3.1 Gen 2 and Thunderbolt 3.
- Page 7 Views Specifications Base Back Left UPMIDIAS Right Hard-drive activity light Right-click button Turns on when the computer reads from or writes to the Press to right‑click. hard drive. Power button/Power-status light Base Wireless-status light Press to turn on the computer if it is turned off or in sleep Turns on when wireless is turned on.
- Page 8 Views Specifications Display Back Left UPMIDIAS Right Left microphone Camera-status light Base Provides sound input for audio recording, voice calls, and Turns on when the camera is in use. so on. Right microphone Camera Provides sound input for audio recording, voice calls, and Allows you to video chat, capture photos, and record so on.
- Page 9 Specifications Views Dimensions and weight Height 34 mm (1.34 in) Width 385.80 mm (15.19 in) Depth 270.20 mm (10.64 in) Weight (maximum) 3.21 kg (7.08 lb) NOTE: The weight of your laptop varies depending on the configuration ordered and the manufacturing variability. UPMIDIAS Dimensions and System...
- Page 10 Specifications Views System information Computer model Alienware 15 R2 Processor • 6 Generation Intel Core i5 • 6 Generation Intel Core i7 Chipset Intel HM170 Series Chipset UPMIDIAS Dimensions and System Ports and Memory Communications Video Audio Storage weight information...
- Page 11 Specifications Views Memory Slot Two SODIMM slots Type DDR4 Speed 2133 MHz Configurations supported 8 GB, 12 GB, and 16 GB UPMIDIAS Dimensions and System Ports and Memory Communications Video Audio Storage weight information connectors Media-card Computer Display Keyboard Camera Touch pad Battery Power adapter...
- Page 12 Specifications Views Ports and connectors External: Network One RJ45 port • One USB 3.0 port with PowerShare • Two USB 3.0 ports • One Thunderbolt 3 (USB Type‑C) port Audio/video • One HDMI port • One headset (headphone and microphone combo) port •...
- Page 13 Specifications Views Communications Ethernet 10/100/1000 Mbps Ethernet controller integrated on system board Wireless • Wi‑Fi 802.11ac • Bluetooth 4.1 • Intel WiDi (optional) • Miracast (Windows 8.1 and Windows 10) UPMIDIAS Dimensions and System Ports and Memory Communications Video Audio Storage weight information connectors...
- Page 14 Specifications Views Video Controller Memory Integrated Intel HD Graphics 530 Shared system memory Discrete • NVIDIA GeForce GTX 965M • 2 GB GDDR5 • NVIDIA GeForce GTX 970M • 3 GB GDDR5 • NVIDIA GeForce GTX 980M • 4 GB GDDR5 •...
- Page 15 Specifications Views Audio Controller Creative Sound Core3D‑EX with Creative Sound Blaster X‑Fi MB3 Speaker Two Klipsch powered stereo speaker system Speaker output: Average 1.5 W Peak Microphone Digital array microphones Volume controls Media‑control shortcut keys UPMIDIAS Dimensions and System Ports and Memory Communications Video...
- Page 16 Specifications Views Storage Interface SATA 6 Gbps Hard drive One 2.5‑inch drive Solid‑state drive Two M.2 PCIe/SATA drives UPMIDIAS Dimensions and System Ports and Memory Communications Video Audio Storage weight information connectors Media-card Computer Display Keyboard Camera Touch pad Battery Power adapter reader environment...
- Page 17 Specifications Views Media-card reader Type One 3‑in‑1 slot Cards supported • SD • SD High‑Capacity (SDHC) • SD Extended‑Capacity (SDXC) UPMIDIAS Dimensions and System Ports and Memory Communications Video Audio Storage weight information connectors Media-card Computer Display Keyboard Camera Touch pad Battery Power adapter reader...
- Page 18 Specifications Views Display Full HD Ultra HD Type 15.6‑inch 15.6‑inch Resolution (maximum) 1920 x 1080 3840 x 2160 Dimensions: Height 224.30 mm (8.83 in) 219.31 mm (8.63 in) Width 360 mm (14.17 in) 358.62 mm (14.12 in) Diagonal 396.24 mm (15.60 in) 396.24 mm (15.60 in) Pixel pitch 0.179 x 0.179 mm...
- Page 19 Specifications Views Keyboard Type Backlit keyboard Shortcut keys Some keys on your keyboard have two symbols on them. These keys can be used to type alternate characters or to perform secondary functions. To type the alternate character, press Shift and the desired key. To perform secondary functions, press Fn and the desired key.
-
Page 20: Shortcut Keys
Keyboard Shortcut keys Allows to disconnect Alienware Graphics Amplifier Disable/Enable wireless Mute audio Macro keys NOTE: You can configure modes and assign multiple tasks for the macro keys. Decrease volume UPMIDIAS Increase volume Switch to external display Decrease brightness Increase brightness... - Page 21 Specifications Views Camera Resolution: Still image 2.1 megapixel Video 1920 x 1080 (Full HD) at 30 fps (maximum) Diagonal viewing angle 74 degrees UPMIDIAS Dimensions and System Ports and Memory Communications Video Audio Storage weight information connectors Media-card Computer Display Keyboard Camera Touch pad...
- Page 22 Specifications Views Touch pad Resolution: Horizontal 1727 dpi Vertical 1092 dpi Dimensions: Height 56 mm (2.20 in) Width 100 mm (3.94 in) UPMIDIAS Dimensions and System Ports and Memory Communications Video Audio Storage weight information connectors Media-card Computer Display Keyboard Camera Touch pad Battery...
- Page 23 Specifications Views Battery Type 8‑cell Lithium‑ion 92 WHr Dimensions: Height 19.85 mm (0.78 in) Width 333.85 mm (13.14 in) Depth 79.10 mm (3.11 in) Weight (maximum) 0.497 kg (1.10 lb) Voltage 14.8 VDC Charging time when the 4 hours computer is off (approximate) UPMIDIAS Operating time Varies depending on operating conditions and can significantly reduce under certain...
- Page 24 Specifications Views Power adapter Type • 180 W • 240 W Input voltage 100 VAC–240 VAC Input frequency 50 Hz–60 Hz Input current • 2.34 A • 2.50 A • 3.50 A Output current • 9.23 A UPMIDIAS • 12.30 A Rated output voltage 19.50 VDC Temperature range:...
- Page 25 Specifications Views Computer environment Airborne contaminant level G1 as defined by ISA‑S71.04‑1985 Operating Storage Temperature range 0°C to 35°C (32°F to 95°F) –40°C to 65°C (–40°F to 149°F) Relative humidity (maximum) 10% to 90% (non‑condensing) 0% to 95% (non‑condensing) Vibration (maximum) 0.66 GRMS 1.30 GRMS Shock (maximum)
-
Page 26: Service Manual
Alienware 15 Service Manual UPMIDIAS Computer Model: Alienware 15 R2 Regulatory Model: P42F Regulatory Type: P42F002... - Page 27 Notes, cautions, and warnings NOTE: A NOTE indicates important information that helps you make better use of your computer. CAUTION: A CAUTION indicates either potential damage to hardware or loss of data and tells you how to avoid the problem. WARNING: A WARNING indicates a potential for property damage, personal injury, or death.
-
Page 28: Table Of Contents
Contents Before working inside your computer......12 ....................12 Before you begin .................... 12 Safety instructions ..................13 Recommended tools After working inside your computer......14 Removing the base panel..........15 ......................15 Procedure Replacing the base panel..........18 ......................18 Procedure UPMIDIAS Removing the memory modules........19 ......................19 Prerequisites ......................19... - Page 29 Removing the hard drive..........26 .....................26 Prerequisites ......................27 Procedure Replacing the hard drive........... 31 ......................31 Procedure ....................31 Post-requisites Removing the wireless card........... 32 .....................32 Prerequisites ......................32 Procedure Replacing the wireless card..........34 ......................34 Procedure ....................35 Post-requisites UPMIDIAS Removing the palm rest........... 36 .....................36 Prerequisites ......................36...
- Page 30 Removing the keyboard........... 49 .....................49 Prerequisites ......................49 Procedure Replacing the keyboard............55 ......................55 Procedure ....................55 Post-requisites Removing the power-button board......56 .....................56 Prerequisites ......................56 Procedure Replacing the power-button board......59 ......................59 Procedure ....................59 Post-requisites UPMIDIAS Removing the status-light board........ 60 .....................60 Prerequisites ......................61 Procedure Replacing the status-light board.........
- Page 31 Removing the speakers............ 67 ..................... 67 Prerequisites ......................67 Procedure Replacing the speakers............ 70 ......................70 Procedure ....................70 Post-requisites Removing the front AlienFX LED boards....71 ...................... 71 Prerequisites ......................71 Procedure Replacing the front AlienFX LED board..... 73 ......................73 Procedure ....................
- Page 32 Removing the display bezel........... 83 .....................83 Prerequisites ......................83 Procedure Replacing the display bezel..........87 ......................87 Procedure ....................87 Post-requisites Removing the display panel........... 88 .....................88 Prerequisites ......................88 Procedure Replacing the display panel..........91 ......................91 Procedure ....................91 Post-requisites UPMIDIAS Removing the display hinges.........92 .....................92 Prerequisites ......................
- Page 33 Removing the display back-cover....... 99 .....................99 Prerequisites ......................99 Procedure Replacing the display back-cover......102 ......................102 Procedure ....................102 Post-requisites Removing the Alienware AlienHead LED board.. 103 ....................103 Prerequisites ......................103 Procedure Replacing the Alienware AlienHead LED board...106 ......................106 Procedure ....................106 Post-requisites UPMIDIAS Removing the display-panel AlienFX LEDs....
- Page 34 Removing the system board......... 114 ....................114 Prerequisites ......................114 Procedure Replacing the system board..........118 ......................118 Procedure ....................119 Post-requisites ........119 Entering the Service Tag in the BIOS setup program Removing the heat-sink assembly......120 ....................120 Prerequisites ......................120 Procedure Replacing the heat-sink assembly......
- Page 35 Removing the coin-cell battery........129 ....................129 Prerequisites ......................129 Procedure Replacing the coin-cell battery........131 ......................131 Procedure ....................131 Post-requisites Removing the battery............132 ....................132 Prerequisites ......................132 Procedure Replacing the battery............135 ......................135 Procedure ....................135 Post-requisites UPMIDIAS Removing the computer base........
- Page 36 Getting help and contacting Alienware....147 ..................147 Self-help resources ..................147 Contacting Alienware UPMIDIAS...
-
Page 37: Before Working Inside Your Computer
Before working inside your computer NOTE: The images in this document may differ from your computer depending on the configuration you ordered. Before you begin Save and close all open files and exit all open applications. Shut down your computer. –... -
Page 38: Recommended Tools
WARNING: Disconnect all power sources before opening the computer cover or panels. After you finish working inside the computer, replace all covers, panels, and screws before connecting to the power source. CAUTION: To avoid damaging the computer, ensure that the work surface is flat and clean. -
Page 39: After Working Inside Your Computer
After working inside your computer CAUTION: Leaving stray or loose screws inside your computer may severely damage your computer. Replace all screws and ensure that no stray screws remain inside your computer. Connect any external devices, peripherals, and cables you removed before working on your computer. -
Page 40: Removing The Base Panel
Removing the base panel WARNING: Before working inside your computer, read the safety information that shipped with your computer and follow the steps in Before working inside your computer. After working inside your computer, follow the instructions After working inside your computer. - Page 41 Slide and remove the base panel from the computer base. UPMIDIAS computer base captive screws (2) base panel plastic scribe...
- Page 42 Disconnect the battery cable from the system board. UPMIDIAS battery cable Turn the computer over and open the display as far as possible. Press and hold the power button for 4 seconds to ground the system board.
-
Page 43: Replacing The Base Panel
Replacing the base panel WARNING: Before working inside your computer, read the safety information that shipped with your computer and follow the steps in Before working inside your computer. After working inside your computer, follow the instructions After working inside your computer. -
Page 44: Removing The Memory Modules
Removing the memory modules WARNING: Before working inside your computer, read the safety information that shipped with your computer and follow the steps in Before working inside your computer. After working inside your computer, follow the instructions After working inside your computer. - Page 45 Slide and remove the memory module from the memory-module slot. UPMIDIAS securing clips (2) memory modules (2) memory-module slot...
-
Page 46: Replacing The Memory Modules
Replacing the memory modules WARNING: Before working inside your computer, read the safety information that shipped with your computer and follow the steps in Before working inside your computer. After working inside your computer, follow the instructions After working inside your computer. -
Page 47: Post-Requisites
Slide the memory module firmly into the slot at an angle and press the memory module down until it clicks into place. NOTE: If you do not hear the click, remove the memory module and reinstall it. UPMIDIAS securing clips (2) notch memory modules (2) memory-module slot... -
Page 48: Removing The Solid-State Drives
Removing the solid-state drives WARNING: Before working inside your computer, read the safety information that shipped with your computer and follow the steps in Before working inside your computer. After working inside your computer, follow the instructions After working inside your computer. - Page 49 Slide and remove the solid-state drive from the solid-state drive slot. UPMIDIAS screw solid-state drive slot solid-state drives (2)
-
Page 50: Replacing The Solid-State Drives
Replacing the solid-state drives WARNING: Before working inside your computer, read the safety information that shipped with your computer and follow the steps in Before working inside your computer. After working inside your computer, follow the instructions After working inside your computer. -
Page 51: Removing The Hard Drive
Removing the hard drive WARNING: Before working inside your computer, read the safety information that shipped with your computer and follow the steps in Before working inside your computer. After working inside your computer, follow the instructions After working inside your computer. -
Page 52: Procedure
Procedure Remove the keyboard-backlight cable, keyboard cable, and macro-keys cable from the routing guides on the computer base. UPMIDIAS macro-keys cable keyboard cable keyboard-backlight cable routing guides (3) hard-drive assembly computer base Remove the screws that secure the hard-drive assembly to the computer base. - Page 53 Lift and slide the hard-drive assembly off the computer base. UPMIDIAS pull tab hard-drive cable screws (4) hard-drive assembly Remove the screws that secure the hard-drive bracket to the hard-drive assembly.
- Page 54 Lift the hard-drive bracket off the hard-drive assembly. UPMIDIAS hard-drive assembly hard-drive bracket screws (4)
- Page 55 Disconnect the interposer from the hard drive. UPMIDIAS interposer hard drive...
-
Page 56: Replacing The Hard Drive
Replacing the hard drive WARNING: Before working inside your computer, read the safety information that shipped with your computer and follow the steps in Before working inside your computer. After working inside your computer, follow the instructions After working inside your computer. -
Page 57: Removing The Wireless Card
Removing the wireless card WARNING: Before working inside your computer, read the safety information that shipped with your computer and follow the steps in Before working inside your computer. After working inside your computer, follow the instructions After working inside your computer. - Page 58 Lift and slide the wireless card out of the wireless-card slot. UPMIDIAS wireless-card bracket antenna cables (2) screw wireless card wireless-card slot tabs (2) notches (2)
-
Page 59: Replacing The Wireless Card
Replacing the wireless card WARNING: Before working inside your computer, read the safety information that shipped with your computer and follow the steps in Before working inside your computer. After working inside your computer, follow the instructions After working inside your computer. -
Page 60: Post-Requisites
Replace the screw that secures the wireless-card bracket to the system board. wireless-card slot antenna cables (2) notches (2) tabs (2) UPMIDIAS screw wireless card wireless-card bracket Post-requisites Replace the base panel. -
Page 61: Removing The Palm Rest
Removing the palm rest WARNING: Before working inside your computer, read the safety information that shipped with your computer and follow the steps in Before working inside your computer. After working inside your computer, follow the instructions After working inside your computer. - Page 62 Lift the latches and disconnect the keyboard-backlight cable, keyboard cable, macro-keys cable, and macro-keys backlight cable from the system board. UPMIDIAS keyboard-backlight cable routing guides (3) latches (4) keyboard cable macro-keys backlight cable macro-keys cable...
- Page 63 Remove the screws that secure the palm-rest assembly to the computer base. UPMIDIAS screws (15) computer base Turn the computer over and open the display as far as possible. Lift the computer base and rest the display on a clean and flat surface.
- Page 64 Push the palm-rest assembly from the release hole to release it from the tabs on the computer base. UPMIDIAS palm-rest assembly computer base release hole Place the computer in an upright position. Using a plastic scribe, pry up along the edges of the palm-rest assembly.
- Page 65 Gently lift the palm-rest assembly and remove the keyboard cable, keyboard-backlight cable, macro-keys cable, and macro-keys backlight cable from the slot on the computer base. UPMIDIAS palm-rest assembly plastic scribe 10 Carefully turn the palm-rest assembly over and disconnect the power- button board cable from the system board.
- Page 66 Lift the palm-rest assembly off the computer base. UPMIDIAS palm-rest assembly computer base power-button board cable 12 Turn the palm-rest assembly over. 13 Follow the procedure from step 1 to step 6 in "Removing the keyboard”. 14 Follow the procedure from step 1 to step 4 in "Removing the power-button board”.
- Page 67 16 Follow the procedure from step 1 to step 5 in "Removing the touch pad”. palm rest UPMIDIAS...
-
Page 68: Replacing The Palm Rest
Replacing the palm rest WARNING: Before working inside your computer, read the safety information that shipped with your computer and follow the steps in Before working inside your computer. After working inside your computer, follow the instructions After working inside your computer. -
Page 69: Removing The Touch Pad
Removing the touch pad WARNING: Before working inside your computer, read the safety information that shipped with your computer and follow the steps in Before working inside your computer. After working inside your computer, follow the instructions After working inside your computer. - Page 70 Remove the screws that secure the touch-pad bracket to the palm-rest assembly. UPMIDIAS latches (2) touch-pad cable touch-pad buttons cable screws (5) touch-pad bracket...
- Page 71 Release the tabs that secure the touch-pad bracket to the palm-rest assembly and lift the touch-pad bracket off the palm-rest assembly. UPMIDIAS touch-pad bracket palm-rest assembly tabs (4)
- Page 72 Lift the touch pad off the palm-rest assembly. UPMIDIAS palm-rest assembly touch pad...
-
Page 73: Replacing The Touch Pad
Replacing the touch pad WARNING: Before working inside your computer, read the safety information that shipped with your computer and follow the steps in Before working inside your computer. After working inside your computer, follow the instructions After working inside your computer. -
Page 74: Removing The Keyboard
Removing the keyboard WARNING: Before working inside your computer, read the safety information that shipped with your computer and follow the steps in Before working inside your computer. After working inside your computer, follow the instructions After working inside your computer. - Page 75 Note the touch-pad cable and status-light cable routings and peel off the cables from the keyboard bracket. UPMIDIAS latches (2) touch-pad cable status-light cable keyboard bracket...
- Page 76 Remove the screws that secure the keyboard bracket to the palm-rest assembly. UPMIDIAS keyboard bracket screws (8)
- Page 77 Lift the keyboard bracket at an angle and remove it from the tabs on the palm-rest assembly. UPMIDIAS keyboard bracket palm-rest assembly tabs (3)
- Page 78 Remove the screws that secure the keyboard to the palm-rest assembly. keyboard screws (2) UPMIDIAS...
- Page 79 Lift the keyboard at an angle and remove it from the tabs on the palm-rest assembly. UPMIDIAS palm-rest assembly keyboard tabs (5)
-
Page 80: Replacing The Keyboard
Replacing the keyboard WARNING: Before working inside your computer, read the safety information that shipped with your computer and follow the steps in Before working inside your computer. After working inside your computer, follow the instructions After working inside your computer. -
Page 81: Removing The Power-Button Board
Removing the power-button board WARNING: Before working inside your computer, read the safety information that shipped with your computer and follow the steps in Before working inside your computer. After working inside your computer, follow the instructions After working inside your computer. - Page 82 Disconnect the power-button board cable from the power-button board. UPMIDIAS power-button board cable latches (2) touch-pad cable status-light cable Remove the screws that secure the power-button board to the palm-rest assembly.
- Page 83 Lift the power-button board off the palm-rest assembly. UPMIDIAS palm-rest assembly power-button board screws (2)
-
Page 84: Replacing The Power-Button Board
Replacing the power-button board WARNING: Before working inside your computer, read the safety information that shipped with your computer and follow the steps in Before working inside your computer. After working inside your computer, follow the instructions After working inside your computer. -
Page 85: Removing The Status-Light Board
Removing the status-light board WARNING: Before working inside your computer, read the safety information that shipped with your computer and follow the steps in Before working inside your computer. After working inside your computer, follow the instructions After working inside your computer. -
Page 86: Procedure
Procedure Lift the latch and disconnect the status-light board cable from the status- light board. UPMIDIAS latch status-light board cable status-light board Remove the screws that secure the status-light board to the palm-rest assembly. - Page 87 Lift the status-light board off the palm-rest assembly. UPMIDIAS screws (2) status-light board palm-rest assembly...
-
Page 88: Replacing The Status-Light Board
Replacing the status-light board WARNING: Before working inside your computer, read the safety information that shipped with your computer and follow the steps in Before working inside your computer. After working inside your computer, follow the instructions After working inside your computer. -
Page 89: Removing The I/O Board
Removing the I/O board WARNING: Before working inside your computer, read the safety information that shipped with your computer and follow the steps in Before working inside your computer. After working inside your computer, follow the instructions After working inside your computer. - Page 90 Lift the I/O board off the computer base. UPMIDIAS screws (2) I/O board computer base latch I/O-board cable...
-
Page 91: Replacing The I/O Board
Replacing the I/O board WARNING: Before working inside your computer, read the safety information that shipped with your computer and follow the steps in Before working inside your computer. After working inside your computer, follow the instructions After working inside your computer. -
Page 92: Removing The Speakers
Removing the speakers WARNING: Before working inside your computer, read the safety information that shipped with your computer and follow the steps in Before working inside your computer. After working inside your computer, follow the instructions After working inside your computer. - Page 93 Note the front AlienFX LED cable routing and peel off the cable from the battery. UPMIDIAS speaker cable tape front AlienFX LED cable speakers (2) Remove the speaker cable from the routing guides on the battery and computer base.
- Page 94 Lift the speakers along with its cable off the computer base. UPMIDIAS routing guides (6) speaker cable battery computer base speakers (2)
-
Page 95: Replacing The Speakers
Replacing the speakers WARNING: Before working inside your computer, read the safety information that shipped with your computer and follow the steps in Before working inside your computer. After working inside your computer, follow the instructions After working inside your computer. -
Page 96: Removing The Front Alienfx Led Boards
Removing the front AlienFX LED boards WARNING: Before working inside your computer, read the safety information that shipped with your computer and follow the steps in Before working inside your computer. After working inside your computer, follow the instructions After working inside your computer. - Page 97 Lift the front AlienFX LED boards off the tubes. UPMIDIAS front AlienFX LED board screws (4) cables (2) front AlienFX LED boards (2) tubes (2) computer base...
-
Page 98: Replacing The Front Alienfx Led Board
Replacing the front AlienFX LED board WARNING: Before working inside your computer, read the safety information that shipped with your computer and follow the steps in Before working inside your computer. After working inside your computer, follow the instructions After working inside your computer. -
Page 99: Removing The Hinge Covers
Removing the hinge covers WARNING: Before working inside your computer, read the safety information that shipped with your computer and follow the steps in Before working inside your computer. After working inside your computer, follow the instructions After working inside your computer. - Page 100 Remove the hinge covers from the computer base. UPMIDIAS display assembly screws (2) hinge covers (2) computer base...
-
Page 101: Replacing The Hinge Covers
Replacing the hinge covers WARNING: Before working inside your computer, read the safety information that shipped with your computer and follow the steps in Before working inside your computer. After working inside your computer, follow the instructions After working inside your computer. -
Page 102: Removing The Display Assembly
Removing the display assembly WARNING: Before working inside your computer, read the safety information that shipped with your computer and follow the steps in Before working inside your computer. After working inside your computer, follow the instructions After working inside your computer. - Page 103 Remove the screws that secure the display assembly to the computer base. display assembly computer base screws (2) UPMIDIAS Turn the computer over and open the display as far as possible. Carefully remove the antenna cables through the slot on the computer base.
- Page 104 Peel off the adhesive tape, disconnect the logo-board cable from the system board, and remove it from the routing guide on the display hinges. UPMIDIAS display cable latch computer base routing guides (2) antenna cables (2) adhesive tapes (2) logo-board cable 10 Remove the screws that secure the display assembly to the computer base.
- Page 105 Lift the display assembly off the computer base. UPMIDIAS display assembly screws (4) computer base...
-
Page 106: Replacing The Display Assembly
Replacing the display assembly WARNING: Before working inside your computer, read the safety information that shipped with your computer and follow the steps in Before working inside your computer. After working inside your computer, follow the instructions After working inside your computer. - Page 107 Replace the wireless card. Replace the solid-state drives. Replace the memory modules. Replace the base panel. UPMIDIAS...
-
Page 108: Removing The Display Bezel
Removing the display bezel WARNING: Before working inside your computer, read the safety information that shipped with your computer and follow the steps in Before working inside your computer. After working inside your computer, follow the instructions After working inside your computer. - Page 109 Carefully lift the display bezel and turn it over. UPMIDIAS display bezel Lift the latches and disconnect the display-board cables from the logo board.
- Page 110 Peel off the adhesive tape and disconnect the logo-board cable from the logo board. UPMIDIAS logo board display-board cables (3) adhesive tape logo-board cable...
- Page 111 Follow the procedure from step 1 to step 2 in “Removing the logo board”. display bezel UPMIDIAS...
-
Page 112: Replacing The Display Bezel
Replacing the display bezel WARNING: Before working inside your computer, read the safety information that shipped with your computer and follow the steps in Before working inside your computer. After working inside your computer, follow the instructions After working inside your computer. -
Page 113: Removing The Display Panel
Removing the display panel WARNING: Before working inside your computer, read the safety information that shipped with your computer and follow the steps in Before working inside your computer. After working inside your computer, follow the instructions After working inside your computer. - Page 114 Gently lift the display panel and turn it over. UPMIDIAS screws (4) display back-cover display panel Lift the latch and disconnect the display cable from the display panel.
- Page 115 Lift the display panel off the display back-cover. UPMIDIAS display panel latch display cable display back-cover...
-
Page 116: Replacing The Display Panel
Replacing the display panel WARNING: Before working inside your computer, read the safety information that shipped with your computer and follow the steps in Before working inside your computer. After working inside your computer, follow the instructions After working inside your computer. -
Page 117: Removing The Display Hinges
Removing the display hinges WARNING: Before working inside your computer, read the safety information that shipped with your computer and follow the steps in Before working inside your computer. After working inside your computer, follow the instructions After working inside your computer. - Page 118 Lift the display hinges off the display assembly. UPMIDIAS display hinges (2) screws (6) display back-cover...
-
Page 119: Replacing The Display Hinges
Replacing the display hinges WARNING: Before working inside your computer, read the safety information that shipped with your computer and follow the steps in Before working inside your computer. After working inside your computer, follow the instructions After working inside your computer. -
Page 120: Removing The Camera
Removing the camera WARNING: Before working inside your computer, read the safety information that shipped with your computer and follow the steps in Before working inside your computer. After working inside your computer, follow the instructions After working inside your computer. -
Page 121: Procedure
Procedure Peel off the tape that secures the camera cable to the camera and disconnect the camera cable from the camera module. UPMIDIAS tape camera module camera cable display back-cover... - Page 122 Note the location of the camera module and pry it off the display back- cover using a plastic scribe. UPMIDIAS camera module plastic scribe display back-cover...
-
Page 123: Replacing The Camera
Replacing the camera WARNING: Before working inside your computer, read the safety information that shipped with your computer and follow the steps in Before working inside your computer. After working inside your computer, follow the instructions After working inside your computer. -
Page 124: Removing The Display Back-Cover
Removing the display back- cover WARNING: Before working inside your computer, read the safety information that shipped with your computer and follow the steps in Before working inside your computer. After working inside your computer, follow the instructions After working inside your computer. - Page 125 Peel off the display board and camera cable from the display back-cover. UPMIDIAS display back-cover display board and camera cable routing guides (3) Follow the procedure from step 1 to step 4 in "Removing the Alienware AlienHead LED board”.
- Page 126 Follow the procedure from step 1 to step 4 in "Removing the display panel AlienFX LED”. display back-cover UPMIDIAS...
- Page 127 Procedure Place the display back-cover on a clean and flat surface. Follow the procedure from step 1 to step 3 in “Replacing the Alienware AlienHead LED board”. Follow the procedure from step 1 to step 3 in “Replacing the...
- Page 128 Follow the procedure from step 1 to step 4 in “Removing the display bezel”. Remove the display panel. 10 Follow the procedure from step 1 to step 2 in "Removing the display back- cover". Procedure Peel off the tape that secures the Alienware AlienHead LED board to the display back-cover.
- Page 129 Note the Alienware AlienHead LED cable routing and peel off the cable from the display back-cover. UPMIDIAS Alienware AlienHead LED tape cable display back-cover Note the location of the Alienware AlienHead LED board and peel off the Alienware AlienHead LED board from the display back-cover.
- Page 130 Lift Alienware AlienHead LED board along with its cable off the display back-cover. UPMIDIAS Alienware AlienHead LED Alienware AlienHead LED cable board display back-cover...
- Page 131 Adhere the Alienware AlienHead LED board to the display back-cover. Route the Alienware AlienHead LED cable on the display back-cover and adhere it to the display back-cover. Adhere the tape that secures the Alienware AlienHead LED board to the UPMIDIAS display back-cover.
-
Page 132: Prerequisites
Removing the display-panel AlienFX LEDs WARNING: Before working inside your computer, read the safety information that shipped with your computer and follow the steps in Before working inside your computer. After working inside your computer, follow the instructions After working inside your computer. -
Page 133: Procedure
Procedure Peel off the tapes that secure the display-panel AlienFX LEDs to the display back-cover. UPMIDIAS display back-cover display-panel AlienFX LED cables (2) tapes (2) Note the routing of the display-panel AlienFX LED cables and peel off the cables from the display back-cover. Note the location of the display-panel AlienFX LEDs and peel off the LEDs from the display back-cover. - Page 134 Lift the display-panel AlienFX LEDs along with the cables off the display back-cover. UPMIDIAS display back-cover display-panel AlienFX LED cables (2) display-panel AlienFX LEDs...
- Page 135 Replacing the display-panel AlienFX LEDs WARNING: Before working inside your computer, read the safety information that shipped with your computer and follow the steps in Before working inside your computer. After working inside your computer, follow the instructions After working inside your computer.
- Page 136 Removing the logo board WARNING: Before working inside your computer, read the safety information that shipped with your computer and follow the steps in Before working inside your computer. After working inside your computer, follow the instructions After working inside your computer.
- Page 137 Note the location of the logo board and pry the logo board off the display bezel using a plastic scribe. UPMIDIAS display bezel logo board plastic scribe...
- Page 138 Replacing the logo board WARNING: Before working inside your computer, read the safety information that shipped with your computer and follow the steps in Before working inside your computer. After working inside your computer, follow the instructions After working inside your computer.
-
Page 139: Removing The System Board
Removing the system board WARNING: Before working inside your computer, read the safety information that shipped with your computer and follow the steps in Before working inside your computer. After working inside your computer, follow the instructions After working inside your computer. - Page 140 Using the pull tab, disconnect the hard-drive cable from the system board. UPMIDIAS pull tab hard-drive cable power-adapter port cable computer base fan cables (2) Turn the computer over. Lift the latch and disconnect the I/O-board cable from the system board. Disconnect the speaker cable from the system board.
- Page 141 Peel the tape and disconnect the front AlienFX LED cable from the system board. latch I/O-board cable UPMIDIAS speaker cable front AlienFX LED cable tape Remove the screws that secure the system board to the computer base. Lift the system board at an angle and slide the ports on the system board out of the slots on the computer base.
- Page 142 10 Lift the system board off the computer base. UPMIDIAS system board screws (6) Turn the system board over. 12 Follow the procedure from step 1 to step 2 in "Removing the heat-sink assembly”. 13 Follow the procedure from step 1 to step 2 in "Removing the coin-cell battery”.
-
Page 143: Replacing The System Board
Replacing the system board WARNING: Before working inside your computer, read the safety information that shipped with your computer and follow the steps in Before working inside your computer. After working inside your computer, follow the instructions After working inside your computer. -
Page 144: Post-Requisites
Turn the computer over. Post-requisites Replace the display assembly. Replace the hinge covers. Follow the procedure from step 5 to step 11 in “Replacing the palm rest”. Replace the wireless card. Replace the solid-state drives. Replace the memory modules. Replace the base panel. -
Page 145: Removing The Heat-Sink Assembly
Removing the heat-sink assembly WARNING: Before working inside your computer, read the safety information that shipped with your computer and follow the steps in Before working inside your computer. After working inside your computer, follow the instructions After working inside your computer. - Page 146 Lift the heat-sink assembly off the system board. heat-sink assembly system board UPMIDIAS captive screws (8)
-
Page 147: Replacing The Heat-Sink Assembly
Replacing the heat-sink assembly WARNING: Before working inside your computer, read the safety information that shipped with your computer and follow the steps in Before working inside your computer. After working inside your computer, follow the instructions After working inside your computer. -
Page 148: Prerequisites
Removing the fans WARNING: Before working inside your computer, read the safety information that shipped with your computer and follow the steps in Before working inside your computer. After working inside your computer, follow the instructions After working inside your computer. - Page 149 Lift the processor fan and video-card fan off the computer base. processor fan computer base UPMIDIAS video-card fan screws (4)
-
Page 150: Replacing The Fans
Replacing the fans WARNING: Before working inside your computer, read the safety information that shipped with your computer and follow the steps in Before working inside your computer. After working inside your computer, follow the instructions After working inside your computer. -
Page 151: Removing The Power-Adapter Port
Removing the power- adapter port WARNING: Before working inside your computer, read the safety information that shipped with your computer and follow the steps in Before working inside your computer. After working inside your computer, follow the instructions After working inside your computer. - Page 152 Lift the power-adapter port along with its cable off the computer base. UPMIDIAS routing guide power-adapter port bracket screws (2) power-adapter port power-adapter port cable...
-
Page 153: Replacing The Power-Adapter Port
Replacing the power-adapter port WARNING: Before working inside your computer, read the safety information that shipped with your computer and follow the steps in Before working inside your computer. After working inside your computer, follow the instructions After working inside your computer. -
Page 154: Removing The Coin-Cell Battery
Removing the coin-cell battery WARNING: Before working inside your computer, read the safety information that shipped with your computer and follow the steps in Before working inside your computer. After working inside your computer, follow the instructions After working inside your computer. - Page 155 Using a plastic scribe, gently pry out the coin-cell battery from the system board. UPMIDIAS coin-cell battery cable coin-cell battery system board...
-
Page 156: Replacing The Coin-Cell Battery
Replacing the coin-cell battery WARNING: Before working inside your computer, read the safety information that shipped with your computer and follow the steps in Before working inside your computer. After working inside your computer, follow the instructions After working inside your computer. -
Page 157: Removing The Battery
Removing the battery WARNING: Before working inside your computer, read the safety information that shipped with your computer and follow the steps in Before working inside your computer. After working inside your computer, follow the instructions After working inside your computer. - Page 158 Note the front AlienFX LED cable routing and peel off the cable from the battery. UPMIDIAS speaker cable routing guides (3) battery front AlienFX LED cable Remove the screws that secure the battery to the computer base.
- Page 159 Lift the battery off the computer base. screws (2) battery UPMIDIAS computer base...
-
Page 160: Replacing The Battery
Replacing the battery WARNING: Before working inside your computer, read the safety information that shipped with your computer and follow the steps in Before working inside your computer. After working inside your computer, follow the instructions After working inside your computer. -
Page 161: Prerequisites
Removing the computer base WARNING: Before working inside your computer, read the safety information that shipped with your computer and follow the steps in Before working inside your computer. After working inside your computer, follow the instructions After working inside your computer. - Page 162 computer base UPMIDIAS...
-
Page 163: Replacing The Computer Base
Replacing the computer base WARNING: Before working inside your computer, read the safety information that shipped with your computer and follow the steps in Before working inside your computer. After working inside your computer, follow the instructions After working inside your computer. -
Page 164: Bios Setup Program
BIOS setup program Overview CAUTION: Unless you are an expert computer user, do not change the settings in the BIOS setup program. Certain changes can make your computer work incorrectly. NOTE: Before you change BIOS setup program, it is recommended that you write down the BIOS setup program screen information for future reference. - Page 165 Main CPU ID Displays the processor identification code. CPU L1 Cache Displays the processor L1 cache size. CPU L2 Cache Displays the processor L2 cache size. CPU L3 Cache Displays the processor L3 cache size. Integrated Graphics Displays the integrated graphics. Discrete Graphics 1 Displays the first discrete graphics installed on your computer.
- Page 166 Advanced defines how the BIOS, in the absence of a USB-aware operating system, handles USB devices. USB emulation is always enabled during POST. NOTE: You cannot boot any type of USB device (floppy, hard drive, or memory key) when this option is off.
- Page 167 Advanced Battery Health Displays the battery health. External USB Ports Allows you to disable or enable the external USB ports. Default: Enabled USB debug Allows you to enable or disable this port for Windows debugging. Default: Disabled Advanced-Performance options Overclocking Feature Allows you to enable or disable global overclocking feature.
-
Page 168: Boot Sequence
• Current Boot Sequence — change the boot sequence for the current boot, for example, to boot from the optical drive to run Alienware Diagnostics from the Drivers and Utilities disc or to reinstall your operating system using an external media. The previous boot sequence is restored at the next boot. -
Page 169: Changing Boot Sequence For The Current Boot
Hard Drive — The computer attempts to boot from the primary hard drive. If no operating system is on the drive, the computer generates an error message. CD/DVD/CD-RW Drive — The computer attempts to boot from the optical drive. If no disc is in the drive, or if the disc is not bootable, the computer generates an error message. - Page 170 Use the arrow keys to highlight the boot priority and press Enter to display the different devices. Select the device and press Enter to set the boot priority. UPMIDIAS...
-
Page 171: Flashing The Bios
Flashing the BIOS You may need to flash (update) the BIOS when an update is available or when you replace the system board. To flash the BIOS: Turn on the computer. Go to www.dell.com/support. Click Product Support, enter the Service Tag of your computer and click Submit. -
Page 172: Getting Help And Contacting Alienware
Getting help and contacting Alienware Self-help resources You can get information and help on Alienware products and services using these online self-help resources: Self-Help Information Self-Help Options Windows 10/Windows 8.1—In Accessing Windows Help Windows search, type Help and Support, and press Enter. - Page 173 NOTE: If you do not have an active internet connection, you can find contact information on your purchase invoice, packing slip, bill, or Dell product catalog. UPMIDIAS...
Need help?
Do you have a question about the 15 R2 and is the answer not in the manual?
Questions and answers