
Related Manuals for Alienware 17 R5


Summary of Contents for Alienware 17 R5
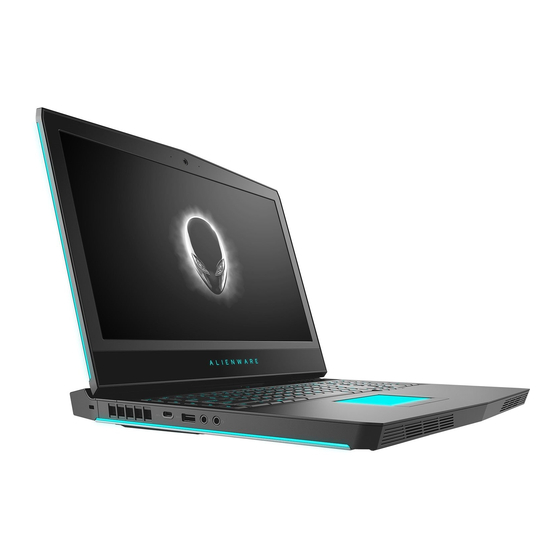
- Page 1 Alienware 17 R5 Setup and Specifications Computer Model: Alienware 17 R5 Regulatory Model: P31E Regulatory Type: P31E002...
- Page 2 Notes, cautions, and warnings NOTE: A NOTE indicates important information that helps you make better use of your product. CAUTION: A CAUTION indicates either potential damage to hardware or loss of data and tells you how to avoid the problem. WARNING: A WARNING indicates a potential for property damage, personal injury, or death.
-
Page 3: Table Of Contents
......5 Set up the Virtual Reality (VR) headset—optional ..................5 HTC Vive ..................6 Oculus Rift ..............8 Oculus Rift with touch ............10 Alienware Graphics Amplifier Views................12 ....................12 Base ................... 13 Display ....................14 Front ....................14 Back .................... - Page 4 Intel Optane storage ..................20 Keyboard ...................21 Camera ..................21 Touchpad ..............21 Touchpad gestures ...................22 Battery .....................22 Video ................23 Power adapter ...................24 Display ..............24 Computer environment Keyboard shortcuts............. 26 Getting help and contacting Alienware..... 28 ................. 28 Self-help resources ..............28 Contacting Alienware...
-
Page 5: Set Up Your Computer
Connect the power adapter and press the power button. Set up the Virtual Reality (VR) headset— optional NOTE: The VR headset is sold separately. NOTE: If you are using Alienware Graphics Amplifier with your computer, see Alienware Graphics Amplifier. HTC Vive Download and run the setup tools for your VR headset at www.dell.com/... -
Page 6: Oculus Rift
Connect the USB cable from the Vive hub to the USB 3.1 Gen 1 port at the right side of your computer. Follow the on-screen instructions to complete the setup. Oculus Rift NOTE: The USB dongles are only shipped with computers that are Oculus certified. - Page 7 Connect the Oculus Rift tracker to the USB Type-A port at the left side of your computer. Connect a USB Type-C to Type-A dongle to the Thunderbolt 3 (USB Type-C) port at the back of your computer. Connect the XBOX controller to the USB Type-A port on the USB dongle. Follow the on-screen instructions to complete the setup.
-
Page 8: Oculus Rift With Touch
Oculus Rift with touch NOTE: The USB dongles are only shipped with computers that are Oculus certified. Download and run the setup tools for your VR headset at www.dell.com/ VRsupport. Connect the HDMI cable of the Oculus Rift headset to the back of your computer. - Page 9 Connect a USB Type-C to Type-A dongle to the Thunderbolt 3 (USB Type-C) port on the back of your computer. Connect the Oculus Rift tracker to the USB Type-A port at the left side of your computer. Connect a USB Type-C to Type-A dongle to the USB 3.1 Gen 2 (Type-C) port at the left side of your computer.
-
Page 10: Alienware Graphics Amplifier
When using the Virtual Reality (VR) headset, connect the HDMI cable to the graphics card installed on your Alienware Graphics Amplifier. The USB cables from the VR headset can be connected either to your computer or your Alienware Graphics Amplifier. - Page 11 Alienware Graphics For more information about Alienware Graphics Amplifier, see Amplifier User’s Guide at www.dell.com/support.
-
Page 12: Views
Press to put the computer in sleep state if it is turned on. Press and hold for 4 seconds to force shut-down the computer. NOTE: You can customize the power-button behavior in Power Options. Macro keys Run pre-defined Macros. Define the macro keys using the Alienware Command Center. -
Page 13: Display
Display Left microphone Provides digital sound input for audio recording and voice calls. Camera Enables you to video chat, capture photos, and record videos. Camera-status light Turns on when the camera is in use. Right microphone Provides digital sound input for audio recording and voice calls. Tobii Eye Tracker Application that enables you to interact with your computer using your eyes. -
Page 14: Front
The Service Tag is a unique alphanumeric identifier that enables Dell service technicians to identify the hardware components in your computer and access warranty information. Front Left speaker Provides audio output. Right speaker Provides audio output. Back Network port (with lights) Connect an Ethernet (RJ45) cable from a router or a broadband modem for network or Internet access. -
Page 15: Left
Provides data transfer rates up to 10 Gbps for USB 3.1 Gen 2 and up to 40 Gbps for Thunderbolt 3. External graphics port Connect an Alienware Graphics Amplifier to enhance the graphics performance. Power-adapter port Connect a power adapter to provide power to your computer and charge the battery. -
Page 16: Right
NOTE: If a USB device is connected to the PowerShare port before the computer is turned off or in hibernate state, you must disconnect and connect it again to enable charging. NOTE: Certain USB devices may not charge when the computer is turned off or in sleep state. -
Page 17: Specifications
Specifications Computer model Alienware 17 R5 System information Table 1. System information Processor generation Intel Core i7/i9 Chipset Intel CM246 Operating system Table 2. Operating system Operating systems supported • Windows 10 Home (64-bit) • Windows 10 Professional (64-bit) Dimensions and weight Table 3. -
Page 18: Memory
Memory Table 4. Memory specifications Slots Two SODIMM slots Type DDR4 Speed 2666 MHz Configurations supported: Per memory module slot 4 GB, 8 GB, and 16 GB Total memory 8 GB, 16 GB, and 32 GB Ports and connectors Table 5. Ports and connectors External: Network One RJ-45 port... -
Page 19: Communications
• One M.2 card slot for Wi-Fi and Bluetooth combo card Communications Table 6. Communications specifications Ethernet 10/100/1000 Mbps Ethernet controller integrated on system board Wireless • Wi-Fi 802.11ac • Bluetooth 4.1 Wireless module Table 7. Wireless module specifications Transfer rate Up to 1733 Mbps Frequency bands supported Dual band 2.4 GHz/5 GHz... -
Page 20: Storage
Subwoofer output • Average: 2 W • Peak: 2.5 W Microphone Digital-array microphones Storage Your computer supports one hard drive and three solid-state drives. Table 9. Storage specifications Storage type Interface type Capacity One 2.5-inch hard drive SATA AHCI 6 Gbps Up to 1 TB One M.2 2242 solid-state drive Up to 1 TB... -
Page 21: Camera
used to type alternate characters or to perform secondary functions. To type the alternate character, press Shift and the desired key. To perform secondary functions, press Fn and the desired key. NOTE: You can define the primary behavior of the function keys (F1–F12) by changing Function Key Behavior in BIOS setup program. -
Page 22: Battery
Battery Table 14. Battery specifications 4-cell “smart” lithium- 6-cell “smart” lithium- ion (68 WHr) ion (99 WHr) Weight (maximum) 0.33 kg (0.72 lb) 0.43 kg (0.94 lb) Voltage 15.20 VDC 11.40 VDC Dimensions: Height 13.50 mm (0.53 in) Width 259.60 mm (10.22 in) Depth 89.20 mm (3.51 in) Temperature range:... -
Page 23: Power Adapter
Integrated Discrete NOTE: The NVIDIA graphics cards support G-Sync panels. Memory Shared system memory • 6 GB GDDR5 • 8 GB GDDR5 • 8 GB GDDR5X Power adapter Table 16. Power adapter specifications 180 W 240 W 330 W Input current 2.34 A 3.50 A 4.40 A... -
Page 24: Display
Display Table 17. Display specifications 17.3-inch FHD 17.3-inch QHD 17.3-inch UHD Anti-Glare panel Anti-Glare panel Anti-Glare panel Resolution 1920 x 1080 2560 x 1440 3840 x 2160 (maximum) Operating angle 140 degrees 140 degrees 140 degrees Pixel pitch 0.1989 mm 0.14925 mm 0.0995 mm Dimensions:... - Page 25 Operating Storage (32°F to 95°F) (–40°F to 149°F) Relative humidity 10% to 90% 5% to 95% (maximum) (non-condensing) (non-condensing) Vibration (maximum) 0.66 GRMS 1.30 GRMS † ‡ Shock (maximum) 110 G 160 G Altitude (maximum) –15.20 m to 3048 m –15.20 m to 10,668 m (–50 ft to 10,000 ft) (–50 ft to 35,000 ft)
-
Page 26: Keyboard Shortcuts
NOTE: Keyboard characters may differ depending on the keyboard language configuration. Keys used for shortcuts remain the same across all language configurations. Table 19. List of keyboard shortcuts Keys Description Disconnect Alienware Graphics Amplifier Disable/enable wireless Mute audio Decrease volume Increase volume... - Page 27 Keys Description NOTE: You can configure modes and assign multiple tasks for the macro keys on the keyboard.
-
Page 28: Getting Help And Contacting Alienware
Getting help and contacting Alienware Self-help resources You can get information and help on Alienware products and services using these online self-help resources: Table 21. Alienware products and online self-help resources Information about Alienware products www.alienware.com and services Dell Help & Support app... - Page 29 NOTE: Availability varies by country and product, and some services may not be available in your country. NOTE: If you do not have an active internet connection, you can find contact information on your purchase invoice, packing slip, bill, or Dell product catalog.
Need help?
Do you have a question about the 17 R5 and is the answer not in the manual?
Questions and answers