Casio WSD-F10 User Manual
Hide thumbs
Also See for WSD-F10:
- User manual (91 pages) ,
- Quick start manual (15 pages) ,
- User manual (85 pages)
Table of Contents
Advertisement
.
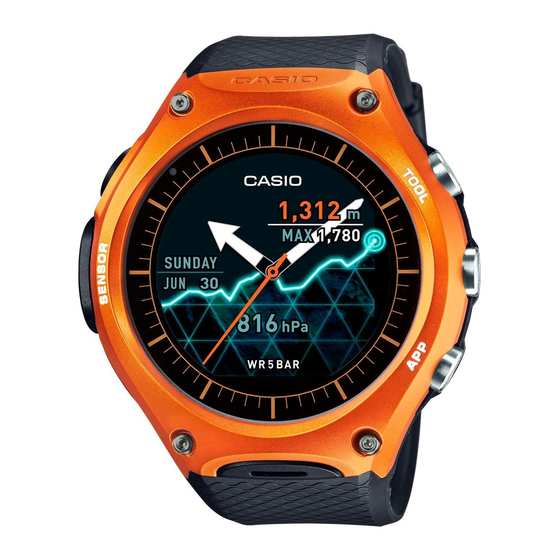
WSD-F10
User's Guide
Thank you for purchasing this watch.
Before trying to use this watch, be sure to read the Safety Precautions in
the Quick Start Guide that comes with the watch. Make sure you use the
watch correctly.
Be sure to keep this manual handy for future reference.
This watch can pair with a smartphone, tablet, or other device (all referred
●
to as "smartphone" in this manual) running Android
8.2 or above. The operations and other details of your watch and
smartphone may differ from those described in this manual, depending on
the smartphone's operating system type or version, the version of Android
Wear
installed on the smartphone, and the version of Android Wear
™
operation system running on this watch.
™
© 2016 CASIO COMPUTER CO., LTD.
4.3 or above or iOS
EN
Advertisement
Table of Contents

Subscribe to Our Youtube Channel
Related Manuals for Casio WSD-F10


Summary of Contents for Casio WSD-F10
- Page 1 Android Wear installed on the smartphone, and the version of Android Wear ™ operation system running on this watch. © 2016 CASIO COMPUTER CO., LTD.
- Page 2 CASIO COMPUTER CO., LTD. shall not be held liable for any loss or ● lost profits due to loss of data caused by malfunction or maintenance of this product, or any other reason.
-
Page 3: Table Of Contents
Contents Watch Features ................. EN-4 Measurement Functions ..............EN-6 Overview .................... EN-8 Getting Ready ................... EN-9 Pairing with Another Smartphone ..........EN-13 Basic Operations (Android Wear) ..........EN-14 Turning Power On or Off ............. EN-14 Home Screen ................EN-15 Wake Up ..................EN-15 Home Screen Icons .............. - Page 4 ....................EN-74 Basic Activity App Operations ............ EN-75 Screen while Measurement is in Progress ........EN-79 Common CASIO App and CASIO Watch Face Settings ....EN-82 Performing Compass Calibration (Magnetization Correction) ..EN-82 Calibrating Barometric Pressure Readings ......... EN-83 Calibrating Altitude Readings .............
- Page 5 Using the CASIO MOMENT SETTER+ App on a Smartphone (Android Only) ....................EN-91 Installing the CASIO MOMENT SETTER+ App on a Smartphone ....................EN-92 Watch Face Switching and Advanced Setting Configuration ..EN-93 TOOL Button and TOOL App Settings ........EN-95 APP Button Settings ..............
-
Page 6: Watch Features
Dual-layer LCD for Improved Readability Your watch has both a color LCD and a monochrome LCD. CASIO app operations are designed to use either the color or the monochrome LCD. The monochrome LCD makes display contents easier to read when outdoors under sunlight. - Page 7 Linking with an EX-FR100 Camera Your watch can link with a CASIO EX-FR100 camera so you can control camera operations from the watch. For details, visit the CASIO website below.
-
Page 8: Measurement Functions
Measurement Functions Your watch can take barometric pressure, altitude, bearing, and other readings. Its built-in watch faces and applications can use readings for display and other useful functions. Note that this watch is not a special purpose measuring instrument. Readings produced by measurement functions are intended as general reference information only. - Page 9 Altimeter, Barometer The watch’s Altimeter use a pressure sensor to measure barometric pressure, and then calculates and displays relative altitude based on the measured value. Because of this, readings taken at different times at the same location may produce different altitude values due to changes in temperature, humidity, barometric pressure, and other factors.
-
Page 10: Overview
Overview Package Contents Watch, AC adaptor, charger cable, Quick Start Guide, warranty General Guide ① ② ⑤ ⑥ ③ ⑦ ④ ⑧ A Charge LED B Charger terminal C Pressure sensor D Microphone E TOOL button F Power button G APP button H Touch screen EN-8... -
Page 11: Getting Ready
Getting Ready After reading the “Safety Precautions” in the “Quick Start Guide”, perform the steps below. Before using this watch for the first time, perform steps 1. through 4. below in sequence. 1. Charge the Watch Connect the provided charger cable to the AC adaptor, and then plug the AC adaptor into a power outlet. - Page 12 3. Install the CASIO MOMENT SETTER+ App on the Smartphone (Android Only) If you are using an Android smartphone, be sure to install “CASIO MOMENT SETTER+” app in order to be able to use all of the functionality provided by this watch.
- Page 13 This does not indicate malfunction. If this happens, wait for a while and then try starting up the CASIO MOMENT SETTER+ app or try operating the watch again. Wait until the “Installation is complete.”...
- Page 14 Follow the instructions that appear on the watch and smartphone screens to complete the operation. If you experience problems with configuring pairing settings, visit ● the website below. http://support.casio.com/wsd/ You can also find useful information by tapping “PAIRING HELP” on the Android Wear app screen. EN-12...
-
Page 15: Pairing With Another Smartphone
Pairing with Another Smartphone Your watch can be paired with a single smartphone at any time. Before pairing with a different smartphone, perform the steps below to unpair with the current smartphone. 1. Hold down the power button for about two seconds to display a list of apps. -
Page 16: Basic Operations (Android Wear
Basic Operations (Android Wear) This section explains basic operations of the Android Wear operating system that your watch uses. Important! Note that the operations described here are subject to change due to the ● type and version of the operating system being used by the smartphone connected with the watch, changes that occur when the watch’s operating system is updated, and other factors. -
Page 17: Home Screen
Home Screen The watch face screen is the Home Screen, which is the starting point of a variety of different operations. While the Home Screen is displayed, you can view notifications on a “card”, and launch operations using voice commands. The screenshot below shows the Home Screen with a card displayed. -
Page 18: Using The Settings
Using the Settings Settings can be used to adjust touch screen brightness and other settings, to unpair with a smartphone, and perform other operations. You can use any of the operations below to start up Settings. Hold down the power button for about two seconds to display a list of apps. ●... - Page 19 Adjust Use this setting to select a value that sets the touch brightness screen brightness. Change watch Use this setting to select the watch face that appears face on the Home Screen. Font size Use this setting to select one of three system font sizes. Gestures Specifies whether or not watch operations can be performed by rotating the wrist.
-
Page 20: Notifications (Card And Vibration
Notifications (Card and Vibration) When the watch receives a notification from the smartphone (incoming mail, Google Now ™ notification, app notification, etc.), the watch displays a card and vibrates. Smartphone and watch settings can be configured to control what is notified and how notification is performed. Note Notification settings and operations depend on the connected smartphone ●... - Page 21 1. Open up the Android Wear app on your smartphone. 2. Tap D. 3. Tap “Block app notifications”. Important! Blocking notification from any CASIO app will block notification from all ● CASIO apps. Also, unblocking CASIO MOMENT SETTER+ app notifications unblocks all CASIO app notifications.
-
Page 22: Incoming Phone Call Notifications
Incoming Phone Call Notifications When a phone comes in on the smartphone, the watch displays a notification and vibrates. If the caller’s number is registered in contacts, the watch will display the caller’s name and image (when one is available). To accept the incoming call, swipe the touch screen from right to left. -
Page 23: Temporarily Boosting Touch Screen Brightness
Temporarily Boosting Touch Screen Brightness Press the power button three times in quick succession to boost touch screen brightness for about five seconds. You can also perform the steps below. 1. Swipe downwards from the top edge of the Home Screen. - Page 24 To start a voice command operation While the Home Screen is displayed, say “OK Google” while facing the watch. This will display the “Speak now” prompt. Or you could swipe the Home Screen from right to left until “Speak now” is displayed, You can control the watch with voice commands while “Speak now”...
-
Page 25: Using Apps
The applications below are built into the watch under factory default settings. APP Button CASIO app. Use this app to specify the app that starts up when the watch’s APP button is pressed. Fitness application. Records and displays number of steps or activity (walking, running, bicycling, etc.) - Page 26 Note Depending on the smartphone the watch is paired with, some of the apps ● in the list above may not be available, and/or apps other than those above may be available. To start up an app 1. Hold down the power button for about two seconds to display a list of apps.
- Page 27 Example Operation 2: Using Flashlight 1. Hold down the power button for about two seconds to display a list of apps. Next, tap “Flashlight”. This brightly illuminates the entire touch screen. ● To temporarily turn off the light, tap the touch screen. To turn the light ●...
-
Page 28: Adding Apps And Watch Faces
Adding Apps and Watch Faces If your watch is connected with an Android smartphone, you can add watch apps and watch faces. Perform one of the operations below on your Android smartphone. Go to the Android Wear app and tap “Watch faces [MORE]” or “Essential ●... -
Page 29: Available Functions When Not Connected To A Smartphone
Available Functions when not Connected to a Smartphone The functions listed below can be used on the watch even when it is not connected with a smartphone. Date and time display ● Some TOOL app functions (Compass, Barometer, Altimeter) ● Watch face switching ●... -
Page 30: Wi-Fi Connectivity
Wi-Fi connectivity For Android smartphones, you will have access to the greatest number of watch functions while it is connected to Wi-Fi and the smartphone is connected to the Internet. However, note that when using a Wi-Fi connection you need to be aware of the watch’s battery level and your surrounding environment. -
Page 31: Smartphone Location Information Settings
Smartphone Location Information Settings To use your smartphone’s GPS for distance, speed, area, and other measurement settings, perform the following operation on your smartphone: Open “Settings”, tap “Location”, use the switch to turn “Location” on, and then choose “High Accuracy” mode. If your smartphone does not have “High Accuracy”... -
Page 32: Watch Faces
Watch Faces Your watch comes with a total of 19 built-in watch faces: 12 standard Android Wear watch faces, plus seven CASIO original watch faces. You can select any one of these as desired. To change the watch face 1. On the Home Screen, hold your finger on the touch screen for about two seconds until the watch face contracts. -
Page 33: Casio Watch Faces
CASIO Watch Faces Details about the CASIO watch faces that come built in are described below. All of the screens below are those produced when there is a connection between the watch and a smartphone. 2 Layers Watch face that combines easy-to-read monochrome LCD and a color LCD. - Page 34 Note that if you hold your finger down too long, the watch face will contract and enable other watch face settings (see “To change CASIO watch face settings”). ①...
-
Page 35: World Time
World Time Shows the time in your current time zone and your Home City. ③ ① ② A Current location time and date, and city name (time zone name) B Time differences between current location and Home City C Home City current time and date, and city name (time zone name) Altitude Shows the high altitude recorded on the watch, and altitude changes for the past 24 hours. - Page 36 Holding your finger on a dial for a short while will cause the dial to cycle to the next type of data that can be displayed there. Note that if you hold your finger down too long, the watch face will contract and enable other watch face settings (see “To change CASIO watch face settings”). ① ②...
- Page 37 Holding your finger on a dial for a short while will cause the dial to cycle to the next type of data that can be displayed there. Note that if you hold your finger down too long, the watch face will contract and enable other watch face settings (see “To change CASIO watch face settings”). ③ ①...
- Page 38 Combination Combination display of a color altitude graph and analog watch. ③ ① ④ ② A Altitude changes for the past 24 hours (graph) B Current barometric pressure C Current altitude D High altitude recorded on the watch to date EN-36...
- Page 39 Waking up the watch will return to the original watch face. Refer to the following for information about correcting data displayed by ● CASIO watch faces: “Calibrating Barometric Pressure Readings” (barometer), “Calibrating Altitude Readings”...
-
Page 40: Casio Watch Face Settings
CASIO Watch Face Settings Many CASIO watch face settings affect both the watch face and CASIO apps. For example, if you use the watch face operation to change the “Monochrome Display” setting, the change will also be reflected by CASIO apps. - Page 41 MAX Altitude Reset (See “To reset the high altitude value ● displayed by the “Altitude” and “Combination” watch faces”.) *1 “Correct Altitude Using Location” is displayed only when the watch is connected to an Android smartphone that has CASIO MOMENT SETTER+ installed. EN-39...
- Page 42 Android smartphone: ● Tapping “Home City” in step 3 automatically displays the home city selection screen of the CASIO MOMENT SETTER+ app on the smartphone. The home city you select on your smartphone will also be reflected on the watch.
- Page 43 To reset the high altitude value displayed by the “Altitude” and “Combination” watch faces 1. Use the procedure under “To change the watch face” to change the watch face to “Altitude” or “Combination”. 2. Hold your finger on the touch screen for about two seconds.
-
Page 44: Using The Tool App (Tool Button
Using the TOOL App (TOOL Button) The TOOL app is a built-in app by CASIO. It provides the six functions described below. Compass Indicates directions and your bearing. Altimeter Measures altitude. You can also view changes in altitude over the past 24 hours as a graph. - Page 45 Barometer Measures barometric pressure. You can also view changes in barometric pressure over the past 24 hours as a graph. Sunrise/sunset Shows the sunrise and sunset times and azimuths for your current location. Tide Graph *1 *2 Shows a tide graph of a preset point (port). This can be used as reference information for fishing.
- Page 46 *1 Can be used only while the watch is connected with an Android smartphone that has CASIO MOMENT SETTER+ app installed. Cannot be used with an Android smartphone without CASIO MOMENT SETTER + app installed or with an iPhone. *2 Requires configuration of settings using CASIO MOMENT SETTER+ app.
-
Page 47: Basic Tool App Operations
Graph display is disabled under initial default watch settings, regardless of whether or not the watch is connected with an Android smartphone. You can use the CASIO MOMENT SETTER+ smartphone app (Android ● only) to specify which tools are called up and their call up sequence when the TOOL button is pressed. - Page 48 Units Changing the Unit Setting *1 “Correct Altitude Using Location” is displayed only when the watch is connected to an Android smartphone that has CASIO MOMENT SETTER+ installed. *2 Tapping “Port setting” displays the “Tide Graph point” screen of the CASIO MOMENT SETTER+ app on your smartphone.
-
Page 49: Tool App Color Display And Monochrome Display
TOOL App Color Display and Monochrome Display You can switch the TOOL app screen between color display and monochrome display. Outdoors in bright sunlight, the monochrome display provides better readability than the color display. To switch between color display and monochrome display Hold down the TOOL button for about three seconds. -
Page 50: Using Compass
Using Compass Compass indicates direction and your bearing as shown below. Color Display ① ② Monochrome Display ③ ④ ⑤ A The center of the face shows letters indicating the bearing that the watch’s 12 o’clock position is pointed, as well as an angle indicating how many degrees there are between 12 o’clock and north (0°). - Page 51 To lock the direction You can use Compass to lock the indicated direction to help you maintain a specific bearing while trekking, etc. While the watch’s 12 o’clock position is pointed in the direction you want, tap the touch screen. * If the watch’s 12 o’clock position deviates from the locked direction, the amount of the deviation will be indicated in blue, as shown here.
- Page 52 Magnetic North and True North North indicated by this watch under initial default settings is magnetic north. If you want the watch to indicate true north, you need to use an Android smartphone to configure required settings. See “TOOL Button and TOOL App Settings”...
-
Page 53: Using Barometer
Using Barometer Your watch displays barometric pressure based on readings taken by a built- in barometric pressure sensor. Color Display ① ③ ② ④ Barometer screen ⑤ ⑥ ③ ⑦ ④ Barometric pressure graph screen EN-51... - Page 54 Monochrome Display ⑧ ⑨ ⑩ A Current barometric pressure indicated by an arrow. The range of scale values shown will change in accordance with the current barometric pressure. B Shown when the barometric pressure is within the range of 900 to 1,100 hPa.
- Page 55 To switch the color display screen On the barometer screen, swiping from right to left changes to the barometric pressure graph. Swiping the graph screen from left to right displays the barometer screen. Calibrating Barometric Pressure Readings Manually Though the pressure sensor built into the watch is adjusted at the factory, and normally does not require calibration, you can perform the calibration operation if you notice that readings are very different from those from other sources.
-
Page 56: Using Altimeter
Using Altimeter Your watch displays relative altitude values based on air pressure readings taken by a built-in pressure sensor. Color Display ① ② ③ Altimeter screen ④ ⑤ ② ⑥ ③ Altitude graph screen EN-54... - Page 57 Monochrome Display ⑦ ⑧ ⑨ A Current altitude indicated by an arrow. The range of scale values shown will change in accordance with the current altitude. B Current altitude. C Current time. D High altitude over the past 24 hours. E Graph of altitude change over the past 24 hours (Horizontal Axis: Time;...
- Page 58 To switch the color display screen On the altimeter screen, swiping from right to left changes to the altitude graph. Swiping the graph screen from left to right displays the altimeter screen. Calibrating Altitude Readings Manually Frequent “Altitude Calibration” by manually inputting locally indicated altitude values is recommended in order to lessen the difference between altitude readings produced by this watch and those shown by local indications.
- Page 59 Before Using Altimeter You can configure the watch’s Altimeter to use smartphone position ● information (GPS) to correct altitude readings automatically. To use auto altitude correction, you need to first perform the following operation (Android smartphone only): Open “Settings”, tap “Location”, use the switch to turn “Location”...
- Page 60 Altimeter Precautions Do not use this watch while skydiving, hang gliding, paragliding, gyrocopter ● flying, glider flying, or engaged in other activities where altitude changes suddenly. Altitude readings produced by this watch are not intended for special- ● purpose or industrial level use. In an aircraft, the watch measures the in-cabin pressurized air pressure, so ●...
- Page 61 Displayed Altitude Values (Relative Altitude) The two ways to express altitude are described below. ① ② Sea level Relative Altitude: This is the difference in the altitudes between two locations. Example: Height measured from the ground to the top of a building (A) Sea Level Altitude (Elevation): Altitude measured from sea level.
-
Page 62: Using Sunrise/Sunset (When Connected With An Android Smartphone Only
Using Sunrise/sunset (When connected with an Android smartphone only) Shows the sunrise and sunset times and directions for your current location. Color Display ① ③ ② ④ ⑤ Time Screen ⑥ ⑦ ⑧ ⑤ Azimuth Screen EN-60... - Page 63 Monochrome Display ⑨ ⑩ A Sunrise time. B Nautical twilight start time before sunrise. C Sunset time. D Nautical twilight end time after sunset. E Current time. F Arrow indicating north. G Sunrise azimuth and time. H Sunset azimuth and time. I Alternates at 10-second intervals between sunrise time and sunset time.
- Page 64 Before Using Sunrise/sunset This function uses smartphone location information. Be sure to perform the following operation: Open “Settings”, tap “Location”, use the switch to turn “Location” on, and then choose “High Accuracy” mode. Nautical Twilight Twilight is the time when the sky brightens as the sun is at or just below the horizon (water horizon or visible horizon).
-
Page 65: Using Tide Graph (When Connected With An Android Smartphone Only
Using Tide Graph (When connected with an Android smartphone only) The Tide Graph screen shows tide information for a specific point (port). A Fishing Time screen indicates optimum fishing times based on the Moon age and Moon hour angle of your current location. Color Display ①... - Page 66 Monochrome Display ⑧ ⑨ A Shows the next high tide level and time for the 12-hour period starting from the current time. B Graphic indication of tide levels for the previous 12-hour period and the following 12-hour period starting from the current time (24 hours total). Orange characters shows current time and tide level.
- Page 67 Before Using Tide Graph To use the Tide Graph screen, you need to use the CASIO MOMENT ● SETTER+ smartphone app (Android only) to specify the point (port) whose tide information you want to view. See “TOOL Button and TOOL App Settings”...
- Page 68 Interpreting Fishing Time Screen Contents Fish Marks (Projected Probability of Fishing Success Indicators) The number of fish marks on the Fishing Time screen indicates the projected probability of fishing success. Anywhere from zero to four fish marks are displayed, and more fish marks indicate that better success can be expected. Note however, that this in no way specifically guarantees your fishing success.
- Page 69 Current Date’s Optimum Predicted Fishing Time Period The Fishing time Screen shows two orange time periods centered on hour angles 00:00 and 12:00, and two blue time periods centered on hour angles 06:00 and 18:00. Each region indicates periods during which optimum fishing can be expected.
- Page 70 Current Month’s Hour Angle and Moon Age Indications The location of the Moon indicator on the Fishing Time screen shows the current hour angle of the Moon, while the shape of the indicator shows the current Moon age. In the screen shown above, for example, the current Moon hour angle is 22:00 (12 o’clock position = hour angle 00:00, 6 o’clock position = hour angle 12:00), while the Moon age is 21.3 to 23.1.
-
Page 71: Using My Graph (When Connected With An Android Smartphone Only
Using My Graph (When connected with an Android smartphone only) My Graph shows a graphic representation of your activities on the current day. It shows the type of activity you performed and when you performed it. Color Display ① ③ ②... - Page 72 Monochrome Display ⑤ ⑥ A Current time. B Circle graph showing the current status of four types of activities starting from midnight of the current day. C Shows current number of calories burned, starting from midnight of the current day (under default settings). You can also change settings to show number of steps or other information.
- Page 73 My Graph is disabled (B) under initial default watch settings. You must enable My Graph ( ) if you want to use it. For more accurate calories burned calculation, you should input physical profile information. Use the CASIO MOMENT SETTER+ smartphone app (Android only) to perform these operations. For more information, see “TOOL Button and TOOL App...
- Page 74 Interpreting Graph Screen Data Four concentric circles correspond to four activity types (rest, walking, running, riding). Engaging in one of the four activities causes a color coded arc to appear within the activity’s circle. ① ② ③ ④ A Time period running. B Time period walking.
-
Page 75: Using The App Button
Using the APP Button Pressing the watch’s APP button starts up the app you assigned to it. You can use the steps below to change the app assigned to the APP button. 1. Hold down the power button for about two seconds to display a list of apps. -
Page 76: Using The Activity App (When Connected With An Android Smartphone Only
Using the Activity App (When connected with an Android smartphone only) The Activity app is a CASIO Android Wear app. It measures the time you spend engaged in three different activities (mountain climbing/trekking, fishing, cycling). You can also use the CASIO MOMENT SETTER+... -
Page 77: Basic Activity App Operations
Basic Activity App Operations To start up the Activity app Hold down the power button for about two seconds to display a list of apps. Next, tap “Activity”. To switch between activity types Start up the Activity app and display the START screen (no timing operation in progress). - Page 78 Correct Altitude Using Location Barometric Pressure Calibration Calibrating Barometric Pressure Readings Units Changing the Unit Setting *1 “Correct Altitude Using Location” is displayed only when the watch is connected to an Android smartphone that has CASIO MOMENT SETTER+ installed. EN-76...
- Page 79 To start activity timing 1. Display the START screen of the activity whose timing you want to start. 2. If you display the “Climbing, trekking” START screen, tap “GOAL”. On the screen that appears, input your target altitude and then tap “SET”. 3.
- Page 80 To stop activity timing 1. On the timing screen, swipe the touch screen from right to left. 2. Tap “STOP”. This stops measurement and returns to the START screen. ● Note The Activity app automatically shuts down when 20 hours elapse after a ●...
-
Page 81: Screen While Measurement Is In Progress
Screen while Measurement is in Progress Climbing, trekking ① ② ③ ④ ⑤ A Difference in altitude between the current reading and the reading 60 minutes before. If the current measurement was started less than 60 minutes ago, this value shows an approximate 60-minute value calculated based on the current reading and the first reading. - Page 82 Fishing ① ② ③ ④ A An arrow indicates barometric pressure change between the current 10- minute average and the previous 10-minute average. The arrow is not displayed when there is no change. The value shows the current barometric pressure. B Current time.
- Page 83 Cycling ① ② ③ ④ A Current traveling speed. B Current time. C Cumulative distance traveled from start of measurement. D Time elapsed from start of measurement. Note Since speed and distance traveled are measured using the smartphone’s ● GPS function, location measurement error may result in measured value error.
-
Page 84: Common Casio App And Casio Watch Face Settings
Common CASIO App and CASIO Watch Face Settings A number of functions, such as Compass and Altimeter are common for both CASIO apps and CASIO watch faces. This section explains settings that are reflected both in CASIO apps and CASIO watch faces. Performing Compass Calibration (Magnetization... -
Page 85: Calibrating Barometric Pressure Readings
You will need another accurate barometer to take current readings at your location, which you can input for correction. 1. What you should do first depends on whether you are starting from a CASIO app or watch face that displays barometric pressure. From a CASIO Watch Face: ●... - Page 86 4. After the value is the way you want, swipe the touch screen from left to right to return to the setting menu. 5. To close the setting menu, swipe the touch screen from left to right. Note To reset the correction value and return to barometric pressure readings ●...
-
Page 87: Calibrating Altitude Readings
Note “Correct Altitude Using Location” is displayed only when the watch is ● connected to an Android smartphone that has CASIO MOMENT SETTER + installed. When “ON” is selected for the “Correct Altitude Using Location” setting, the ●... - Page 88 To perform altitude reading calibration manually 1. What you should do first depends on whether you are starting from a CASIO app or watch face that displays altitude. From a CASIO Watch Face: ● While the “Altitude”, “Authentic”, “Field”, “Multi”, or “Combination”...
- Page 89 4. On the altitude input screen that appears, input the elevation at your current location (which you obtained from local indications). Tap the digit of the value that you want to change, and then tap ● to change it. 5. After the value is the way you want, swipe the touch screen from left to right to return to the setting menu.
- Page 90 To reset the altitude calibration value 1. Perform steps 1 through 3 under “To perform altitude reading calibration manually”. 2. Tap C. Important! Using the above procedure to reset the correction value causes the watch ● to display altitude values that are simply calculated based on International Standard Atmosphere (ISA) definitions.
-
Page 91: Changing The Monochrome Display Setting
Changing the Monochrome Display Setting You can select how the watch’s monochrome LCD displays data. This setting is applied to all of the displays below. “2 Layers” monochrome CASIO Watch Face display ● All function monochrome displays of the TOOL app ●... -
Page 92: Changing The Unit Setting
Changing the Unit Setting You can change the measurement units used when a CASIO app and watch face displays altitude, distance, barometric pressure, and other values. This setting affects all CASIO apps and watch faces that display values in the applicable units. -
Page 93: Using The Casio Moment Setter+ App On A Smartphone (Android Only
Using the CASIO MOMENT SETTER+ App on a Smartphone (Android Only) Important! If you are using an Android smartphone, be sure to install CASIO MOMENT ● SETTER+ app in order to be able to use all of the functionality provided by this watch. -
Page 94: Installing The Casio Moment Setter+ App On A Smartphone
This does not indicate malfunction. If this happens, wait for a while and then try starting up the CASIO MOMENT SETTER+ app or try operating the watch again. Wait until the “Installation is complete.”... -
Page 95: Watch Face Switching And Advanced Setting Configuration
Watch Face Switching and Advanced Setting Configuration Use the procedures in this section to switch to any one of the original CASIO watch face designs and to configure watch face settings. To switch to another watch face 1. Y On your Android smartphone, start up CASIO MOMENT SETTER+ app and then tap “Watch faces”. - Page 96 To change watch face settings 1. Y On your Android smartphone, start up CASIO MOMENT SETTER+ app and then tap “Watch faces”. 2. Y Use the left (<) and right (>) arrows on either side of the screen or swipe the touch screen left and right to scroll though the available watch faces, and display the one whose settings you want to change.
-
Page 97: Tool Button And Tool App Settings
TOOL button is pressed. You can also configure settings that control watch functions. 1. Y On your Android smartphone, start up CASIO MOMENT SETTER+ app and then tap “Buttons”. 2. Y Tap “TOOL Button” to display a list of TOOL app functions that can be assigned. - Page 98 Function Setting item Description Compass Compass settings Select to turn magnetic declination on or off. The compass indicates true north when on, and magnetic north when off. Altimeter Altimeter settings Select to specify whether or not to correct altitude (elevation) using GPS information for your current location.
-
Page 99: App Button Settings
You can use the procedure below to specify the watch app that starts up when the APP button is pressed. 1. Y On your Android smartphone, start up CASIO MOMENT SETTER+ app and then tap “Buttons”. 2. Y Tap “APP Button” to display a list of installed watch apps. -
Page 100: Registration Details
Registration Details The “Save daily activity records” setting must be enabled in order to use “My Graph”. Enabling “Save daily activity records” increases power consumption, so it is recommended that you disable it when not using My Graph. 1. Y In the upper left corner of the screen, tap . -
Page 101: Using Moment Setter
Using MOMENT SETTER MOMENT SETTER lets you configure the watch to display specific information in accordance with timing specified by you. MOMENT SETTER is designed mainly to be used while an Activity app measurement operation is in progress. For example, you can use MOMENT SETTER as described below. - Page 102 Important! To receive alerts from the selected MOMENT SETTER items, a watch ● Activity app of the same category of the selected MOMENT SETTER items must be performing a measurement. However, in the case of MOMENT SETTER items included in the “Extras” category, alerts are issued when specified conditions are met, even if an Activity app operation is not in progress.
- Page 103 Practical Application 1: Using the “Climbing, trekking”: “Every 1000 steps, display "Take a break.".” MOMENT SETTER item 1. Y On your Android smartphone, start up CASIO MOMENT SETTER+ app and then tap 2. Y Tap “Climbing, trekking”. 3. Y Scroll the menu downwards, and then tap the checkbox to the left of “Every 1000 steps, display "Take...
- Page 104 8. X Tap “START”. This starts measurement and displays the “Climbing, trekking” timing ● screen. A step count for mountain climbing or trekking is started from this point, ● so the message “Take a break.” (or another message you specified in step 5) will appear every 1,000 steps (or the number of steps you specified in step 5).
- Page 105 Practical Application 2: Using the “Cycling”: “When stopped, display the distance travelled thus far.” MOMENT SETTER item 1. Y On your Android smartphone, start up CASIO MOMENT SETTER+ app and then tap 2. Y Tap “Cycling”. 3. Y Scroll the menu downwards, and then tap the checkbox to the left of “When stopped, display the...
- Page 106 7. X Press the power button to return to the Home Screen (watch face screen). Leaving the Activity app timing screen on the display may cause you ● to miss MOMENT SETTER notifications. To avoid this, return the watch to the Home Screen at this time. To display the Activity app timing screen again, perform the steps ●...
- Page 107 Practical Application 3: Using the “Extras”: “When phone battery becomes 20 % or lower, display a low battery alert.” MOMENT SETTER item 1. Y On your Android smartphone, start up CASIO MOMENT SETTER+ app and then tap 2. Y Tap “Extras”.
-
Page 108: Using The Timepiece App
Using the Timepiece App Running the Timepiece app enters the Timepiece Mode and displays the current time on a monochrome screen. All other non-timekeeping watch functions are disabled. The Timepiece Mode consumes very little power, so you can use the watch for normal timekeeping while conserving battery power. - Page 109 To enter the Timepiece Mode 1. Hold down the power button for about two seconds to display a list of apps. Next, tap “Timepiece”. This displays the Timepiece Mode confirmation screen. ● 2. Read the explanation on the screen, swiping from right to left as required to change pages.
- Page 110 6. On the confirmation message that appears, tap Shutting down Android Wear enters the Timepiece Mode and displays ● the current time on a monochrome screen. To illuminate the display in Timepiece Mode Press (and immediately release) the power button. This will illuminate the display for about two seconds.
-
Page 111: Monochrome Lcd Screen
Monochrome LCD Screen Your watch has a dual-layer color and monochrome LCD. Switching between monochrome and color LCD screens can be performed manually, but it is also performed automatically in certain cases. The following section explains when the watch displays the monochrome LCD screen. After entering the Timepiece Mode The watch will use the monochrome LCD screen to display the current time after you enter the Timepiece Mode by running the Timepiece app (see... - Page 112 While the “2 Layers” watch face is selected While the “2 Layers” watch face is selected (see “CASIO Watch Faces”), the monochrome LCD screen will display the current time after the watch is left idle for some time. Display Operations Tapping the touch screen while ●...
- Page 113 While “Always-on screen” is OFF While OFF is selected for the “Always-on screen” setting on the Settings screen (see “Using the Settings”), the watch uses the monochrome LCD screen to display the current time after the watch is left idle under the conditions below.
- Page 114 When the charge level drops below 5% The watch will switch to current time display using the monochrome LCD screen whenever its charge level drops below 5%, regardless of the currently selected watch face type and display settings. Display Operations Tapping the touch screen while ●...
- Page 115 While the watch is in Doze mode The watch will display the current time using the monochrome LCD screen while in Doze mode (see “Doze Mode”). Display Operations Tapping the touch screen while ● the monochrome LCD screen is shown will switch to the color LCD screen.
- Page 116 While Android Wear operation is stopped due to a low charge level The watch displays the current time using the monochrome LCD screen for a while after Android Wear operation is stopped due to a low charge level. Display Operations Though this screen has the same ●...
-
Page 117: Error Code And Error Message List
Power about 12 seconds until the display goes white. will turn off shortly. 9001, 9002, 9003 Take your watch to an authorized CASIO Some problem occurred service center or to your original retailer for with the watch. Power inspection and repair. -
Page 118: Restoring Watch Operation
Restoring Watch Operation If you find that the watch will not operate normally, perform the steps below to restart the watch and then try the operation again. 1. Hold down the power button for about two seconds to display a list of apps. 2. -
Page 119: Precautions During Use
Precautions During Use Display Information Accuracy Tide Graph Precautions For Japan area oceans, tide times and level changes are predictively calculated using harmonic constant data obtained from Bibliography 742 Tidal Harmonic Constants Tables, Japanese Coast (February 1992) published by the Hydrographic Department of the Japan Coast Guard, and from the List of Tidal Stations (2015) published by the Japan Meteorological Agency. -
Page 120: Water Resistance
CASIO service center or to your original retailer. Do not charge the watch if the watch or charger cable is wet. Wipe off all ●... - Page 121 MIL-STD-810G This watch has been tested for the items described below in accordance with the MIL-STD-810G standard established by the U.S. Department of Defense. Shock resistance is based on the assumption of normal daily use. Throwing ● the watch, or subjecting it to excessive dropping or other extreme shock can cause it to break.
- Page 122 Take your watch to an authorized CASIO service center or to your original retailer for inspection and repair (for which you will be charged) or to have the band replaced (for which you will be charged).
- Page 123 Temperature Never leave your watch on the dashboard of a car, near a heater, or in any ● other location that is subject to very high temperatures. Do not leave your watch where it will be exposed to very low temperatures. Doing so can cause malfunction.
- Page 124 Resin Components Allowing your watch to remain in contact with other items or storing it ● together with other items for long periods while it is wet can cause color on resin components to transfer to the other items, or the color of the other items to transfer to the resin components of your watch.
-
Page 125: Liquid Crystal Display
Metal Components Failure to clean dirt from metal components can lead to formation of rust, ● even if components are stainless steel or plated. If metal components exposed to sweat or water, wipe thoroughly with a soft, absorbent cloth and then place the watch in a well-ventilated location to dry. -
Page 126: User Maintenance
● pins to fly out of position or to fall out. If you ever notice any abnormality immediately stop using your watch and take it to an authorized CASIO service center or to your original retailer. Even if the surface of the metal appears clean, sweat and rust in crevasses ●... - Page 127 Premature Wear Leaving sweat or water on a resin band or bezel, or storing your watch in ● an area subject to high moisture can lead to premature wear, cuts, and breaks. Skin Irritation Individuals with sensitive skin or in poor physical condition may experience ●...
-
Page 128: Main Specifications
Main Specifications 1.32-inch dual layer display, Color TFT LCD (320 × 300 pixels) + ● Monochrome LCD Capacitive touch panel ● Sensors: Pressure sensor, Accelerometer, Gyrometer, Magnetic sensor ● Microphone ● Vibration ● Battery: ● Type: Lithium-ion battery Charging time: Approximately 2 hours at room temperature (Be sure to use the special charger cable and AC adaptor.) Operating time on full charge... - Page 129 Full auto-calendar: Auto switching by linking with smartphone Summer time: Auto switching by linking with smartphone Watch faces: Selectable from among 19 types (Google 12, CASIO 7) Other Functions: Stopwatch, Countdown timer, Daily alarm *2 *3 ● TOOL App: ●...
- Page 130 Altimeter: Measurement range: –700 to 10,000m (–2,300 to 32,800ft) Measurement unit: 1m (5ft) Measurement accuracy: within ±75m (within ±250ft) (When frequent manual calibration is performed) Shortest measurement interval: 1 minute Altitude graph: Past 24 hours Manual altitude correction, Auto altitude correction using location information *4 *5 Barometer:...
- Page 131 Charger (AC adaptor): ● AD-W50100U1 Power supply: INPUT: AC 100V to 240V 50Hz/60Hz OUTPUT: 5.0V/1.0A Power consumption: 160 mA AD-C54UG Power supply: INPUT: AC 100V to 240V 50Hz/60Hz OUTPUT: 5.0V/650mA Power consumption: 90 mA Charger cable: ● Length Approximately 0.75m (2.46ft) Type: AC adaptor USB A TYPE Included accessories: Charger (AC adaptor), Special charger cable, Quick ●...
- Page 132 About MIL-STD 810G (United States military standard issued by the U.S. ● Department of Defense): Description: 1. Drop 2. Random Vibration 3. Humidity 4. Solar-Radiation 5. Non-Operating Altitude 6. Operating Altitude 7. Non-Operating High Temperature 8. Non-Operating Low Temperature 9. Temperature Shock 10.
- Page 133 *2 Snooze Feature *3 Vibration alert only without alarm sound. *4 iOS not supported. (It is necessary to install “CASIO MOMENT SETTER +” on an Android smartphone.) *5 GPS altitude information is used, so the indicated altitude may not exactly match the actual above sea level elevation or altitude.
-
Page 134: Chargeable Battery Handling
For information about the proper procedure to follow when discarding the watch, contact an authorized CASIO service center or your original retailer. Protecting Your Private Information when Discarding the... -
Page 135: Supplementary Information
Supplementary Information Open Source Information CASIO uses GPL, LGPL and other source code that comes under an open source license in this product. CASIO discloses the source code in accordance with each open source license. For source codes and details about each open source license, visit the CASIO website. -
Page 136: Regulatory Information
Regulatory Information Your watch is a device that supports electronic way of display. To display regulatory information, perform the steps below. 1. Hold down the power button for about two seconds to display a list of apps. 2. Scroll the screen downwards and then tap in the following sequence: “Settings”... - Page 137 This device complies with part 15 of FCC Rules and Industry Canada’s licence-exempt RSSs. Operation is subject to the following two conditions: (1) this device may not cause harmful interference, and (2) this device must accept any interference received, including interference that may cause undesired operation.
- Page 138 Some studies have suggested that some biological effects might occur, but such findings have not been confirmed by additional research. The WSD-F10 has been tested and found to comply with FCC/IC radiation exposure limits set forth for an uncontrolled environment and meets the FCC radio frequency (RF) Exposure Guidelines and RSS-102 of the IC radio frequency (RF) Exposure rules.
- Page 139 CASIO COMPUTER CO., LTD. 6-2, Hon-machi 1-chome Shibuya-ku, Tokyo 151-8543, Japan S02_MA1605-A...
Need help?
Do you have a question about the WSD-F10 and is the answer not in the manual?
Questions and answers