
Related Manuals for Mira FORM


Summary of Contents for Mira FORM
- Page 1 MIRA FORM SHOWER CONTROL Installation & User Guide These instructions are to be left with the user...
-
Page 2: Table Of Contents
CONTENTS Introduction ..................... 3 Safety:Warnings ..................3 Pack Contents ..................4 Dimensions ..................... 6 Specifications ..................7 Normal Operating Conditions ..............7 Pressures and Flow Rates ..............7 Temperatures ..................9 Installation Requirements ..............10 Installation ..................... 13 General ....................13 Reversed Inlet Supplies .............. -
Page 3: Introduction
INTRODUCTION The Mira Form Thermostatic mixing valve is specified to meet the highest standards of safety, comfort and economy as demanded by todays users. The Mira Form is designed, manufactured and supported in accordance with accredited BS EN ISO 9001:1994 Quality Systems. -
Page 4: Pack Contents
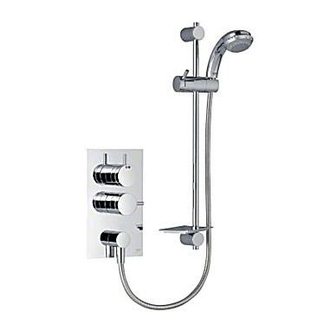
PACK CONTENTS Tick the appropriate boxes to familiarize yourself with the part names and to confirm that the parts are included. Form Mixing Valve 1 x Valve Assembly (with building-in shroud fitted) 1 x 3mm Hexagonal Key 1 x RAC Elbow 1 x 2.5mm Hexagonal Key... - Page 5 Form Fittings 1 x Outlet Support Plate (with low capacity sprayplate fitted) 2 x Wall Plugs 2 x End Supports 1 x High Capacity Sprayplate 1 x Slidebar 1 x Flexible Hose 1 x Clamp Bracket 1 x Soapdish 2 x Hose Seals...
-
Page 6: Dimensions
DIMENSIONS DIMENSIONS 251 mm 184.5 mm 62 mm 6-21 mm when front mounted onto 80 mm a solid, stud wall 4-19 mm when rear mounted onto 310 mm a panel wall 100 mm 75 mm 152 mm 283 mm max. 600 mm... -
Page 7: Specifications
Guidelines/Approved Codes of Practice. If in any doubt as to the suitability of chemical solutions, refer to Kohler Mira Ltd, or Local Agent. Pressures and Flow Rates For optimum performance, dynamic supply pressures should be nominally equal. - Page 8 Mira Form Thermostatic Shower with Fittings Flow Rate / Pressure Loss Graphs Mira Form with the low capacity sprayplate fitted to the handset (Maintained supply pressures are equal and outlet temperature set to mid-blend) Force Economy Start Soothe Flow Rate (litres/minute)
-
Page 9: Temperatures
60-65°C where serving ablutionary applications. Minimum temperature differential between hot and outlet temperature: 10°C. Flow Control The Mira Form shower control has integral flow control; no other user-operated flow control should be used with this shower control. Connections The shower control inlet connections are 15 mm compression (nuts and olives are provided). -
Page 10: Installation Requirements
INSTALLATION REQUIREMENTS Key to Symbols Float operated valve Isolating Valve Mixing Valve Overflow Pressure Reducing Valve Twin Impeller Pump Single Impeller Pump Tempering Valve Mini expansion vessel Gravity Fed Shower - The shower MUST be fed from a cold water cistern and hot water cylinder providing nominally equal pressure. - Page 11 Gas Heated Shower - The shower MUST be installed with a gas water heater or combination boiler of a fully modulating design. A modulating boiler is one that the draw off rate is indirectly controlling the gas flow to the boiler, producing a relatively constant hot water temperature.
- Page 12 Mains Pressurised Instantaneous Hot Water Shower - The shower installed with systems of this type is supplied hot water via a tempering valve, this provides relatively constant hot water and the shower will compensate for temperature changes should they occur. Cold Pumped Shower - The shower can be installed with an inlet pump (twin impeller).
-
Page 13: Installation
INSTALLATION General Installation must be carried out in accordance with these instructions, and must be conducted by designated, qualified and competent personnel. Before commencing, make sure that the installation conditions comply with the information given in section: ‘Specifications’. Care must be taken during installation to prevent any risk of injury or damage. The mixing valve should be positioned for easy access during use and maintenance. -
Page 14: Reversed Inlet Supplies
It is essential the inlet supplies correspond with the red and blue markings on the thermostatic cartridge for the Mira Form to operate correctly. The shower control is supplied with the inlet connections configured hot-left, cold-right. If the existing hot and cold pipework makes this configuration inconvenient the cartridge inlets can be reversed. -
Page 15: Installation: Solid And Dry-Lined Walls
Installation: Solid and Dry-lined Walls Shower Control - Installation The Mira Form can be built into solid, dry-lined, stud partition or dry partition wall structures. All plumbing connections are 15 mm compression. A building-in shroud is supplied, which can provide a depth reference when chiselling out the wall surface and protects the shower control during plastering. - Page 16 Mark the route of the inlet pipework 155mm and the approximate shape of the recess. Remove plaster brickwork/dry-lining to the required 260mm depth using the building-in shroud as 62mm a reference. The wall mounting bracket requires a minimum building-in depth 75mm of 60 mm.
- Page 17 10. Fit the valve and connect the supply Hot and Cold Inlets pipework. Check the hot and cold supplies have been connected to the correct inlets. If necessary the valve inlets can be reversed, refer to Reversed Inlet Supplies for further information.
-
Page 18: Shower Fittings - Installation
End Support Shower Fittings - Installation Slidebar End Drill the two 7.0 mm fixing holes for Fixing Screw the slidebar at 600 mm centres, avoiding any buried cables or pipes, and insert the wall plugs. Assemble the clamp bracket End Support components. -
Page 19: Installation: Panel Walls
Rear Mounted (4 mm to 19 mm thickness) To fit the Form shower control to the rear face of the panel, the panel thickness (including plaster and tiles) must be between 4 mm and 19 mm. - Page 20 Mount the mixing valve securely onto the rear of the panel, with the fixing screws supplied. Note! If access is available it may be preferable to make the initial valve/pipework connections prior to securing the mixing valve to the panel. Important! Always flush through the hot and cold supplies thoroughly before connection to the mixing valve.
- Page 21 Front Mounted (maximum thickness 13 mm) To fit the Form shower control to the front face of a panel, a further finishing layer (e.g. plaster and tiles) must be applied to the panel to cover over the wall mounting plate and fixing screws. This finishing layer can be between 6 mm and 21 mm thick.
-
Page 22: Commissioning
The maximum blend temperature obtainable by the user should be limited, to prevent accidental selection of a temperature that is too hot. All Mira Thermostatic mixing valves are fully performance tested and the maximum temperature is preset to approximately 43 C under ideal installation conditions at the factory. - Page 23 Remove the temperature knob and locknut assemblies. Refer to section: ‘Maintenance, Removing/Fitting Knob and Concealing Plate Assemblies’. Unlock and remove the temperature spindle. Use the 3 mm hexagonal key supplied to undo the locking screw. Rotate the cartridge spindle until the required maximum blend temperature is obtained at the discharge point (clockwise = decrease temperature).
- Page 24 Commissioning Checks (Temperatures should always be recorded with a thermometer with proven accuracy). Check inlet pipework temperatures for correct function of checkvalves i.e. that hot water does not cross flow into the cold supply and vice versa. Check that the supply pressures are within the operating pressures for the valve. Make sure that all connections and mixer body are water tight.
-
Page 25: Operation
OPERATION Mira Form Shower Control The Mira Form shower control has separate controls for temperature and flow. Turn the temperature lever anticlockwise for warmer water or clockwise for cooler water. The preset maximum temperature can be adjusted as required to suit both site conditions and the user's comfort. - Page 26 Mira Form Fittings Handset Spray Adjustment The Mira Form adjustable handset has three different spray actions (start, soothe and force) and an economy setting. Start Start Spray Turn the adjuster ring until the three dots align with top centre of the handset.
-
Page 27: Fault Diagnosis
FAULT DIAGNOSIS Symptom Cause/Rectification a. Inlet supplies are reversed (refer to section: ‘Installation, 1. Only hot or Reversed Inlet Supplies’. Check. cold water b. No hot water reaching shower control. Check. from outlet. c. Check strainers and inlet/outlet fittings for blockage. d. - Page 28 Symptom Cause/Rectification 7. Water leaking Seal(s) worn or damaged. from shower a. Obtain service pack and renew all seals. control body. b. (If leak persists from around temperature spindle) Renew thermostatic cartridge. 8. Flow knob or a. Impaired free movement of internal components. Renew the temperature appropriate cartridge.
-
Page 29: Maintenance
0.5 mm) will reduce the need to remove debris at each mixing valve point. The designed minimum service life of all cartridges used in Mira products is 5 years providing the Mira Form is operated with the recommended operating conditions and within the recommended operating parameters. - Page 30 Components are precision-made, so care must be taken while servicing to avoid damage. When ordering spare parts, please state product type, i.e. Mira Form, and identify part name and number (refer to section: ‘Spare Parts’). A Seal pack is available, containing all the seals that may be necessary for renewal during maintenance or servicing.
- Page 31 Removing/Fitting Knob and Concealing Plate Assemblies Removing the Knob Assembly Rotate the flow knob fully clockwise Locknut and the temperature knob fully Inner anticlockwise. Bush Unscrew the lever cover anticlockwise. Temperature Knob Unscrew lever screw, anticlockwise, and remove the temperature/flow knob. Locknut Unscrew the grub screw using the Trim...
- Page 32 Fitting the Knob Assembly Screw the locknut onto the headnut until it firmly locks the concealing plate in place. Make sure that the ‘O’ seal is fitted to the locknut for a watertight seal between the locknut and Fit the locknut concealing plate.
- Page 33 Fitting the Concealing Plate Assembly Concealing Plate Fit the concealing plate to the valve and secure with the temperature and control knobs. Refer to section: ‘Maintenance, Fitting the Knob Assembly’ for detailed instructions. Note! If the wall surface or tiling is uneven, the foam outer seal on the concealing plate...
- Page 34 Maintenance Procedure - Thermostatic Cartridge Removal Turn off the supplies to the shower control. Open the flow control to release the trapped water pressure and assist the draining of residual water. Remove the temperature and flow knob assemblies, using the 2.5 mm A/F hexagonal wrench (supplied).
- Page 35 Reassembly 11. Identify which is the hot inlet to the shower control body, and align the thermostatic cartridge accordingly. Carefully push the thermostatic cartridge back into the body, checking that the 2 cartridge inlet port seals remain in place, and locate the cartridge lugs into body slots.
- Page 36 Cleaning/Renewal of Parts The inner surface of the shower control body must be clean before refitting the cartridge. If scale or deposition is present, clean (without thermostatic, flow and checkvalve cartridges fitted) using a mild proprietary inhibited scale solvent, e.g. domestic kettle descalent. After descaling, rinse the body thoroughly in clean water before refitting the cartridge.
- Page 37 Checkvalve Cartridges - Cleaning/Renewal of Parts Hot water entering the cold supply, or vice versa, indicates the checkvalve cartridge needs immediate attention. Turn off the supplies to the shower control. Open the flow control to release the trapped water pressure and assist draining the residual water. Remove the control knob and concealing plate assemblies, Refer to section: ‘Maintenance, Removing/Fitting Knob and Concealing Plate Assemblies’.
- Page 38 It is essential that the inlet strainer screens are periodically cleaned or, if necessary, renewed as part of a preventative maintenance programme. A Strainer pack is available for the Mira Form, containing 2 strainer screens and 2 retainers.
- Page 39 Shower Fittings Spray Plate Assembly - Removal and Installation Removal Handset Body Assembly Turn adjuster ring fully anticlockwise. Spray Plate Assembly Unclip and remove the adjuster ring. Unscrew the spray plate in an anti-clockwise direction. The 'O' seals will provide some resistance. Adjuster Ring 'O' Seal Installation...
- Page 40 Sprayplate Cleaning Sprayplate External Assembly Use your thumb or a soft cloth to wipe any limescale from the soft triangular nozzles and the front face of the spray plate assembly. Sprayplate Internal Assembly Remove the spray plate assembly. Refer to section: ‘Maintenance, Spray plate assembly - removal and installation’.
-
Page 41: Spare Parts
SPARE PARTS Shower Fittings Spare Parts List 126.65 Slidebar Ends 411.37 Service Pack 'O' Seals - components identified 'A' 413.22 Adjuster Ring - satin chrome 413.58 Handset Body Assembly - chrome 413.60 Spray Plate Assembly - High capacity - dark grey 413.61 Spray Plate Assembly - Low capacity - dark grey 449.01... - Page 42 Shower Control Spare Parts List 147.67 Outlet Checkvalve Assembly 407.26 Cartridge Removal Clip 427.32 Inlet Checkvalve Assembly 427.33 Filter 427.48 Seal Pack - components identified 'A' 427.50 Compression Nut and Olive Pack 441.54 Spindle Extension 441.55 Headnut 441.56 Flow Cartridge Assembly 441.57 Valve Mounting Bracket 441.58...
- Page 43 427.32 427.33 441.59 441.75 1598 030 427.50 407.26 441.54 441.57 441.56 441.55 441.92 441.93 441.91 441.97 441.98 147.67 441.94 441.95...
-
Page 44: Customer Service
CUSTOMER SERVICE P3704/3 © Kohler Mira Limited, October 2005...
Need help?
Do you have a question about the FORM and is the answer not in the manual?
Questions and answers