Viessmann VITOCAL 200-S Installation And Service Instructions Manual
Hide thumbs
Also See for VITOCAL 200-S:
- Service instructions for contractors (168 pages) ,
- Installation and service instructions manual (160 pages) ,
- Installation and service instructions for contractors (152 pages)
Table of Contents
Advertisement
VIESMANN
Installation and service
instructions
for contractors
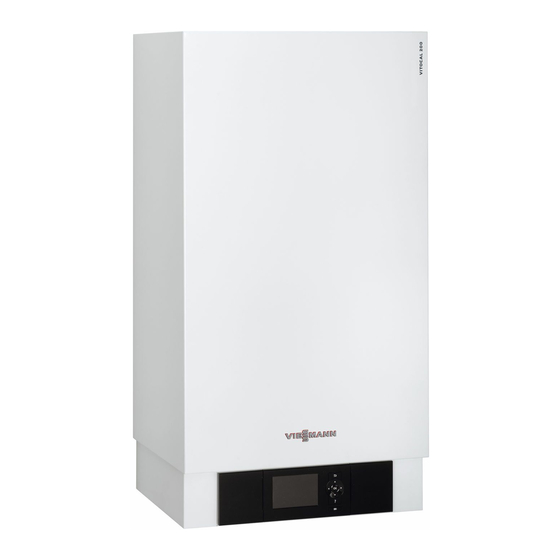
Vitocal 200-S
Type AWB 201.B04 to B13, C10, C13
Air source heat pump, split version for heating operation
Type AWB-AC 201.B04 to B13, C10, C13
Air source heat pump, split version for heating and cooling opera-
tion
For applicability, see the last page
VITOCAL 200-S
Please keep safe.
5782 176 GB
2/2013
Advertisement
Chapters
Table of Contents

Related Manuals for Viessmann VITOCAL 200-S


Summary of Contents for Viessmann VITOCAL 200-S
- Page 1 VIESMANN Installation and service instructions for contractors Vitocal 200-S Type AWB 201.B04 to B13, C10, C13 Air source heat pump, split version for heating operation Type AWB-AC 201.B04 to B13, C10, C13 Air source heat pump, split version for heating and cooling opera-...
-
Page 2: Safety Instructions
Safety instructions Safety instructions Please follow these safety instructions closely to prevent accidents and mate- rial losses. Safety instructions explained ■ Codes of practice of the relevant trade associations. Danger ■ All current safety regulations as This symbol warns against the defined by DIN, EN, DVGW, VDE and risk of injury. - Page 3 Repairing components that fulfil a safety function can compromise the safe operation of your sys- tem. Defective components must be replaced with genuine Viessmann spare parts. Auxiliary components, spare and wearing parts Please note Spare and wearing parts that have not been tested together with the system can compromise its function.
-
Page 4: Table Of Contents
Index Index Installation instructions Preparing for installation Intended use......................Requirements regarding on-site connections............Installation sequence Installing the external unit..................10 Installing the internal unit..................14 Connecting the refrigerant lines................17 Connecting a secondary circuit................23 Connecting a cooling circuit if required..............24 Electrical connections................... - Page 5 Index Index (cont.) Overview of the assemblies................. 106 External unit casing....................107 Electrical equipment, external unit............... 109 Hydraulics, external unit..................111 Parts lists for external unit 400 V~, type AWB/AWB-AC 201.C10, C13 Ordering individual parts..................113 Overview of the assemblies................. 114 External unit casing....................
-
Page 6: Intended Use
Preparing for installation Intended use The appliance is only intended to be Commercial or industrial usage for a pur- installed and operated in sealed unven- pose other than central heating/cooling ted heating systems that comply with or DHW heating shall be deemed inap- EN 12828, with due attention paid to the propriate. -
Page 7: Requirements Regarding On-Site Connections
Preparing for installation Requirements regarding on-site connections Internal unit... - Page 8 Preparing for installation Requirements regarding on-site connections (cont.) Symbol Meaning Connection Refrigerant lines from/to the Type Pipe 7 UNF thread external unit: AWB/ AWB-AC ■ Hot gas line 201.B04 12 mm ⅞ Reducer ⅞ x ¾ 201.B07 16 mm ⅞ 201.B10 16 mm ⅞...
- Page 9 Preparing for installation Requirements regarding on-site connections (cont.) Cable lengths in the internal/external unit plus wall clearance Cables Internal unit External unit Power cables: ■ Heat pump control unit (230 V~) 2.0 m – ■ Compressor (230 V~/400 V~) – 1.5 m Other connecting cables: ■...
-
Page 10: Installing The External Unit
Installation sequence Installing the external unit Please note Please note Avoid damaging the appliance If the compressor in the external during transport. unit is strongly tilted, lubricant will Never put weight on top of the enter the refrigerant circuit and appliance. - Page 11 Installation sequence Installing the external unit (cont.) Types of installation ■ Consider the heat emitted by the unit when planning your weatherproofing ■ Floorstanding installation with cable or an enclosure. entry above ground level ■ Ensure the condensate can drain ■...
- Page 12 Installation sequence Installing the external unit (cont.) Type Weight in kg AWB/AWB-AC 201.C10 201.C13 Minimum clearances Example type AWB/AWB-AC 201.B04 A Air intake B Air discharge Type AWB/ Dimensions in mm AWB-AC Cable entry above below ground ground level level 201.B04 ≥...
- Page 13 Installation sequence Installing the external unit (cont.) Floor mounting A Support for floorstanding installation (accessory)
-
Page 14: Installing The Internal Unit
Installation sequence Installing the external unit (cont.) B Gravel bed as condensate soak- E Rubber mounts (supplied) away C Concrete foundations (see technical guide) D Drainage pipe DN 100 (only with entries below ground level) Note We recommend letting condensate drain away freely (without condensate pipe). - Page 15 Installation sequence Installing the internal unit (cont.) Minimum clearances A Cable entry <42 V B Cable entry 400 V~/230 V~, >42 V...
- Page 16 Installation sequence Installing the internal unit (cont.) Fitting the internal unit to the wall...
-
Page 17: Connecting The Refrigerant Lines
Installation sequence Connecting the refrigerant lines ■ The external unit is pre-filled with – In heating mode, if the internal unit refrigerant R 410A. is installed higher than the external ■ In the following cases, fit oil lift bends unit. in the vertical pipe (see diagram –... - Page 18 Installation sequence Connecting the refrigerant lines (cont.) Sound and vibration isolation when cable entry is above ground level Note Route connecting cables and refrigerant lines separately. A Pipe bends as vibration compensa- D Electrical cables/leads, internal/ tors external unit B Pipe clips with EPDM lining C Cable entry, e.g.
- Page 19 Installation sequence Connecting the refrigerant lines (cont.) Connection to the external unit 1. Type AWB/AWB-AC 201.B04 and 201.B07: Remove the side cover; see page 43. Example type AWB/AWB-AC 201.B04 C Liquid line D Hot gas line...
- Page 20 Installation sequence Connecting the refrigerant lines (cont.) Please note 3. Flare the pipe ends. Contamination (e.g. metal swarf) or moisture must not 4. Secure the pipes. enter the copper pipes. Therefore, hold the pipe open- ings down or plug them. Remove the nuts from connections C (liquid line) and D (hot gas line) of the refrigerant lines.
- Page 21 Installation sequence Connecting the refrigerant lines (cont.) Connection to the internal unit C Liquid line D Hot gas line Please note 1. Remove the nuts from refrigerant Contamination (e.g. metal swarf) connections C and D. or moisture must not enter the Type AWB/AWB-AC 201.B04: copper pipes.
- Page 22 Installation sequence Connecting the refrigerant lines (cont.) 2. Flare the pipe ends of the refrigerant 3. Fit refrigerant lines and insulate them lines. to provide protection from heat and vapour diffusion. Note If solder fittings are used, solder the fittings using a shielding gas. Tighten the nuts with the following torque: Type Line...
-
Page 23: Connecting A Secondary Circuit
Installation sequence Connecting a secondary circuit Refrigerant lines from/to the exter- nal unit Symbol Meaning Connection DHW cylinder flow (heating water side) G 1¼ Heating water return and DHW cylinder G 1¼ return Heating water flow G 1¼ 1. Equip the secondary circuit on site 2. -
Page 24: Connecting A Cooling Circuit If Required
Installation sequence Connecting a secondary circuit (cont.) 4. Thermally insulate pipes inside the Note building. ■ In underfloor heating circuits, install a temperature limiter to restrict the max- 5. Connect the drain hose to the safety imum temperature for underfloor heat- valve. - Page 25 Installation sequence Electrical connections (cont.) This ensures that, should there Note be an error, for example when Make all connections on the control detaching a wire, the wires can- panel, (see page 28) with flexible not drift into the adjacent voltage cables to ensure that the control panel area.
- Page 26 Installation sequence Electrical connections (cont.) Internal unit: Routing electrical cables to the wiring chamber < 4 > 4...
- Page 27 Installation sequence Electrical connections (cont.) A Type AWB/AWB-AC 201.B10, B13, C10, C13: 12 V BUS cable: Routing in the 230 V~ voltage range (connection, see page 45) B Type AWB/AWB-AC 201.B04 and 201.B07: 43 V BUS cable: Routing in the 230 V~ voltage range (connection, see page 45)
- Page 28 Installation sequence Electrical connections (cont.) Internal unit: Overview of connections F101 P202 P203 12V COM COM 43V 211.4 211.2 3 2 1 F7 F14...
- Page 29 Installation sequence Electrical connections (cont.) A AVI PCB (see page 43) E Controller and sensor PCB (see F101 MCB/fuse 1.0A (slow) page 39) B Switching module and power supply F Main PCB (see page 29) for instantaneous heating water F3 MCB/fuse 6.3 A (slow) heater (see from page 50) G Expansion PCB on main PCB (see C Power supply 230 V~ (see...
- Page 30 Installation sequence Electrical connections (cont.) Plug sYA Terminals Function Explanation 211.5 Type AWB-AC: Connection values Cooling control ■ Max. output: 10 W 3-way diverter valves for ■ Voltage: 230 V~ heating water buffer cylin- ■ Max. switching current: 4(2) A der bypass in cooling mode Connect the 3-way diverter valves for the...
- Page 31 Installation sequence Electrical connections (cont.) Connecting a temperature limiter as a maximum temperature limiter for under- floor heating Connecting a general temperature Connecting the temperature limiter, limiter B part no. 7151 728, 7151 729 B X2.N X2.N sÖ Heating circuit without mixer A1/ Connection Circulation pump C A to control...
- Page 32 Installation sequence Electrical connections (cont.) Connecting the temperature limiter, part no. 7151 728, 7151 729 B to mixer extension kit sÖ sÖ A Connect plug sÖ to mixer extension B Temperature limiter C Heating circuit pump for heating cir- cuit with mixer...
- Page 33 Installation sequence Electrical connections (cont.) Internal unit: Expansion PCB on main PCB (function compo- nents 230 V~) Information regarding the connection Set the required parameters during com- values missioning; see from page 68. ■ The specified output is the recommen- ded connected load.
- Page 34 Installation sequence Electrical connections (cont.) Plug sXS Terminals Function Explanation 222.3 Control of external heat Floating contact 222.4 sources and 1 high limit safety cut-out each (on site, Note max. 70 °C), to switch off or ■ The switching contact is a zero switch between the follow- volt N/O contact that is closed when a ing components:...
- Page 35 Installation sequence Electrical connections (cont.) High limit safety cut-out for heat C Connection on the external heat pump in conjunction with an external source at terminals for external heat source demand D High limit safety cut-out (max. 70 °C) as heat pump protection X3.1 K1 Relay;...
- Page 36 Installation sequence Electrical connections (cont.) Immersion heater (400 V~) 224.7 X2.N A Immersion heater, power supply B Terminals of the heat pump control 3/N/PE 400 V/50 Hz unit Immersion heater (230 V~, on site) 224.7 X2.N A Immersion heater, power supply B Terminals of the heat pump control 1/N/PE 230 V/50 Hz unit...
- Page 37 Installation sequence Electrical connections (cont.) Internal unit: Luster terminals (signal and safety connections) Set the required parameters during com- missioning; see from page 68. Terminals Function Explanation X3.1 Switched phase Via control unit ON/OFF switch. Note Observe the total load (1000 W) for all connected components.
- Page 38 Installation sequence Electrical connections (cont.) Terminals Function Explanation Note ■ No parameters need to be set. ■ The compressor is "forced" off as soon as the contact opens. ■ The supply voltage to the relevant func- tion components is switched off by the power-OFF contact signal.
-
Page 39: Electrical Connections
Installation sequence Electrical connections (cont.) Terminals Function Explanation 211.2 Secondary pump Connection values ■ Max. output: 130 W ■ Voltage: 230 V~ ■ Max. switching current: 4(2) A ■ In systems without a heating water buf- fer cylinder, no other heating circuit pump is required (see terminal 212.2). - Page 40 Installation sequence Electrical connections (cont.) Plug Sensor Type Cylinder temperature sensor, bottom NTC 10 kΩ (X25.7/X25.8) Contact humidistat 24 V– ― Note If a 230 V~ contact humidistat (connection to X3.8/X3.9) is used for cooling, insert a jumper, otherwise the heat pump will not start (message "Protectn device primry").
- Page 41 Installation sequence Electrical connections (cont.) Plug Sensor Type Jumper for setting master/slave Modbus 2 Heat pump control unit is slave Heat pump control unit is master (delivered condition) Modbus 1 Connection for Vitovent 300-F Connection for LON communication module (see LON communication module installation instruc- tions) Coding card slot...
- Page 42 Installation sequence Electrical connections (cont.) L1 N A Extension EA1 G Circulation pump for swimming pool B Power supply 1/N/PE 230 V/50 Hz heating (accessory) H Thermostat for swimming pool tem- C Junction box (on site) perature control (floating contact: D Fuses and contactor for circulation 230 V~, 0.1 A, accessories) pump for swimming pool heating...
- Page 43 Installation sequence Electrical connections (cont.) Internal unit: AVI PCB Interface internal unit – external unit Plug Component F101 Fuse 1.0 A (slow, L) P202 BUS connection (12 V) to the external unit (type AWB/AWB-AC 201.B10, B13, C10, C13) P203 BUS connection (43 V) to the external unit (type AWB/AWB-AC 201.B04, B07) Note ■...
- Page 44 Installation sequence Electrical connections (cont.) 400 V~: Opening the external unit wir- ing chamber Type AWB/AWB-AC 201.C10 and A Wiring chamber: ■ BUS connection to the internal unit Note Do not interchange the BUS con- nection wires between the internal and external units.
- Page 45 Installation sequence Electrical connections (cont.) Connecting internal and external units 230 V~ Type AWB/AWB-AC 201.B04 201.B07 201.B10 and B13 C N L ? C2 C1 ? N L 12V COM COM 43V 12V COM COM 43V 12V COM COM 43V 400 V~ A External unit wiring chamber (see Type AWB/AWB-AC 201.C10 and...
-
Page 46: Power Supply
Installation sequence Power supply Isolators for non-earthed conductors Danger ■ The mains isolator (if installed) must Incorrect core allocation can simultaneously isolate from the mains result in serious injury and dam- all non-earthed conductors with a min- age to the appliance. imum contact separation of 3 mm. - Page 47 Installation sequence Power supply (cont.) ■ In conjunction with on-site energy con- sumption (use of power generated by the PV system to meet own require- ments): Note During the power-OFF period, it is not possible to operate the compres- sor with power generated on site. ■...
- Page 48 Installation sequence Power supply (cont.) External unit power supply (230 V~/400 V~) ■ Economy tariff and power-OFF can be Note used. Free terminals for internal use. ■ No parameters need to be set when using economy tariff with power-OFF. The compressor is shut down during the power-OFF period.
- Page 49 Installation sequence Power supply (cont.) External unit power supply 400 V~ A External unit wiring chamber (see page 43) B Power supply 230 V/50 Hz Type AWB/AWB-AC 201.C10 and C2 C1 ? N L3 L2L1 Type AWB/AWB-AC 201.C10 201.C13 Recommended power cable 5 x 2.5 mm 5 x 2.5 mm (max.
- Page 50 Installation sequence Power supply (cont.) Connecting the power cable of the instantaneous heating water heater (only type AWB-AC) Internal unit ■ Recommended power cable: 400 V~: 5 x 2.5 mm 1/N/PE 230 V~: 7 x 2.5 mm 230 V/50 Hz ■...
- Page 51 Installation sequence Power supply (cont.) Power supply with power-OFF Power-OFF without on-site load disconnection The power-OFF signal is connected Note directly to the heat pump control unit. Observe the technical connection condi- The compressor is "forced" off when tions of the relevant power supply util- power-OFF is enabled.
- Page 52 Installation sequence Power supply (cont.) H Economy tariff meter K Feed: TNC system Power-OFF with on-site load disconnection The power-OFF signal is connected to Note the on-site contactor of the economy tar- Observe the technical connection condi- iff power supply and to the heat pump tions of the relevant power supply util- control unit.
- Page 53 Installation sequence Power supply (cont.) Power supply in conjunction with own energy consumption Without power-OFF E1E2 D /D L1 L1 L2 L2 L3 L3 A Heat pump G Double-tariff meter (for special tariff for heat pump) B Additional consumers in the house- Not permissible in conjunction with hold (powered by self-generated electricity)
-
Page 54: Closing The Heat Pump
Installation sequence Power supply (cont.) H Bi-directional meter (for PV systems L Isolator for the domestic power sup- for own energy consumption): ply connection (distribution panel) Energy taken from power supply M Distribution panel utility and energy fed into power N Domestic distribution box supply utility K Meter with reverse block:... - Page 55 Installation sequence Closing the heat pump (cont.) Fitting the front panel of the internal unit Note Ensure that the locking screws are tight- ened before operating. Fitting the side cover of the external unit In reverse order to "Opening the external unit wiring chamber"...
-
Page 56: Steps - Commissioning, Inspection And Maintenance
Commissioning, inspection, maintenance Steps - commissioning, inspection and maintenance For further information regarding the individual steps, see the page indicated Commissioning steps Inspection steps Maintenance steps Page • • • 1. Opening the heat pump..........58 • 2. Compiling reports............58 •... -
Page 57: Commissioning Steps
Commissioning, inspection, maintenance Steps - commissioning, inspection and… (cont.) Commissioning steps Inspection steps Maintenance steps Page • 19. Ticking the heat pump type on the type plate of the internal unit (as per external unit type plate) • • • 20. -
Page 58: Opening The Heat Pump
Commissioning, inspection, maintenance Further details regarding the individual steps Opening the heat pump Danger Please note Contact with 'live' components Wait at least 30 min between can lead to serious injury from installing and commissioning the electric current. appliance to prevent equipment ■... -
Page 59: Evacuating The Refrigerant Lines And Internal Unit
Commissioning, inspection, maintenance Further details regarding the individual steps (cont.) Evacuating the refrigerant lines and internal unit Please note Please note Commissioning is weather- Before evacuating the refrigerant dependent. lines and the internal unit, check all connections for tightness with In the case of high relative humid- leak detection spray. - Page 60 Commissioning, inspection, maintenance Further details regarding the individual steps (cont.) Example type AWB/AWB-AC 201.B04 A Internal unit H Pressure gauge set B External unit K Connection hose between pressure C Hot gas line gauge set and vacuum pump L Vacuum pump D Fill valve M Connection hose between pressure E Service valve (Schrader valve)
-
Page 61: Filling The Refrigerant Lines And Internal Unit
Commissioning, inspection, maintenance Further details regarding the individual steps (cont.) 2. Make all connections, as shown 5. On the pressure gauge set, close the above. valve to the vacuum pump. Stop the vacuum pump and wait Please note approx. 5 min. If the indication on the Fill valve D must remain vacuum gauge rises, there is a leak. - Page 62 Commissioning, inspection, maintenance Further details regarding the individual steps (cont.) Please note 2. Top up with the required amount of Topping up the system with refrigerant (see following table). refrigerant or evacuating the refrigerant can result in appliance Please note damage.
-
Page 63: Checking The Refrigerant Circuit For Leaks
Observe VDI 2035 regarding the quality ■ Soften fill water with a hardness above and amount of heating water, incl. fill and 16.8 °dH (3.0 mol/m ), e.g. with the top-up water. small softening system for heating water (see the Viessmann Vitoset pricelist). - Page 64 Commissioning, inspection, maintenance Further details regarding the individual steps (cont.) 1. Open any non-return valves installed on site. 2. Check the pre-charge pressure of the expansion vessel and top up if required. 3. Fill (flush) and vent the secondary cir- cuit via an on-site connection.
- Page 65 Commissioning, inspection, maintenance Further details regarding the individual steps (cont.) 7. To prevent damage to electrical com- ponents, connect an on-site hose to secondary circuit air vent valve B. Open secondary circuit air vent valve 8. Move 3-way diverter valve A by its handle into its centre position.
-
Page 66: Checking Expansion Vessel And Heating Circuit Pressure
Commissioning, inspection, maintenance Further details regarding the individual steps (cont.) Checking expansion vessel and heating circuit pressure Observe engineering informa- tion Heat pump technical guide Checking the free running of the fan in the external unit Danger 1. ■ Type AWB/AWB-AC 201.B04: Starting the fan with the external First remove the top cover and then unit open can lead to severe inju-... -
Page 67: Checking Thermal Insulation Of Flared Connections 15. Checking Electrical Connections Of The External Unit For Firm Seating
Commissioning, inspection, maintenance Further details regarding the individual steps (cont.) Checking electrical connections of the external unit for firm seat- Danger Wait at least 4 min, until the Contact with 'live' components capacitors have discharged, can result in severe injuries. before starting work on the exter- Capacitors remain 'live' after the nal unit. -
Page 68: Commissioning The System
Commissioning, inspection, maintenance Further details regarding the individual steps (cont.) Commissioning the system Commissioning (configuration, parame- Note ter settings and function checks) can be The type and extent of the parameters carried out with or without the commis- depend on the heat pump type, on the sioning assistant (see following chapter selected system scheme and the acces- and service instructions for the... - Page 69 Commissioning, inspection, maintenance Further details regarding the individual steps (cont.) Language Date Time Date/time Start commissioning? Parameter group Parameter Coding level 1 select Sensor values Temperature sensors display Signal inputs Signal inputs display Actuator test Actuator test carry out Subscriber check Subscriber check carry out Function check...
- Page 70 Commissioning, inspection, maintenance Further details regarding the individual steps (cont.) Commissioning without the commissioning assistant Enabling the service menu Service menu: 1. Press OK + å simultaneously for The service menu can be enabled from approx. 4 s any menu. 2.
- Page 71 Commissioning, inspection, maintenance Further details regarding the individual steps (cont.) Required parameters for components connected on site Detailed explanations regard- ing parameters Service instructions for Vitotronic 200 heat pump control unit System scheme Overview of all available system schemes Component System scheme Heating circuit A1/HC1...
- Page 72 Commissioning, inspection, maintenance Further details regarding the individual steps (cont.) Pumps and other components Pump/component Parameter Setting Heating circuit pump "System definition" Ó ■ With heating circuit A1/ "System scheme 7000" HC1 (for heating circuit without mixer) ■ With heating circuit M2/ HC2 (for heating circuit with mixer) DHW circulation pump...
- Page 73 Commissioning, inspection, maintenance Further details regarding the individual steps (cont.) Pump/component Parameter Setting Remote control For the heating/cooling cir- "1" cuit: "Heating circuit 1" Ó Note Set code on the Vitotrol to "Remote control 2003" assign heating circuits: H1/HC1 for heating circuit "Heating circuit 2"...
- Page 74 Commissioning, inspection, maintenance Further details regarding the individual steps (cont.) External functions Parameter Setting External changeover of the "System definition" Ó "0" to "55" operating state of various sys- "System components for tem components external changeover 7011" "System definition" Ó "0"...
- Page 75 Commissioning, inspection, maintenance Further details regarding the individual steps (cont.) Instantaneous heating water heater Parameters for Setting Instantaneous heating water heater "Electr booster heater" Ó "1" "Enable instantaneous heating water heater 7900" "Electr booster heater" Ó if applicable "1" "Enable instant. heating water heater for cen- tral heating 7902"...
- Page 76 Commissioning, inspection, maintenance Further details regarding the individual steps (cont.) Swimming pool water heating Parameters for swimming pool heating Setting "System definition" Ó "1" "External extension 7010" "System definition" Ó "1" "Swimming pool 7008" Ventilation Ventilation unit parameters Setting "Ventilation" Ó "1"...
- Page 77 Commissioning, inspection, maintenance Further details regarding the individual steps (cont.) Energy meter Electricity meter parameters Setting "Photovoltaics" Ó "1" "Enable own energy consumption PV 7E00" Extended menu: Enable the required functions/ "PV ctrl strategy" system components for own en- ergy consumption. "Photovoltaics"...
- Page 78 Commissioning, inspection, maintenance Further details regarding the individual steps (cont.) Checking the system function (e.g. actuators, temperatures, heat meter if applicable) Only for type AWB-AC Please note If the heat pump is exposed to temperatures below –15 °C dur- ing storage or transport, the high limit safety cut-out of the instan- taneous heating water heater may respond.
-
Page 79: Repairs
Troubleshooting Repairs Overview of electrical components See from page 28. Opening the programming unit 2. 2x... - Page 80 Troubleshooting Repairs (cont.) Removing cover from programming unit, if necessary...
- Page 81 Troubleshooting Repairs (cont.) Placing the control panel in its service position...
- Page 82 Troubleshooting Repairs (cont.) Overview of internal components: Internal unit...
- Page 83 Troubleshooting Repairs (cont.) ? Flow temperature sensor, secon- D Secondary circuit temperature sen- dary circuit sor upstream of the instantaneous aJ Return temperature sensor, secon- heating water heater (LWT) dary circuit E Air vent valve, secondary circuit sG Secondary pump F High limit safety cut-out for the lJ 3-way diverter valve for "Central instantaneous heating water heater...
- Page 84 Troubleshooting Repairs (cont.) External unit, type AWB/AWB-AC 201.B04 A Fan F Electronic expansion valve (EEV) B Heat exchanger (evaporator) G Compressor head temperature sen- C Evaporator air intake temperature sor (CTT) sensor (OAT) H Liquid separator D Evaporator temperature sensor K Evaporator refrigerant inlet temper- (OMT) ature sensor (OCT)
- Page 85 Troubleshooting Repairs (cont.) External unit, type AWB/AWB-AC 201.B07 A Fan F Electronic expansion valve (EEV) B Heat exchanger (evaporator) G Compressor head temperature sen- C Evaporator air intake temperature sor (CTT) H Liquid separator sensor (OAT) D Evaporator temperature sensor K Evaporator refrigerant inlet temper- (OMT) ature sensor (OCT)
- Page 86 Troubleshooting Repairs (cont.) External unit, type AWB/AWB-AC 201.B10, 201.B13, 201.C10, 201.C13 A Fan G Compressor head temperature sen- B Heat exchanger (evaporator) sor (CTT) C Evaporator air intake temperature H Liquid separator sensor (OAT) K Evaporator refrigerant inlet temper- D Evaporator temperature sensor ature sensor (OCT) (OMT) L Compressor...
- Page 87 Troubleshooting Repairs (cont.) Draining secondary side heat pump 1. Close the on-site boiler drain & fill 2. Drain the heat pump at the secondary valve. circuit fill & drain valve (see chapter "Overview of internal components: Internal unit"). Checking the sensors Sensor Captur- Installed loca-...
- Page 88 (see page 83) control (observe label in the exter- nal unit) Temperature sensors in the internal unit (with identification label) Viessmann NTC 10 kΩ (blue identifi- Further sensors cation label) Outside temperature sensor 10 30 50 70 90 110 Temperature in °C...
- Page 89 Troubleshooting Repairs (cont.) Viessmann Pt500A (green identifica- tion label) 140 180 Temperature in °C Temperature sensors in external unit (no marking) Type NTC 10 kΩ 1000 -30 -20 -10 0 10 20 30 40 50 60 70 80 90 100...
- Page 90 Troubleshooting Repairs (cont.) Type NTC 50 kΩ 1000 -30 -20 -10 0 10 20 30 40 50 60 70 80 90 100 Temperature in °C Checking fuses For fuse locations, see from page 28. ■ Fuse F1 is located on the mains ter- minal of the heat pump control unit.
- Page 91 Parts lists, internal unit Parts lists, internal unit Ordering individual parts The following information is required: Standard parts are available from your ■ Serial no. (see type plate A) local dealer. ■ Assembly (from this parts list) ■ Position number of the individual part within the assembly (from this parts list)
-
Page 92: Overview Of Assemblies, Internal Unit
Parts lists, internal unit Overview of assemblies, internal unit A Type plate B Casing assembly, internal unit... -
Page 93: Parts Not Shown, Internal Unit
Casing, internal unit 0001 Casing frame 0006 Front pipe outlet with seal 0002 Front panel 0007 Screws (set) 0003 Control panel 0008 Viessmann logo 0004 Safety guard 0009 Fixing clips 0005 Rear pipe outlet with seal 0010 Wall mounting bracket... - Page 94 Parts lists, internal unit Casing, internal unit (cont.) 0007 0010 0001 0003 0009 0009 0005 0006 0008 0002 0004 0008 0009...
-
Page 95: Electrical Equipment, Internal Unit
Parts lists, internal unit Electrical equipment, internal unit 0001 Programming unit 0019 Connecting cable 4-PIN, length 0002 Controller and sensor PCB with 85 mm cover (CU401) 0020 Ribbon cable AWG 28, 24 x 0.09 0003 PCB with connection adaptor folded (SA136-A10) 0021 Cable duct (set) 0004 PCB with connection adaptor,... - Page 96 Parts lists, internal unit Electrical equipment, internal unit (cont.) 0022 0008 0021 0030 0011 0012 0026 0002 0007 0026 0009 0005 0020 0010 0006 0019 0028 0001 0016 0017 0029 0018 0015 0031 0016 0017 0016 0018 0003 0004 0039 0040...
-
Page 97: Hydraulics, Internal Unit, Type Awb
Parts lists, internal unit Hydraulics, internal unit, type AWB 0001 Connection assembly, condenser 0015 Soldered bush 15/16 x ⅞ UNF 0002 Line, heating water return/DHW 0016 O-ring 28.0 x 2.5 cylinder return 0017 Gasket 21 x 30 x 2 0003 Line, 3-way diverter valve 0018 Gasket 27 x 38 x 2 0004 Hose, heating water flow 0019 Schrader valve... - Page 98 Parts lists, internal unit Hydraulics, internal unit, type AWB (cont.) 0010 0009 0010 0008 0011 0012 0013 0014 0015 0019 0020 0016 0021 0027 0001 0003 0016 0021 0022 0019 0022 0009 0025 0023 0027 0022 0016 0006 0022 0026 0026 0021 0017...
-
Page 99: Hydraulics, Internal Unit, Type Awb-Ac
Parts lists, internal unit Hydraulics, internal unit, type AWB-AC 0001 Connection assembly, condenser 0016 Gasket 21 x 30 x 2 0002 Line, heating water return/DHW 0017 Gasket 27 x 38 x 2 cylinder return 0018 Schrader valve 0003 Hose, heating water flow 0019 Sealing cap B 6 0020 Valve body ⁷⁄₁₆... - Page 100 Parts lists, internal unit Hydraulics, internal unit, type AWB-AC (cont.) 0009 0008 0007 0009 0015 0010 0011 0012 0013 0014 0018 0019 0020 0026 0021 0001 0015 0020 0028 0018 0015 0024 0008 0021 0026 0029 0015 0021 0021 0015 0016 0020 0018...
-
Page 101: Parts Lists For External Unit 230 V~, Type Awb/Awb-Ac 201.B04 Ordering Individual Parts
Parts lists for external unit 230 V~, type AWB/AWB-AC 201.B04 Ordering individual parts The following information is required: Standard parts are available from your ■ Serial no. (see type plate A) local dealer. ■ Assembly (from this parts list) ■ Position number of the individual part within the assembly (from this parts list) External unit... - Page 102 Parts lists for external unit 230 V~, type AWB/AWB-AC 201.B04 External unit (cont.) 0024 0022 0026 0010 0021 0020 0031 0028 0023 0027 0009 0014 0006 0005 0004 0030 0025 0002 0008 0019 0015 0017 0016 0001 0003 0032 0018 0013 0029 0007...
-
Page 103: Parts Lists For External Unit 230 V~, Type Awb/Awb-Ac 201.B07 Ordering Individual Parts
Parts lists for external unit 230 V~, type AWB/AWB-AC 201.B07 Ordering individual parts The following information is required: Standard parts are available from your ■ Serial no. (see type plate A) local dealer. ■ Assembly (from this parts list) ■ Position number of the individual part within the assembly (from this parts list) External unit... - Page 104 Parts lists for external unit 230 V~, type AWB/AWB-AC 201.B07 External unit (cont.) 0033 0032 0031 0036 0027 0036 0028 0030 0026 0035 0029 0004 0007 0034 0038 0003 0012 0020 0022 0021 0025 0043 0005 0006 0042 0024 0037 0023 0013 0014...
-
Page 105: Parts Lists For External Unit 230 V~, Type Awb/Awb-Ac 201.B10, B13 Ordering Individual Parts
Parts lists for external unit 230 V~, type AWB/AWB-AC 201.B10, B13 Ordering individual parts The following information is required: Standard parts are available from your ■ Serial no. (see type plate A) local dealer. ■ Assembly (from this parts list) ■... -
Page 106: Overview Of The Assemblies
Parts lists for external unit 230 V~, type AWB/AWB-AC 201.B10, B13 Overview of the assemblies A Type plate B Casing assembly, external unit... -
Page 107: External Unit Casing
Parts lists for external unit 230 V~, type AWB/AWB-AC 201.B10, B13 Overview of the assemblies (cont.) C Electrical equipment assembly, external unit D Hydraulic assembly, external unit External unit casing 0001 Top panel 0013 Transport handle, left 0002 Side panel, right 0014 Motor support 0003 Cover, power supply 0015 Air inlet ring... - Page 108 Parts lists for external unit 230 V~, type AWB/AWB-AC 201.B10, B13 External unit casing (cont.) 0012 0001 0019 0018 0013 0014 0009 0021 0010 0015 0011 0004 0008 0006 0020 0021 0010 0003 0015 0017 0016 0006 0007 0002 0016 0005...
-
Page 109: Electrical Equipment, External Unit
Parts lists for external unit 230 V~, type AWB/AWB-AC 201.B10, B13 Electrical equipment, external unit 0001 Main PCB 0020 Communication cable, drivers 0002 Driver PCB 0021 Communication cable, IDU 0003 Capacitor PCB 0022 Power cable, controller PCB, 0004 PCB, mains filter 0005 Coils 0023 Communication cable, starter 0006 Terminal... - Page 110 Parts lists for external unit 230 V~, type AWB/AWB-AC 201.B10, B13 Electrical equipment, external unit (cont.) 0002 0004 0003 0006 0005 0011 0009 0012 0010 0001 0013 0007 0008...
-
Page 111: Hydraulics, External Unit
Parts lists for external unit 230 V~, type AWB/AWB-AC 201.B10, B13 Hydraulics, external unit 0001 Compressor 0009 Compressor thermal insulation 0002 EEV pipework, complete 0010 Temperature sensor NTC 50 kΩ 0003 4-way diverter valve pipework, (CTT) complete 0011 Shut-off valve, liquid line 0004 Liquid separator 0012 Compressor power supply cover 0005 High pressure switch... - Page 112 Parts lists for external unit 230 V~, type AWB/AWB-AC 201.B10, B13 Hydraulics, external unit (cont.) 0002 0005 0008 0004 0010 0007 0006 0003 0009 0001 0011 0012...
-
Page 113: Parts Lists For External Unit 400 V~, Type Awb/Awb-Ac 201.C10, C13 Ordering Individual Parts
Parts lists for external unit 400 V~, type AWB/AWB-AC 201.C10, C13 Ordering individual parts The following information is required: Standard parts are available from your ■ Serial no. (see type plate A) local dealer. ■ Assembly (from this parts list) ■... -
Page 114: Overview Of The Assemblies
Parts lists for external unit 400 V~, type AWB/AWB-AC 201.C10, C13 Overview of the assemblies A Type plate B Casing assembly, external unit... -
Page 115: External Unit Casing
Parts lists for external unit 400 V~, type AWB/AWB-AC 201.C10, C13 Overview of the assemblies (cont.) C Electrical equipment assembly, external unit D Hydraulic assembly, external unit External unit casing 0001 Top panel 0012 Protective grille, left 0002 Side panel, right 0013 Transport handle, left 0003 Top cover 0014 Motor support... - Page 116 Parts lists for external unit 400 V~, type AWB/AWB-AC 201.C10, C13 External unit casing (cont.) 0001 0012 0014 0017 0009 0019 0018 0013 0011 0010 0015 0005 0008 0007 0011 0002 0003 0020 0010 0015 0004 0007 0016 0006...
-
Page 117: Electrical Equipment, External Unit
Parts lists for external unit 400 V~, type AWB/AWB-AC 201.C10, C13 Electrical equipment, external unit 0001 Main PCB Parts not shown 0002 Driver PCB 0013 Cable harness, compressor 0003 Capacitor PCB 0014 Cable harness complete, com- 0004 PCB, mains filter pressor 0005 Coils 0015 Communication cable, drivers... - Page 118 Parts lists for external unit 400 V~, type AWB/AWB-AC 201.C10, C13 Electrical equipment, external unit (cont.) 0005 0002 0004 0003 0010 0001 0011 0017 0006 0008 0007 0009 0012...
-
Page 119: Hydraulics, External Unit
Parts lists for external unit 400 V~, type AWB/AWB-AC 201.C10, C13 Hydraulics, external unit 0001 Compressor 0007 Electronic expansion valve 0002 4-way diverter valve pipework, 0008 Compressor thermal insulation complete 0009 Temperature sensor NTC 50 kΩ 0003 Liquid separator (CTT) 0004 High pressure switch 0010 Shut-off valve, liquid line 0005 Shut-off valve, hot gas line... - Page 120 Parts lists for external unit 400 V~, type AWB/AWB-AC 201.C10, C13 Hydraulics, external unit (cont.) 0007 0004 0003 0002 0008 0006 0011 0010 0001 0009 0005 0008...
-
Page 121: Hydraulic Parameter Report
Commissioning/service reports Hydraulic parameter report Setting and test values Set value Commis- sioning Testing the external heating circuit pumps Circulation pump type Circulation pump stage Overflow valve setting Commissioning, primary circuit Air intake temperature °C ("Diagnosis" Ó "System overview") Air discharge temperature °C ("Diagnosis"... - Page 122 Commissioning/service reports Control parameters report (cont.) System definition Parameter Code Delivered condi- Commis- tion sioning "System scheme" (see chapter "System 7000 scheme") "Temperature differential for calculat- 7003 40 (≙ 4 K) ing the heating limit" "Temperature differential for calculat- 7004 40 (≙...
- Page 123 Commissioning/service reports Control parameters report (cont.) External heat source Parameter Code Delivered condi- Commis- tion sioning "Enable external heat source" 7B00 "Priority ext. heat source/instant. heat- 7B01 ing water heater" "Dual mode temperature external heat 7B02 100 (≙ 10 °C) source"...
- Page 124 Commissioning/service reports Control parameters report (cont.) Electric booster heater Parameter Code Delivered condi- Commis- tion sioning "Enable instantaneous heating water 7900 heater" "Enable instant. heating water heater 7902 for central heating" "Max. output instantaneous heating 7907 water heater" "Output for instant. heating water 790A heater at power-OFF"...
- Page 125 Commissioning/service reports Control parameters report (cont.) Heating circuit 1 Parameter Code Delivered condi- Commis- tion sioning "Standard room temperature" 2000 200 (≙ 20 °C) "Reduced room temperature" 2001 160 (≙ 16 °C) "Remote control" 2003 "Heating curve level" 2006 0 (≙ 0 K) "Heating curve slope"...
- Page 126 Commissioning/service reports Control parameters report (cont.) Parameter Code Delivered condi- Commis- tion sioning "Influence room temperature hook-up 7104 cooling circuit" "Ranking room temp sensor separate 7106 cooling circuit" "Cooling curve level" 7110 0 (≙ 0 K) "Cooling curve slope" 7111 12 (≙1.2) "Remote control cooling circ"...
- Page 127 Commissioning/service reports Control parameters report (cont.) Photovoltaic systems Parameter Code Delivered condi- Commis- tion sioning "Enable own energy consumption 7E00 PV" "Enable own energy consumptn for 7E10 set DHW temperature 2" "Enable own energy consumption for 7E11 DHW heating" "Enable own energy consumptn for 7E12 heating water buffer cyl."...
- Page 128 Commissioning/service reports Control parameters report (cont.) Parameter Code Delivered condi- Commis- tion sioning "Interval for data transfer via LON" 779C 20 min "Source outside temperature" 77FC "Send outside temperature" 77FD "Source time" 77FE "Send time" 77FF Control Parameter Code Delivered condi- Commis- tion sioning...
-
Page 129: Specification
Specification Specification 230 V appliances Type AWB/AWB-AC 201.B04 201.B07 201.B10 201.B13 Heating output data At 100 % according to EN 14511 (A2/W35 °C, spread 5 K) Rated heating output 10.6 Compressor frequency Fan speed Power consumption 0.91 1.73 2.20 3.25 Coefficient of performance ε... - Page 130 Specification Specification (cont.) Type AWB/AWB-AC 201.B04 201.B07 201.B10 201.B13 Cooling performance data At 100 % according to EN 14511 (A35/W18 °C, spread 5 K) Rated cooling capacity 10.0 12.6 Compressor frequency Fan speed Power consumption 1.13 2.63 2.80 4.20 Energy efficiency ratio EER in 3.72 3.35 3.57...
- Page 131 Specification Specification (cont.) Type AWB/AWB-AC 201.B04 201.B07 201.B10 201.B13 Internal unit electrical val- Heat pump control unit/ ■ Rated voltage, control unit/ 1/N/PE 230 V/50 Hz ■ Fuse protection, power sup- 1 x B 16 A ■ Internal fuse 6.3 A (slow)/250 V Instantaneous heating wa- ter heater Type AWB-AC...
- Page 132 Specification Specification (cont.) Type AWB/AWB-AC 201.B04 201.B07 201.B10 201.B13 External unit dimensions Total length 1040 Total width Total height 1255 1255 Dimensions, internal unit Total length Total width Total height Total weight External unit Internal unit type AWB Internal unit type AWB-AC Permissible operating pres- sure, secondary side Connections...
- Page 133 Specification Specification (cont.) 400 V appliances Type AWB/AWB-AC 201.C10 201.C13 Heating output data At 100 % according to EN 14511 (A2/W35 °C, spread 5 K) Rated heating output 7.57 9.06 Compressor frequency Fan speed Power consumption 2.99 2.45 Coefficient of performance ε (COP) in heat- 3.79 3.70 ing mode...
- Page 134 Specification Specification (cont.) Type AWB/AWB-AC 201.C10 201.C13 Air intake temperature (type AWB-AC) Cooling mode ■ Min. °C ■ Max. °C Heating mode ■ Min. °C –20 –20 ■ Max. °C Heating water at 10 K spread Capacity (excl. expansion vessel) Minimum flow rate (always maintain) 1200 1380...
- Page 135 Specification Specification (cont.) Type AWB/AWB-AC 201.C10 201.C13 Cooling circuit Refrigerant R 410 A R 410 A Refrigerant charge 2.95 2.95 Top-up amount for line lengths >12 m to ≤ 30 m Compressor (hermetically sealed) Type Double rotat- Double rotat- ing piston ing piston Permiss.
- Page 136 Specification Specification (cont.) Type AWB/AWB-AC 201.C10 201.C13 Sound power level of external unit (Measurements with reference to EN 12102/EN ISO 9614-2) Weighted total noise emission levels at A7 °C (±3 K)/W55 °C (±5 K) At rated heating output dB(A)
-
Page 137: Commissioning Order
Components for ventilation fully installed (optional). Components for PV system fully installed (optional). Preferred appointment: Date Time Date Time The work that is requested to be carried out by Viessmann will be billed in accordance with the latest Viessmann pricelist. Place/date Signature... -
Page 138: Declaration Of Conformity
Declaration of conformity We, Viessmann Werke GmbH&Co KG, D-35107 Allendorf, declare as sole respon- sible body that the product Vitocal 200-S type AWB and AWB-AC incl. the Vitotronic 200 type WO1C heat pump control unit complies with the following stand-... -
Page 139: Keyword Index
Keyword index Keyword index Compressor max. tilting angle...10 Air short circuit........10 Concrete foundations......14 Area cooling system......24 Condensate drain......11, 14 Assembly...91, 101, 103, 105, 113 Condensate pan.........11 Assembly, external unit....101, 103 Condensate pipe......132, 135 AVI PCB.........29, 43, 45 Connecting a cooling circuit....24 Connecting cable, internal/external unit.............25 BDF valve..........87... - Page 140 Keyword index Keyword index (cont.) External unit Data.........129, 133 ■ Cable lengths........9 Declaration of conformity....138 ■ Checking electrical connections..67 Defrosting...........10 ■ Cleaning.........66 DHW cylinder, flow/return....23 ■ Closing..........55 Dimensions..........7 ■ Dimensions......132, 135 ■ External unit......132, 135 ■ Electrical connection.......43 Directives for work on the refrigerant cir- ■...
- Page 141 Keyword index Keyword index (cont.) Function check........78 Installation, external unit Function components....29, 33 ■ Bracket set for wall mounting..11 Fuse F1..........90 ■ Supports for floorstanding installa- Fuse F101..........90 tion..........11 Fuse F3..........90 Installation site requirements Fuse protection ■ External unit........10 ■ External unit power supply..48, 49 ■...
- Page 142 Keyword index Keyword index (cont.) Liquid line.........132, 135 ■ External unit........20 Parameter ■ Internal unit........22 ■ Immersion heater......75 Liquid separator.....84, 85, 86 Parameters LV leads..........25 ■ Cooling function......74 ■ Electric booster heater....75 ■ External functions......73 Mains isolator........46 ■ External heat source.......75 Maintenance........58 ■...
- Page 143 Keyword index Keyword index (cont.) Pressure gauge set......60 Primary store system......39 Safety assembly.........64 Properties of refrigerant.....63 Safety connections......37 Pumps......29, 72, 82, 83 Safety instructions for refrigerant..63 Safety valve........64 Secondary circuit Quick-action air vent valve....64 ■ Connecting........23 ■ Filling and venting......63 Secondary pump........39 RCD...........46 Selecting the parameter group...70...
- Page 144 Keyword index Keyword index (cont.) Switching contacts Transport........10, 14 ■ Contact humidistat......24 Type-dependent heating output..70 Switching on appliance......67 System pressure, checking....66 Underfloor heating......31 Underfloor heating circuit....31 Temperature limiter......31 Temperature sensor......87 ■ Compressor head (CTT)..84, 85, 86 Vacuum gauge........60 ■ Curve, type Pt500A......89 Vacuum pump........61 ■...
- Page 148 7497345 7502075 7502076 7502077 7502078 7513685 7513686 7514941 7514942 Viessmann Werke GmbH&Co KG Viessmann Limited D-35107 Allendorf Hortonwood 30, Telford Telephone: +49 6452 70-0 Shropshire, TF1 7YP, GB Fax: +49 6452 70-2780 Telephone: +44 1952 675000 www.viessmann.com Fax: +44 1952 675040...
Need help?
Do you have a question about the VITOCAL 200-S and is the answer not in the manual?
Questions and answers