Table of Contents
Advertisement
Advertisement
Table of Contents

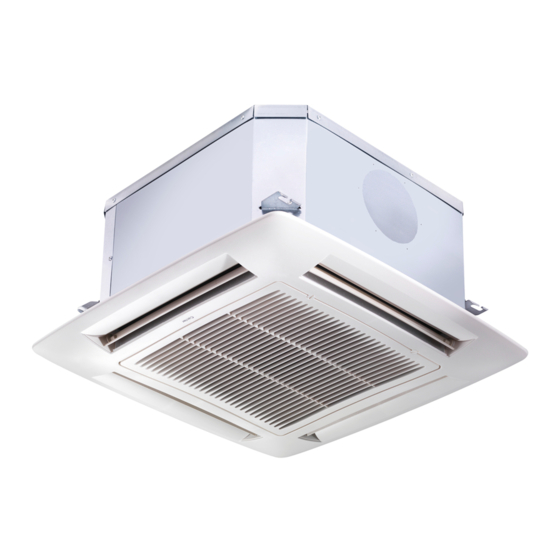
Summary of Contents for Carrier 42GWC004-3
- Page 1 42GW 60 Hz INSTALLATION MANUAL...
-
Page 2: Table Of Contents
9/11 Electrical connections ................11/12 Wiring diagram ..................Fresh air renewal and conditioned air supply to adjacent room .... 14/15 Maintenance ..................Models Power supply C = 2-pipe 42GWC004-3 42GWC008-3 42GWC010-3 230V ~ 60Hz 42GWC012-3 42GWC016-3 42GWC020-3 GB - 1... -
Page 3: Dimensions And Weights
42 GW Dimensions and weights 42GW 004 - 008 - 010 Ø 25 ø150 Ø 100 42GW 012 - 016 - 020 42GW Unit 17.5 Frame/Grille assembly GB - 2... -
Page 4: Technical Data
42 GW Technical data E N G L I S H Table I: POWER INPUT Nominal data Models Cooling Heating 42GWC004-3 0.26 0.21 42GWC008-3 0.28 0.24 42GWC010-3 0.41 0.37 42GWC012-3 0.47 0.42 42GWC016-3 0.60 0.56 Note: 230V ~ 60 Hz. -
Page 5: General Information
42 GW General Information Unit installation Choosing the installation site Read this instruction manual thoroughly before starting Positions to avoid: installation. • Exposure to direct sunlight. • This unit complies with the low-voltage (EEC/73/23) and electromagnetic compatibility (EEC/ 89/336) directives. •... -
Page 6: Avoid
42 GW Avoid... E N G L I S H ... any obstruction of the unit air intake or supply grilles..exposure to direct sunshine, when the unit is operating in the cooling mode; always use shutters or shades.. -
Page 7: Installation
42 GW Installation Max. 2 louvres closed A Cooling only: louvre position for correct air flow. B Heating: louvre position for correct air flow. Warning: To close one or two air outlets use the special kit • Install the unit as centrally as possible in the room, the air flow If plaster board ceiling panels are installed the maximum direction can be controlled by manually regulating the louvres dimensions of the unit housing must not exceed 660 x 660 mm... - Page 8 42 GW Installation E N G L I S H Condensate drain pipe Threaded hangers "T" bar (to be removed) First position the connection lines , as described in the chapter "Water connections". Remove the "T" bar in order to facilitate installation operations. Suspension brackets Carefully lift the unit (without the frame) using the four suspension brackets (or the four corners), inserting it into the...
-
Page 9: Water Connections
42 GW Installation Frame pre-hooking support Safety belt Frame fixing screw A. Gasket "A" B. Gasket "B" Air discharge Ensure that the frame is not distorted by excessive tightening, Installation of grille/frame assembly that it is aligned with the false ceiling and above all that there is a seal between the air inlet and outlet. -
Page 10: Motorized Valve And Control
42 GW Motorized valve and control E N G L I S H • The unit control circuit only allows opening of the motorized Instructions for mounting of motorized valve when the fan motor is working. thermo-electric valve assembly (See wiring diagrams) (see "Components"... -
Page 11: Instructions For Field Supplied Valves
42 GW Motorized valve and control ON-OFF valves (230V) Automatic operation position • In this case the cold water valve must be controlled by the ON- OFF signal from terminal 1 of TB3 and the hot water valve from A Thermo-electric valve head terminal 2 of TB3. -
Page 12: Electrical Connections
42 GW Motorized valve and control E N G L I S H • The water discharge pump should work every time the • If these connections are not made as described the drain cold water valve is opened, supplying TB1 terminal 7 pan condensate may overflow. -
Page 13: Wiring Diagram
42 GW Electrical connections The control panel can be reached by opening the grille and removing the metal covers using the 3 or 4 screws. Connect the power cables to terminal box connectors in accordance with the wiring diagram and tighten firmly. IMPORTANT: •... -
Page 14: 230V ~ 60Hz
42 GW Wiring diagram, standard version unit E N G L I S H 230V ~ 60Hz 1 2 3 6 7 8 10 11 C3_F C1_F C2_F C1_M C3_M C2_M COOLING ONLY COOLING+HEATING Valves connection: (2 PIPE SYSTEM) (2 PIPE SYSTEM) select the diagram according to the system type GB - 13... - Page 15 42 GW Fresh air renewal and conditioned air supply to an adjacent room Ø Ø Duct connection flange Clip 6 mm neoprene gasket Model 004-008-010 012-016-020 Insulated flexible duct Fresh air intake Ø A Conditioned air supply to an adjacent room Ø...
- Page 16 42 GW Fresh air renewal and conditioned air supply to an adjacent room E N G L I S H Fresh air renewal Conditioned air supply to an adjacent room • The optional supplementary fan for fresh air intake (field •...
-
Page 17: Filter Cleaning
42 GW Maintenance and owner's guide Maintenance Additional maintenance Cleaning and maintenance operations must be carried out by specially trained personnel. • The electric panel is easily accessible by removing the cover panel. Before performing any service or maintenance operations, The inspection or replacement of internal components such as: turn OFF the main power switch. - Page 18 L010125H13 - 1201 Via R. Sanzio, 9 - 20058 Villasanta (MI) Italy - Tel. 039/3636.1 The manufacturer reserves the right to change any product specifications without notice. Order No. 14254-74, December 2001. Supersedes Order No. 14254-74, July 2001. Printed in Italy...


Need help?
Do you have a question about the 42GWC004-3 and is the answer not in the manual?
Questions and answers