Sony VPL-EX100 Service Manual
Hide thumbs
Also See for VPL-EX100:
- Quick reference manual (116 pages) ,
- Protocol manual (48 pages) ,
- Operating instructions manual (45 pages)

Related Manuals for Sony VPL-EX100


Summary of Contents for Sony VPL-EX100
- Page 1 DATA PROJECTOR VPL-EX100 VPL-EX120 VPL-EX145 VPL-EX175 REMOTE COMMANDER RM-PJ7 SERVICE MANUAL 1st Edition (Revised 1)
- Page 2 Unterbrecher einzufügen, Follow the instructions for the above port. oder das Netzkabel muß mit einer in der Nähe des Geräts befi ndlichen, leicht zugänglichen Wandsteckdose verbunden werden, damit sich bei einer Funktionsstörung die Stromversorgung zum Gerät jederzeit unterbrechen läßt. VPL-EX100...
- Page 3 Batterien nur durch den vom Hersteller empfohlenen Kasser batteriet i henhold til gjeldende avfallsregler. oder einen gleichwertigen Typ ersetzen. Wenn Sie die Batterie entsorgen, müssen Sie die Gesetze der jeweiligen Region und des jeweiligen Landes befolgen. 注意 注意 如果更换的电池不正确,就会有爆炸的危险。 只更换同一类型或制造商推荐的电池型号。 处理电池时,必须遵守相关地区或国家的法律。 1 (P) VPL-EX100...
-
Page 5: Table Of Contents
Circuit Description ............3-5 (E) 1-5-3. Event Trace Function ........1-26 (E) 3-2-1. Main Board ............3-5 (E) 1-5-4. Setup Function ..........1-29 (E) 3-2-2. Sensor Board ............3-6 (E) 3-2-3. G Board ............3-6 (E) 1-6. Indicator Display .............1-30 (E) 1-7. Lead-free Solder ............1-31 (E) 1 (E) VPL-EX100... -
Page 6: Frame Wiring
4. Spare Parts 4-1. Notes on Repair Parts ............4-1 4-2. Exploded Views ............... 4-2 4-3. Packing Materials & Supplied Accessories ....4-10 5. Block Diagrams Overall ................5-1 6. Frame Wiring Frame Wiring..............6-1 2 (E) VPL-EX100... -
Page 7: Manual Structure
Manual Structure Purpose of this manual This manual is the Service Manual of the Data Projector VPL-EX100/EX120/ EX145/EX175. This manual contains the service overview, adjustments, troubleshooting, circuit description, spare parts, block diagrams, and frame wiring. Related manuals In addition to this Service Manual, the following manuals are provided. -
Page 9: Service Overview
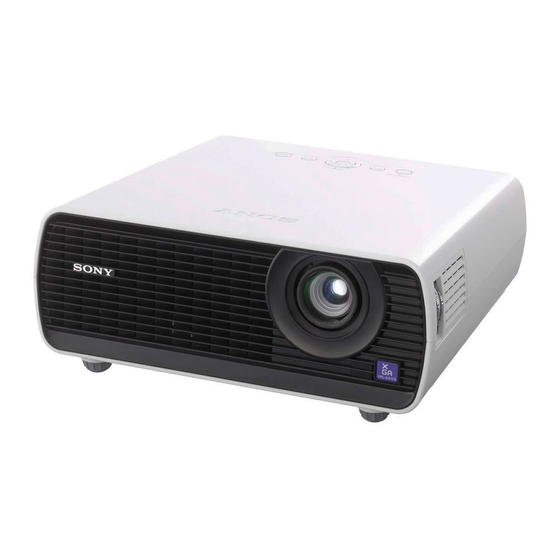
Section 1 Service Overview 1-1. Appearance Figure RM-PJ7 1-2. Board Locations Main board TL board G board U board Power supply (Ballast) NFTA board 1-1 (E) VPL-EX100... -
Page 10: Disassembly
Three hooks on the front side of the upper case assembly are fragile. Release the connection with taking care. Upper case assembly 5 Release the three hooks attaching the upper case assembly and front panel assembly. Front panel assembly 1-2 (E) VPL-EX100... - Page 11 When attaching the upper case assembly, attach it while aligning with the lower case starting from this corner. Lower case Upper case assembly These hooks are fragile. Be careful not to damage them. Hooks Upper case assembly Lower case 1-3 (E) VPL-EX100...
-
Page 12: Rear Panel
Remove the upper case assembly. (Refer to Section 1-3-1.) 5 Rear panel 6 Connector sheet 3 Eight connector screws (VPL-EX120/EX145/EX175)/ Six connector screws (VPL-EX100) 2 Two screws (K3 x 10) 4 Two screws (BVTP3 x 10) *The illustration indicates VPL-EX120. -
Page 13: Main Board
Prism assembly (R) Prism assembly (G) 1 Two screws (PSW3 x 8) 2 Shield (U) 3 Seven harnesses 6 Three screws (PSW3 x 8) 7 Main board 5 Three flexible flat cables 4 Four harnesses *The illustration indicates VPL-EX120. 1-5 (E) VPL-EX100... -
Page 14: G Board
1 Screw 4 Ground terminal (PS4 x 6) 5 Four screws (BVTP3 x 10) 2 Ground terminal 6 Main board bracket 7 Power insulating sheet 8 Harness 9 G board 0 Two harnesses *The illustration indicates VPL-EX120. 1-6 (E) VPL-EX100... -
Page 15: Dc Fan (Lamp Duct)
5 Fuse connector assembly 4 Upper lamp duct 6 DC fan Label side When attaching, place the label side facing upward. 1 Two screws (BVTP3 x 10) 7 Lower lamp duct 2 Lamp duct *The illustration indicates VPL-EX120. 1-7 (E) VPL-EX100... -
Page 16: Speaker
1-3-6. Speaker Remove the upper case assembly. (Refer to Section 1-3-1.) VPL-EX100/EX120 Main board CN100 1 Harness 5 Speaker box (Back) 6 Speaker 4 Release the four hooks. 2 Two screws (PWH3 x 10) 3 Speaker box (Front) VPL-EX145/EX175 Main board... -
Page 17: Optical Block
Lens: Rotate the focus/zoom gear Dial assembly Lens to the end in the counterclockwise direction. Rotate the dial assembly to the end in the clockwise direction, then install it. 1-9 (E) VPL-EX100... -
Page 18: Dc Fan (Intake)
(PS4 x 6) 5 Fan cushion R Label side 7 Fan cushion F 4 DC fan Label side When attaching, place the label side facing upward. 6 DC fan When attaching, place the label side facing upward. 1-10 (E) VPL-EX100... -
Page 19: Power Supply (Ballast)
. Remove the optical block. (Refer to Section 1-3-7.) . Remove the prism duct. (Refer to steps 1 to 3 in Section 1-3-8.) 3 Power supply 4 Two harnesses 1 Harness 3 Power supply (Ballast) (Ballast) 2 Release the hook. 1-11 (E) VPL-EX100... -
Page 20: Front Panel Assembly And Nfta Board
. Remove the DC fan (Intake). (Refer to Section 1-3-8.) 4 Front panel assembly 6 NFTA board 5 Screw (BVTP3 x 8) 3 Two hooks 7 Harness 2 Two hooks 8 Emblem (ELK) 4 Front panel assembly 1 Two screws (BVTP3 x 10) 2 Two hooks 1-12 (E) VPL-EX100... -
Page 21: Dc Fan (Exhaust) And U Board
(BVTP3 x 10) 3 Lamp house Label side 6 U board 5 Screw (BVTP3 x 10) 7 Harness 1 Harness 4 Two DC fans Label side When attaching, place the label side facing frontward. Power supply (Ballast) 1-13 (E) VPL-EX100... -
Page 22: Lens Assembly And S Prism Block Assembly
(PSW M3 x 10) 8 S prism block assembly 2 Lens assembly 5 Two screws (P2 x 5) 3 Two screws (P2 x 5) 1 Four screws (PSW M3 x 10) 6 Zoom ring 4 Focus ring 1-14 (E) VPL-EX100... - Page 23 4. Attach the focus ring to reach for the zoom ring. 5. Fix the focus ring using the two screws. Attach to reach for the zoom ring. P2 x 5 Zoom ring Focus lens Focus ring P2 x 5 Arrow B view Focus ring 1-15 (E) VPL-EX100...
-
Page 24: S Out-Polarizer (G)/(B) Assembly And 2-5-5. S Out-Pre-Polarizer (R)/(G)/(B) Assembly
. Remove the lens assembly and S prism block assembly. (Refer to Section 1-3-12.) Front side 2 S out-pre-polarizer (G) assembly 4 S out-pre-polarizer (B) assembly 1 S out-pre-polarizer (R) assembly 5 S out-polarizer (B) assembly 3 S out-polarizer (G) assembly 1-16 (E) VPL-EX100... - Page 25 VPL-EX100 VPL-EX120 Arrow A view Arrow A view 4 S out-pre-polarizer (B) assembly 4 S out-pre-polarizer (B) assembly 5 S out-polarizer (B) assembly 5 S out-polarizer (B) assembly 1 S out-pre-polarizer (R) 1 S out-pre-polarizer (R) assembly assembly Front side...
-
Page 26: S In-Polarizer (R)/(G)/(B) Assembly
. Remove the optical block. (Refer to Section 1-3-7.) 3 Screw (B2 x 5) 5 Screw (B2 x 5) 4 S in-polarizer (G) assembly 1 Screw (B2 x 5) 6 S in-polarizer (B) assembly 2 S in-polarizer (R) assembly Front side 1-18 (E) VPL-EX100... - Page 27 VPL-EX100/EX120 Arrow A view 6 S in-polarizer (B) 2 S in-polarizer (R) assembly assembly Blue Front side Green 4 S in-polarizer (G) assembly VPL-EX145 VPL-EX175 Arrow A view Arrow A view 6 S in-polarizer (B) 2 S in-polarizer (R) 6 S in-polarizer (B)
-
Page 28: S Ps Assembly
. Remove the optical block. (Refer to Section 1-3-7.) 2 Unit cover (FE) 1 Two hooks Marking 3 S PS assembly When attaching the S PS assembly, attach with the marking in the direction as shown in the figure. 1-20 (E) VPL-EX100... -
Page 29: Optional Fixtures
D MOLEX connector assembly 5P x1 E MOLEX connector assembly 7P x1 B MOLEX connector assembly 3P x5 F JST connector assembly 10P x1 C MOLEX connector assembly 4P x3 X kit assembly (A-1797-932-A) USBX board SH connector assembly 4P x1 1-21 (E) VPL-EX100... -
Page 30: Connection
CN702 CN5702 CN701 CN701 CN5701 CN602 CN602 CN1400 CN6701 CN1701 CN5602 CN1701 CN700 CN700 * CN5700 CN1705 CN1705 CN6705 CN1704 CN1704 CN6704 CN1500 CN1300 For * marked connectors, connect the harnesses which ware disconnected from c board. 1-22 (E) VPL-EX100... -
Page 31: Service Mode (Network Volume) (Vpl-Ex145/Ex175)
. The address leased from DHCP is not released in the Update mode when DHCP is set automatically. Avoid updating in the environment where DHCP has a short lease period. . Updating may fail due to the blocked fi re wall function. Invalidate the fi re wall function before updat- ing. 1-23 (E) VPL-EX100... - Page 32 . Network Update Bridge: Used for serial-to-network conversion. . Null-modem emulator: Used for virtual port creation. For obtaining each application, please contact your local Sony Sales Offi ce/Service Center. (1) Install Network Update Bridge. 1) Copy Network Update Bridge.exe below C:\Projector\Network Update Bridge.
- Page 33 When Main/Sub is updated; Pull out and insert the AC cord of a projector after Network Update Bridge is closed every time each updating is completed. Return to step 1 for updating when continuing updating. 1-25 (E) VPL-EX100...
-
Page 34: Event Trace Function
Serial number . Location: Installation site (Blanked when Location is not set.) ROM Ver. . Main ROM Version: Version of Main ROM . Sub ROM Version: Version of Sub ROM . Ext ROM Version: Version of Ext ROM 1-26 (E) VPL-EX100... -
Page 35: Error Log
LAMP/FILTER REPLACE 50H: 50 hours before lamp/fi lter replacement LAMP REPLACE: Lamp replacement SIGNAL WARNING FREQUENCY OVER: Input signal frequency warning SIGNAL WARNING SIGNAL SETTING MISTAKE: Input signal type warning FILTER CLEANING: Filter cleaning FILTER REPLACE: Filter replacement 1-27 (E) VPL-EX100... - Page 36 Requested action not taken: mailbox name not The name of a mailbox is improper, so data allowed was not delivered. Transaction failed Processing failed. (Continue) 1-28 (E) VPL-EX100...
-
Page 37: Setup Function
Reception failed. 1-5-4. Setup Function When a user forgot a Web password, click the [Setup] tab and then [Password] button from the Web page of service and set the Web password on the password setting screen again. 1-29 (E) VPL-EX100... -
Page 38: Indicator Display
The main-CPU does not operate normally. Assembly error The connector of temperature sensor is disconnected. LAMP/COVER indicator (Blinks in red) Error Number of Status blinking Cover error The lamp cover is removed. Lamp error The lamp does not light normally. 1-30 (E) VPL-EX100... -
Page 39: Lead-Free Solder
. The ordinary soldering iron can be used but the iron tip has to be applied to the solder joint for a slightly longer time. The printed pattern (copper foil) may peel away if the heated tip is applied for too long, so be careful. 1-31 (E) VPL-EX100... -
Page 41: Adjustments
3. Write the main board data saved in step 1 to replaced main board. (Refer to Section 2-5-5.) 4. Perform the V COM adjustment. (Refer to Section 2-3-3.) 5. Perform the angle detect sensor adjustment. (Refer to Section 2-3-4.) If any board other than the main board is replaced, there is not adjustment item. 2-1 (E) VPL-EX100... -
Page 42: Mechanical Adjustment
S in-polarizer (B) S in-polarizer (B) assembly assembly S in-polarizer (R) S in-polarizer (R) assembly assembly Screw (B2 x 5) Screw (B2 x 5) 13. Assemble the unit in the reverse order of steps 1 to 3. 2-2 (E) VPL-EX100... -
Page 43: Electrical Adjustment
6. Select the menus in the following order: Installation → Image Flip and set it to either “V” or “HV”. 7. Perform the steps 2 to 4. 8. Select the menus in the following order: Installation → Image Flip and set back to “Off”. 2-3 (E) VPL-EX100... -
Page 44: Angle Detect Sensor Adjustment
Gadget Serial Driver . USBX board (A-1797-932-A: X kit assembly): USB connection . For obtaining the each application and version upgrade fi le, contact your local Sony Sales Offi ce/ Service Center. . For Ext (Network) updating PC, the installation of the softwares below is required. - Page 45 Connection The Updater for Ext (Network) is available only connected by RS-232C. RS-232C connection RS-232C connector RS-232C cross cable USB-RS-232C dual connection USB connector RS-232C connector Remove the emblem (ELK). USB cable USBX board RS-232C cross cable 2-5 (E) VPL-EX100...
-
Page 46: Main (Scan Converter)
4. Connect this unit with PC by RS-232C, USB-RS-232C dual, or USB, referring to the connection fi gure. 2-4-2. Main (Scan Converter) 1. Copy the fi les to be written into the same folder of application fi le FlashUpgrader.exe. The example for VPL-EX100 Ver. 1.00: ex2av1000a.bin, ex2av1000a.inf ex2bv1000a.bin, ex2bv1000a.inf ex2dv1000a.bin, ex2dv1000a.inf ex2kv1000a.bin, ex2kv1000a.inf... - Page 47 . Depending on PC, the installation/recognition of the Linux Gadget Serial Driver may fail. In this case, use the USB-RS-232C dual connection. 3. Double-click FlashUpgrader.exe to start the application. Application name: Pixelworks ImageProcessor SDK FlashUpgrader/SONY Custom File name: FlashUpgrader.exe 4. Set the writing settings.
-
Page 48: Sub
1. Copy the three fi les rx2vXXXXX.dli, 5212.inf, and rx2vXXXXX.mot into the same folder of applica- tion fi le Flash.exe. XXXXX means version number. 2. Double-click Flash.exe to start the application. Application name: Sub Flash Upgrader for Sony Projector File name: Flash.exe 3. Check rx2vXXXXX.dli, 5212.inf, rx2vXXXXX.mot are selected in download information fi le, MCU Type setting, and ROM File Name respectively. -
Page 49: Ext (Network)
The updating starts, then the results are displayed as PASS or FAIL. 5. Check that no FAIL is displayed. Example screen of updating the ROM.hex in C:\Projector\FLEX-ANEM\ANEM Updater via COM1 The executed commands are in blue. The parameters needed to set are in yellow. 2-9 (E) VPL-EX100... -
Page 50: Quick Access
13. Click the [OK] button. The saving starts. Completed is displayed after completed. 14. Press the I/O button and set this unit to standby state. 15. Disconnect the AC plug. 16. Click the [Complete] button. 2-10 (E) VPL-EX100... -
Page 51: Saving Of Ddc Data
8. Set the destination fi le for the obtained data as below. DDC data for INPUT A: ****_a_0_** DDC data for INPUT B: ****_a_1_** . For VPL-EX100, set INPUT A only. . **** means model name, and ** means version. 9. Click the [Next] button. -
Page 52: Saving Of Nvm Data
After completed, The massage “Verify Success! Reading Model Name, Serial Number, NVM Map Version and NVM Data Version is successful.” is displayed. 14. Click the [OK] button. Completed is displayed. 15. Disconnect the AC plug. 16. Click the [Complete] button. 2-12 (E) VPL-EX100... -
Page 53: Writing Of 3Dgamma/Lookuptable/Main Board Data
13. Click the [OK] button. The writing starts. Completed is displayed after completed. 14. Press the I/O button and set this unit to standby state. 15. Disconnect the AC plug. 16. Click the [Complete] button. 2-13 (E) VPL-EX100... -
Page 54: Writing Of Ddc Data
8. Set the destination fi le for the writing data as below. DDC data for INPUT A: ****_a_0_** DDC data for INPUT B: ****_a_1_** . For VPL-EX100, set INPUT A only. . **** means model name, and ** means version. 9. Click the [Next] button. -
Page 55: Saving Of Nvm Data
After completed, The massage “Turn Off and On the AC, and then Power On to enable the new settings.” is displayed. 14. Click the [OK] button. Completed is displayed. 15. Disconnect the AC plug. 16. Click the [Complete] button. 2-15 (E) VPL-EX100... -
Page 56: Adjustment Item Initialize Data
Graphics Graphics Screen Wide Mode(SD) Wide Mode(HD) 16_9 Wide Mode(PC) FULL_1 Over Scan Adjust Signal Dot Phase Pitch Shift Function Volume SmartAPA CC Display Lamp Mode Lamp timer setting Background BLUE Startup Image (Continue to Next page) 2-16 (E) VPL-EX100... - Page 57 *1: “Phase, Pitch, Shift H/V, Over Scan” in the “Adjust Signal” menu have the initial value respectively in accordance with the input signal (PRESET MEMORY No.). *2: For CN model, this parameter is “50”. There are nonadjustable items in accordance with the input signal. 2-17 (E) VPL-EX100...
- Page 58 Black Level Adj. Gamma Mode Screen Wide Mode(SD) Wide Mode(HD) Wide Mode(PC) Over Scan Adjust Signal Dot Phase Pitch Shift Function Volume SmartAPA CC Display Lamp Mode Lamp timer setting Background Startup Image (Continue to Next page) 2-18 (E) VPL-EX100...
- Page 59 Serial Number signal info signal info Main ROM Version NVM Version Sub ROM Version Network ROM Version Lamp Timer Operation Timer Prev. Lamp Timer Gain R Bias R There are nonadjustable items in accordance with the input signal. 2-19 (E) VPL-EX100...
- Page 60 Black Level Adj. Gamma Mode Screen Wide Mode(SD) Wide Mode(HD) Wide Mode(PC) Over Scan Adjust Signal Dot Phase Pitch Shift Function Volume SmartAPA CC Display Lamp Mode Lamp timer setting Background Startup Image (Continue to Next page) 2-20 (E) VPL-EX100...
- Page 61 Serial Number signal info signal info Main ROM Version NVM Version Sub ROM Version Network ROM Version Lamp Timer Operation Timer Prev. Lamp Timer Gain R Bias R There are nonadjustable items in accordance with the input signal. 2-21 (E) VPL-EX100...
- Page 62 LUT Enb UF Enb R SHP G SHP B SHP DE/R REG H DE/R REG V DE/B REG H DE/B REG V Other Other/ Synchronous Sync Pattern Enb Pattern Type Pattern R Pattern G Pattern B Pattern Section 2-22 (E) VPL-EX100...
- Page 63 LUT Enb UF Enb R SHP G SHP B SHP DE/R REG H DE/R REG V DE/B REG H DE/B REG V Other Other/ Synchronous Pattern Enb Pattern Type Pattern R Pattern G Pattern B Pattern Section 2-23 (E) VPL-EX100...
- Page 64 LUT Enb UF Enb R SHP G SHP B SHP DE/R REG H DE/R REG V DE/B REG H DE/B REG V Other Other/ Synchronous Pattern Enb Pattern Type Pattern R Pattern G Pattern B Pattern Section 2-24 (E) VPL-EX100...
- Page 65 DE/B REG H DE/B REG V Other Other/ Synchronous Pattern Enb Enable Pattern Type Pattern R 4095 Pattern G 4095 Pattern B 4095 Pattern Section *1: Excluding VPL-EX100 There are nonadjustable items in accordance with the input signal. 2-25 (E) VPL-EX100...
-
Page 67: Troubleshooting And Circuit Description
? Replace the G board. Does the projector lamp illuminated ? VPL-EX100: All white screen? Is any image Other than VPL-EX100: projected ? All black screen ? Replace the main board. Is the color abnormal or all white (all black)? Does the unit recover? Replace the optical block. - Page 68 6 times ? Does the projector illuminate ? Does the Check the temperature ON/STANDBY sensor board. red indicator blink (TL and NFTA boards). 14 times ? Replace the main board. Replace the main board. 3-2 (E) VPL-EX100...
- Page 69 Connect the harness securely. supply (ballast) is normal ? Is the lamp broken ? Replace the lamp. Does the unit recover after the power supply (ballast) replacement? Replace the main board. 3-3 (E) VPL-EX100...
- Page 70 No problem. The set is normal. Check another device and cable. Check the LCD connectors. Does the Connect the flexible flat flexible flat cable cable securely? connect securely? Replace the main board Does the unit recover? or optical block. 3-4 (E) VPL-EX100...
-
Page 71: Circuit Description
IC. LCD driver block The LCD driver block uses a Sony LCD panel drive IC. The LCD panel is 12-phase- driven using the tim- ing pulse generated using a timing generator. This block mounts GBR and a three-channel circuit. -
Page 72: Sensor Board
RS-232C block This block is connected with main CPU through an RS-232C driver and receiver. *: VPL-EX100 has only INPUT A. 3-2-2. Sensor Board The TL board of a lamp temperature sensor, the U board of a lamp cover switch, and the NFTA board of an external air temperature sensor and IR sensor are available as a sensor board. -
Page 73: Spare Parts
Therefore, specifi ed parts should be used in the case of な部品です。したがって,交換する時は必ず指定 replacement. の部品を使ってください。 2. Standardization of Parts 2. 部品の共通化 Some repair parts supplied by Sony differ from those ソニーから供給する補修用部品は,セットに使われて used for the unit. These are because of parts common- いるものと異なることがあります。 ality and improvement. これは部品の共通化,改良等によるものです。... -
Page 74: Exploded Views
X-2548-664-5 s ASSY, CASE UPPER 3-701-438-11 s WASHER, 2.5 4-188-044-01 s PANEL, REAR (For VPL-EX100) 4-188-044-11 s PANEL, REAR (For VPL-EX120) 4-193-623-01 s CONNECTOR SHEET A (For VPL-EX100) 4-193-624-01 s CONNECTOR SHEET B (For VPL-EX120) 4-194-071-01 s DOOR, LAMP 4-194-075-01 s CAP, LENS... - Page 75 4-188-044-21 s PANEL, REAR 4-261-652-01 s SHEET, BLIND 4-193-625-01 s CONNECTOR SHEET C 4-194-071-01 s DOOR, LAMP (For VPL-EX145 (SY, CN)/EX175 (SY)) 7-682-249-09 s SCREW +K 3X10 4-194-071-11 s DOOR, LAMP 7-685-647-19 s SCREW +BVTP 3X10 TYPE2 N-S (For VPL-EX175 (CN)) VPL-EX100...
- Page 76 To U board To DC fan (Exhaust)(Inner side) To DC fan (Exhaust)(Outer side) To DC fan (Intake) To DC fan (Intake) BVTP 3 x 10 BVTP 3 x 10 VPL-EX145/EX175 3 x 10 To Power unit (Ballast) 3 x 10 VPL-EX100/EX120 VPL-EX100...
- Page 77 A-1799-005-A s MOUNTED CIRCUIT BOARD, MAIN (For VPL-EX175) A-1784-219-A s MOUNTED CIRCUIT BOARD, G 1-855-001-11 s D.C. FAN (SIROCCO) 1-858-494-11 s SPEAKER ASSY 1W (For VPL-EX100/EX120) 1-967-437-11 s SUB HARNESS (FUSE CONNE ASSY) 1-967-477-11 s SUB HARNESS(FASTEN CONNE ASSY) 2-067-018-01 s +PS4X6...
- Page 78 To MAIN board To G board side BVTP 3 x 10 Inner side To MAIN board BVTP 3 x 10 To MAIN board BVTP 3 x 10 BVTP 3 x 8 BVTP 3 x 10 3 x 6 To MAIN board VPL-EX100...
- Page 79 1-838-404-11 s LAMP CONNECTOR ASSY 1-855-000-11 s FAN, DC (80 SQUARE) 1-855-002-11 s D.C. FAN (SIROCCO) 2-067-018-01 s +PS4X6 4-194-056-02 s CASE, LOWER (For VPL-EX100 (SY, CN)/ EX120 (SY, CN)/EX145 (SY, CN)/ EX175 (SY)) 4-194-056-11 s CASE, LOWER (For VPL-EX175 (CN))
- Page 80 Optical Block P2 x 5 Marking P2 x 5 Marking P2 x 5 P2 x 5 Marking B2 x 5 B2 x 5 B2 x 5 Marking Marking For detail of marking position, refer to Sections 1-3-13 to 1-3-15. VPL-EX100...
- Page 81 Optical Block Part No. SP Description A-1797-886-A s OPTICS UNIT ASSY-A, S (For VPL-EX100) A-1797-887-A s OPTICS UNIT ASSY-B, S (For VPL-EX120) A-1797-888-A s OPTICS UNIT ASSY-C, S (For VPL-EX145) A-1797-889-A s OPTICS UNIT ASSY-D, S (For VPL-EX175) A-1797-890-A s LENS ASSY-A...
-
Page 82: Packing Materials & Supplied Accessories
4-3. Packing Materials & Supplied Accessories ---------------------------------------- PACKING MATERIALS & SUPPLIED ACCESSORIES ---------------------------------------- *1:[VPL-EX100(SY)/EX120(SY)/EX145(SY)/EX175(SY)] *2:[VPL-EX100(CN)/EX120(CN)/EX145(CN)/EX175(CN)] Ref. No. or Q'ty Part No. SP Description 1-489-222-11 s REMOTE COMMANDER (RM-PJ7) 1-791-992-61 s CABLE ASSY(15PDSUBCONNECTORX2) 1pc *2 1-830-860-11 s AC POWER-SUPPLY CORD (For CN) -
Page 83: Block Diagrams
VAL AMP IC101 S VIDEO IN/VIDEO IN AUDIO SPEAKER AU_V_L,AU_V_R IC102 AUDIO 1W AUDIO INPUT A AUDIO PROCESSOR INPUT B AUDIO C_100K EXCLUDING VPL-EX100 IC700 IC703 ADC_A,DDC_SEL0,WP_DDC INPUT A 128M BIT RGB/Y P IC200 FLASH Q200,Q202 Q208,Q209 MEMORY EXCLUDING VPL-EX100... -
Page 85: Frame Wiring
CN700 4P BLUE CN30 3P LAMP_COVER LAMP_TEMP FLEXIBLE FLAT CABLE PANEL B FAN A FAN B FAN C FAN D FAN E (FOR INTAKE) (FOR INTAKE) (FOR LAMP DUCT) (FOR (FOR EXHAUST EXHAUST Frame Wiring INNER SIDE) OUTER SIDE) VPL-EX100... - Page 87 20 V AC range are suitable. (See Fig. A) To Exposed Metal Parts on Set 1.5 k Z 0.15 μF voltmeter (5.25V) Earth Ground Fig A. Using an AC voltmeter to check AC leakage. VPL-EX100...
- Page 88 VPL-EX100 (CN) VPL-EX100 (SY) VPL-EX120 (CN) VPL-EX120 (SY) VPL-EX145 (CN) VPL-EX145 (SY) VPL-EX175 (CN) Printed in Japan Sony Corporation VPL-EX175 (SY) J, E 2010. 8 32 9-968-771-02 ©2010...
Need help?
Do you have a question about the VPL-EX100 and is the answer not in the manual?
Questions and answers