Sanyo SAP-URV246EH Instruction Manual

Sanyo SAP-URV246EH Instruction Manual

Inverter-controlled split system air conditioner
Hide thumbs Also See for SAP-URV246EH:

Advertisement

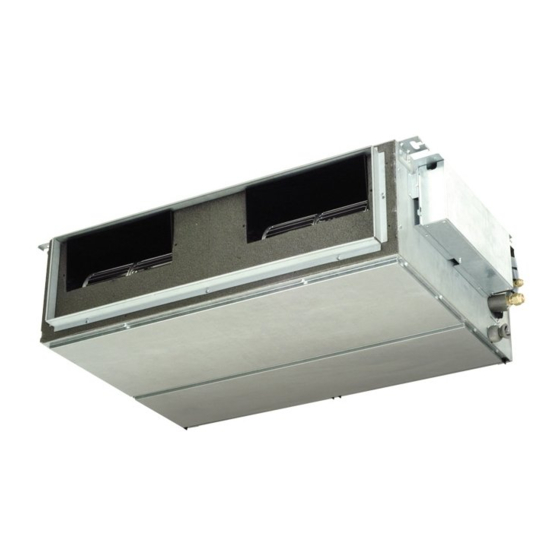
• INSTRUCTION MANUAL
• MANUAL DE INSTRUCCIONES
• MODE D'EMPLOI
• BEDIENUNGSANLEITUNG
SAP-XRV96EH
SAP-XRV126EH
SAP-XRV186EH
This air conditioner uses the new refrigerant R410A.
Save These Instructions!
Guarde estas instrucciones
Conserver ce mode d'emploi
Bewahren Sie bitte diese
Bedienungsanleitung auf.
Pub. OI-37.4196.127.0
SAP-FRV96EH
SAP-FTRV126H
SAP-FTRV186EH
SAP-FTRV246EH
© SANYO 2010
Inverter-Controlled
Split System Air Conditioner
Acondicionador de aire de dos unidades
controlado por invertidor
Climatiseur de type séparé contrôlé par
inverseur
Splitsystem-Klimagerät mit Inverter-
Steuerung
SAP-URV96EH
SAP-URV126EH
SAP-URV186EH
SAP-URV246EH
COOL/DRY/HEAT Model

Advertisement

Table of Contents
loading

Summary of Contents for Sanyo SAP-URV246EH

  • Page 1 SAP-XRV96EH SAP-FTRV126H SAP-XRV126EH SAP-URV126EH SAP-FTRV186EH SAP-XRV186EH SAP-URV186EH SAP-FTRV246EH SAP-URV246EH This air conditioner uses the new refrigerant R410A. COOL/DRY/HEAT Model Save These Instructions! Guarde estas instrucciones Conserver ce mode d’emploi Bewahren Sie bitte diese Bedienungsanleitung auf. © SANYO 2010 Pub. OI-37.4196.127.0...
  • Page 2: Features

    Features This air conditioner is an inverter type unit that automatically adjusts capability as appropriate. Details on these functions are provided below; refer to these descriptions when using the air conditioner. • Microprocessor Controlled Operation • Automatic Switching between Cooling and The interior compartment of the remote control Heating unit contains several features to facilitate...
  • Page 3: Table Of Contents

    Contents Page Features ......................2 Product Information................... 3 Alert Symbols....................3 Installation Location ..................4 Electrical Requirements ..................4 Safety Instructions..................... 4 Names of Parts ....................5 Using the Remote Control Unit ............... 11 Operation with the Remote Control Unit ............14 1.
  • Page 4: Installation Location

    Installation Location • We recommend that this air conditioner be installed properly by qualified installation technicians in accordance with the Installation Instructions provided with the unit. • Before installation, check that the voltage of the electric supply in your home or office is the same as the voltage shown on the nameplate.
  • Page 5: Names Of Parts

    Names of parts MODELS XRV INDOOR UNIT 6. Air intake grille: Air from the room is drawn into this section and passes through air filter which removes dust. 7. Air filter. 8. Suspension brackets. 9. Refrigerant couplings. 10. Condensate drain connection. 11.
  • Page 6 MODELS FTRV-FRV TIMER OPERATION TIMER OPERATION TEST TIMER OPERATION TEST 1. Remote control unit. CAUTION 2. Sensor: Detects the room temperature around the remote control unit, the air conditioner is controlled accordingly. 3. Air outlet: Conditioned air is blown out of the air conditioner TEST Position: This position is used only for servicing the through the air outlet.
  • Page 7 MODELS URV 12 11 TIMER OPERATION 10. Operation selector. ON Position: In this position the air conditioner is operating and controlled by the remote control unit. Set the selector normally in this position. OFF Position: Switch the selector to the off position if you are not going to use the air conditioner for a few days or longer.
  • Page 8: Remote Control Display

    Remote Control Unit (Display) Displayed when transmitting data Displayed when indoor unit sensor is in use Displayed when setting temperature Displayed when temperature is shown Displayed when setting timer Displayed when the time display is set to 12-hour time. Symbols (1) Operation mode (4) Timer 24-hour clock with ON/OFF...
  • Page 9: Remote Control Unit

    Remote Control Unit Sensor Transmitter (Cover closed) Display ON/OFF operation button HIGH POWER button 1 HR. TIMER button Temperature setting buttons (TEMP.) MODE selector button FAN SPEED selector button FLAP button NIGHT SETBACK button ON TIME Advance button OFF TIME Advance button setting setting...
  • Page 10 Remote Control Unit (continued) Temperature setting buttons Press the button to increase the set temperature. (TEMP.) Press the button to reduce the set temperature. The temperature setting changes by 1 °C or 2 °F each time one of the TEMP. buttons is pressed.
  • Page 11: Using The Remote Control Unit

    Remote Control Unit (continued) SENSOR button When you press this button (use a small-tipped object such as a ballpoint pen), the mark will appear at the display. And the room temperature is detected by the sensor which is built into the indoor unit and the air conditioner is controlled accordingly.
  • Page 12 Using the Remote Control Unit (continued) How to Use the Remote When using the remote control unit, always point the unit’s transmitter head Control Unit directly at the air conditioner’s receiver. MODELS XRV Air conditioner (Indoor unit) Receiver Remote control (Transmitter head) unit MODELS FTRV-FRV...
  • Page 13 Remote Control Unit The remote control unit may be operated either from a non-fixed position or Installation Position from a wall-mounted position. To ensure that the air conditioner operates correctly, DO NOT install the remote control unit in the following places: DO NOT •...
  • Page 14: Operation With The Remote Control Unit

    Operation with the Remote Control Unit 1. Automatic Operation This unit automatically switches between cooling operation and heating operation according to the difference between the room temperature and the temperature setting. STEP 2 STEP 1 Check that the circuit breaker on the power panel is turned on. NOTE Once mode is selected and the unit is preset by following the steps below,...
  • Page 15: Manual Operation

    Operation with the Remote Control Unit (continued) 2. Manual Operation STEP 2 STEP 3 STEP 4 STEP 1 STEP 5 Check that the circuit breaker on the power panel is turned on and that the NOTE operation selector of the indoor unit is in the ON position. If the automatic operation settings of the unit do not meet your needs, press the setting buttons as described below and change the settings as desired.
  • Page 16: Adjusting The Fan Speed

    Operation with the Remote Control Unit (continued) • Choose the best position in the room for the remote control unit, which NOTE also acts as the sensor for room comfort and transmits the operating instructions. Once you’ve found this best position, always keep the remote control unit there.
  • Page 17: Night Setback Mode

    Operation with the Remote Control Unit (continued) 5. Night Setback Mode Night Setback Mode is used for saving energy. Press the NIGHT SETBACK button while operation. mark appears in the display. To release the night setback function, press the NIGHT SETBACK button again.
  • Page 18: High Power Mode

    Operation with the Remote Control Unit (continued) 6. HIGH POWER Mode HIGH POWER mode can be used to increase the output of the indoor unit for all operation modes except automatic operation. Press the HIGH POWER button. mark appears in the display. To cancel, press HIGH POWER button again.
  • Page 19: Special Remarks

    Special Remarks ‘‘DRY’’ ( ) Operation How it works? • Once the room temperature reaches the level that was set, the unit’s operation frequency is changed automatically. • During DRY operation, the fan speed automatically runs at lower speed for providing a comfortable breeze.
  • Page 20: Setting The Timer

    Setting the Timer In the descriptions below, the following settings are used for the temperature NOTE and time indicator selector button on the bottom front section of the remote control. • Temperature: °C • Time: AM, PM 1. How to set the present (Example) To set to 10:30 pm.
  • Page 21 Setting the Timer (continued) 3. How to set the ON time (Example) To start operation at 7:10 am. Operation Indication 1. Press the ON TIME setting The timer indication is button once. displayed, and the present ON time is shown. 2.
  • Page 22: Using The 1-Hour Off Timer

    Using the 1-Hour OFF Timer 1. 1-Hour OFF Timer This function causes the unit to operate for one hour and then stop, regardless of whether the unit is on or off when this button is pressed. indicator in the display indicates that this function is operating. Setting procedure: Regardless of whether the unit is operating or stopped, press the 1 HR.
  • Page 23: Adjusting The Airflow Direction

    Adjusting the Airflow Direction MODELS XRV This air conditioner is equipped with auto flaps. You can set the airflow direction using the remote control unit. F L A P S SWEEP COOL SWEEP HEAT A. Sweep function B. Setting the airflow manually The flap starts moving up and down to Referring to the above illustration, use the deliver air over the sweep range.
  • Page 24 MODELS FRV-FTRV HORIZONTAL (manual) VERTICAL VANE VERTICAL VANE The horizontal air flow can be adjusted by moving the vertical vanes to the left or right, as indicated in the following figures for each model. CAUTION Set vertical vanes to the front position during COOLING/DRY operation if humidity is high. If the vertical vanes are set to the left-most or right-most position, condensation will form around the air outlet and drip off.
  • Page 25: Operation Without The Remote Control Unit

    Operation without the Remote Control Unit MODELS XRV If you have lost the remote control unit or it has trouble, follow the steps below. 1. When the air conditioner is not running If you want to turn on the air conditioner, switch the operation selector to the OFF position, and then to the ON position.
  • Page 26: Air Filter

    MODELS XRV Care and Cleaning (continued) AIR FILTER ADDITIONAL MAINTENANCE The inspection or replacement of internal components involve The air filter should be cleaned at least once every six months or the removal of the condensate drain pan. more frequently; it depends on the real operation conditions. CAUTION Some metal edges and the vanes of heat exchanger are sharp and may cause injury if handled improperly;...
  • Page 27 MODELS FTRV-FRV AIR FILTER The air filter behind the air intake grille should be checked and cleaned at least once every two weeks. HOW TO REMOVE THE FILTER 1.Grasp both ends of the air intake grille and pull to open it. 2.Hold the air filter and pull it upward.
  • Page 28 "AIR CLEAN" FILTER (only for FTRV models) (ACCESSORY SUPPLIED ON REQUEST) G The air filter is to be added by springs to the standard filter. G It is made of two layers: - the first layer consists in a synthetic honey comb high efficiency media to remove the dust and purifing the air. - the second layer in charcoal media deodorizing the ambient air.
  • Page 29: Troubleshooting

    Troubleshooting If your air conditioner does not work properly, first check the following points before requesting service. If it still does not work properly, contact your dealer or service center. Trouble Possible Cause Remedy Air conditioner does not run at all. 1.
  • Page 30 INFORMATION FOR CORRECT DISPOSAL OF THE PRODUCT IN ACCORDANCE WITH THE EUROPEAN DIRECTIVE 2002/96/EC At the end of its working life this equipment must not be disposed of as an household waste. It must be taken to special local community waste collection centres or to a dealer providing this service. Disposing of an electrical and electronic equipment separately avoids possible negative effects on the environment and human health deriving from an inappropriate disposal and enables its components to be recovered and recycled to obtain significant savings in energy and resources.
  • Page 31 F-GAS Regulation (EC) No. 842/2006 Do not vent R410A into atmosphere: R410A is a fluorinated greenhouse gas, covered by Kyoto Protocol, with a Global Warming Potential (GWP) = 1975. No expulsar R410A a la atmósfera: el R410A es un gas fluorado de efecto invernadero, cubierto por el protocolo de Kyoto, con potencial de calentamiento global (GWP) = 1975.
  • Page 32 SANYO Sales & Marketing Europe GmbH Via Bisceglie, No. 76 20152 Milano, Italy...

Table of Contents