Table of Contents
Advertisement
Advertisement
Table of Contents

Related Manuals for Gocycle G3


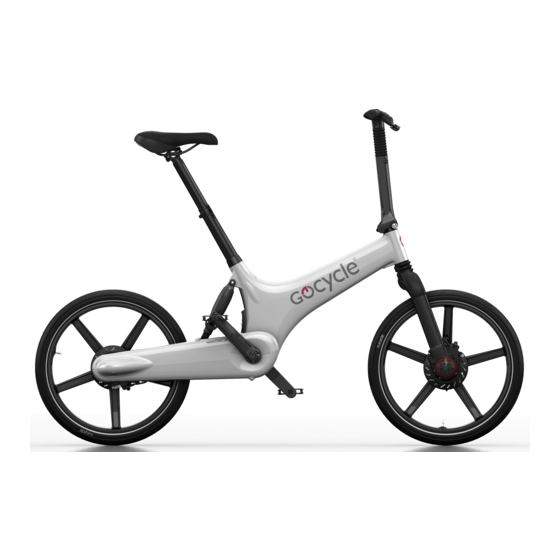
Summary of Contents for Gocycle G3
- Page 1 Owner’s Manual for Gocycle ® Version March 2016 www.gocycle.com...
-
Page 2: Table Of Contents
Recommended Assembly Sequence ......................8 Fitting the Seat Collar and Pedals ....................... 8 Assembly .............................. 10 Fitting the PitstopWheel with the Hexlock™ to the Gocycle ............12 Pre-ride Checks and Service Interval ....................13 Warning! Take Care during Assembly ..................... 14 Handlebar Height and Reach Adjustment .................. - Page 3 Gocycle ® Owner’s Manual for G3, March 2016 Getting to Know Your Gocycle Lithium Battery ................35 Gocycle Lithium Battery: Usage ......................36 Gocycle Lithium Battery: Care and Maintenance ................41 Shipping and Handling of Lithium Batteries .................. 41 Battery Pack Disposal ......................... 42 Operation ..............................
-
Page 4: Gocycle ® Owner's Manual For G3, March
Gocycle ® Owner’s Manual for G3, March 2016 Contact Information ..........................97 © Karbon Kinetics Limited. All Rights Reserved. -
Page 5: Disclaimer, Copyrights And Trademarks
Karbon Kinetics Ltd accepts no responsibility for any errors or misinterpretation of information as a result of such translation. Visit www.gocycle.com/manuals to check for any new revisions or updates to this manual. Disclaimer The specifications, information and performance of the Gocycle and other products manufactured by or sold under license granted by Karbon Kinetics Limited and featured in this document may change without notice. -
Page 6: Standards And Conformity
Gocycle ® Owner’s Manual for G3, March 2016 All trademarks and the Gocycle logo may not be used without the prior written approval of Karbon Kinetics Limited, a United Kingdom Registered Company Number 4357956. Standards and Conformity Gocycle is an electric power assisted cycle developed in accordance with:... -
Page 7: Safety
Such risks are increased in busy, urban environments with moving traffic. By choosing to ride a Gocycle, you assume the responsibility for these risks, and it is important that you know how to ride responsibly and to exercise proper maintenance to minimise such risks and potential damage. -
Page 8: Maximum Design Limit
Front and Rear Reflectors) Stopping the Gocycle The Gocycle is equipped with front and rear hydraulic disk brakes, operated by two levers on the handlebars (shown). Before riding, it is important to familiarise yourself with which brake lever operates the front brake and which operates the rear brake. Proper use of your brakes will slow and bring your Gocycle to a safe and controlled stop. -
Page 9: Riding In Wet, Cold Or Icy Conditions
Gocycle to a complete stop. Do not release the brakes until it is safe to do so. -
Page 10: First Ride
® Owner’s Manual for G3, March 2016 An impact to your Gocycle, either major or minor, can cause stress and fatigue on the Gocycle and its components or compromise the integrity of the electronics, including the battery, electronic controller, motor drive system or wiring. In the event of an accident and if safe to do so put your battery into sleep mode. -
Page 11: Warranty
Warranty Registration For your continued satisfaction and safety whilst riding your Gocycle, we strongly encourage you to register your Gocycle with us. Doing so will enable us to contact you with important product safety- related information, should the need arise. -
Page 12: Recommended Assembly Sequence
Gocycle ® Owner’s Manual for G3, March 2016 ECOMMENDED SSEMBLY EQUENCE Fitting the Seat Collar and Pedals To fit the pedals you will need an 8 mm allen key fitted and a torque wrench that can measure 35 – 40 Important parts needed for assembly. - Page 13 Gocycle ® Owner’s Manual for G3, March 2016 Locate the left and right hand pedals. Using an 8 mm allen key, fit the right hand pedal as shown tightening to 35-40 Nm in the direction shown. Using an 8 mm allen key, fit the left hand pedal as shown and tighten to 35- 40 Nm in the direction shown.
-
Page 14: Assembly
Gocycle ® Owner’s Manual for G3, March 2016 4.2 Assembly © Karbon Kinetics Limited. All Rights Reserved. - Page 15 Owner’s Manual for G3, March 2016 IMPORTANT ASSEMBLY ADVICE! Continue reading for important assembly advice, including how to register your Gocycle. Unless you register your Gocycle, after 60 miles (100 km), your Gocycle motor will cease to operate. See Section 4.7 Gocycle Registration.
-
Page 16: Fitting The Pitstopwheel With The Hexlock™ To The Gocycle
Gocycle ® Owner’s Manual for G3, March 2016 4.3 Fitting the PitstopWheel with the Hexlock™ to the Gocycle While holding all three quick release cam levers open, fit the Pitstopwheel to the hub. Hexlock™ Close all three Pitstopwheel quick release levers as shown. -
Page 17: Pre-Ride Checks And Service Interval
Owner’s Manual for G3, March 2016 Pre-ride Checks and Service Interval Before riding your Gocycle you must complete the pre-ride checks. This will ensure your safety and that your Gocycle is operating optimally. © Karbon Kinetics Limited. All Rights Reserved. -
Page 18: Warning! Take Care During Assembly
During assembly or disassembly, do not over-fold the Cleandrive more than is necessary to engage or disengage the Gocycle Lockshock™. Over-folding the Cleandrive can cause the internal cables to become taut and in some cases may result in cables becoming disconnected, ultimately affecting the operation of the product. -
Page 19: Handlebar Height And Reach Adjustment
Height adjustment In addition to Gocycle’s patented Vgonomic adjustment (changing the effective cross-bar length when lowering or heightening the saddle), it is also possible to make further adjustments to accommodate most riders comfortably by changing the handlebar height and reach. - Page 20 Gocycle ® Owner’s Manual for G3, March 2016 Undo the quick release lever (anticlockwise). Completely remove the quick release. The handlebar stem adjuster has two positions: A. Top position Use the top position for aft adjustment. (Shorter rider: least reach, handlebars closest to saddle).
- Page 21 Gocycle ® Owner’s Manual for G3, March 2016 Align the desired position and re-insert the quick release, as shown. With the quick release inserted, rotate clockwise to tighten Close the quick release lever. The lever should feel harder to close at it reaches a 90- degree position.
- Page 22 Gocycle ® Owner’s Manual for G3, March 2016 4.3.2 Handlebar Height Adjustment Undo and remove the handlebar stem bolt using a Torx tool, as shown. A. Lower position Lift the rubber dust cover to expose the B. Upper lower position.
- Page 23 Gocycle ® Owner’s Manual for G3, March 2016 Push down to align the lower position A. Lower position aligned Ensure the bolt hole and stem upper position or lower position hole are fully aligned. B. Upper position © Karbon Kinetics Limited. All Rights Reserved.
- Page 24 Gocycle ® Owner’s Manual for G3, March 2016 Reinsert the stem bolt and tighten to a torque of 6-8 Nm. CAUTION! Ensure the bolt passes through either “A. Lower position” or “B. Upper position” hole of the stem upper. Tidy the rubber dust cover.
-
Page 25: Assembling The G2 Seatpost Tool Holder
Gocycle ® Owner’s Manual for G3, March 2016 Assembling the G2 Seatpost Tool Holder 1.1. Orientate the Tool Holder as shown 1.2. Locate the Snap Rail Tool Holder (B) above the saddle rails as shown. © Karbon Kinetics Limited. All Rights Reserved. - Page 26 Gocycle ® Owner’s Manual for G3, March 2016 1.3. Apply pressure onto the right hand side of the Snap Rail Tool Holder (B) until this side is properly located onto the right saddle rail. 1.4. Apply pressure onto the left...
- Page 27 Gocycle ® Owner’s Manual for G3, March 2016 1.6. Push the Snap Rail Tool Holder (B) towards the front of the saddle. 1.7. Insert the 4mm Allen key (A) supplied with the Gocycle. Tool Holder installation is complete. © Karbon Kinetics Limited. All Rights Reserved.
- Page 28 Gocycle ® Owner’s Manual for G3, March 2016 © Karbon Kinetics Limited. All Rights Reserved.
-
Page 29: Assembling The Front And Rear Reflectors
® Owner’s Manual for G3, March 2016 Assembling the Front and Rear Reflectors Front and rear reflectors are supplied as standard with your Gocycle and can be found in the small parts bag. To install the rear reflector: Mount the rear reflector on the upper seat... - Page 30 Gocycle ® Owner’s Manual for G3, March 2016 Place the bracket around the upper seat post and tighten, using a screwdriver, to secure in a position as shown Mount the rear (red) reflector onto the bracket and listen for a “click”...
- Page 31 Gocycle ® Owner’s Manual for G3, March 2016 Adjust the bracket to ensure that the reflector is vertical Fix the assembled reflector in a vertical position as shown © Karbon Kinetics Limited. All Rights Reserved.
- Page 32 Gocycle ® Owner’s Manual for G3, March 2016 To install the front reflector: Lift the rubber stem cover to expose the upper handlebar stem Open the reflector bracket Place the bracket around the upper stem and tighten, using a screwdriver, to secure in the position as shown ©...
- Page 33 Gocycle ® Owner’s Manual for G3, March 2016 Mount the front (white) reflector onto the bracket and listen for a “click” Adjust the bracket to ensure that the reflector is vertical Fix the assembled reflector in a vertical position as shown...
-
Page 34: Assembling The Bell
Gocycle ® Owner’s Manual for G3, March 2016 Assembling the Bell Bell and mounting bracket (Supplied in small parts bag) Clip the mounting bracket over the brake lever as shown Tighten the bell mounting bracket with a Torx T10 to 2-3 Nm. - Page 35 Gocycle ® Owner’s Manual for G3, March 2016 Assembled bell © Karbon Kinetics Limited. All Rights Reserved.
-
Page 36: Gocycle Registration
Gocycle since new. 4.7.2 Pre-Registration: Delivery State Explained Gocycle is shipped in Delivery State and will require registration via the GocycleConnect App to gain full functionality. Delivery State allows 60 miles (100 km) of normal usage before the motor will cease to operate. -
Page 37: Gocycle App Installation - Frequently Asked Questions
How do I register the Gocycle and gain normal operation? Download and install the Gocycle Connect App from either the Apple App Store or Google Play for your Apple iOS or Android device. Follow the registration directions. For more details, see www.gocycle.com/app. - Page 38 From time to time, we need to make you aware of important announcements regarding the correct maintenance and servicing of your Gocycle. We may also have to send you important safety related information relating to your particular Gocycle.
-
Page 39: Gocycle Lithium Battery
The following important information applies to your Gocycle lithium battery. Read carefully to ensure the proper and safe operation and storage of the battery. Your battery has been designed for use only with a generation-two (G2) Gocycle. Do not use the battery with any other product. ... -
Page 40: Gocycle Lithium Battery: Usage
Gocycle ® Owner’s Manual for G3, March 2016 Gocycle Lithium Battery: Usage 5.3.1 Proper Charging Sequence Open the rubber charging port cover, as shown While holding open the rubber charging port cover, insert the charging lead as shown Plug the charger into mains electricity and turn on (where applicable) ©... - Page 41 Gocycle ® Owner’s Manual for G3, March 2016 The charger light will turn orange to indicate charging. Charge time up to 7 hours The battery charge level is displayed on the Gocycle dashboard. (See 6.1 Familiarising Yourself with Gocycle Dashboard Display for more information).
- Page 42 Gocycle ® Owner’s Manual for G3, March 2016 BEST PRACTISE! With the battery fully charged and the charger disconnected, turn the battery off by placing it into Sleep Mode. See section 5.3.4 Returning the Battery to Sleep Mode for more information.
- Page 43 5.3.2 Battery Operation Mode (Wakes the Battery for Use) The battery must be in Operation Mode before you can use your Gocycle. If the battery is not in Operation Mode, the Gocycle will not function, the gears will not shift and the motor will not work.
- Page 44 During riding when using the motor, the battery charge level will decrease over time, with fewer LEDs displayed accordingly. The Battery Low Level Indicator is represented by one flashing LED. When this is displayed, the Gocycle will default to Power Save mode. See 6.3.2.5 Power Save for more information.
-
Page 45: Gocycle Lithium Battery: Care And Maintenance
The battery will enter Sleep Mode automatically if not in use for 5 hours. Check that the battery is in Operation Mode before attempting to ride. If the Gocycle is plugged into the charger and the charger is charging, it will never enter Sleep Mode. -
Page 46: Battery Pack Disposal
Never attempt to transport your lithium-ion battery by air without first seeking the prior approval of your airline. Do not discard any of the battery packaging materials. Battery Pack Disposal When your Gocycle lithium battery has reached the end of its service life, you must recycle or dispose of it properly: ... -
Page 47: Operation
Gear selection display Speed display NOTE: If the Gocycle is stationary (including when on charge) for more than one minute (60 seconds), the display screen saver will be shown. Press either button to view the charge state. Understanding Electronic Gear Shifting Your Gocycle is equipped with electronic shifting. -
Page 48: Riding Modes
Allows user to turn predictive shifting ON/OFF Riding Modes You can operate your Gocycle in different modes to suit your personal riding style. The motor assistance will start and stop at different speeds—you can control this with either the left-hand selector (A) rotating “wrist down”... - Page 49 The following sections explain the differences between the riding modes and how to select them. NOTE: In addition to riding modes 1 through 4, your Gocycle comes pre-programmed with a number of helpful modes to assist with gear shift adjustment and fault-finding. You should not attempt to ride your Gocycle, unless prompted by mode instructions, in any other mode preinstalled on your Gocycle.
- Page 50 Gocycle ® Owner’s Manual for G2R, Version 4 6.3.1 Riding Modes Reference Table Starting and Stopping the Motor Motor Operating Speed (No. of LEDs) (E) Controlling Motor Speed Continuously Power Reduces Press Red Button above this Pedal Input Low Battery...
- Page 51 Refer to the table in 6.3.1 Riding Modes Reference Table. You can operate your Gocycle in different modes to suit your personal riding style. The motor assistance will start and stop at different speeds—you can control this by either rotating the left selector “wrist-down”...
- Page 52 See 6.6 Maximising Your Gocycle’s Motor Performance and Reliability for more information as to how to get the best out of your Gocycle. WARNING! The motor will continue to operate while the red button is pressed and the pedals are rotating.
- Page 53 Fault diagnosis Gocycle is Bluetooth -enabled and requires the Gocycle App to connect via a smart device. The user ® can personalize the settings via the App and save the settings to suit the user’s riding style and assistance preferences.
-
Page 54: Daytime Running Light (Drl)
6.3.2.5 Power Save Your Gocycle will default to Power Save when the battery has reached a low level. The mode is represented by the battery low level warning indicator (one flashing LED) on the dashboard display. All riding modes will default to Power Save mode when a low battery level is reached. - Page 55 LEDs on the dash. The DRL will automatically turn on when the Gocycle is moves. The mode that the DRL starts in is called the “default running mode”. When the Gocycle stops and after a short amount of time of inactivity, the DRL will turn off.
- Page 56 6.4.2 Enabling Flashing Modes The Gocycle G3 is delivered from the factory with the DRL flashing modes 2 and 4 disabled. To enable flashing modes hold buttons A and B rotated wrist down for 15 seconds until all dash LEDS are flashing.
-
Page 57: Energy Consumption Meter
As with a car, top speed and range (related to fuel consumption) are difficult to define as both factors are greatly affected by a large number of variables. For the Gocycle, this is including but not limited to rider weight (including clothing and luggage), tyre type, tyre pressure, terrain, surface texture, wind conditions and of course, how much pedal input the rider is providing. -
Page 58: Heat And Over-Temperature Protection
Wet conditions: Gocycle is a British product, designed with British weather in mind. However, it is important that your Gocycle is dry before storage. A city atmosphere can be a corrosive environment made worse with high humidity. We recommend a simple check and towel- down (if necessary) after using your Gocycle in wet conditions. - Page 59 Gocycle ® Owner’s Manual for G3, March 2016 Caution! During and shortly after use, the motor area (highlighted) will be hot to touch! WARNING! Extreme caution should be used when attempting to touch any part of the motor after it has been in operation—the same caution you would use in the kitchen with hot pots or pans or...
-
Page 60: Maintenance And Adjustments
The following information details mandatory inspection points to be completed every 3 months/ 500 miles (whichever is sooner) of Gocycle ownership. This is to ensure your Gocycle is safe to ride and operating at peak performance. If you find any of the following items to be damaged or incorrectly adjusted then please seek immediate assistance from your nearest Authorised Gocycle Service Centre who will help rectify any issue. - Page 61 Gocycle. Nevertheless, you must inspect the Gocycle every 500 miles to see if any of the components have cracks and need replacing. To do this, clean the Gocycle thoroughly with a damp cloth. Wipe away all dust or dirt. Look carefully at all the components under good lighting.
- Page 62 WARNING! Should you discover a fatigue crack more than 3mm long, or should you suspect that a component may have received an impact in an unusual way—such as if the product has been dropped—do not ride your Gocycle and immediately contact techsupport@gocycle.com. © Karbon Kinetics Limited. All Rights Reserved.
- Page 63 Gocycle ® Owner’s Manual for G3, March 2016 © Karbon Kinetics Limited. All Rights Reserved.
-
Page 64: Cleaning And Preventing Corrosion
Cleaning and Preventing Corrosion We do not recommend that you ride your Gocycle in heavy rain or store it in damp or wet areas. Please read 2.7 Riding in Wet, Cold or Icy Conditions for safety recommendations for riding in wet conditions. -
Page 65: Lubrication
From time to time, it might be necessary to adjust your shifting; for example, if you hear a noise from your rear hub or your Gocycle is not holding in gear. Your Gocycle’s electronic shifting is calibrated during production, but you can recalibrate it by adjusting the servo electronically as follows:... -
Page 66: Adjusting The Brakes
As with all hydraulic brakes, for the best possible performance, we recommend that the hydraulic brakes on your Gocycle are bled every 12 months. We advise that your Gocycle brakes are bled by a skilled bicycle mechanic with experience with bleeding hydraulic cycle brakes. -
Page 67: Replacing The Brake Pads
Gocycle ® Owner’s Manual for G3, March 2016 CAUTION! DOT 4 brake fluids will strip paint. Exercise caution to avoid brake fluid coming into contact with painted surfaces. If brake fluid does come into contact with painted surfaces, wipe the surface immediately and clean with an isopropyl alcohol. - Page 68 Gocycle ® Owner’s Manual for G3, March 2016 Locate and remove the two calliper securing bolts Slide the calliper off the disk rotor Compress the spit pin using a pair of pliers, as shown. © Karbon Kinetics Limited. All Rights Reserved.
- Page 69 Gocycle ® Owner’s Manual for G3, March 2016 With the split pin compressed, pull the pin out using a pair of pliers. Carefully push the brake pads from the top of the calliper, as shown. Pinch both brake pads and remove from the calliper.
- Page 70 Gocycle ® Owner’s Manual for G3, March 2016 Replace the brake pads as necessary before reassembly. Replace the brake pads as necessary. Pinch together with the spring and reassemble into the calliper. Replace the split pin to secure the brake pads in position.
- Page 71 Gocycle ® Owner’s Manual for G3, March 2016 Using pliers, bend open the split pin to lock it in place. WARNING! Do not attempt to ride your Gocycle without re-installing the brake pads and securing split pin. Doing so may result in injury.
- Page 72 Gocycle ® Owner’s Manual for G3, March 2016 Replace the six motor cover securing screws. Tighten to a torque of 3–4Nm. WARNING! The braking performance of new brake pads will increase over time. Ensure that you “bed-in” your brakes by performing a number of stops.
- Page 73 Gocycle ® Owner’s Manual for G3, March 2016 Compress the spit pin using a pair of pliers, as shown. With the split pin compressed, pull the pin out using a pair of pliers. Pinch both brake pads and remove from the calliper.
- Page 74 Gocycle ® Owner’s Manual for G3, March 2016 Replace the brake pads as necessary before reassembly. Replace the brake pads as necessary. Pinch together with the spring and reassemble into the calliper. Replace the split pin to secure the brake pads in position.
- Page 75 Gocycle ® Owner’s Manual for G3, March 2016 Using pliers, bend open the split pin to lock it in place. WARNING! Do not attempt to ride your Gocycle without re-installing the brake pads and securing split pin. Doing so may result in injury.
-
Page 76: Adjusting The Pitstopwheel Quick Release Cam Levers
Gocycle ® Owner’s Manual for G3, March 2016 Adjusting the PitstopWheel Quick Release Cam Levers All three Pitstopwheel quick release cam levers should have equal resistance when closing or opening. As per the pre-ride checks there must be a maximum of 10mm free play measured at the tip of the cam lever when open. - Page 77 Gocycle ® Owner’s Manual for G3, March 2016 1. Fit the Pitstopwheel onto the hub, close all three quick release levers, rotate the red Hexlock™ to the “locked” postion. Remove the three black rubber grommets as indicated by the arrows.
- Page 78 Gocycle ® Owner’s Manual for G3, March 2016 3. Keep 2 cam levers in the closed position and open one cam lever fully so that the back edge touches the next closed cam lever. 4. Lightly move the cam lever back and forth to gauge the extent of the free play.
- Page 79 Gocycle ® Owner’s Manual for G3, March 2016 6. Insert the 4mm Allen key into the stud and turn clockwise to reduce the cam lever free play and anticlockwise to increase cam lever free play. Hold the cam lever lightly while...
- Page 80 Gocycle ® Owner’s Manual for G3, March 2016 3-5kg force 8. Cross check reference: with the Hexlock™ in the unlocked position, there should now be an equal resistance across all three cam levers requiring 3-5kg to open an individual cam lever.
-
Page 81: Fleet Management And Tour Operators
Fleet management and Tour Operators If you operate a fleet of Gocycles that are lent to people who are not accustomed to the Gocycle or are running a tour operating service with the Gocycle as the chosen vehicle we would highly recommend fitting the tamper proof security bolts. -
Page 82: Checking For And Minimising Wear On The Front And Rear Hubs
Gocycle ® Owner’s Manual for G3, March 2016 7.10 Checking for and Minimising Wear on the Front and Rear Hubs Periodically remove the rear wheel to check for hub wear Periodically remove the front wheel to check for hub wear... -
Page 83: Tyres
When changing a tyre, always use plastic tyre levers. Never use a metal tyre lever as you will damage the wheel rim. Note the correct direction of the tread of the Gocycle tyre in relation to the wheels (see figure below). In the event that you wish to use a lower performance tyre with increased puncture resistance, you can use any BMX-sized tyre (406x40-47) from 1.75"... -
Page 84: Adjusting The Headset
Gocycle ® Owner’s Manual for G3, March 2016 WARNING! Bicycle tyres do not last forever. When the tread depth is critically low and the centreline grooves in the tyre have worn down in any part of the tyre, it may be dangerous to continue to ride on the tyre, and in this event, we recommend that you replace the tyre. - Page 85 Gocycle ® Owner’s Manual for G3, March 2016 Check for loose headset. There should be no play in the steerer assembly. Remove front wheel and carefully place Gocycle onto a non-slip surface. Grip the handlebars and rock forwards and backwards to check for any...
-
Page 86: Adjusting The Stem Quick Release Lever
Gocycle ® Owner’s Manual for G3, March 2016 Using right angle circlip pliers or a pin spanner, tighten the headset pre load tophat to 8-12 NOTE: NEVER TIGHTEN OR ADJUST THE HEADSET PRE LOAD TOPHAT UNLESS THE FORK CROWN BOLTS ARE LOOSE. - Page 87 Gocycle ® Owner’s Manual for G3, March 2016 Undo the clock nut securing bolt using a 2.5mm Allen key Remove the clock-nut as shown Install the QR Lever and hold in the closed position, ensuring it is in the correct zone as demonstrated in the below photo.
- Page 88 Gocycle ® Owner’s Manual for G3, March 2016 Open the QR Lever to 90 degrees and slowly rotate the clock nut until it stops against the handlebar stem lower. Rotate so that one of the holes in the clock nut...
-
Page 89: Adjusting The Bearings On The Rear Hub
Gocycle ® Owner’s Manual for G3, March 2016 The QR should have roughly 120 degrees of free play before it beings to engage. The closing resistance should act over the remaining 60 degrees of movement till it is firmly shut in the correct location. - Page 90 WARNING! Check the hub gear bearing adjustment every 500 miles (800 km) or 6 months. Regular checks will ensure best possible performance for your Gocycle. Failure to inspect the hub gear bearing adjustment may have serious consequences and could result in serious bodily injury or even death.
- Page 91 Gocycle ® Owner’s Manual for G3, March 2016 First, loosen the lock nut. Using (2) 14mm wrenches, adjust the rear hub gear bearing cups Second, tighten the inner adjuster nut. Between adjustments, check that the rear hub rotates in the freewheel direction.
-
Page 92: Troubleshooting
No LEDs visible Resolution: To return to normal shifting, stop riding and remain stationary for up to 5 seconds with both brakes applied. The Gocycle will reset to first gear and the gear shift LEDs will return to the dashboard. -
Page 93: Gears Will Not Shift Down Automatically
Diagnosis Modes Your Gocycle is pre-programmed with a number of modes to assist in fault diagnosis, should an issue occur. Should an issue arise, a Gocycle technical support executive may request you to perform a number of checks in an attempt to properly diagnose a problem. The following section is for reference. - Page 94 Gocycle ® Owner’s Manual for G3, March 2016 (C). To save the mode, rotate “wrist down” and hold selector A until LEDs flash and then release the button. 8.4.1 Pedal and Wheel Sensor Physical Check To check the sensors: © Karbon Kinetics Limited. All Rights Reserved.
- Page 95 Gocycle ® Owner’s Manual for G3, March 2016 Select Pedal and Wheel Sensor Physical Check, mode 12. Rotate the rear wheel. When movement of the rear wheel is detected, one LED will light on the right-hand side of the dashboard display.
- Page 96 Gocycle ® Owner’s Manual for G3, March 2016 Exit by rotating “wrist down” and holding selectors and B—the riding mode will flash to confirm exit. Mode Pedal and Wheel Sensor Physical Check LED Mode Display Checks the operation of the pedal and wheel...
- Page 97 Gocycle ® Owner’s Manual for G3, March 2016 8.4.2 Motor Check To check operation of red power button and motor: Select Motor Check, mode 13. Lift the front wheel so that is it off the ground. Rotate “wrist down” selector (A) to initiate the motor.
- Page 98 Gocycle ® Owner’s Manual for G3, March 2016 8.4.3 Pedal Torque Sensor Present Check To check the presence and operation of the pedal torque sensor: Select Pedal Torque Sensor Present Check, mode 14. With both brakes held, apply pressure to the left hand (non- drive side) pedal crank.
- Page 99 Gocycle ® Owner’s Manual for G3, March 2016 8.4.4 Pedal and Wheel Sensor Ratio Check Follow the next steps to check function of the wheel and pedal sensors in all gears: Place the Gocycle in a cycle stand, so the rear wheel and pedal cranks are free to turn.
-
Page 100: Led Reference Tables
Gocycle ® Owner’s Manual for G3, March 2016 8.5 LED Reference Tables 8.5.1 Dashboard Display Battery Charge Level Gear (Displayed when motor is Speed Selection OFF) Energy Consumption Meter Gear (Displayed when motor is Speed Selection 8.5.2 Energy Consumption Meter... - Page 101 Gocycle ® Owner’s Manual for G3, March 2016 ONTACT NFORMATION Gocycle is a product of Karbon Kinetics Limited, a UK-registered company. Karbon Kinetics Limited Unit 30, Barwell Business Park Chessington, Surrey KT9 2NY UNITED KINGDOM Registered number 4357956 www.gocycle.com For details of your local Gocycle reseller visit www.gocycle.com/map.
Need help?
Do you have a question about the G3 and is the answer not in the manual?
Questions and answers