Table of Contents
Advertisement
Quick Links
Download this manual
See also:
User Manual
Advertisement
Table of Contents

Related Manuals for Philco PD 1251 BiT


Summary of Contents for Philco PD 1251 BiT
- Page 1 DISHWASHER USER'S MANUAL PD 1251 BiT...
- Page 2 Dear customer, Thank you for buying a PHILCO brand product. So that your appliance serves you well, please read all the instructions in this user's manual.
-
Page 3: Table Of Contents
CONTENTS PART 1: BEFORE PUTTING INTO OPERATION ....................2 Important safety instructions ..............................2 PART 2: TECHNICAL SPECIFICATIONS ......................8 PART 3: DESCRIPTION OF THE PRODUCT ....................... 9 PART 4: INSTALLATION ..........................10 Unpacking ...................................... 10 Placement ....................................... 10 ... -
Page 4: Part 1: Before Putting Into Operation
PART 1: BEFORE PUTTING INTO OPERATION Important safety instructions Read carefully and store for future use. The safety of this appliance complies with industry norms and meets legal appliance safety requirements. However, as manufacturers, we consider it our duty to provide you with the following safety instructions. - Page 5 Children must be supervised to ensure that they do not play with the appliance. Installation Check that the dishwasher has not been damaged during transport. Never connect a damaged appliance. If the dishwasher is damaged, contact the supplier. ...
- Page 6 WARNING! When using the dishwasher follow all the notices below. Grounding instructions This appliance must be grounded. In the event of a failure or malfunction the grounding will reduce the risk of injury by electrical shock by ensuring a lower resistance to the electrical current.
- Page 7 Do not wash plastic items in the dishwasher unless they are marked by the manufacturer as dishwasher-safe. For plastic items without such markings, follow the recommendations of the manufacturer. When using the dishwasher you should prevent the plastic items from coming into contact with the heating element.
- Page 8 WARNING! Knives and other utensils with sharp tines and blades must be placed inside the basket with tips facing downwards or in a horizontal position. Ensure that the dishwasher door is always closed, except for the time when dishes are being inserted or removed. This will prevent the danger of tripping over the door and subsequent injury.
- Page 9 Under no circumstances tamper with the control buttons. Servicing, disposal If it is necessary to repair the appliance, contact an authorised service technician, who should use only original spare parts. If the power cord is damaged it must be replaced by the manufacturer or the manufacturer's service technician, to prevent injury to persons or damage to the appliance.
-
Page 10: Part 2: Technical Specifications
NOTE: All the here mentioned data is subject to change. The original version is Czech. These instructions shall be also available in an alternative format, e.g. on a website www.philco-intl.eu. EN - 8 Copyright © 2015, Fast ČR, a. s. -
Page 11: Part 3: Description Of The Product
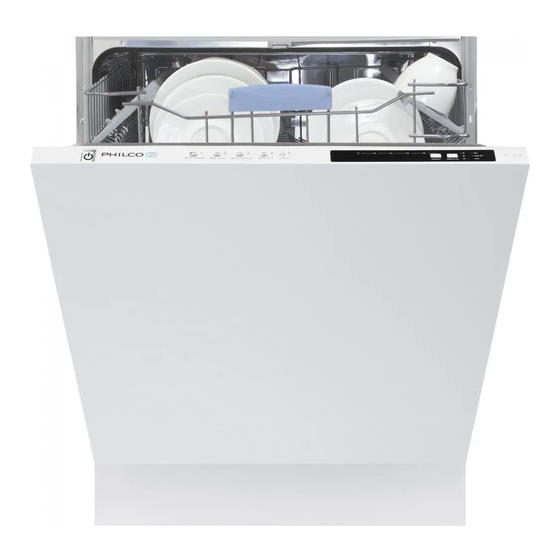
PART 3: PRODUCT DESCRIPTION Upper rack with cup shelves Top spraying arm Lower rack Bottom spraying arm Filters Rating label Control panel Washing detergent and rinsing aid compartment Basket for cutlery 10. Salt compartment (located in the bottom part of the appliance) 11. -
Page 12: Part 4: Installation
PART 4: INSTALLATION Unpacking Remove the external packaging, remove the protective plastic fi lm from the surface of the appliance (if used) and clean the external parts of the appliance with an agent designed for this purpose. Do not use steel wool or any coarse agents, which could irreparably damage the surface of the appliance. -
Page 13: Electrical Connection
Electrical connection Check that the voltage and frequency of the used power source correspond to the information on the appliance's rating label. Insert the power plug only into a properly grounded power socket. If the socket to which the appliance will be connected is not properly grounded, replace the socket rather than using adapters, etc., which could lead to overheating or burning. -
Page 14: Connecting The Drain Hose
How to disconnect the water supply hose? Shut off the water inlet. Reduce water pressure by pressing the reduce pressure button. This will reduce the water pressure and prevent water from possibly squirting out into the room. Unscrew the water supply hose from the water tap. -
Page 15: Built-In
Draining water Connect the drain hose. The drain hose must be properly attached so that water does not leak. Check that the hose is not knotted up or pinched. Extending the hose If you need to extend the drain hose, you must use the same type of drain hose. ... -
Page 16: Turning On The Dishwasher
After connecting the inlet and drain hoses, slide the dishwasher into the installation area. Take care not to damage, crimp, bend or otherwise impair any of the hoses. WARNING! Only remove the top cover if it is absolutely necessary for the installation into the built-in area. The dimensions of some built-in areas may be higher and so the dishwasher will fi t in with the top cover attached. -
Page 17: Part 5: Control Panel
PART 5: CONTROL PANEL Control panel 1. Power button (ON/OFF) Turning on/off power to the appliance. After turning on, the Start/Pause indicator light will come on. 2. Program selection button: press the button to select the desired program. 3. Delayed start button: the washing program can be postponed by 3, 6 and 9 hours. Repeatedly press the delayed start button (Delay) to select the length of the delay until the dishwasher is started. -
Page 18: Before Fi Rst Use
Before fi rst use Before you put your dishwasher into operation: a) set water softening; b) pour 3/4 litre of water into the salt compartment and fi ll it up with salt; c) fi ll the rinsing aid compartment; d) fi ll the dishwashing detergent compartment. Water softener The water softener is made so that it releases minerals and salts contained in water, which would have a negative eff ect on the operation of the dishwasher. -
Page 19: Adding Salt
Setting salt consumption The dishwasher is designed to enable the adjustment of salt consumption on the basis of the hardness of the water used. This should optimise and adapt the level of salt consumption. Table for setting up water hardness Water Water hardness setting indicator hardness... -
Page 20: Adding Rinsing Aid
a) Slide out the lower rack and then unscrew the lid of the salt compartment – see pic. 1/2. b) Before the fi rst wash, pour 3/4 litre of water into the salt compartment. c) Place the funnel (included accessory) on the opening of the compartment and pour 1 kg of salt into it. •... -
Page 21: Function Of The Detergent
CAUTION Wipe any spilled rinsing aid with a wiping cloth, so that excessive suds are not formed in the following wash. Do not forget to put the lid back on before closing the dishwasher door. Setting dial (rinse) The rinsing aid compartment has six diff erent settings. Its factory level setting is 3. If stains form on the dishes or if there is a problem with drying the dishes, increase the released amount of the rinsing aid by removing the lid and turning the dial to "4". - Page 22 Concentrated dishwashing detergents Based on their chemical composition dishwashing detergents are divided into two basic types: standard, alkaline dishwashing detergents with caustic additives; less alkaline dishwashing detergents with natural enzymes. Using "standard" washing programs in combination with concentrated dishwashing detergents reduces pollution and is appropriate for your dishes.
-
Page 23: Dosage Of The Detergent
Dosage of the dishwashing detergent Release the clip to open the dishwashing detergent compartment. Place the required amount of dishwashing detergent into the main wash detergent compartment (if you are using a dishwashing powder). Make sure that the amount of the dishwashing detergent is between the MIN and MAX level lines. -
Page 24: Part 6: Washing Dishes / Cutlery
PART 6: WASHING DISHES / CUTLERY Purchase dishes designated as dishwasher safe. Use a gentle dishwashing detergent marked as "gentle on dishes". If necessary seek out further information from the dishwashing detergent manufacturer. For certain types of dishes select a lower temperature. ... -
Page 25: Filling The Upper Rack
Hollow cookware, e.g. cups, glasses, pans, etc. should be placed bottom up so that water does not accumulate inside them during the wash. Dishes and cutlery must not be inserted into each other or to cover each other. ... -
Page 26: Setting The Upper Rack
Incorrect arrangements of dishes Important Note for Test Laboratories For detailed information on performance tests, please contact following address: "info@philco.cz” . In your email, please provide the model name and serial number (20 digits) which you can find on the appliance door. -
Page 27: Tilting Down The Tines In The Upper Rack
Setting the height of the side partitions You can set the height of the side partitions to create more / less room for larger / smaller glasses / cups in the top rack. At the same time the side partitions are divided into 4 smaller sections, so you can set 2 diff erent heights on either side. -
Page 28: Basket For Cutlery
Basket for cutlery Place cutlery into the basket with the handle downwards. If the basket has side partitions, place spoons separately into the appropriate openings. Particularly long cutlery should be place in a horizontal position in the front part of the upper rack as shown in the picture. Table spoons Forks Knives... - Page 29 Program table Program Intensive wash Super (P2) Quick wash Pre-wash (P1) wash (P3) Temperature 70°C 65°C 50°C 40°C Food types Heavily soiled Dishes soiled Lightly soiled Lightly soiled Pre-wash and dishes for from soup, dishes from dishes from removal of soils hygienic sauces, pasta, coff ee, milk,...
-
Page 30: Turning On The Appliance / Starting A Washing Program
WARNING! Short programs do not include the drying function. The above mentioned values were obtained on the basis of laboratory tests according to relevant standards. These values may change depending on conditions such as the type of dishes used, degree of dirtiness, type of dishwashing detergent, water pressure, water hardness, etc.). - Page 31 After the end of the washing cycle After ending the washing cycle the ‘end the program’ indicator light (End) will turn on. Press the ON/OFF button to turn off the dishwasher. Disconnect the power cord from the power socket and shut off the water inlet. NOTE: Wait a few minutes before taking dishes out of the dishwasher so that you do not handle the dishes while they are hot and more susceptible to breakage, and they will dry better too.
-
Page 32: Part 7: Maintenance And Cleaning
PART 7: MAINTENANCE AND CLEANING Filtration system The fi lter prevents food remains or other foreign items from entering the pump. Food remains may clog the fi lter and in such a case it is necessary to take it out. The fi ltration system consists of a coarse fi lter, a plastic fi lter and a micro-fi lter (fi ne fi lter). -
Page 33: Cleaning The Fi Lter
To remove and clean the fi ltration system turn the fi lter anticlockwise and then lift it up. Pull out the metal/plastic fi lter. Take the course fi lter out of the fi ne fi lter. NOTE: Follow all the steps of this procedure remove the fi ltration system; then reinstall it by proceeding from step 3 to step 1. -
Page 34: Protection Against Frost
Cleaning the door To clean the door edges use a soft, warm, damp wiping cloth. To prevent water leaking into the door lock or its electronic parts, do not use any cleaning agents in sprays. WARNING! Never use cleaning agents in sprays to clean the dishwasher door because this could damage the door lock and electrical parts. - Page 35 Cleaning the spraying arms It is important to regularly clean the spraying arms so that hard water minerals do not clog the jets and the bearings of the spraying arms. Detach the spraying arms by turning the nut clockwise, remove the washer from the spraying arm and then the spraying arm itself.
-
Page 36: Part 8: Prevention Of Minor Malfunctions
PART 8: PREVENTION OF MINOR MALFUNCTIONS Problem Possible causes What to do A burned fuse or the Replace the fuse or turn on the circuit breaker. Disconnect circuit breaker is off . any other appliances sharing the same circuit. Check that the dishwasher is turned on and the door is shut Power source is not properly. - Page 37 Problem Possible causes What to do Banging noise is The spraying Interrupt the program and rearrange the dishes, so coming from the arm is hitting some that they no longer interfere. dishwasher. dishes located in a rack. The dishwasher Dishes are placed Noise coming from the loosely in the...
- Page 38 The dishes were Load the dishwasher with dishes according to the instructions. incorrectly loaded. You did not add Increase the amount of rinsing aid / fi ll up the rinsing enough rinsing aid. aid compartment. Do not take the dishes out of the dishwasher immediately after the Drying wash.
-
Page 39: Error Codes
Error codes Error code Description Possible causes Check that the water inlet is fully open and that the water supply was not interrupted. Insuffi cient water Shut off the water inlet. Unscrew supply the water supply hose and clean out the fi lter on the end of the hose. -
Page 40: Packaging Materials
INSTRUCTIONS AND INFORMATION REGARDING THE DISPOSAL OF USED PACKAGING MATERIALS Dispose of packaging material at a public waste disposal site. DISPOSAL OF USED ELECTRICAL AND ELECTRONIC APPLIANCES The meaning of the symbol on the product, its accessory or packaging indicates that this product shall not be treated as household waste.
Need help?
Do you have a question about the PD 1251 BiT and is the answer not in the manual?
Questions and answers