Table of Contents
Advertisement
Quick Links
Advertisement
Table of Contents

Related Manuals for Philco PD 125 IQ


Summary of Contents for Philco PD 125 IQ
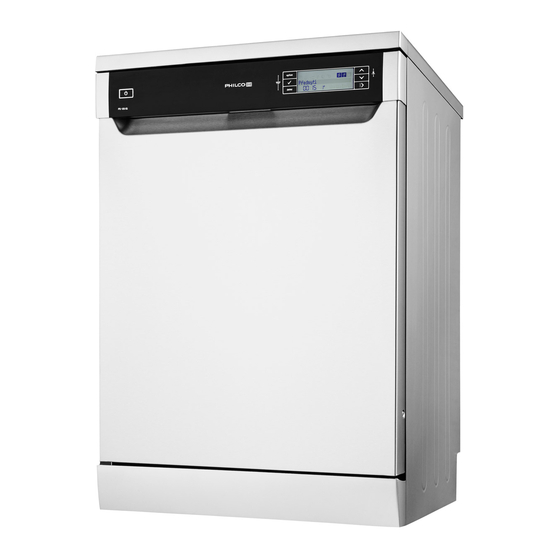
- Page 1 DISHWASHER USER'S MANUAL PD 125 IQ...
- Page 2 Dear customer, Thank you for buying a PHILCO brand product. So that your appliance serves you well, please read all the instructions in this user's manual.
-
Page 3: Table Of Contents
CONTENTS PART 1: BEFORE PUTTING INTO OPERATION ....................PART : TECHNICAL SPECIFICATIONS AND INFORMATION SHEET............. PART : DESCRIPTION OF THE APPLIANCE AND THE CONTROL PANEL ............PART : INSTALLATION ..........................1 • Unpacking ...................................... 1 • Installation location of the appliance ........................... 1 •... - Page 4 PART 1: BEFORE PUTTING INTO OPERATION Important safety instructions Recycling • Certain parts and packaging materials of your appliance were made using recycled materials. • Plastic parts are marked using standard international markings: (>PE<, >PS< , >POM<, >PP<, ) • Cardboard parts were made from recycled paper and should be disposed of in a collection container for paper recycling.
- Page 5 • Pay special attention and check that the power plug is unplugged from the power socket. • Never use an extension cord or a multi-socket adapter to connect the appliance. The power plug must be easily accessible after the installation of the appliance. •...
- Page 6 • Do not place items that are not suitable for washing in a dishwasher into the dishwasher. Also, do not fi ll the powder compartment past the maximum mark. Neither the manufacturer nor the vendor take any responsibility for scratching or rust that may form on the edge of the appliance as a result of rack movement.
- Page 7 Child safety • After taking the appliance out of the packaging materials, make sure to put the packaging materials out of children's reach. • Do not allow children to play with the dishwasher or to start it. • Store the powder and rinsing aid out of children's reach. •...
- Page 8 INFORMATION SHEET: Philco Philco brand: Name Philco Model identifi cation number PD 125 IQ Nominal capacity (Sets of dishes) Energy effi ciency class A+++ (scale from A+++ as most effi cient to D as least effi cient) Annual power consumption (AE...
- Page 9 The annual power consumption of 189 kWh is based on 280 standard wash cycles, with cold water at the inlet and operation in the low power consumption modes. Actual power consumption will depend on how the appliance is used. The annual water consumption of 2520 litres is based on 280 standard wash cycles. Actual water consumption will depend on how the appliance is used.
- Page 10 Recommendation • To save electricity and water, remove large scraps from the dishes before placing them inside the dishwasher. Start the dishwasher only when it is fully loaded. • Use the pre-wash function only when necessary. • Always place dishes such as bowls, glasses and pots, etc. into the dishwasher upside down. •...
-
Page 11: Part : Description Of The Appliance And The Control Panel
PART : DESCRIPTION OF THE APPLIANCE AND THE CONTROL PANEL This drawing is intended for information purposes about the individual parts and accessories of the product. Individual parts may diff er depending on the model. Top cover Control panel Upper rack with partitions Washing detergent and rinsing aid compartment Top spraying arm 10. -
Page 12: Control Panel
Control panel 1- On/Off button 15- Add salt indicator 2- Handle 16- Add rinsing aid indicator 3- Confi rm button 17- Child lock indicator 4- Select button 18- Delayed start indicator 5- Delayed start button 19- Remaining time / delayed start time indicator 6- Start / pause button 20- Program number indicator 7- Up button... -
Page 13: Additional Functions
On / Off button When the On / Off button is pressed, the power will be provided to the dishwasher and the previous program will be shown on the display; when the appliance is turned off , the LED indicators on the display will not be lit. - Page 14 Warning indicators Add salt indicator To fi nd out whether there is a suffi cient amount of salt in the dishwasher, check the add salt indicator on the display. When this indicator is lit on the display, it is necessary to add salt. Add rinsing aid indicator To fi nd out whether there is a suffi cient amount of rinsing aid in the dishwasher, check the add rinsing aid indicator on the display.
-
Page 15: Part : Installation
PART : INSTALLATION Unpacking Remove the external packaging, remove the protective plastic fi lm from the surface of the appliance (if used) and clean the external parts of the appliance with an agent designed for this purpose. Do not use steel wool or any coarse agents, which could irreparably damage the surface of the appliance. Carefully remove all papers and adhesive tape from the appliance, the door and other parts packed in polystyrene. -
Page 16: Water Supply Hose
Water supply hose Do not use an old supply hose or the hose from the previous dishwasher. Always only use a new supply hose. If you intend to connect a hose that is new or that has not been used for a long time to the appliance, fl ush the hose out with water before connecting it. -
Page 17: Electrical Connection
Electrical connection The appliance is equipped with a plug with a grounding pin and as such must be connected only to a properly grounded power socket with appropriate voltage and current. If the power socket is not properly grounded, have it replaced by a qualifi ed electrician. If you connect the appliance to an incorrectly grounded power socket then neither the manufacturer nor vendor take any responsibility for possible damages. - Page 18 Level the dishwasher using the adjustable feet to on the angle of the fl oor (Fig. 3). Slide the dishwasher under the countertop ensuring not to crimp or bend the hoses (Fig. 4). Product Without insulation With insulation All models for 2nd rack for 3rd rack Height...
-
Page 19: Part : Before Using
PART : BEFORE USING Before fi rst use of the dishwasher Check that the electrical and water connection requirements provided in the user's manual match the technical specifi cations of your power grid and the water mains. You can fi nd out such technical specifi cations from your power and water suppliers. - Page 20 Setting salt consumption The dishwasher is designed to enable the adjustment of salt consumption on the basis of the hardness of the water used. This should optimise and adapt the level of salt consumption. Table for setting up water hardness Hardness level dH (German dF (French...
-
Page 21: Adding Salt Into The Salt Compartment
Adding salt into the salt compartment Always use salt designed for dishwashers. The salt compartment is located under the lower rack and you should refi ll it in the following manner. CAUTION! Use only salt specifi cally designed for use in dishwashers! Any other kind of salt, which is not specifi cally designed for use in dishwashers, particularly table salt, would damage the softener system in the dishwasher. -
Page 22: Adding Rinsing Aid
Adding rinsing aid Rinsing aid compartment The rinsing aid is released during the last rinse so that water drops do not remain on your dishes causing stains. It also improves drying due to the fact that all the water fl ows off the dishes. Your dishwasher is designed to only be used with a liquid rinsing aid. -
Page 23: Dishwashing Detergents
Function of the detergent Dishwashing detergents with their chemical additives are essential for the removal of soils, their decomposition and removal from the dishwasher. For this purpose the majority of commercial quality dishwashing detergents are suitable. Dishwashing detergents There are 3 types of dishwashing detergents: containing phosphates and chlorine;... - Page 24 Using the dishwashing detergent Use only dishwashing detergent specifi cally designed for use in dishwashers. Store the dishwashing detergent in a dark and dry place. Do not put dishwashing detergent powder into the compartment unless you intend to start the dishwasher. Dosage of the dishwashing detergent Release the clip to open the dishwashing detergent compartment.
-
Page 25: Part : Basic Functions
PART : BASIC FUNCTIONS Selecting programs and starting the dishwasher Press the On/Off button. Select the wash program using the up/down buttons (7, 8). If necessary, you can add an additional function (4) (9-10-11-12-13-14) to the program. Start the dishwasher by pressing the Start/Pause button. The message "Program Activated" (Program activated) will appear on the display and the selected program will start. -
Page 26: Monitoring The Wash Cycle
Monitoring the wash cycle You can monitor the wash cycle using the indicators on the display (22 - a, b, c, d). As the wash cycle proceeds, the wash and drying symbols gradually light up. When the drying symbol is lit, the dishwasher will be quiet for a time of approx. -
Page 27: Adding Additional Functions To A Selected Program
Adding additional functions to a selected program You may change the selected wash cycle according to your preferences by adding additional functions to a selected wash cycle. Wash programs are designed in such a way that the best wash results are always achieved with respect to the type of soiling, degree of soiling and the properties of the washed dishes. -
Page 28: Changing A Program
Certain functions cannot be selected simultaneously, follow the diagram below. Half load Extra Extra Delayed Extra qui- Extra Option (3 op- Tablet Child lock quick hygienic start et wash drying tions) wash wash Delayed start Half load (3 options) Tablet Child lock Extra quick wash Extra hygienic... -
Page 29: Settings Menu
Settings menu To enter the settings menu, hold down the selection and delayed start buttons for approximately 3 seconds. The message "Keep Pressing..X" (Keep pressing..X) will appear on the display, indicating how many more seconds you need to hold down the button. When a zero is shown on the display, the settings menu will appear. -
Page 30: Child Lock
6. Reset to factory settings In order to be able to delete all the settings you performed and to restore factory settings, select "6- Factory settings" (Restore factory settings) using the up/down buttons. The display will show "6. Factory settings: X" (X: yes or no). -
Page 31: Delayed Start: (Standby Mode)
Delayed start: (Standby mode) You may delay the start of a selected cycle by up to 24 hours. Once the wash cycle starts, it is not possible to set a delayed start. In order to set the delayed start function, the wash cycle must not be started. Press the delayed start button (5). - Page 32 EN - Copyright © 2015, Fast ČR, a. s. 08/2015...
- Page 33 "Double wash": Fragile dishes in the upper rack are washed at a lower pressure and more soiled dishes in the lower rack are washed at a higher pressure. Thereby you may have both fragile/slightly soiled dishes as well as heavily soiled dishes at the same time. Tests of the off mode and turned on mode were performed in accordance with norm EN 62301 Measurement of standby power.
- Page 34 PART : WASHING DISHES / CUTLERY Purchase dishes designated as dishwasher safe. Use a gentle dishwashing detergent marked as "gentle on dishes". If necessary seek out further information from the dishwashing detergent manufacturer. For certain types of dishes select a lower temperature. To prevent possible damage, remove glassware and cutlery from the dishwasher as soon as possible after the end of the wash.
-
Page 35: Loading The Upper Rack
Taking dishes out of the dishwasher To prevent water dripping down from the upper rack on to the dishes in the lower rack, we recommended you fi rst empty the lower rack and only then the upper rack. Loading the upper rack The upper rack is designed for lighter dishes: glasses, cups and mugs and saucers, also small plates, small bowls and shallow pots (if they are not too soiled). -
Page 36: Setting The Upper Rack
Incorrect arrangements of dishes For detailed information on performance tests, please contact following address: " ” . In your email, please provide the model name and number (20 digits) which you can find on the appliance door. Setting the upper rack Upper rack partitions The upper rack partitions (1, 2) can be tilted upwards as necessary for example for loading tall glasses. - Page 37 Setting the height of the upper rack The height of the upper rack can be set so as to create more space for larger dishes in the upper / lower rack. The height of the upper rack can be set without removal by simply lifting / pushing down the upper rack on both sides.
-
Page 38: Cutlery Rack
Cutlery rack The cutlery rack is specially designed for loading forks, spoons and knives, large serving spoons and smaller items if necessary. Since it is very easy to take out, it is possible to take out both the upper rack as well as the cutlery rack. The cutlery rack consists of two parts. -
Page 39: Part : Cleaning And Maintenance
PART : CLEANING AND MAINTENANCE BEFORE CLEANING, REGULAR MAINTENANCE OR OTHER HANDLING OF THE APPLIANCE, APART FROM THE OPERATION OF THE APPLIANCE, ALWAYS CHECK THAT YOU HAVE DISCONNECTED ITS POWER PLUG FROM THE POWER SOCKET Filtration system The fi lter prevents food remains or other foreign items from entering the pump. Food remains may clog the fi lter and in such a case it is necessary to take it out. -
Page 40: Dishwasher Care
Recommendation: After every use of the dishwasher check that the fi lters are not clogged. You can take out the fi ltration system by unscrewing the coarse fi lter. Remove any food remains and clean out the fi lters under running water. NOTE: You should clean the entire fi ltration set once per week. - Page 41 Reconnect the water supply hose to the water valve. Take out the fi lter on the bottom of the dishwasher and using a sponge suck up the water from the waste tank. NOTE: If your dishwasher is not working because it has frozen, contact an authorised service technician. Cleaning the spraying arms It is important to regularly clean the spraying arms so that hard water minerals do not clog the jets and the bearings of the spraying arms.
-
Page 42: Part : Troubleshooting
PART : TROUBLESHOOTING The appliance may only be repaired by an authorised service centre. Before calling the authorised service centre, check whether you can remedy the problem yourself by reading the instructions or proceeding according to the operating instruction. You may be charged repair fees even within the scope of a valid warranty. Error messages Error Description... - Page 43 Washing detergent remains in the detergent compartment. • The washing detergent was wet. Water is inside the dishwasher at the end of a program. • The drain hose is clogged or tangled. • The fi lters are clogged. • The program has not fi nished yet. The dishwasher stopped during operation.
-
Page 44: Packaging Materials
INSTRUCTIONS AND INFORMATION REGARDING THE DISPOSAL OF USED PACKAGING MATERIALS Dispose of packaging material at a public waste disposal site. DISPOSAL OF USED ELECTRICAL AND ELECTRONIC APPLIANCES The meaning of the symbol on the product, its accessory or packaging indicates that this product shall not be treated as household waste.
Need help?
Do you have a question about the PD 125 IQ and is the answer not in the manual?
Questions and answers