Table of Contents
Advertisement
Quick Links
Advertisement
Table of Contents

Related Manuals for Tenda AP5V


Summary of Contents for Tenda AP5V
-
Page 2: Copyright Statement
Shenzhen Tenda Technology Co., Ltd. No part of this publication can be reproduced, transmitted, transcribed, stored in a retrieval system, or translated into any language in any form or by any means without the prior written permission of Shenzhen Tenda Technology Co., Ltd. - Page 3 Conventions Thank you for choosing Tenda! Please read this user guide before you start. This user guide instructs you to install and configure the router. Typographical conventions in this User Guide: Item Presentation Example “Click the Save button” can be simplified as...
-
Page 4: Table Of Contents
Contents 1 Product Overview ..............................1 Package Contents ..............................1 Hardware Description .............................. 1 Front Panel ................................1 Back Panel ................................2 Label .................................. 3 2 Quick Internet Setup .............................. 4 Step 1: Connect the AP for Configuration ........................ 4 Step 2: Configure IP on Your PC .......................... - Page 5 Reboot Manually ............................... 43 How to Reset Your AP ............................43 How to Upgrade Your AP ............................43 How to Backup and Restore Your AP’s Configurations ..................44 How to View System Info and Wireless Info of Your AP ..................45 How to View DHCP Client Information .........................
-
Page 6: Product Overview
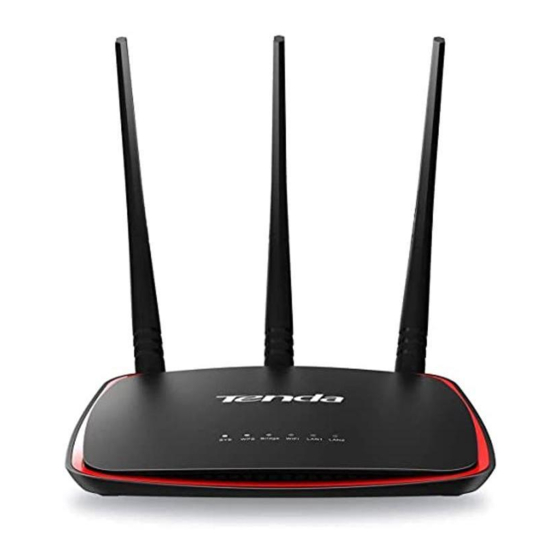
1 Product Overview Package Contents Open the package and verify that the following items are included: Wireless AP Power Adapter PoE Injector Ethernet Cable Install Guide If any item is incorrect, missing, or damaged, please contact your dealer for immediate replacement. Hardware Description Front Panel... -
Page 7: Back Panel
Status Description Malfunction occurs or the device is not powered on. Blinking The device is working properly. WPS is disabled or WPS authentication negotiation is completed. Blinking The device is negotiating with the uplink ADSL Modem or Wi-Fi Router. Not bridged Bridge (Not apply to AP mode) Solid... -
Page 8: Label
Port/Button Description 1) PoE port for connecting to the included PoE injector for power supply. PoE/LAN2 2) 100Mbps Ethernet LAN port for connecting to the local device, like a computer, a switch, etc. 100Mbps Ethernet LAN port for connecting to the local device, like a computer, a LAN1 switch, etc. -
Page 9: Quick Internet Setup
2 Quick Internet Setup Step 1: Connect the AP for Configuration Note: If the AP deployment location is far away from the power outlet, you can refer to the Power over Ethernet (PoE) solution in appendix A With PoE Setup. ❶... - Page 10 ❸ Click Ethernet > Properties. ❹ Find and double click Internet Protocol Version 4(TCP/IPv4).
-
Page 11: Windows 7
❺ Select Use the following IP address, type in the IP address: 192.168.0.x (2~253), Subnet mask: 255.255.255.0 and click OK. ❻ Click OK on the Ethernet Properties window. Windows 7 ❶ Click the icon on the bottom right corner of your desktop. ❷... - Page 12 ❸ Click Local Area Connection > Properties. ❹ Find and double click Internet Protocol Version 4(TCP/IPv4).
-
Page 13: Windows Xp
❺ Select Use the following IP address, type in the IP address: 192.168.0.x (2~253), Subnet mask: 255.255.255.0 and click OK. ❻ Click OK on the Local Area Connection Properties window. Windows XP ❶ Right click My Network Places on your desktop and select Properties. - Page 14 ❷ Right click Local Area Connection and select Properties. ❸ Scroll down to find and double click Internet Protocol (TCP/IP). ❹ Select Use the following IP address, type in the IP address: 192.168.0.x (2~253), Subnet mask: 255.255.255.0 and click OK.
-
Page 15: Step 3: Login To Its Web Manager
❺ Click OK on the Local Area Connection Properties window. Step 3: Login to Its Web Manager Input 192.168.0.254 in a web browser’s address bar, and then press Enter or Return on your keyboard. Enter the default user name and password (admin for both) and click Login. -
Page 16: Step 4: Configure The Operation Mode
Please select the proper operating mode according to your needs and click Next to finish mode settings. 5 modes are available here. Next we will introduce them one by one. Tip: After successful login, for your network security, it is advisable to modify your login user name, password and LAN IP address. - Page 17 Settings: ❶ Select AP mode on Quick Setup page and click Next. ❷ Set a WiFi name and WiFi password for your local network and click Next. ❸ Note down your WiFi name and password on this page and click Save to apply your settings. Wait until the device restarts successfully.
-
Page 18: Station Mode
Station Mode In this mode, the AP will work as an adapter to connect your wired devices to a wireless network. Settings ❶ Select Station mode on Quick Setup page and click Next. ❷ Click the Scan button, select the remote SSID (WiFi name) and click Next. - Page 19 ❸ The security mode will be selected automatically, please confirm it and enter the WiFi password of the uplink ADSL modem or router in the Key field and click Next. ❹ Make sure that the IP address is a different one but on the same network segment as that of the uplink ADSL modem or router and then click Next.
-
Page 20: Universal Repeater Mode
Universal Repeater Mode In this mode, the AP can extend the WiFi range of the uplink ADSL modem or router. It’s an ideal solution for large house, villa, eatery, store, etc. As compatibility problems may exist among routers of different manufacturers, it is not advisable to bridge a device from other manufacturers. - Page 21 ❶ Press the WPS button on the uplink ADSL modem or router until the WPS LED blinks. ❷ Within 2 minutes, press the Range Extender button on the AP5 for 3 seconds until the WPS LED is blinking. Then the AP will start to connect to the ADSL modem or Router. ❸...
- Page 22 Method 2: Boost WiFi Range via Web UI ❶ Select Universal Repeater mode on Quick Setup page and click Next. ❷ Click the Scan button, select the remote SSID (WiFi name) from the list and click Next. ❸ The security mode will be selected automatically, please confirm it and enter the WiFi password of the uplink ADSL modem or router in the Key field and click Next.
-
Page 23: Wisp Mode
❹ Make sure the IP address is a different one but on the same network segment as that of the uplink ADSL modem or router and click Next. ❺ Note down your SSID (WiFi name) and WiFi password on this page and click Save to apply your settings. Wait until the device restarts successfully. - Page 24 Settings ❶ Select WISP mode on Quick Setup page and click Next. ❷ Click the Scan button, select the remote SSID (WiFi name) you wish to and click Next.
- Page 25 ❸ The security mode will be selected automatically, please confirm it and enter the WiFi password of the uplink ADSL modem or router in the Key field and click Next. ❹ Select the WAN connection type according to your needs, finish corresponding Internet setups, and then click Next.
-
Page 26: Client + Ap Mode
❻ Make sure that the IP address is on a different network segment from that of the ISP hotspot and then click Next. ❼ Note down your SSID (WiFi name) and WiFi password on this page and click Save to apply your settings. Wait until the device restarts successfully. - Page 27 Note: As compatibility problems may exist among routers of different manufacturers, it is not advisable to bridge a device from other manufacturers. Settings ❶ Select Client +AP mode on Quick Setup page and click Next. ❷ Click the Scan button, select the remote SSID (WiFi name) you wish to and click Next.
- Page 28 ❸ The security mode will be selected automatically, please confirm it and enter the WiFi password of the uplink ADSL modem or router in the Key field and click Next. ❹ Set the WiFi name and network security settings for your local network and click Next. ❺...
-
Page 29: Step 5: Done
❻ Note down your local SSID (WiFi name) and WiFi password on this page and click Save to apply your settings. Wait until the device restarts successfully. Step 5: Done! After finishing settings of the mode you select, set your PC to Obtain an IP address automatically for Internet access. -
Page 30: Setup: Advanced
3 Setup: Advanced How to Change the LAN IP Address You can choose whether the AP gets its IP address manually (static IP) or automatically (DHCP). Click Network > LAN Setup to enter page below: To set your AP’s IP address in Static IP mode: ❶... -
Page 31: How To Configure Dhcp Server Settings
To set your AP’s IP address in DHCP mode: ❶ Address Type: Select DHCP. ❷ Click Save to apply your changes. Note: In DHCP mode, your LAN IP address is assigned by the DHCP server of your uplink device. Thus, to know your LAN IP address, you need to check it on the DHCP client list of the uplink device. -
Page 32: How To Configure Basic Wireless Settings
DHCP Server --- Check/Uncheck it to enable/disable the DHCP server. Start IP --- The start IP address that the DHCP server has automatically assigned. End IP --- The end IP address that the DHCP server has automatically assigned. Primary DNS Server --- Primary DNS server address. Alternate DNS Server --- Alternate DNS server address. - Page 33 WiFi --- Check the Enable box to enable the WiFi of your SSID or check the Disable box to disable the WiFi of your SSID. Country --- Select the country for your WiFi. Select SSID --- Select the SSID you wish to use. SSID Enable --- Check the Enable box to enable the SSID or check the Disable box to disable the SSID.
- Page 34 Network Mode --- Select a proper network mode: 11 b/g/n mixed, 11 b/g mixed, 11g or 11b. Security Mode --- Select WEP, WPA-PSK , WPA2-PSK,WPA, WPA2. (1) WEP: Compliant with the full IEEE 802.11 standard. Encryption Type: Open, Shared, 802.1 X Enter a WEP key that is either 5 or 13 ASCII characters or 10 or 26 Hex characters when your encryption type is Open and Shared.
-
Page 35: How To Configure Advanced Wireless Settings
How to Configure Advanced Wireless Settings Click Wireless > Advanced to configure advanced wireless settings. If you are not familiar with these settings, keep the default settings unchanged. Beacon Interval --- This is a time interval between any two consecutive Beacon packets sent by an Access Point to synchronize a wireless network. -
Page 36: How To Filter Access To Your Network
Preamble --- Mainly used for preamble synchronization. It is advisable to keep the default value unchanged. Sensitivity Threshold --- Define the minimum client signal level accepted by the AP for the client to connect to. If the client signal level subsequently drops, the client remains connected to the AP. How to Filter Access to Your Network Click Wireless >... -
Page 37: How To Configure Qvlan Settings To Work With Switches
How to Configure QVLAN Settings to Work with Switches QVLAN enables this AP to broadcast up to 8 wireless networks with different names. When using this feature, users could also assign different VLAN IDs to different wireless networks, which makes it possible to get it work with switches which as VLAN assigned for different access levels and authorities. - Page 38 Below is a basic topology of How AP5 should work with Switches that has VLAN assigned. Assume that in the network there are four Departments: HR, Sales, Technical and R&D. They belong to different VLAN networks to have different authorities (HR-VLAN1, Sales-VLAN2, Tech-VLAN3, and R&D-VLAN4). When we setup VLAN to each SSID, for example: SSID 1 with VID 1;...
- Page 39 Note Only the PoE/LAN2 port is QVLAN-enabled. Thus, to enable QVLAN feature on this AP, you need to connect the PoE/LAN2 port on the AP to the switch. Settings on AP5: ❶ Click Wireless > Basic to set 4 SSIDs: SSID1, SSID2, SSID3 and SSID4. ❷...
-
Page 40: How To Login To Web Manager In A More Secure Way
How to Login to Web Manager in a More Secure When HTTP and HTTPS web service are enabled simultaneously, you are only allowed to login to its web manager via HTTPS. How to login to Web Manager via HTTP To login to its web manager via HTTP: ❶... -
Page 41: How To Configure The Idle Timeout
❺ Then you need to enter “https://login IP address: port No.” in the address bar to login to its web manager. Here we enter “https://192.168.0.254:443” in the address bar. Tip: HTTPS web service is a more secure way for web login. How to Configure the Idle Timeout You are automatically logged out of the web manager after a period of inactivity. - Page 42 ❸ Select a time interval from the drop-down list. ❹ Select your time zone. ❺ Click Save. To set time and date manually: ❶ Click Tools > Date & Time. ❷ Select Manual. ❸ Specify the time and date manually or click Synchronized with local time to automatically copy your PC's time to the device.
-
Page 43: How To Change The Login User Name And Password
How to Change the Login User Name and Password Click Tools > Administrator to enter screen below. Here you can change the user name and password for web login. We suggest that you change this password to a more secure one. -
Page 44: Maintaining And Monitoring
4 Maintaining and Monitoring How to Diagnose Your Network Three ways are available here to diagnose your network. If there’s something wrong with your network, select the proper one as you need. To deactivate this feature, select Disable. Site Survey To get an overview of your nearby wireless networks in range on all supported channels, click Tools >... -
Page 45: Ping
Ping Ping is a computer network administration utility used to test the reachability of a host on an Internet Protocol (IP) network and to measure the round-trip time for messages sent from the original host to a destination computer. To implement Ping action, click Tools > Diagnose and finish settings as shown below: ❶... -
Page 46: Traceroute
Traceroute Traceroute is a computer network diagnostic tool for displaying the route (path) and measuring whether network connection is available or not. When malfunctions occur to the network, you can locate trouble spot of the network with this traceroute test. To implement Traceroute action, click Tools >... -
Page 47: How To Reboot Your Ap
How to Reboot Your AP When some settings you have configured cannot be activated or your device is functioning improperly, you can reboot your device. Once this function is enabled, please make sure that your device is synchronized with the Internet time server. -
Page 48: Reboot Manually
Reboot Manually To reboot your device manually, click Tools > Maintenance, locate the Reboot Router section and click Reboot. How to Reset Your AP If the device or client connected to the device fails to access the Internet due to incorrect configurations and you cannot solve the problem, you can reset the device. -
Page 49: How To Backup And Restore Your Ap's Configurations
❶ Launch a web browser and go to http://www.tendacn.com to download the latest firmware. ❷ Unzip the compressed upgrade file in the corresponding directory. ❸ Click Tools > Maintenance, locate the Upgrade Firmware section and click Upgrade. ❹ Click Choose File (in Google browser) to locate and select the upgrade file in the corresponding directory on your hard disk. -
Page 50: How To View System Info And Wireless Info Of Your Ap
To backup your configurations: ❶ Click Backup / Restore. ❷ Click Backup on the pop-out window and follow on screen instructions to save your configurations in a directory on your hard disk. To restore your configurations: ❶ Click Backup / Restore. ❷... -
Page 51: How To View Dhcp Client Information
How to View DHCP Client Information To view DHCP clients information, click Network > DHCP Client to enter page below: How to View Wireless Clients Information To view wireless clients information, click Wireless > Wireless Clients to enter page below: How to View the History of Your AP’s Actions Click Tools >... -
Page 53: Appendix
Appendix A With PoE Setup ❶ Connect your computer to the LAN port of the injector with the included Ethernet cable. ❷ Connect the PoE/LAN2 port of your AP to the PoE port of the injector with another Ethernet cable. ❸... -
Page 54: Windows 8
Windows 8 Step 1: Click the icon on the bottom right corner of your desktop. Step 2: Select your wireless network from the list, click Connect and then follow onscreen instructions. 1. If you cannot find the icon , please move your mouse to the top right corner of your desktop, select Settings >... -
Page 55: Windows 7
Windows 7 Step 1: Click the icon on the bottom right corner of your desktop. Step 2: Double click your SSID (wireless network name) and then follow onscreen instructions. Step 3: When your SSID (wireless network name) displays Connected as shown below, you’ve connected to it for Internet access successfully. -
Page 56: Windows Xp
Windows XP Step 1: Right click My Network Places, and select Properties. Step 2: Right click Wireless Network Connection, and select View Available Wireless Networks from the pop-up submenu. Step 3: Select your wireless network from the list and then follow onscreen instructions. -
Page 57: C Faqs
Step 4: When your SSID displays Connected as shown below, you’ve connected to it successfully. C FAQs Q: I enter the device’s LAN IP address in the web browser but cannot access this device’s web manager. What should I do? 1) Verify that the IP address of computer should be a different one but on the same network segment as the LAN IP address of devices. - Page 58 FCC Statement This device complies with Part 15 of the FCC Rules. Operation is subject to the following two conditions: (1) This device may not cause harmful interference, and (2) this device must accept any interference received, including interference that may cause undesired operation. This equipment has been tested and found to comply with the limits for a Class B digital device, pursuant to Part 15 of the FCC Rules.
Need help?
Do you have a question about the AP5V and is the answer not in the manual?
Questions and answers