Panasonic HC-W580 Operating Instructions Manual
Hide thumbs
Also See for HC-W580:
- Basic owner's manual (281 pages) ,
- Basic operating instructions manual (40 pages) ,
- Operating instructions manual (248 pages)

Related Manuals for Panasonic HC-W580


Summary of Contents for Panasonic HC-W580
- Page 1 Operating Instructions High Definition Video Camera HC-W580 Model No. HC-W580M HC-V380 Please read these instructions carefully before using this product, and save this manual for future use. SQW0521...
-
Page 2: Read This First
SD card or built-in memory is being HD Writer LE 3.1. accessed (initialisation, recording, playback, j Copy the image to a Panasonic Blu-ray deleting etc.). Do not perform the following disc recorder that supports AVCHD operations when the lamp illuminates. It may Progressive. -
Page 3: This Unit
≥ 4 GB or more Memory Cards that do not have instructions the SDHC logo or 48 GB or more Memory HC-W580 [W580] W580 Cards that do not have the SDXC logo are not based on SD Memory Card... -
Page 4: Table Of Contents
Contents Read this first ..........2 Recording with the Backup for Twin Camera Function..........51 Preparation Changing the Recording Mode ....53 Intelligent Auto ........54 Intelligent Auto Plus ....... 56 Names and Functions of Main Parts .... 7 Creative Control ........56 Power supply.......... - Page 5 Deleting scenes/still pictures ....107 [Copy]............157 Deleting part of a scene (AVCHD/ Preparations before using [Copy] ..157 Backup for Twin Camera) ....109 Copying to a PC........159 Dividing a scene (AVCHD/Backup for [Live Cast]...........161 Twin Camera) ........110 Preparations before using Dividing a scene to partially delete [Live Cast] ..........
- Page 6 With a PC What you can do with a PC ....... 208 Before Installing HD Writer LE 3.1..210 Operating environment ......212 Installation ..........214 Connecting to a PC........215 About the PC display ......217 Starting HD Writer LE 3.1 ......219 Reading the operating instructions of the software applications .....
-
Page 7: Preparation
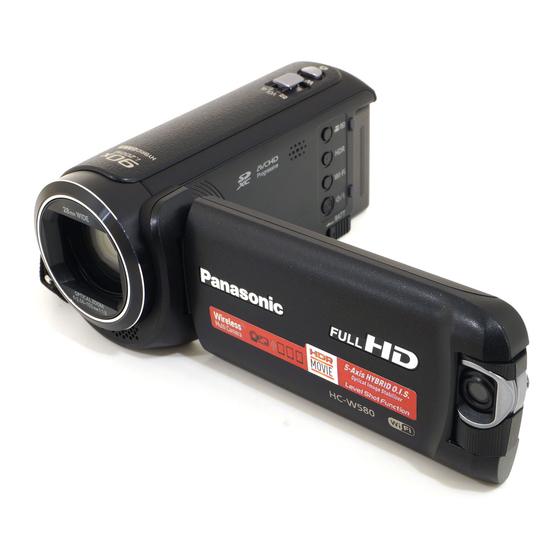
Preparation Names and Functions of Main Parts V380 Lens cover Speaker ≥ W580 W580M Recording/playback button [ The lens cover opens in Motion Picture Recording Mode or Still Picture Recording W580M W580 Mode. HDR button [ V380 V380 Lens cover opening/closing switch Level Shot Function button [ When not using the unit, close the lens cover to protect the lens. - Page 8 16 17 Tripod receptacle Status indicator 17, 168) ≥ Attaching a tripod with a screw length of Recording start/stop button 5.5 mm or more may damage the unit. Battery holder Sliding stand LCD monitor (Touch screen) When using this unit on a desk or any flat surface, pull out the sliding stand as illustrated below to keep this unit stable.
- Page 9 DC input terminal [DC IN] Photoshot button [ ≥ Do not use any other AC adaptors except the Zoom lever [W/T] (In Motion Picture supplied one. Recording Mode or Still Picture Wi-Fi Transmitter 139) Recording Mode) 43)/ Shoulder strap fixture Thumbnail display switch [ Grip belt 30)/...
-
Page 10: Power Supply
≥ The unit has a function for distinguishing batteries which can be used safely. The dedicated battery (VW-VBT190/VW-VBT380) supports this function. The only batteries suitable for use with this unit are genuine Panasonic products and batteries manufactured by other companies and certified by Panasonic. Panasonic cannot in any way guarantee the quality, performance or safety of batteries which have been manufactured by other companies and are not genuine Panasonic products. -
Page 11: Charging The Battery
Please refer to page 216. ≥ If the status indicator flashes at a particularly fast or slow rate, refer to page 234. ≥ We recommend using Panasonic batteries 12). ≥ If you use other batteries, we cannot guarantee the quality of this product. -
Page 12: Charging And Recording Time
Charging and recording time ∫ Charging/Recording time ≥ The indicated charging time is for when the battery has been discharged completely. Charging time and recordable time vary depending on the usage conditions such as high/ low temperature. ≥ Temperature: 25 oC/humidity: 60%RH ≥... - Page 13 However, it will be constantly displayed when the remaining battery time becomes less than 30 minutes. ≥ The remaining battery capacity is displayed when using the Panasonic battery that you can use for this unit. The actual time can vary depending on your actual use.
-
Page 14: Recording To A Card
SDXC Memory Card 48 GB to 128 GB ≥ Please check the latest information on the support website below. http://panasonic.jp/support/global/cs/e_cam (This website is in English only.) ≥ When using an SDHC Memory Card/SDXC Memory Card with other equipment, check the equipment is compatible with these Memory Cards. -
Page 15: Inserting/Removing An Sd Card
Class 10, recording may suddenly stop. Inserting/removing an SD card When using an SD card not from Panasonic, or one previously used on other equipment, for the first time on this unit, format the SD card. 39) When the SD card is formatted, all of the recorded data is deleted. - Page 16 ≥ Do not touch the terminals on the back of the ≥ Do not expose the terminals of the SD card to SD card. water, dirt or dust. ≥ Do not apply strong shocks, bend, or drop the ≥ Do not place SD cards in the following areas: SD card.
-
Page 17: Turning The Unit On/Off
Preparation Turning the unit on/off You can turn the unit on and off using the power button or by opening and closing the LCD monitor. Turning the unit on and off with the power button Open the LCD monitor and press the power button to turn on the unit. To turn off the unit ... -
Page 18: Selecting A Mode
Preparation Selecting a mode You can switch this unit between Recording Mode (Motion Picture Recording Mode/Still Picture Recording Mode) and Playback Mode by pressing the recording/playback button. If you touch the recording mode switching icon in Recording Mode, this unit can be switched between Motion Picture Recording Mode and Still Picture Recording Mode. -
Page 19: How To Use The Touch Screen
To display the recording mode switching icon Display of the recording mode switching icon will disappear when no touch operation is performed for a specific period of time. To display it again, touch the screen. ≥ The recording mode switching icon does not work when the Wireless Multi-Camera function is in use. -
Page 20: About The Touch Menu
About the Touch Menu Touch (left side)/ (right side) of on the Touch Menu to switch the operation icons. ≥ It is also possible to switch the operation icons by sliding the Touch Menu right or left while touching it. A Touch Menu ... -
Page 21: Setting Date And Time
Preparation Setting date and time The clock is not set at the time of purchase. Make sure to set the clock. ≥ When you turn on this unit, the message “Set home region and date/time.” may be displayed. Select [YES], and follow the steps below to make these settings: j Step 3 of [SET WORLD TIME] j Steps 2–3 of “Setting date and time”... -
Page 22: Basic
Basic Before recording ∫ Basic camera positioning 1 Hold the unit with both hands. 2 Put your hand through the grip belt. 3 It is convenient to use the Recording button icon A when holding the unit at waist level. ≥... -
Page 23: Selecting A Media To Record [W580M]
Basic Selecting a media to record [W580M] The card and built-in memory can be selected separately to record motion pictures or still pictures. Set this unit to Recording Mode. Select the menu. : [MEDIA SELECT] MENU Touch the media to record motion pictures or still pictures. - Page 24 ∫ Screen indications in the Motion Picture Recording Mode Recording mode 0h00m00s 0h00m00s 0h00m00s Approximate remaining recordable time R 1h20m R 1h20m R 1h20m R 1h20m ≥ When the remaining time is less than 1 minute, R 0h00m flashes red. Recording time elapsed ≥...
- Page 25 ≥ (Maximum recordable scenes of a single SD card or built-in memory*) Recording format [AVCHD] [MP4/iFrame] Recordable scenes Approx. 3900 Approx. 89100 Different dates Approx. 900 Approx. 900 ≥ Maximum number of recordable scenes and maximum number of different dates will be less than above table when there are both MP4/iFrame scenes and still pictures recorded on an SD card or the built-in memory*.
-
Page 26: Recording Still Pictures
Basic Recording still pictures Open the LCD monitor, and set this unit to Still Picture Recording Mode. Press the button halfway. (For Auto Focus only) Focus indication: A Focus indication: ± (The white lamp flashes.): Focusing ¥ (The green lamp lights up.): When in focus ... -
Page 27: Recording Still Pictures In Motion Picture Recording Mode
∫ About the screen indications in Still Picture Recording Mode Still picture operation indicator 221) R3000 R3000 R3000 MEGA Remaining number of still pictures R3000 ≥ Flashes in red when [0] appears. Size of still pictures MEGA Optical Image Stabilizer MEGA ≥... -
Page 28: Motion Picture/Still Picture Playback
Basic Motion picture/Still picture playback Set this unit to Playback Mode 18). Touch the play mode select icon A 20). ≥ You can also set by touching , selecting [VIDEO SETUP] MENU or [PHOTO SETUP] # [MEDIA, VIDEO/PICTURE]. W580 V380 ... - Page 29 ≥ The following icons are displayed on thumbnails when [ALL AVCHD] or [1080/50i] is touched: j AVCHD [1080/50p] scene: j AVCHD [PH] scene: j AVCHD [HA] scene: j AVCHD [HG] scene: j AVCHD [HE] scene: ≥ The following icons are displayed on thumbnails when [ALL MP4/iFrame] is touched: j MP4 [1080/50p] scene: (Blue) (Recording mode [1080/50M]) (Recording mode [1080/28M])
-
Page 30: Motion Picture Compatibility
∫ Change the thumbnail display While the thumbnail is displayed, the thumbnail display changes in the following order if the zoom lever is operated to side or side. 20 scenes () 9 scenes () 1 scene () Highlight & Time Frame Index* * Highlight &... -
Page 31: Using The Menu Screen
Basic Using the menu screen ≥ Touch (left side)/ (right side) of on the Touch Menu to display MENU ∫ About guide display Touch MENU After touching , touching the submenus and items will cause function descriptions and settings confirmation messages to appear. ≥... -
Page 32: Using The Setup Menu
Basic Using the Setup Menu [DISPLAY] Set the display method for the screen information display. : [SETUP] # [DISPLAY] # desired setting MENU [5 SEC.]: Information is displayed on the screen for 5 seconds after starting the Motion Picture Recording Mode or Still Picture Recording Mode, starting to playback, or touching the screen. - Page 33 (Only when setting the region of your travel destination) Touch [DESTINATION]. ≥ Touch [ENTER]. ≥ When the home region is set for the first time, the screen for selecting home/travel destination appears after setting the home region successively. If the home region has already been set once, execute the menu operation for Step 1.
-
Page 34: Date Format
[DATE/TIME] It is possible to change the date and time display mode. : [SETUP] # [DATE/TIME] # desired display MENU [DATE]/[D/T]/[OFF] ≥ The date and time are not displayed while the recording mode switching icon is displayed. ≥ When the Touch Shutter is enabled, the recording mode switching icon is constantly displayed. This causes the date and time to disappear from the screen. -
Page 35: Quick Power On
[ECONOMY (BATT)] When about 5 minutes have passed without any operation, this unit automatically turns off to save battery life. : [SETUP] # [ECONOMY (BATT)] # [ON] MENU ≥ This unit will not automatically turn off even if [ECONOMY (BATT)] is set to [ON] in following cases: j Using the AC adaptor* j Using the USB cable for PC etc. - Page 36 [ALERT SOUND] Touch screen operation, starting and stopping of recording and unit on/off can be confirmed with this sound. When [OFF] is selected, the sound is not output at the start/end of recording, etc. : [SETUP] # [ALERT SOUND] # desired setting MENU (Volume low)/ (Volume high)/[OFF]...
-
Page 37: Power Lcd
[POWER LCD] This makes it easier to view the LCD monitor in bright places including outdoors. : [SETUP] # [POWER LCD] # desired setting MENU (Makes brighter)/ (Normal)/ (Makes less bright) ≥ These settings will not affect the images actually recorded. ≥... - Page 38 [TV ASPECT] Please refer to page 118. [INITIAL SET] Set to [YES] for changing the menu settings back to the default condition. : [SETUP] # [INITIAL SET] MENU ≥ Settings for [MEDIA SELECT] , [CLOCK SET] and [LANGUAGE] will not be changed. * For users who have , this menu is not displayed.
-
Page 39: Format Media
[NUMBER RESET] Set the file number of the MP4/iFrame and still picture recorded next to 0001. : [SETUP] # [NUMBER RESET] MENU ≥ Folder number is updated and file number will start from 0001. 217) ≥ To reset the folder number, format the SD card and built-in memory, and then perform [NUMBER RESET]. - Page 40 [Version Up] You can update the firmware version of this unit. : [SETUP] # [Version Up] MENU For the latest update information, check the support website below. (As of November 2015) http://panasonic.jp/support/global/cs/e_cam (This Site is English only) - 40 -...
-
Page 41: Demo Mode
[DEMO MODE] This item is used to start the unit demonstration. : [SETUP] # [DEMO MODE] # [ON] MENU ≥ If [DEMO MODE] is switched to [ON] and you touch [EXIT] when there is no SD card inserted and while this unit is connected to the AC adaptor, the demonstration automatically starts. If any operation takes place, the demonstration is cancelled. - Page 42 [SOFTWARE INFO] You can connect this unit and a PC with the USB cable and check software information (License) on the PC. Select the menu. : [SETUP] # [SOFTWARE INFO] MENU Connect this unit to a PC. ≥ A message will be displayed when the connection is complete. On the PC, check [LICENSE.TXT]. ≥...
-
Page 43: Advanced (Recording)
Advanced (Recording) Using the zoom Zoom lever/Zoom button icons T side: Close-up recording (zoom in) W side: Wide-angle recording (zoom out) A Zoom bar ≥ Maximum zoom ratio for recording motion pictures can be set with [ZOOM MODE]. ∫ About the zoom bar The zoom bar is displayed during the zoom operation. -
Page 44: Level Shot Function [V380]
Advanced (Recording) Level Shot Function [V380] This function detects the horizontal tilt of the unit, and automatically corrects it to the level position. (When setting (Normal)) (When setting (Strong)) : With Level Shot Function : Without Level Shot Function Level Shot Function button Each press of this button switches Level Shot Function. -
Page 45: Hdr Movie Mode [W580] [W580M]
Advanced (Recording) HDR Movie Mode [W580] [W580M] You can minimise the loss of gradations in bright areas and dark areas when, for example, the contrast between the background and the subject is large. HDR button You can switch from Recording mode to HDR Movie Mode by pressing this button. -
Page 46: Recording With The Sub Camera (Twin Camera) [W580] [W580M]
≥ You can also change this setting by touching its operation icon. ≥ You may not see the full effect depending on the recording conditions. Advanced (Recording) Recording with the Sub Camera (Twin Camera) [W580] [W580M] Using the Sub Camera and the Main Camera, you can record two images simultaneously. - Page 47 Rotate the Sub Camera dial to adjust its up/ down angle. Rotating the Sub Camera dial to the left : The Sub Camera points down. Rotating the Sub Camera dial to the right : The Sub Camera points up. ≥...
-
Page 48: Changing And Adjusting The Settings Of The Sub Camera And The Sub Window
≥ The following button icons may not be displayed when the Sub Window is displayed. To display them, touch the Main Camera’s image on the screen. (Touch Menu) (Zoom button icons) (Recording button icon) j Recording Mode button icon ≥ The following functions do not work when the Sub Window is displayed: j Touch Shutter j Creative Control Mode j [FACE FRAMING]... - Page 49 j When [PICTURE SIZE] in Still Picture Recording Mode is set to [ 7.4M], [ 0.3M], 7.7M] or [ 2M]: 3 : 2 3 : 2 Aspect ratio 4:3 or 3:2* Size * The Sub Window will be displayed in the aspect ratio set in [PICTURE SIZE]. Changing the display position of the Sub Window Touch Sub Window.
- Page 50 (When [WB] is touched) Touch to select White Balance Mode. (Automatic White Balance adjustment)/ (Sunny mode)/ (Cloudy mode)/ (Indoor mode 1)/ (Indoor mode 2) (When is touched) Touch to adjust settings. (When is touched) Touch : Enables Narration Mode. : Disables Narration Mode.
-
Page 51: Recording With The Backup For Twin Camera Function
Advanced (Recording) Recording with the Backup for Twin Camera Function When simultaneously recording two images with the Main Camera and Sub Camera, you can also record the Main Camera’s image as a separate scene. (Backup for Twin Camera) ... - Page 52 ≥ When recording with [Backup for Twin Camera], use an SD card conforming to Class 10 of the SD Speed Class Rating. ≥ Scenes recorded as Backup for Twin Camera and scenes that show the Sub Window’s image will be saved on the same media. This causes the remaining recordable time to be halved. ≥...
-
Page 53: Changing The Recording Mode
Advanced (Recording) Changing the Recording Mode Touch the Recording Mode button icon. MENU Touch the desired Recording Mode button icon. Mode Effect You can switch the mode to the Intelligent Auto Mode, which optimises settings to the recording environment Intelligent Auto you are in. -
Page 54: Intelligent Auto
Intelligent Auto The following modes (appropriate for the condition) are set just by pointing the unit to what you want to record. Mode Effect Portrait Faces are detected and focused automatically, and the brightness is adjusted so it is recorded clearly. Scenery The whole landscape will be recorded vividly without whiting out the background sky, which may be very bright. -
Page 55: Intelligent Auto Mode
∫ Intelligent Auto Mode When switching to Intelligent Auto Mode, the Automatic White Balance and Auto Focus operate and automatically adjust the colour balance and focusing. Depending on the brightness of the subject etc., the aperture and shutter speed are automatically adjusted for an optimum brightness. -
Page 56: Intelligent Auto Plus
Intelligent Auto Plus Please refer to page for details about the effect of each mode. (Portrait)/ (Scenery)/ (Spotlight) (Low Light) (Night Scenery) (Macro) (Normal) (Normal) In Motion Picture Recording Mode only In Still Picture Recording Mode only ≥ Change the Recording Mode to (When adjusting the brightness) Touch (When adjusting the colour balance) -
Page 57: Miniature Effect
[Miniature Effect] MINI Touch to adjust the horizontal position of the in-focus portion. ≥ If you touch the screen, you can adjust the horizontal position of the in-focus portion. ≥ When no touch operations are performed for approximately 1 second, [Reset], [SIZE], and [ENTER] are displayed. If you touch the screen, you can readjust the horizontal position of the in-focus portion. - Page 58 [8mm movie] (When adjusting the brightness) Touch ≥ The level of brightness is switched every time you touch the icon. (Standard) # (Bright) # (Dark) (When adjusting the colour balance) Touch ≥ The level of colour balance is switched every time you touch the icon. (Blue) # (Red) # (Yellow)
-
Page 59: Time Lapse Rec
[Time Lapse Rec] INTV Touch the desired setup time. [1 SEC.]/[10 SEC.]/[30 SEC.]/[1 MINUTE]/[2 MINUTES] ≥ Touch [ENTER]. ≥ A frame is recorded with a set recording interval. 25 frames will make up motion picture of 1 second. Setup time Setup example (recording Recording time... -
Page 60: Scene Mode
Scene Mode ≥ Change the Recording Mode to Select the desired Scene Mode, then touch [ENTER]. Mode Effect 5Sports: To make fast moving scenes less shaky with slow playback and pause of playback Portrait: To make people stand out against the background Soft Skin: To makes skin colours appear softer for a more attractive appearance... -
Page 61: Hdr Movie Mode [W580] [W580M]
≥ (Portrait) j Colour and screen brightness may change under indoor lighting. ≥ (Soft Skin) j If the background or anything else in the scene has colours similar to the skin colour, they will also be smoothed. j If the brightness is insufficient, the effect may not be clear. j If you record a person in the distance, the face may not be recorded clearly. -
Page 62: Stop Motion Animation Assist
Stop Motion Animation Assist Before recording in Stop Motion Animation Assist Mode You can create a slideshow that appears to be moving by recording the subject while moved a little at a time. ≥ Each recording group can store up to 999 still pictures recorded in Stop Motion Animation Assist Mode. -
Page 63: Manual Recording
Advanced (Recording) Manual recording ≥ The Manual Focus, White Balance, Shutter Speed, Brightness (Iris and Gain) settings are retained when you change between Motion Picture Recording Mode and Still Picture Recording Mode. Touch the to switch to Manual Mode 53), or display the Manual icon 20). -
Page 64: White Balance
White Balance Automatic White Balance function may not reproduce natural colours depending on the scenes or lighting conditions. If so, you can adjust the White Balance manually. ≥ Switch to Manual Mode. Touch [WB]. FOCUS Touch to select White Balance Mode. SHTR ≥... -
Page 65: Manual Shutter Speed/Iris Adjustment
Manual shutter speed/iris adjustment Shutter Speed: Adjust it when recording fast-moving subjects. Iris: Adjust it when the screen is too bright or too dark. ≥ Switch to Manual Mode. Touch [SHTR] or [IRIS]. Touch to adjust settings. ≥ Touch [SHTR]/[IRIS] to end the adjustment. : Shutter speed: SHTR 1/50 to 1/8000... -
Page 66: Manual Focus Adjustment
Manual Focus adjustment If auto focusing is difficult due to the conditions, then use Manual Focus. ≥ Switch to Manual Mode. (When MF assist function is used) Select the menu. : [RECORD SETUP] # [MF ASSIST] # [ON] MENU ≥ Touch to display the Manual icon. -
Page 67: Recording With The Touch Function
Advanced (Recording) Recording with the Touch Function You can record using convenient functions just by the easy operation of touching the screen. Touch (left side)/ (right side) of on the Touch Menu to display Touch Function icons. Touch the Touch Function icon. (e.g. -
Page 68: Image Stabilizer Function
Image Stabilizer Function Use the Image Stabilizer to reduce the effects of shake during recording. This unit is equipped with Hybrid Optical Image Stabilizer. Hybrid Optical Image Stabilizer is a hybrid of Optical and Electrical Image Stabilizer. Touch to switch the Image Stabilizer on/off. ≥... - Page 69 (Still Picture Recording Mode) : [RECORD SETUP] # [O.I.S.] # [MODE1] or [MODE2] MENU [MODE1]: The function works all the time. [MODE2]: The function works when the button is pressed. We recommend using this mode when you are recording yourself or recording with a tripod in Still Picture Recording Mode.
-
Page 70: Optical Image Stabilizer Lock
≥ This function can be used in Intelligent Auto Mode or Intelligent Auto Plus Mode. In Still Picture Recording Mode, this function can only be used with some settings in Scene Mode. ≥ It may track different objects or may not lock the target depending on the recording conditions such as the following: j When the object is too large or too small j When colour of the object is similar to the background... - Page 71 ∫ To make the display of disappear Display of will not disappear even when no operation is performed for specific time with the default setting. To make the display of disappear, change the setting of the [O.I.S. LOCK DISPLAY]. : [SETUP] # [O.I.S. LOCK DISPLAY] # desired setting MENU [ON]: Constantly display.
-
Page 72: Recording Functions Of Operation Icons
Advanced (Recording) Recording functions of operation icons Select the operation icons to add different effects to the images to be recorded. Touch (left side)/ (right side) of on the Touch Menu to display the operation icons. Touch an operation icon. PRE-REC (e.g. -
Page 73: Intelligent Contrast Control
Fade When you start recording, the image/audio gradually (Fade in) appears. (Fade in) When you pause recording, the image/audio gradually disappears. (Fade out) ≥ The Fade setting is cancelled when the recording stops. ∫ To select the colour for fade in/out (Fade out) : [RECORD SETUP] # [FADE COLOUR] # MENU... -
Page 74: Intelligent Exposure
PRE-REC This prevents you from missing a shot. This allows recording of the pictures and sound to start approximately 3 seconds before the recording start/stop button is pressed. PRE-REC appears on the screen. ≥ ≥ Aim the unit at the subject beforehand. ≥... -
Page 75: Tele Macro
Backlight Compensation This makes the image brighter to prevent darkening of a backlit subject. Tele Macro A more impressive image can be obtained by focusing on the object only in close-up and shading off the background. ≥ The unit can focus on the subject at a distance of approx. 1.1 m. ≥... - Page 76 HDR Effect [W580] [W580M] You can change the level of image contrast correction in HDR Movie Mode. 45, 61) The icon changes each time you touch it. (Low) # (High) (Low): Sets the correction level to low. (High): Sets the correction level to high. ≥...
-
Page 77: Recording Functions Of Menus
Advanced (Recording) Recording functions of menus [SCENE MODE] This function is identical to Scene Mode in Recording Mode. The shutter speed and aperture, etc. are automatically adjusted to match the scene you want to record. ≥ This item is displayed in the menu only when [Time Lapse Rec] in Creative Control Mode is set. -
Page 78: Zoom Mode
[ZOOM MODE] Set the maximum zoom ratio for the Motion Picture Recording Mode. : [RECORD SETUP] # [ZOOM MODE] # desired setting MENU [i.Zoom OFF]: Up to 62k [i.Zoom 90k]: This zoom function allows you to maintain high-definition picture quality. (Up to 90k) [D.Zoom 150k]: Digital zoom (Up to 150k) [D.Zoom 3000k]:... -
Page 79: Rec Mode
[REC MODE] Switch the picture quality and recording format of the motion pictures to record. The recording formats that can be set change according to [REC FORMAT] setting. : [RECORD SETUP] # [REC MODE] # desired setting MENU ≥ When [REC FORMAT] is set to [AVCHD] [PH]/[HA]/[HG]/[HE]: Set the recording format to 1080/50i. -
Page 80: Relay Rec
W580M [RELAY REC] It is possible to continuously record motion picture to an SD card when there is no space available in the built-in memory. (It allows you to record only to SD card from built-in memory.) ≥ Set [MEDIA SELECT] to [Built-inMemory]. ≥... - Page 81 ∫ Prioritised face framing Prioritised face framing is displayed as orange frames. Focus and adjustment of brightness will be performed against the prioritised face framing. ≥ The prioritised face frame is displayed only with Portrait Mode in Intelligent Auto Mode or Intelligent Auto Plus Mode.
-
Page 82: Auto Slow Shtr
[AGS] If the unit continues to be tilted upside down from the normal horizontal position while recording motion pictures, it is automatically put into recording pause. : [RECORD SETUP] # [AGS] # [ON] MENU ≥ The AGS function may activate and cause the unit to pause the recording if you are recording a subject right above or right below you. -
Page 83: Shooting Guide
[SHOOTING GUIDE] Message is displayed when this unit is moved rapidly. : [RECORD SETUP] # [SHOOTING GUIDE] # [ON] MENU When “CAMERA PANNING IS TOO FAST.” appears, move the unit slowly while recording. ≥ In the following cases, message will not appear: j While pausing the recording (only when [DEMO MODE] is not set to [ON]) j When [LEVEL GAUGE] is set to [ON] [Wind Noise Canceller]... -
Page 84: Mic Level
[MIC SETUP] Recording setting of the built-in microphone can be adjusted. ≥ Set [REC FORMAT] to [AVCHD]. : [RECORD SETUP] # [MIC SETUP] # desired setting MENU [STEREO MIC]: Sound from two directions is recorded in 2 ch by forward-facing stereo microphones. -
Page 85: Picture Size
[PICTURE ADJUST] Adjust the quality of the image while recording. Adjust by outputting to a TV while adjusting the quality of the image. ≥ This setting is retained when you change between Motion Picture Recording Mode and Still Picture Recording Mode. ≥... -
Page 86: Shtr Sound
Picture size Aspect ratio Extra Optical Zoom 10M] 4224k2376 – 16:9 [16:9] 2.1M] 1920k1080 – 16:9 7.4M] 3136k2352 – [4:3] 0.3M] 640k480 100k 7.7M] 3408k2272 – 3 : 2 [3:2] 1728k1152 – 3 : 2 Extra Optical Zoom cannot be used. The maximum zoom magnification is 62k. Extra Optical Zoom cannot be used. -
Page 87: Advanced (Playback)
Advanced (Playback) Playback Operations Motion picture playback using operation icon For details on the basic playback operations, refer to page 28. Playback operation Playback display Operating steps During Playback Touch the LCD monitor and slide from right to left (from left to right) during playback. Skip Playback (to the start of a scene) -
Page 88: Creating Still Picture From Motion Picture
≥ Scenes that are large in file size may cause this unit to respond slower to operations performed by the user or cause certain operations performed by this unit to become slower. Creating still picture from motion picture A single frame from the recorded motion picture can be saved as a still picture. The size of pictures to be recorded is determined by their scene type. -
Page 89: Highlight & Time Frame Index
Highlight & Time Frame Index An image of one scene is displayed as a thumbnail at set search condition. Scene can be played back from any midway point of the scene you wish to see. ≥ Operate the zoom lever to side and change over the thumbnail display to Highlight &... -
Page 90: Resuming The Previous Playback
Resuming the previous playback If playback of a scene was stopped halfway, the playback can be resumed from where it was stopped. : [VIDEO SETUP] # [RESUME PLAY] # [ON] MENU If playback of a motion picture is stopped, appears on the thumbnail view of the stopped scene. -
Page 91: Various Playback Functions
Advanced (Playback) Various playback functions Playing back motion pictures/still pictures by date The scenes or the still pictures recorded on the same day can be played back in succession. Touch the date select icon. A Date select icon Touch the playback date. The scenes or the still pictures recorded on the date selected are displayed as thumbnails. -
Page 92: Highlight Playback
≥ The following scenes and still pictures are grouped separately on the date list, and icons are displayed according to the category: Scene or still picture Icon to be displayed Scenes recorded with [1080/50p] in [AVCHD] Scenes recorded with [1080/50M]/[1080/28M] in [MP4/iFrame] Scenes recorded with [720] in [MP4/iFrame] Scenes saved in MP4 (1280k720/25p) 113)*... - Page 93 Touch the desired effect. [POP]: Recommended for party scene. [NATURAL]: Recommended for scenery. [CLASSICAL]: Recommended for slow moving scene. [DYNAMIC]: Recommended for fast moving scene such as sports scene. [CUSTOM]: Set the combination of the effect and the music. ≥ The scenes matching the effect will be extracted and displayed in the thumbnail view. ≥...
- Page 94 ∫ Setting up the custom effect It is possible to enjoy the Highlight Playback with your favourite effect by setting up the combination of an image effect and music. Touch [CUSTOM]. Touch [EFFECT SETUP] or [MUSIC SELECT]. (When [EFFECT SETUP] is selected) Touch the desired effect.
- Page 95 Playing back with the settings changed Touch [SET] to select the item to change. [SCENE SETUP] Select the scene or date to be played back. [FAVOURITE SCENE SETUP] Set up the favourite scenes. [FAVOURITE SCENE PLAY] Set up if the favourite scenes are to be included in the Highlight Playback or not.
- Page 96 ∫ Checking the favourite scenes Touch the scenes to be played back. 0h01m30s 0h01m30s 0h01m30s Touch [Add] and add the favourite part. ≥ Approximately 4 seconds before and after touching [Add] will be added as favourite. ≥ Number of favourite scenes that can be added are 1 to 14. (Number of scenes that can be added differs depending on the ...
-
Page 97: Entering Text
∫ Playback time setting Touch the playback time. [APPROX 90 SEC.]/[APPROX 3 MIN.]/[AUTO] ≥ The playback time of [AUTO] is a maximum of approx. 5 minutes. ≥ Playback time may become shorter than the setting, or it may not even be played back if the part recognised as clearly recorded is short. - Page 98 Saving the Highlight Playback The scenes put together as a Highlight Playback can be saved as a single scene. W580 V380 The recorded scenes can be saved in the SD card. W580M The recorded scenes can be saved in the built-in memory. Stop the playback of the Highlight Playback or wait until the Highlight Playback is finished.
-
Page 99: Manual Edit
Manual Edit You can join desired AVCHD scenes, scenes recorded as Backup for Twin Camera or parts of these scenes in the order they were recorded to play back or save as a single scene with music added. ≥ Manual Edit cannot be used for MP4/iFrame scenes. Select the menu. - Page 100 ∫ To select a scene Touch the scene to be played back. ≥ The scene selection is made as you touch it, and the indication appears on the thumbnail. To cancel the operation, touch the scene again. ≥ When part of a scene has been selected, the indication appears on the thumbnail.
- Page 101 ∫ To set the music Touch [Music]. Touch the desired sound. ≥ When [NO MUSIC] is selected, the audio recorded at the time of shooting is played back. (To test the music audio) Touch [START]. ≥ Touch the other music option to change the music to be tested. ≥...
-
Page 102: Baby Calendar
W580 V380 Touch [EXIT]. W580M Touch [COPY] or [EXIT]. ≥ Scenes saved in the built-in memory can be copied to the SD card. To copy to the SD card, select [COPY]. ≥ Operate according to the message and touch [EXIT] at the end. ≥... - Page 103 Check the Baby Calendar. ≥ The name of the registered baby and its age in months are displayed. ≥ You can switch the age in months display by touching MENU : Changes the age in months display to that of the previous month ...
-
Page 104: Changing The Playback Settings And Playing Back The Slide Show
To change/add a baby’s registered details Touch the name display on the Baby Calendar 102) or select the menu. : [VIDEO SETUP] # [Baby Calendar Setup] MENU Touch the name of the baby whose details are to be changed. ≥ When [Baby 1]/[Baby 2]/[Baby 3] is displayed, the birthday and name or name only are not registered. - Page 105 (Only when you would like to change the settings) Touch [SET] to select the item to change. [DATE SETUP]: Select the date to be played back. [SLIDES INTERVAL] Select the interval between still pictures at playback. [EFFECT SETUP] Select the effect for playback. [MUSIC SELECT]: Select the music to be played on playback.
-
Page 106: Playing Back Still Pictures Recorded In Stop Motion Animation Assist Mode As A Slide Show
Playing back still pictures recorded in Stop Motion Animation Assist Mode as a slide show ≥ For details on recording in Stop Motion Animation Assist Mode, refer to page 62. Touch ≥ The recording group created most recently in Stop Motion Animation Assist Mode is displayed. -
Page 107: Deleting Scenes/Still Pictures
Advanced (Playback) Deleting scenes/still pictures Deleted scenes/still pictures cannot be restored, so perform appropriate confirmation of the contents before proceeding with deletion. ¬ Press the recording/playback button to switch this unit to the Playback Mode. ∫ To delete the scene or still picture being played back Touch while scenes or still pictures to be deleted are being played back. - Page 108 When you stop deleting halfway: Touch [CANCEL] while deleting. ≥ The scenes or still pictures that have already been deleted when the deletion is cancelled cannot be restored. To complete editing: Touch [Return]. , selecting [EDIT SCENE] # [DELETE] # [ALL ≥...
-
Page 109: Deleting Part Of A Scene (Avchd/Backup For Twin Camera)
Deleting part of a scene (AVCHD/Backup for Twin Camera) Unnecessary part of an AVCHD scene or a scene recorded as Backup for Twin Camera can be deleted. The deleted scenes cannot be restored. ≥ Press the recording/playback button to switch this unit to the Playback Mode, and touch the play mode select icon. -
Page 110: Dividing A Scene (Avchd/Backup For Twin Camera)
Dividing a scene (AVCHD/Backup for Twin Camera) It is possible to divide an AVCHD scene or a scene recorded as Backup for Twin Camera. Any unwanted parts in the scene can be deleted after dividing. ≥ Press the recording/playback button to switch this unit to the Playback Mode, and touch the play mode select icon. -
Page 111: Dividing A Scene To Partially Delete (Mp4/Iframe)
Dividing a scene to partially delete (MP4/iFrame) Divide the MP4/iFrame scenes, and delete unnecessary parts. This divides the recorded scenes in two and deletes the front half or back half. The scenes deleted by dividing cannot be restored. ≥ Press the recording/playback button to switch this unit to the Playback Mode, and touch the play mode select icon. -
Page 112: Protecting Scenes/Still Pictures
Protecting scenes/still pictures Scenes/still pictures can be protected so that they are not deleted by mistake. (Even if you protect some scenes/still pictures, formatting the media will delete them.) ≥ Press the recording/playback button to switch this unit to the Playback Mode. Select the menu. -
Page 113: Convert To Mp4
Advanced (Playback) Convert to MP4 You can convert and copy AVCHD scenes, scenes recorded as Backup for Twin Camera, and MP4 scenes. The image quality will be converted into a format that supports playback on a PC and online sharing (MP4 (1280k720/25p) or MP4 (640k360/25p)). ≥... -
Page 114: Relay Scene Combining [W580M]
Advanced (Playback) Relay scene combining [W580M] You can combine the relayed scene 80) in the built-in memory and the continued scene in the SD card to be one into the SD card. Relay-recorded scene Relay scene combining A Built-in memory B SD card C Range of Relay Recording ≥... - Page 115 To cancel relay information : [EDIT SCENE] # [RELAY INFO CANCEL] MENU ≥ When the relay information is cancelled, combining of the relayed scenes will not be possible anymore. Combining of the relay scene cannot be performed if the available space on the SD card is less than the volume of the relayed scene in the built-in memory.
-
Page 116: Watching Video/Pictures On Your Tv
2 Standard images when connecting to video terminal ≥ Check that the plugs are inserted as far as they go. ≥ Always use the supplied HDMI mini cable or a genuine Panasonic HDMI mini cable (RP-CDHM15, RP-CDHM30: optional). - 116 -... - Page 117 Select the video input on the TV. ≥ Example: Select the [HDMI] channel with an HDMI mini cable. Select the [Video 2] channel with an AV cable. (The name of the channel may differ depending on the connected TV.) ≥ Check the input setting (input switch) and the audio input setting on the TV. (For more information, please read the operating instructions for the TV.) Change the mode to to play back.
-
Page 118: Connecting With An Hdmi Mini Cable
Mode. aspect setting on the TV. (Refer to the operating instructions of the TV for details.) Refer to the following support site for information about Panasonic TVs with an SD card slot for playing back your pictures. http://panasonic.net/ ≥ It may not be possible to play back scenes on the TV depending on the [REC MODE]. -
Page 119: Playback Using Viera Link
What is the VIERA Link (HDAVI Control™)? ≥ This function allows you to use your remote control for the Panasonic TV for easy operations when this unit has been connected to a VIERA Link compatible device using an HDMI mini cable (supplied) for automatic linked operations. - Page 120 VIERA Link, read the operating instructions for the devices. ≥ Available linked operations between this unit and a Panasonic TV is different depending on the types of Panasonic TVs even if they are compatible with VIERA Link. Refer to the operating instructions of the TV for the operations that support on the TV.
-
Page 121: Copy/Dubbing
Copy/Dubbing Copying between SD card and Built-in Memory [W580M] Motion pictures or still pictures recorded with this unit can be copied between an SD card inserted in this unit and a built-in memory. ≥ MP4/iFrame scenes recorded with [1080/50M] are not copied from the built-in memory of this unit to an SD Memory Card or SDHC Memory Card. - Page 122 ≥ Scenes recorded as Backup for Twin Camera will be saved as normal AVCHD scenes when copied. ≥ When [ ] is selected, the recording format will be converted. If there is no need to convert the recording format, touch [NO]. If there is need to convert the recording format, touch [YES] and select the copying method.
- Page 123 Approximate time for copying When copying a recorded motion picture of full 4 GB size: Approx. 5 minutes to 15 minutes When performing [ ] on a recorded 1080/50p motion picture of full 4 GB size: Approx. 10 minutes to 20 minutes When performing [ ] on a recorded AVCHD (HA) motion picture of full 4 GB size:...
-
Page 124: Copying/Playing Back With A Usb Hdd
≥ Please read the operating instructions of the USB HDD for how to use it. Preparing for copying/playing back Refer to the following support site for information about USB HDD. http://panasonic.jp/support/global/cs/e_cam (This Site is English only) When the USB HDD that requires formatting is connected, a message is displayed. Follow the instructions on the screen to format it. - Page 125 A USB Connection Cable (commercially-available) B USB HDD (commercially-available) C Turn the side with the symbol up to connect the micro A end of the USB Connection Cable to the USB terminal of this unit. ≥ Connect this unit to the AC adaptor (When using a desktop HDD) Connect the AC adaptor (supplied with USB HDD) to the USB HDD.
- Page 126 ≥ Following can be performed by connecting the USB HDD with the scenes and still pictures copied from this unit to other devices. j Save on a PC or rewrite on USB HDD using HD Writer LE 3.1 When the USB HDD is connected to other devices such as Blu-ray disc recorder, a message prompting to format the USB HDD may display.
-
Page 127: Simple Copy
∫ Displaying media information The used space of the USB HDD can be checked. ≥ Connect this unit to the USB HDD and touch [Playback HDD] : [SETUP] # [MEDIA STATUS] MENU ≥ W580 V380 If you touch [CHANGE MEDIA], you can switch the display between the SD card and USB HDD. W580M If you touch [CHANGE MEDIA], you can switch the display between the SD card, built-in memory, and USB HDD. -
Page 128: Copy Selected Files
Copy selected files Connect this unit to the USB HDD to prepare for copying. 124) Touch [Copy selected files]. ≥ You can also copy scenes or still pictures by touching , selecting [COPY]. MENU W580 V380 Touch [NEXT]. W580M Touch the media you want to copy. When copying from the SD card to the USB HDD. -
Page 129: Playing Back The Usb Hdd
Playing back the USB HDD ≥ Only motion picture/still picture that have been copied by connecting this unit to the USB HDD or copied with HD Writer LE 3.1 can be played back. A USB Connection Cable (commercially-available) B USB HDD (commercially-available) C Turn the side with the symbol up to connect the micro A end of the USB Connection Cable to the USB terminal of this unit. - Page 130 ≥ It is also possible to switch the media to play back by touching the play mode select icon. When the USB HDD is connected, the (USB HDD) can be selected from the displayed media types. ≥ Scenes recorded as Backup for Twin Camera will be saved as normal AVCHD scenes when copied to the USB HDD.
-
Page 131: Dubbing With A Blu-Ray Disc Recorder, Video Device, Etc
≥ For the positions of the SD card slot, USB terminal, or terminal for connecting the AV cable, refer to the operating instructions of the equipment used. You can dub scenes recorded with this unit to a Panasonic Blu-ray disc recorder or DVD recorder that supports the recording format or recording mode you want to use. - Page 132 Dubbing in high-definition picture quality ∫ To dub using equipment with an SD card slot You can dub by directly inserting an SD card. ≥ W580M To copy scenes or still pictures from the built-in memory to an SD card, see page 121. ∫...
- Page 133 Panasonic Blu-ray disc recorder or a DVD recorder. ≥ When this unit is connected to a Panasonic Blu-ray disc recorder or a DVD recorder using a USB cable while the unit is turned on, power is also supplied from the connected equipment to this unit.
-
Page 134: Dubbing In Standard Picture Quality
Dubbing in standard picture quality ∫ Dubbing using equipment without an SD card slot or a USB terminal, or using a video device You can dub by connecting an AV cable (commercially-available). ≥ Use the AC adaptor to free you from worrying about the battery running down. Change the video input on the video device and TV that this unit is connected to. -
Page 135: Using The Eye-Fi™ Card
Copy/Dubbing ™ Using the Eye-Fi card Using an Eye-Fi card (commercially-available), you can record motion pictures and still pictures on the card, and save them on a PC or upload them on a file-sharing website via a wireless network. ≥ The functions of the Eye-Fi card (including wireless transmission) are not guaranteed to work on this product. - Page 136 ∫ Using Eye-Fi direct mode The files can be transferred directly from the Eye-Fi card to a smartphone without going through the wireless access point when necessary setting is performed in a PC in advance. ≥ Install the software supplied with the Eye-Fi card on your PC, and configure the Eye-Fi direct mode settings.
- Page 137 ≥ The Eye-Fi menu only appears when an Eye-Fi card is used. ≥ The Eye-Fi transfer feature cannot be guaranteed to continue to operate in the future due to changes to the card specification etc. ≥ Update the firmware of the Eye-Fi card to the latest one using the software supplied with the Eye-Fi card before use.
-
Page 138: Wi-Fi
Panasonic will not take any responsibility for any damage that arises when using this unit for any purpose other than as a wireless LAN device. - Page 139 ≥ This unit cannot be used to connect to a public wireless LAN connection. ≥ Use a IEEE802.11b, IEEE802.11g or IEEE802.11n compatible device when using a wireless access point. ≥ This unit uses the 2.4 GHz frequency band. You cannot establish a wireless LAN connection using the 5 GHz frequency band.
-
Page 140: [Remote Ctrl]
Wi-Fi [Remote Ctrl] Using a smartphone, you can perform record/playback operations from a remote location or upload motion pictures and still pictures recorded in this unit on SNS (Social Networking Service). A When connecting directly to a smartphone B When connecting to a wireless access point ≥... -
Page 141: Preparations Before Using [Remote Ctrl]
Preparations before using [Remote Ctrl] Install the smartphone application “Image App” on your smartphone. 167) Setting up a direct Wi-Fi connection between this unit and a smartphone Operate this unit and the smartphone to set up a direct connection. Check the [Direct Connection Password] setting in [Wi-Fi Setup]. 180) ≥... -
Page 142: Using [Remote Ctrl] With A Direct Connection
Using [Remote Ctrl] with a direct connection When [Direct Connection Password] is set to [OFF] Press Wi-Fi button on this unit and touch [Wi-Fi Setup]. Touch [Direct Connection]. ≥ This unit will go into connection standby with the smartphone. ≥ The SSID of this unit is displayed on the screen of this unit. Turn on the Wi-Fi function in the smartphone’s setup menu. -
Page 143: Using [Remote Ctrl] With A Wireless Access Point Connection
When [Direct Connection Password] is set to [ON] ≥ Proceed to Step 5 when your Wi-Fi connection has been made via [Direct Connection] in [Wi-Fi Setup] 174). Press Wi-Fi button on this unit and touch [Remote Ctrl]. ≥ (If you have touched [Remote Ctrl] for the first time) A message will be displayed asking whether to connect to a wireless access point. -
Page 144: About [Remote Ctrl]
To exit [Remote Ctrl]: Touch [EXIT] or press Wi-Fi button. ≥ The message is displayed. Touch [YES] to close the indication. About [Remote Ctrl] Screen display during remote operations Smartphone screen shots are example displayed in Motion Picture Recording Mode and Playback Mode. -
Page 145: In Playback Mode
Functions available for remote operations ∫ In Recording Mode ≥ Recording motion pictures/still pictures ≥ Selecting a mode ≥ W580M Selecting a media to record ≥ Using the zoom (Available in the medium or fast speed) ≥ Switching between the Recording Mode: j Intelligent Auto Mode j Manual Mode j Stop Motion Animation Assist Mode... -
Page 146: [Baby Monitor]
≥ Functions other than those listed above are not available for remote operation. ≥ If you record an image when the LCD monitor of this unit is closed with the screen facing outward, the LCD monitor turns off. Wi-Fi [Baby Monitor] You can use your smartphone to check on your baby being monitored by this unit when you are in another room. -
Page 147: Preparations Before Using [Baby Monitor]
Preparations before using [Baby Monitor] Check if the wireless access point is compatible with IEEE802.11b/g/n. Install the smartphone application “Image App” on your smartphone. 167) Set up a Wi-Fi connection between this unit and the wireless access point. ≥ [Easy Connection (WPS)] 170) ≥... - Page 148 What you can do with [Baby Monitor] ∫ Checking on the baby in your house You can check the image of the baby being monitored on your smartphone. ≥ Images of baby-monitoring cannot be recorded. ≥ It cannot be confirmed with multiple smartphones simultaneously. ∫...
-
Page 149: [Hom.monitor]
Wi-Fi [Hom.Monitor] You can confirm the recording screen of this unit from outside using a smartphone. XXXXXXXXX ≥ Switch the Wi-Fi setting to off on your smartphone and use with mobile network such as 3G. ≥ If [CLOCK SET] 21) is not set correctly, [Hom.Monitor] cannot be used. ≥... -
Page 150: Using [Hom.monitor]
Using [Hom.Monitor] ≥ Perform the home monitoring operation on the smartphone. 153) ≥ When the firewall is turned on, the Wi-Fi function may not work correctly. If this occurs, check the network settings. When using the home monitor function for the first time ≥... - Page 151 ∫ When configuring the home monitor settings using QR code ≥ Proceed to Step 2 when your Wi-Fi connection has been made via [Set Wireless Access Point] in [Wi-Fi Setup] (l 170 to 173). Press Wi-Fi button on this unit. Touch [Hom.Monitor] on the Wi-Fi menu screen.
- Page 152 Line quality The image and sound may be interrupted or the connection may be terminated depending on your line conditions. Use the recommended optimal speed (upstream) below as a guide to make necessary settings. ∫ Recommended optimal speed (upstream) for the broadband line, mobile router (tethering), etc.
- Page 153 What you can operate/set with a smartphone during home monitoring ≥ Refer to [Help] in the “Image App” menu about how to operate. ∫ What you can operate with a smartphone Confirm the condition inside the house The monitoring video can be confirmed. ≥...
- Page 154 Changing the home monitor settings of this unit ≥ Setting cannot be performed while operating monitoring with a smartphone. Touch [Setup] and select desired setting. ∫ [Home Monitor Connect] You can display the registration screen for a Device ID and Password. ≥...
-
Page 155: [Dlna Play]
Wi-Fi [DLNA Play] Connecting this unit to a DLNA-compatible TV via Wi-Fi, you can play back scenes and still pictures on the TV. A DLNA-compatible TV ≥ Please read the operating instructions for the TV about connecting TV to the wireless access point. -
Page 156: Playing Back On A Tv
Playing back on a TV You can play back the scenes and still pictures recorded with or stored in this unit on a TV. ≥ The following scenes can be played back: j Scenes recorded in AVCHD j Scenes recorded as Backup for Twin Camera j Scenes recorded in MP4/iFrame [720] j Scenes saved in MP4 (1280k720/25p) or MP4 (640k360/25p) ≥... -
Page 157: [Copy]
Wi-Fi [Copy] By setting up a Wi-Fi communication between this unit and a PC, you can copy scenes and still pictures recorded with this unit to the PC. A PC ≥ If [CLOCK SET] 21) is not set correctly, scenes and still pictures may not be able to be copied to a PC. - Page 158 Creating a shared folder (destination folder) on the PC To copy scenes and still pictures by setting up a Wi-Fi connection between this unit and the PC, complete the following preparations: j Turn on the PC j Create a shared folder (destination folder) The name of the folder must consist of 15 or less alphanumeric characters.
-
Page 159: Copying To A Pc
Copying to a PC ≥ Create a shared folder (destination folder) on the PC. 158) ≥ Proceed to Step 2 when your Wi-Fi connection has been made via [Set Wireless Access Point] in [Wi-Fi Setup] (l 170 to 173). Press Wi-Fi button on this unit. Touch [Copy] on the Wi-Fi menu screen. - Page 160 If you intend to delete the original scenes or still pictures when the copying has finished, always play back the duplicate scenes or still pictures on PC before deletion to confirm that they have been copied normally. ≥ Copying can be performed even when the battery is used for power, but we recommend that the AC adaptor be used.
-
Page 161: [Live Cast]
Wi-Fi [Live Cast] You can broadcast motion pictures of this unit live by setting up a link between the “LUMIX CLUB” and USTREAM. A You can also broadcast motion pictures live by connecting this unit and a smartphone that supports tethering. -
Page 162: Preparations Before Using [Live Cast]
Use linked services with “LUMIX CLUB” To use the Live Cast, access following website. http://lumixclub.panasonic.net/eng/c/ ≥ Log in to the “LUMIX CLUB” and register/set up the USTREAM on WEB service link setup. Set up a Wi-Fi connection between this unit and the wireless access point. -
Page 163: Broadcasting Live
Broadcasting live ≥ Proceed to Step 2 when your Wi-Fi connection has been made via [Set Wireless Access Point] in [Wi-Fi Setup] (l 170 to 173). Press Wi-Fi button on this unit. Touch [Live Cast] on the Wi-Fi menu screen. ≥... - Page 164 ∫ About the screen indications in the Live Cast Mode Live broadcast indication Line quality 165) 1h23m Elapsed time of the live broadcast 10fps Frame rate 165) Number of people watching the live broadcast ≥ Up to 9999 viewers can be indicated. The indication does not appear when the number is 0.
- Page 165 ∫ To configure the e-mail delivery settings You can make the delivery setting of a broadcast notification e-mail and the setting for the scheduled time and date of the broadcast indicated in the e-mail. Touch [Send E-mail]. Touch [ON] or [OFF]. [ON]: Enables e-mailing.
- Page 166 ≥ If the selected line quality has an image quality higher than the one you are using, images will appear as if the frame rate is low. ≥ Operation cannot be guaranteed for all devices. ≥ Even with a broadband line, the recommended optimal speed may not be reached depending on your environment.
-
Page 167: Install The "Image App
140) j [Baby Monitor] 146) j [Hom.Monitor] 149) About the “Image App” The “Image App” is an application provided by Panasonic. For Android apps For iOS apps Android 4.0 or later iOS 7.0 or later Connect your Android Connect your iOS... -
Page 168: Setting Up A Wi-Fi Connection
Wi-Fi Setting Up a Wi-Fi Connection To use the Wi-Fi function, connect this unit to a wireless access point or smartphone via Wi-Fi. ≥ Depending on the Wi-Fi connection method, available Wi-Fi functions differ. Wi-Fi connection Connecting to a wireless access Setting up a direct connection to a methods point... -
Page 169: Using The [Wi-Fi Setup Wizard] To Set Up A Connection
Using the [Wi-Fi Setup Wizard] to set up a connection With the smartphone application “Image App”, you can transfer the following information between the smartphone and this unit. ≥ Set [Direct Connection Password] in [Wi-Fi Setup] to [ON]. 180) (The default setting is [OFF].) ≥... -
Page 170: Connecting To A Wireless Access Point
When [Wi-Fi] is selected Turn on the Wi-Fi function in the smartphone’s setup menu. On the smartphone’s Wi-Fi setting screen, select the SSID displayed on this unit. ≥ If this is the first time the smartphone is connecting to this unit via Wi-Fi, enter the Password displayed on this unit’s screen into the smartphone. -
Page 171: Searching For Wireless Access Points To Set Up A Connection
Enter a PIN code to set the Wi-Fi connection Touch [PIN code] in Step 6. Touch the wireless access point to be connected. ≥ If you touch [Refresh], you can search for wireless access points again. ≥ If you touch and select a wireless access point, all characters will be displayed. -
Page 172: Setting Up A Connection Manually
Touch the wireless access point to connect. ≥ If you touch [Refresh], you can search for wireless access points again. ≥ If you touch and select a wireless access point, all characters will be displayed. In this case, touch [OK]. ≥... - Page 173 Touch the desired Network Authentication method. Network authentication type Encryption types that can be set [Open] [NONE]/[WEP] [WEP] There is no setup of an encryption types. [WPA-PSK]/[WPA2-PSK] [TKIP]/[AES] ≥ When [WEP] is selected, proceed according to step 9. Touch the desired Encryption method. ≥...
-
Page 174: Setting Up A Direct Connection To A Smartphone
Setting up a direct connection to a smartphone Check the [Direct Connection Password] setting in [Wi-Fi Setup]. 180) ≥ The default setting is [OFF]. Select [ON] as needed, for example when the setting seems necessary for your Wi-Fi environment. ≥ When [Direct Connection Password] is set to [OFF] j Proceed to the following section, “When [Direct Connection Password] is set to [OFF]”... -
Page 175: Connecting By Entering An Ssid And Password
Connecting with QR code Press Wi-Fi button on this unit and touch [Wi-Fi Setup]. Touch [Direct Connection]. Touch [Change connection type]. Touch [QR code]. ≥ QR code is displayed on the screen of this unit. Start up the smartphone application “Image App”. On the smartphone, select [QR code] to scan the QR code displayed on the screen of this unit. -
Page 176: Connecting From The History
Connecting from the history Each use of a Wi-Fi function is stored in the Wi-Fi connection history. Connecting from the history allows you to easily set up a connection using the previous connection settings. Press Wi-Fi button on this unit and touch [History]. Touch the desired item to be connected. - Page 177 If the Wi-Fi connection cannot be established ≥ Please refer to the operating instruction of the device in use for details about the setting of the wireless access point or smartphone. Problem Check points It cannot connect to the (General) wireless access point.
- Page 178 Problem Check points The Wi-Fi connection is (Wireless Access Point Connection) not possible between this ≥ Make sure the smartphone is properly connected to the unit and a smartphone. wireless access point by checking the Wi-Fi settings of the smartphone. ≥...
-
Page 179: How To Use The [Wi-Fi Setup] Menu
Wi-Fi How to Use the [Wi-Fi Setup] Menu Configure various settings necessary to use the Wi-Fi function. When connected to Wi-Fi, the settings cannot be changed. Press Wi-Fi button on this unit and touch [Wi-Fi Setup]. Touch desired menu item. [Set Wireless Access Point] You can add or delete wireless access points, or rearrange the display order of wireless access... - Page 180 38, 181) [Wireless Sub Camera] You can use this unit as a Wireless Sub Camera. For the connection procedure and other details, check the website below. http://panasonic.jp/support/global/cs/e_cam [LUMIX CLUB] Please refer to page 183. [Home Monitor Connect] Please refer to page 154.
- Page 181 [Wi-Fi Password] [Setup]/[Delete] This will set/clear the Password to limit the startup of the Wi-Fi setting menu. By setting the Password, it will prevent erroneous operation, prevent wrongful use of the Wi-Fi function by third party, and protect the set personal information. Touch [Setup].
- Page 182 [Wireless LAN setup] You can change or check your wireless LAN’s network settings, such as the [IP Address], [Subnet Mask] and [MAC Address]. [IP Address]/[Subnet Mask]/[Gateway]/[Primary DNS]/[Secondary DNS]/[MAC Address] ≥ If you touch [AUTO], the network settings are configured automatically. If you touch [MANUAL], you can set each item.
- Page 183 When different Login IDs are acquired for this unit and the smartphone, change one of the Login ID and Password to the one you like to keep. Refer to the “LUMIX CLUB” site for details. http://lumixclub.panasonic.net/eng/c/ ≥ Connect this unit and a wireless access point in [Set Wireless Access Point]. 170) Press Wi-Fi button on this unit and touch [Wi-Fi Setup].
- Page 184 ∫ Check or change the acquired Login ID/Password ≥ To change the “LUMIX CLUB” Password on this unit, access the “LUMIX CLUB” website from your smartphone or PC and change the “LUMIX CLUB” Password in advance. Press Wi-Fi button on this unit and touch [Wi-Fi Setup]. Touch [LUMIX CLUB].
- Page 185 “LUMIX CLUB”. Registering multiple WEB services will send images to all services simultaneously. ≥ Check the “FAQ/Contact us” on the following site for compatible WEB services. http://lumixclub.panasonic.net/eng/c/ Preparation: Make sure that you have created an account on the WEB service you want to use, and have the login information available.
-
Page 186: Wireless Twin/Multi-Camera
These operating instructions describe the procedure for connecting this unit and a smartphone. For information on non-smartphone devices that support the Wireless Sub Camera function and the procedures for using them, check the support website below. (As of November 2015) http://panasonic.jp/support/global/cs/e_cam - 186 -... - Page 187 ∫ Wireless Multi-Camera function Connecting multiple smartphones to this unit via Wi-Fi allows you to simultaneously display two Sub Windows and record images in them. ≥ Up to three smartphones can be connected simultaneously. 193) ≥ W580 W580M You can also use the Sub Camera of this unit*. * When the LCD monitor is either closed or closed with the screen facing outward, the Sub Camera does not work.
-
Page 188: Notes On The Wireless Twin/Multi-Camera Function
Notes on the Wireless Twin/Multi-Camera function The performance of the Wireless Twin/Multi-Camera function varies depending on the surrounding radio wave conditions. Since the human body blocks radio waves, it is also influenced by how crowded the area is. ∫ Recording tips ≥... -
Page 189: Using A Smartphone As A Wireless Sub Camera
Wireless Twin/Multi-Camera Using a Smartphone as a Wireless Sub Camera ≥ You need to turn on the Wi-Fi function of your smartphone. ≥ Install the smartphone application “Image App” on your smartphone. 167) When connecting a smartphone to this unit as a Wireless Sub Camera for the first time (To use the Wireless Twin Camera function) ≥... - Page 190 Selecting this unit’s SSID on the smartphone to set up a connection (When using the Wi-Fi menu screen) Press Wi-Fi button on this unit and touch [TWIN CAMERA]. A [TWIN CAMERA] B [EXIT] (When using the recording screen) Touch the recording screen on this unit and touch ...
- Page 191 When [Direct Connection Password] is set to [OFF] On the smartphone’s Wi-Fi setting screen, select the SSID displayed on this unit. ≥ It may take time to complete the Wi-Fi connection. When the Wi-Fi connection is complete, press the home button on the smartphone and start up the smartphone application “Image App”.
- Page 192 Scanning a QR code to set up a connection ≥ Set [Direct Connection Password] to [ON]. 180) (When using the Wi-Fi menu screen) Press Wi-Fi button on this unit and touch [TWIN CAMERA]. A [TWIN CAMERA] B [EXIT] (When using the recording screen) Touch the recording screen on this unit and touch ...
-
Page 193: When Connecting A Smartphone To This Unit As A Wireless Sub Camera For The First Time (To Use The Wireless Multi-Camera Function)
When connecting a smartphone to this unit as a Wireless Sub Camera for the first time (To use the Wireless Multi-Camera function) ≥ The default setting for [Direct Connection Password] is [OFF]. ≥ The QR code is not displayed when [Direct Connection Password] 180) is set to [OFF]. - Page 194 When [Direct Connection Password] is set to [OFF] On the smartphone’s Wi-Fi setting screen, select the SSID displayed on this unit. ≥ It may take time to complete the Wi-Fi connection. When the Wi-Fi connection is complete, press the home button on the smartphone and start up the smartphone application “Image App”.
- Page 195 When [Direct Connection Password] is set to [ON] Touch [Wi-Fi] on the screen of this unit. On the smartphone’s Wi-Fi setting screen, select the SSID displayed on this unit. ≥ If this is the first time the smartphone is connecting to this unit via Wi-Fi, enter the Password displayed on this unit’s screen on the smartphone.
- Page 196 Scanning a QR code to set up a connection ≥ Set [Direct Connection Password] to [ON]. 180) Press Wi-Fi button on this unit and touch [Multi Camera]. A [Multi Camera] B [EXIT] Touch [Unregistered] to register the smartphone to be connected. ≥...
-
Page 197: When Connecting For The Second Time Or Later
≥ V380 The image being captured by the smartphone connected to this unit will be displayed in a Sub Window of this unit. ≥ If you touch , the registration will be cancelled. ≥ You cannot connect devices other than smartphones for the Wireless Multi-Camera function. ≥... - Page 198 To use the Wireless Multi-Camera function To use the last connected smartphones Press Wi-Fi button on this unit and touch [Multi Camera]. Touch [ENTER]. Start up the smartphone application “Image App”. ≥ This unit and the smartphone will be connected via Wi- A [Multi Camera] Fi.
-
Page 199: Terminating The Connection
Terminating the connection Touch the recording screen on this unit and touch Touch [EXIT] on the screen of this unit. ≥ The Wi-Fi connection will be terminated. ≥ Close the “Image App” on the smartphone. ≥ You can also terminate the connection by pressing the Wi-Fi button on this unit. If you press the Wi-Fi button during recording pause, a message will be displayed. -
Page 200: Recording With A Wireless Sub Camera
Wireless Twin/Multi-Camera Recording with a Wireless Sub Camera (Wireless Twin/Multi-Camera) ≥ W580 W580M The Sub Camera of this unit is not available for the Wireless Twin Camera function. ≥ An image recorded with the Main Camera and the Wireless Sub Camera’s image displayed on the Sub Window are recorded as a single scene or still picture*. - Page 201 When the Wi-Fi signal weakens If the signal weakens when the Sub Window is displayed, the connection status icon changes to (Weak) and flashes on the Sub Window. If the signal weakens further, the connection status icon changes to and the Sub Window image disappears.
-
Page 202: Changing The Wireless Twin Camera Settings
∫ Sub Window size when using a Wireless Twin/Multi-Camera The size of the image displayed on the Sub Window varies depending on the smartphone camera and the orientation of the smartphone. Example: Sub Window display when the Main Camera’s aspect ratio is set to 16:9 (The yellow frames correspond to the size of the image be displayed on the Sub Window.) Smartphone orientation Vertical... -
Page 203: Changing The Wireless Multi-Camera Settings
Changing the Wireless Multi-Camera settings Changing the display position of the Sub Window Touch Sub Window to be changed. ≥ The selected Sub Window will be highlighted in yellow. Touch the display position you want to change. ≥ Depending on the display position of the Sub Window, the positions of the icons displayed on the screen may change. - Page 204 Switching the image in the Sub Window Touch Sub Window to be switched. ≥ The selected Sub Window will be highlighted in yellow. ≥ The Sub Camera select icons will be displayed and the selected icon will be highlighted in yellow. Touch the desired icon to switch the image in the Sub Window.
- Page 205 Swapping the images between the Sub Windows Touch Sub Window to be swapped. ≥ The selected Sub Window will be highlighted in yellow. ≥ The Sub Camera select icons will be displayed and the selected icon will be highlighted in yellow. Touch the icon selected for the other Sub Window.
- Page 206 ≥ Recording menu items, operation icons, and functions such as Image Stabilizer, Level Shot Function and [QUICK POWER ON] work only for the Main Camera. ≥ The Fade function’s image effects do not affect the Sub Window. ≥ When the “Image App” screen disappears, image transmission to the Sub Window stops. (The Wi-Fi connection stays connected.) This may occur when, for example, the smartphone receives a call or you press the home button.
-
Page 207: If The Wi-Fi Connection Cannot Be Established (Wireless Twin/Multi-Camera)
Wireless Twin/Multi-Camera If the Wi-Fi connection cannot be established (Wireless Twin/Multi- Camera) ≥ For information on the setup of your smartphone, refer to its operating instructions. Problem Check points Cannot connect ≥ Check the Wi-Fi settings of the smartphone to see if the SSID of this unit is this unit to the selected so that a Wi-Fi connection will be made from the smartphone to smartphone. -
Page 208: With A Pc
Check the website below to download/install the software. ≥ The software is available for download until the end of March 2019. http://panasonic.jp/support/global/cs/soft/download/f_le31.html ≥ Refer to the operating instructions of HD Writer LE 3.1 (PDF file) for details on how to use it. -
Page 209: Important Notice
Important Notice ≥ When using an SDXC Memory Card, check the following support site. http://panasonic.net/avc/sdcard/information/SDXC.html ≥ Do not insert a disc recorded in AVCHD format with HD Writer LE 3.1 in a device that does not support the AVCHD format. In some cases the disc may get stuck in the device. -
Page 210: Before Installing Hd Writer Le 3.1
Panasonic does not warrant that the operation of the Software will be uninterrupted or error Article 2 Use by a Third Party free. Panasonic or any of its distributors will not Licensee may not use, copy, modify, transfer, be liable for any damage suffered by Licensee rent, lease, lend or allow any third party, arising from or in connection with Licensee’s... - Page 211 Article 9 With regard to MICROSOFT SQL SERVER COMPACT 3.5 produced by Microsoft Corporation (1) Licensee shall use the MICROSOFT SQL SERVER COMPACT 3.5 only when included in the Software, and shall not use the MICROSOFT SQL SERVER COMPACT 3.5 in any other configuration or method.
-
Page 212: Operating Environment
With a PC Operating environment ≥ Even if the system requirements mentioned in these operating instructions are fulfilled, some PCs cannot be used. ≥ A compatible Blu-ray disc/DVD writer drive and media are necessary for writing to a Blu-ray disc/ DVD. - Page 213 ≥ HD Writer LE 3.1 is only for Windows. ≥ Input is not supported in languages other than English, German, French, Simplified Chinese and Russian. ≥ Operation cannot be guaranteed on all Blu-ray disc/DVD drives. ≥ Operation is not guaranteed on Windows 7 Enterprise, Windows 8 Enterprise, Windows 8.1 Enterprise, Windows 10 Enterprise or Windows RT.
-
Page 214: Installation
Check the website below to download/install the software. ≥ The software is available for download until the end of March 2019. http://panasonic.jp/support/global/cs/soft/download/f_le31.html ∫ Uninstalling HD Writer LE 3.1 Follow the steps below to uninstall any software applications that you no longer require. -
Page 215: Connecting To A Pc
≥ When performing reading/writing between a PC and an SD card, be aware that some SD card slots built into PCs and some SD card readers are not compatible with the SDHC Memory Card or SDXC Memory Card. ≥ When using an SDXC Memory Card, check the following support site. http://panasonic.net/avc/sdcard/information/SDXC.html - 215 -... -
Page 216: To Disconnect Usb Cable Safely
∫ Charging the battery by connecting it to different devices When using the battery, if you turn off the unit and connect it to a PC, Panasonic Blu-ray disc recorder or Panasonic DVD recorder, the battery will charge. ≥ When connecting this unit to a PC for the first time, make sure to connect this unit to the PC with this unit turned on. -
Page 217: About The Pc Display
About the PC display When the unit is connected to a PC, it is recognised as an external drive. ≥ Removable disk (Example: ) is displayed in [Computer]. W580M We recommend using HD Writer LE 3.1 to Example folder structure of built-in memory: copy motion picture data. - Page 218 ∫ Copying your still pictures to your PC Card reader function (mass storage) Still pictures recorded with this unit can be copied to the PC with Explorer or other programmes. Double-click the folder that contains the still pictures. ([DCIM] # [100CDPFQ] etc.) Drag and drop the still pictures onto the destination folder (on the PC’s HDD).
-
Page 219: Starting Hd Writer Le 3.1
≥ You will need Adobe Acrobat Reader 5.0 or later or Adobe Reader 7.0 or later to read the PDF operating instructions. Select [Start] # [All Programs] # [Panasonic] # [HD Writer LE 3.1] # [Operating Instructions]. - 219 -... -
Page 220: If Using Mac (Mass Storage)
With a PC If using Mac (mass storage) ≥ HD Writer LE 3.1 is not available for Mac. ≥ iMovie and Final Cut Pro X supported. For details about iMovie and Final Cut Pro X, please contact Apple Inc. ∫ Operating environment OS X v10.11 Intel Core 2 Duo or better 2 GB or more... -
Page 221: Indications
Others Indications W580 W580M ∫ Recording indications Motion Picture Recording Mode Still Picture Recording Mode 0h00m00s 1h30m 1h30m R 3000 R 1h20m MEGA PRE-REC 1/100 OPEN Built-in memory recording possible status (White) Card recording possible status Intelligent Auto Mode (Green) Recognising the card Intelligent Auto Plus Mode Motion Picture Recording Mode... - Page 222 PRE-REC PRE-REC Display Touch Menu Time Lapse Recording Backlight Compensation Tele Macro Zoom Microphone Intelligent Contrast Control Stereo Microphone Wind Noise Canceller Microphone Level Relay Recording Fade (White), Fade (Black) Power LCD Night Mode Intelligent Exposure Image Stabilizer 68)/ World Time setting Optical Image Stabilizer Lock Sub Window icon Picture Adjustment...
- Page 223 ∫ Playback indications ∫ Indication of connection to Wi-Fi /7/8/9/:/ 1/;/5/ D/E/;1/2; Wi-Fi connection status (wireless access point) 168) Display during playback 29, 87) Wi-Fi connection status (Direct 0h00m00s Playback Time connection) 168) No.10 Scene Number ∫ Indication of connection to Repeat Playback USB HDD Resume Playback...
-
Page 224: Messages
≥ Use a battery that is compatible with this unit. If using a Panasonic battery compatible with this unit, remove the battery and then insert it again. If the message appears even after repeating this several times, this unit needs repair. -
Page 225: About Recovery
Failed to connect wireless access point/ No wireless access point found ≥ Check the Wi-Fi set up of your wireless access point and smartphone. ≥ [Easy Connection (WPS)] can establish a connection only between two devices: this unit and a device that will connect to this unit. Check if multiple devices are trying to establish a connection in the WPS waiting state simultaneously. -
Page 226: Troubleshooting
Others Troubleshooting ∫ It is not a malfunction in following cases A clicking sound is heard ≥ This is the sound of the lens moving and is not a defect. when the unit is shaken. This sound will no longer be heard when the unit is turned on and set this unit to the Motion Picture Recording Mode or Still Picture Recording Mode. - Page 227 Indication Problem Check points Remaining battery ≥ The remaining battery capacity indication is an indication is not displayed approximation. properly. If the remaining battery capacity indication is not displayed correctly, fully charge the battery, discharge it and then charge it again. Recording Problem Check points...
- Page 228 Playback Problem Check points Scenes/still pictures ≥ Any scenes/still pictures where the thumbnails are displayed cannot be played back. cannot be played back. Scenes cannot be deleted. ≥ Release the protect setting. 112) ≥ Any scenes/still pictures where the thumbnails are displayed cannot be deleted.
- Page 229 With other products Problem Check points Cannot copy scenes on ≥ Other equipment might have not recognised the SD card. the SD card by connecting Unplug the USB cable once, and reconnect it. to other equipment with the USB cable. With a PC Problem Check points...
- Page 230 “LUMIX CLUB” Login ID and registered wireless access points will be deleted. I have forgotten the Login ≥ Check the information in the login screen of “LUMIX CLUB”. ID or Password for the http://lumixclub.panasonic.net/eng/c/ “LUMIX CLUB”. Others Problem Check points If the SD card is inserted in ≥...
- Page 231 ∫ If AVCHD scenes do not change smoothly when played back on another device The images may be still for several seconds at the joins between the scenes if the following operations are performed when multiple scenes have been continuously played back using another unit.
-
Page 232: Cautions For Use
Others Cautions for use When you use the unit in a sandy or dusty About this unit place such as a beach, do not let sand or fine dust get into the body and terminals of the unit. The unit and the SD card become warm Also, keep the unit away from sea water. -
Page 233: About The Battery
≥ Dust and other matter attached to the battery on-screen instructions. terminals should be removed. Please look after the data in your built-in memory carefully. Panasonic will not be held responsible in the unlikely case that private data is divulged. - 233 -... -
Page 234: About The Ac Adaptor
Prepare spare batteries when going out for About status indicator during recording. charging ≥ Prepare batteries enough to last for 3 to 4 times the period you are planning to record When the status indicator is flashing at a for. Cold places such as a ski resort can particularly fast or slow rate, the following shorten recording time. -
Page 235: Lcd Monitor
About the SD card LCD monitor When disposing of or giving away the SD ≥ When the LCD screen is dirty or card, note that: condensation has occurred, please wipe it ≥ Formatting and deletion of data on this unit or using a soft cloth such as eyeglass cleaner. - Page 236 Please note in advance that Panasonic is not liable in any way for any direct or indirect damage from the alteration or vanishing of information or personal information.
-
Page 237: About Copyright
(i) encode video in ™ ≥ HDAVI Control is a trademark of Panasonic compliance with the AVC Standard (“AVC Corporation. Video”) and/or (ii) decode AVC Video that was ™... -
Page 238: Recording Modes/Approximate Recordable Time
Others Recording modes/approximate recordable time ≥ SD cards are only mentioned with their main memory size. The stated times are the approximate recordable times for continuous recording. Recording format [AVCHD] [1080/50i] Recording mode [1080/50p] [PH] [HA] [HG] [HE] Picture size/ 1920k1080/ 1920k1080/... -
Page 239: Approximate Number Of Recordable Pictures
≥ Use time in the row of 4 GB in above table as a guideline for the time that can be copied onto one DVD disc (4.7 GB). ≥ Recordable times will be approximately half the times in the above table when Backup for Twin Camera is in operation. -
Page 240: Optional Accessories
Others Optional accessories Some optional accessories may not be available in some countries. About the Suction Cup Mount/the Video Camera Mount (For Handlebar) You can attach the Suction Cup Mount (VW-SCA100) as follows. ≥ For information on how to mount the Video Camera Mount (For Handlebar) RP-CMC10E, refer to the operating instructions for it. -
Page 241: About The Remote Pan Tilt Cradle
About the Remote Pan Tilt Cradle If you connect this unit to the Remote Pan Tilt Cradle VW-CTR1 (optional) by USB cable, this unit can automatically track the movement of the subject being recorded. This unit zooms in/out the image automatically, and the Remote Pan Tilt Cradle pans and tilts this unit. Using Wi-Fi functions in combination with the Remote Pan Tilt Cradle The Remote Pan Tilt Cradle can also be used by the following Wi-Fi functions. - Page 242 Touch [Remote Pan Tilt Cradle]. ≥ The Remote Pan Tilt Cradle Mode selection screen is displayed. ≥ If you have touched an item other than [Remote Pan Tilt Cradle] or if the Remote Pan Tilt Cradle is not recognised correctly, reconnect the USB cable. ≥...
- Page 243 Using the Remote Pan Tilt Cradle ≥ Connecting the Remote Pan Tilt Cradle to this unit. 241) ≥ Set [Panning Angle]/[Tilt Angle]/[Tilt Speed] in advance. 246, 247) Touch the desired Remote Pan Tilt Cradle Mode. Operation of the Mode Description Remote Pan Tilt Cradle The operation is automatic.
- Page 244 Press the recording start/stop button. (When [Party Scene]/[Moving Object] is selected) ≥ Before recording starts, the Remote Pan Tilt Cradle rotates and returns to its home position. It takes time until recording starts. ≥ The Remote Pan Tilt Cradle operates within the range set in advance. (When [Manual]/[Preset Positions] is selected) ≥...
- Page 245 ∫ Using Cyclic Mode In this mode, the Remote Pan Tilt Cradle cycles through positions registered to the position buttons in the desired sequence. The default sequence is as follows: [HOME] # [POS1] # [POS2] # [POS3] # [POS4] # [POS5] Touch ≥...
- Page 246 ≥ The following functions will be set to [OFF]: j Level Shot Function j Optical Image Stabilizer j [SHOOTING GUIDE] ≥ If you experience fatigue, a feeling of discomfort or other symptoms when playing back a scene recorded with the Remote Pan Tilt Cradle, stop the playback. (About [Party Scene]/[Moving Object]) ≥...
- Page 247 You can update the firmware version of the Remote Pan Tilt Cradle. For the latest update information, check the support website below. (As of November 2015) http://panasonic.jp/support/global/cs/e_cam (This Site is English only) ≥ Before updating this unit, update the Remote Pan Tilt Cradle.
- Page 248 Panasonic Corporation Web site: http://www.panasonic.com...
Need help?
Do you have a question about the HC-W580 and is the answer not in the manual?
Questions and answers