Table of Contents
Advertisement
CA 421 Installation Instructions
PROFESSIONAL INSTALLATION STRONGLY RECOMMENDED
Installation Precautions:
Roll down window to avoid locking
keys in vehicle during installation
Avoid mounting components or
routing wires near hot surfaces
Avoid mounting components or
routing wires near moving parts
Tape or loom wires under hood
for protection and appearance
Use grommets when routing wires
through metal surfaces
Use a voltmeter for testing and
verifying circuits
FCC COMPLIANCE
This device complies with Part 15 of the FCC rules and with RSS-210 of Industry Canada. Operation is subject to the following two conditions:
1. This device may not cause harmful interference, and
2. This device must accept any interference received, including any interference that may cause undesired operation.
Warning!
Changes or modifications not expressly approved by the party responsible for compliance could void the user's authority to operate the equipment.
Note:
Do not install this system on a vehicle
that is not equipped with the following:
• Automatic Transmission
• Fuel Injection
• Ignition / Shift Interlock
Technical Support
or go to
http://techservices.codesystems.com
1
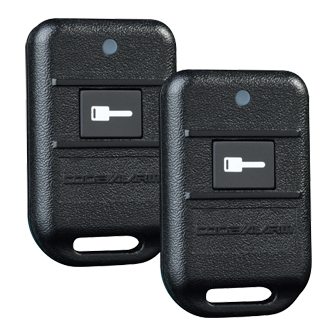
Kit Contents
(1) - Control Module
(2) - 1 Button High Frequency Transmitters
(1) - Receiver with Pushbutton
(1) - Multi Pin Harness
(1) - Six Pin Harness
(1) - Four Pin Harness
(1) - Pin Switch
(1) - Remote Start Warning Label
(1) - Literature Package
(800) 421-3209
Advertisement
Table of Contents

Subscribe to Our Youtube Channel
Related Manuals for Code Alarm CA 421


Summary of Contents for Code Alarm CA 421
- Page 1 CA 421 Installation Instructions PROFESSIONAL INSTALLATION STRONGLY RECOMMENDED Kit Contents Installation Precautions: (1) - Control Module Roll down window to avoid locking (2) - 1 Button High Frequency Transmitters keys in vehicle during installation (1) - Receiver with Pushbutton Avoid mounting components or...
- Page 2 C A 421 S Y S T E M LAY OUT...
-
Page 3: Installation Of The Major Components
INSTALLATION OF THE MAJOR COMPONENTS Control Module: Select a mounting location inside the passenger compartment (behind the dashboard). The mounting location selected must be within 24" of the ignition switch wiring harness to allow connection of the 6-pin harness. Be certain that the chosen location will not interfere with the proper operation of the vehicle. - Page 4 PURPLE: Starter Output This wire will have +12 volts when the ignition switch is turned to the start (crank) position only. This wire will have 0 volts in all other ignition switch positions. PINK: Ignition 1 Output Connect this wire to the ignition 1 wire from the ignition switch. This wire will show +12 volts when the ignition key is turned to the to the ON, RUN and START positions, and will have 0 volts when the key is turned to the OFF and ACCESSORY positions.
- Page 5 It is necessary to use an existing grommet when passing wires through the firewall to prevent short circuiting. This is an important safety feature of CA 421, and failure to use this feature can result in serious injury. Route the wire to the pin switch and connect it using the bullet connector provided.
- Page 6 YELLOW w/ BLACK: + 12 Volt Alarm By - Pass Output This wire provides a 500mA +12 Volt transistorized output when the ignition key is turned to the ON position, and 0 Volts when the ignition key is OFF and when the vehicle is running under the control of the Remote Start. This wire should be connected to the ignition input of the alarm system.
- Page 7 3. Transponder Key Override: To bypass the system while the vehicle is operating under the control of the Remote Start system. Connect the BLUE w/BLACK wire to the NEG trigger input of the accessory bypass. GRAY w/BLACK: Diesel Wait To Start For Diesel glow plug preheat circuits, this Wait To Start input will allow the ignition to keep the glow plugs active for the vehicles automatic time out period before cranking the starter motor.
- Page 8 GREEN w/BLACK: Pulsed Ground Output Before Start The GREEN w/BLACK wire will provide a 1 second 300mA pulsed ground output 1.5 second before the remote start system activates. Typical use for this output would be to disarm a factory theft deterrent system to prevent false triggering of the factory alarm when the Remote Start system engages.
-
Page 9: Programmable Features
PROGRAMMABLE FEATURES: Feature LtsFlash1X Lts Flash 2X Lts Flash 3X Lts Flash 4X Default 1. Run Time 5 Min. 10 Min. 15 Min. 20 Min. 10 Min. 2. Ign. 2 Off during Crank On during Crank 3. Parking Lights ON Flash 4. -
Page 10: Tach Programming
TACH PROGRAMMING: The Remote Car Start will learn the tach rate of most vehicles single ignition coils, multiple coil packs, and or single injector. To learn tach: 1. Turn the ignition key to the ON position. 3. Press and release the program switch 3 times. 4. -
Page 11: Testing Your Installation
TESTING YOUR INSTALLATION: CAUTION!! The following procedure must be performed after the installation of a Remote Start system. It is the responsibility of the installing technician to complete these tests. Failure to test the system in the following manner may result in personal injury, property damage, or both. -
Page 12: Completing The Installation
COMPLETING THE INSTALLATION: 1. If you have not done so already, place the red rubber handle cover over the handle of the control switch for ease of identification. This will allow your customer to distinguish the Remote Start control switch from the program switch.
Need help?
Do you have a question about the CA 421 and is the answer not in the manual?
Questions and answers