Table of Contents
Advertisement
Quick Links
Advertisement
Table of Contents

Subscribe to Our Youtube Channel
Related Manuals for Kyocera duraxe


Summary of Contents for Kyocera duraxe
- Page 1 User Guide...
-
Page 2: Table Of Contents
Table of Contents Phone Basics ......................... 8 Phone Overview ......................8 Key Functions ......................9 Get the Phone Ready ....................12 Battery and Charger ....................12 Battery Capacity ....................12 Install the Battery ....................12 Charge the Battery ....................14 Remove the Battery .................... - Page 3 Call from Contacts ....................27 Call Emergency Numbers ..................28 Call a Phone Number with Pauses................28 Call Using a Speed Dial Number ................29 Call Using the Plus (+) Code .................. 29 Call a Phone Number in a Message ................. 30 Receive Phone Calls ....................
- Page 4 Contacts ........................43 Display Contacts ....................... 43 Contacts List ......................43 Display Options ..................... 43 Contacts Details ....................44 Add a Contact ......................44 Save a Phone Number ....................45 Edit a Contact ......................45 Add or Change Information for a Contact ..............45 Assign a Picture to a Contact ..................
- Page 5 General Email Settings ................... 55 Email Account Settings ..................56 Text and Multimedia Messaging ................. 57 Compose Messages ....................57 New Messages Notification ..................58 Read a Message ....................58 Reply to a Message ....................58 Delete a Message Thread ..................59 Delete All Message Threads ...................
- Page 6 Browser Menu ....................... 69 Tethering and Mobile Hotspot ................... 72 Tethering ......................72 Mobile Hotspot ...................... 72 Camera and Videos ...................... 75 Take a Picture or Record a Video ................75 Activate Camera or Video Mode ................75 Deactivate the Camera or Video Mode ..............75 Take a Picture .......................
- Page 7 Stopwatch ......................89 World Clock ......................89 Calculators ....................... 89 Calculator ......................89 Tip Calculator ......................90 Unit Converter ...................... 90 Voice Services ......................91 Automatic Speech Recognition (ASR) ..............91 Manage Voice Memos .................... 95 Bluetooth ......................... 96 Turn Bluetooth On and Off ..................96 Bluetooth Settings Menu ..................
- Page 8 Cellular Network Settings ..................103 Device Settings ...................... 104 Display Settings ....................104 Sound & Notification Settings ................105 Programmable Key Settings ................. 108 Navigation Key Shortcuts ..................108 Keyguard ......................108 Storage Settings ....................109 Connectivity Settings ................... 109 Personal Settings ....................
-
Page 9: Phone Basics
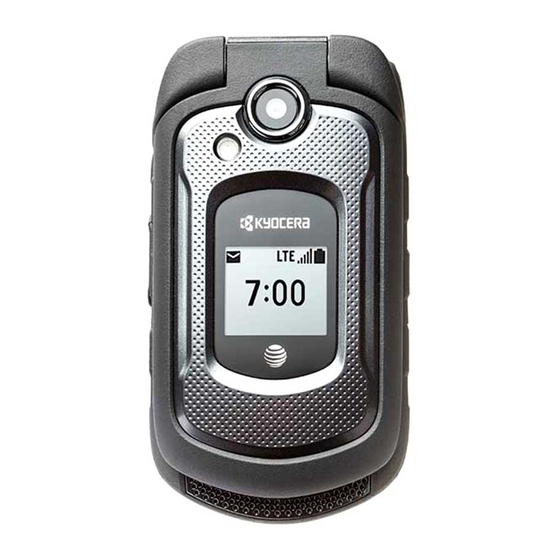
Phone Basics Phone Overview Phone Basics... -
Page 10: Key Functions
Key Functions ● Smart sonic receiver (internal) lets you hear the caller and automated prompts. Place your ear around the internal receiver and adjust the position of the phone to find the best hearing point depending on the surrounding environment. Note: Do not cover the microphones during a call. - Page 11 ● End/Home/Power key ( ) lets you turn the phone on or off, end a call, or cancel your input and return to the Home screen. ● Keypad lets you enter numbers, letters, and characters, and perform functions. ● External End key lets you ignore an incoming call, end the ongoing call, or hide the recent calls list.
- Page 12 ● Internal antenna facilitates reception and transmission. To maximize performance, do not obstruct while using the phone. ● SIM card slot (internal) allows you to insert a SIM card. The SIM compartment is behind the battery. See Replace the SIM Card.
-
Page 13: Get The Phone Ready
Warning: Use only Kyocera-approved batteries and chargers with your phone. The failure to use a Kyocera-approved battery and charger may increase the risk that your phone will overheat, catch fire, or explode, resulting in serious bodily injury, death, or property damage. - Page 14 Note: The battery door screw is permanently mounted on the door and cannot be removed. 2. Insert your fingernail into the slot at the bottom of the battery door and lift the battery. 3. Insert the battery into the battery compartment, making sure the connectors align. Gently press down to secure the battery.
-
Page 15: Charge The Battery
5. Using a coin, rotate the battery door screw clockwise until it is tight. Charge the Battery Fully charge the battery before powering the phone on. Important: Before turning on your phone, charge the battery fully with the charger that came with your phone. -
Page 16: Replace The Sim Card
Replace the SIM Card Your phone comes with the SIM card already installed. If you need to replace your SIM card, follow these steps. Note: Use only a nano SIM card in this phone. 1. Remove the battery door and the battery. 2. -
Page 17: Insert The Microsd Card
Insert the microSD Card A microSD™ card is an optional accessory that allows you to store images, videos, music, documents, and voice data. See microSD Card for more information. Warning: You can easily damage the microSD card by improper operation. Please be careful when inserting, removing, or handling the microSD card 1. -
Page 18: Turn Your Phone On And Off
Turn Your Phone On and Off Turn Your Phone On ► Open the phone and press and hold until the screen lights up. Turn Your Phone Off ► Open the phone and press and hold for two seconds until you see the powering-down animation on the main screen. -
Page 19: Display Your Phone Number
Select Menu Items As you navigate through the menu, menu options are highlighted. Select any option by highlighting it and pressing . If the option is numbered, you can select it by pressing the corresponding number on the phone’s keypad. For example, to view the Brightness level screen: 1. -
Page 20: Your Home Screen
From the Home screen, press Menu (center softkey) > Settings > System > About phone > Status > My phone number. Your Home Screen The Home screen is the starting point for your phone’s functions and menus. Home Screen Overview ●... - Page 21 Status Icons Icon Description Bluetooth® enabled Wi-Fi® active (full signal) Vibrate Silent Network (full signal) Network (no signal) 4G (data service) 4G LTE (data service) EDGE (data service) GPRS (data service) Airplane mode Battery (charging) Battery (full charge) Battery (low charge) Battery (discharged) Notification Icons Icon...
- Page 22 Icon Description New message New Voicemail message Event Alarm set Camera Icons Icon Description Auto scene mode Landscape mode Food mode Night mode Sports mode Memo mode Self-Timer (5 Seconds) Self-Timer (10 Seconds) Multiple shots set Camera resolution (5.0M) Camera resolution (3.2M) Camera resolution (2.0M) Camera resolution (1.3M) Camera resolution (0.3M)
- Page 23 Icon Description Camera resolution (0.1M) Video resolution (720P) Video resolution (VGA) Video resolution (QVGA) Video resolution (QCIF) Saving to Phone Saving to Memory Card Camera Flash On This Shot Camera Flash Always On or Video Light On Automatic Camera Flash Focus settings (Continuous AF) Focus settings (Infinity) Phone Basics...
-
Page 24: Text Entry
Text Entry Your phone provides convenient ways to enter letters, numbers, and symbols whenever you are prompted to enter text. Key Function For text entry, you can use the following keys as mentioned below. ● Press to delete characters from the display. ●... -
Page 25: Xt9 Smart Input
Web shortcuts to enter Web shortcuts (for example, www., http://, or .com). Note: When you select Symbols, Smileys, Emoticons, or Web shortcuts, a list will be displayed at the bottom of the screen. You can scroll through the options by pressing the navigation key left, right, up or down. -
Page 26: Abc Mode
Tip: You can also add a word by copying from the text entry field. Move the cursor next to the word you want to add and press Text mode (left softkey) > Copy/Cut. Press the navigation key and highlight the word. Then, press Next (left softkey) > Add word. -
Page 27: Copy And Paste Text
My words to edit or delete custom words you have added to the predictive text database. Add word to store words that you frequently use. Help to view the XT9 instructions. Copy and Paste Text You can copy or cut the text and paste it in the text entry field. 1. -
Page 28: Phone Calls
Phone Calls Make Phone Calls Call Using the Phone Keypad The most “traditional” way to place a call is by using the phone’s keypad. 1. Enter a phone number from in standby mode. (If you make a mistake while dialing, press to erase the numbers.) 2. -
Page 29: Call Emergency Numbers
To dial another number from the same entry, press , select a number, and then press or Call (center softkey). Call Emergency Numbers You can place calls to 9-1-1 or 1-1-2 even if your phone is locked or your account is restricted. -
Page 30: Call Using A Speed Dial Number
● 2-sec pause automatically sends the next set of numbers after two seconds. Note: You can have multiple pauses in a phone number and combine two-second and hard pauses. To dial or save phone numbers with pauses: 1. Enter all or part of a number. 2. -
Page 31: Call A Phone Number In A Message
2. Enter the country code and phone number, and then press . (The phone automatically prepends the access code for international dialing, followed by the country code and phone number.) Call a Phone Number in a Message You can place a call to a number that appears in a message. 1. -
Page 32: End Phone Calls
Answer an Incoming Call in Speakerphone Mode ► Press or the external speaker key. Mute the Ringtone and Stop the Vibration ► Press the volume button down. Send an Incoming Call to Voicemail ► Press or the external end key. –... -
Page 33: Voicemail Notification
Voicemail Notification There are several ways your phone alerts you to a new message. You will be notified of a new voicemail: ● By displaying a message on the screen. ● By sounding the assigned ringtone type. ● By displaying at the top of the screen. -
Page 34: Phone Call Options
Phone Call Options In-call Options Pressing Options (left softkey) during a call displays a list of available in-call features. To select an option, highlight the option and press ● Add call to initiate a conference call. ● Go to Bluetooth settings to open the Bluetooth settings screen (if applicable). ●... -
Page 35: Conference Calling
To switch back to the first caller: ► Press Swap (right softkey). – or – ► Press To create a conference call between your existing calls: ► Press Options (left softkey) > Merge call. Conference Calling With Conference calling, you can talk to two or more people at the same time. When using this feature, the normal airtime rates will be charged for each of the calls. -
Page 36: Phone Call Settings
► Press If one of the people you called hangs up during your call, you and the remaining caller stay connected. If you initiated the call and are the first to hang up, all callers are disconnected. Phone Call Settings You can configure various call-related settings. -
Page 37: Quick Responses
Hands free to answer calls automatically when the phone is connected to an optional headset or hands-free device. Speakerphone to answer calls automatically in speakerphone mode. 3. Highlight the time you would like your phone to wait before answering and press Quick Responses You can modify the preset text messages to send when you select to reject an incoming call and send a text message. -
Page 38: Caller Id
Caller ID Caller ID identifies a caller before you answer the phone by displaying the number of the incoming call. If you do not want your number displayed when you make a call, follow these steps. 1. From the Home screen, press Menu (center softkey) > Settings > Device > Call setup >... -
Page 39: Call Barring
Call Barring Call Barring allows you to prevent certain calls being made from or to your mobile phone. To activate or deactivate Call barring: 1. From the Home screen, press Menu (center softkey) > Settings > Device > Call setup > Call barring. 2. -
Page 40: Fixed Dialing Numbers (Fdn)
2. Select Activate or Deactivate. To check the current status, select Check status. 3. Press Fixed Dialing Numbers (FDN) This feature allows you to restrict your outgoing calls to the numbers included in the FDN list. Emergency calls will not be affected by this setting. Note: To use this feature you will have to enter your PIN2 number, which is associated with your SIM card. -
Page 41: Voicemail Settings
Add new contact to add contacts to your FDN list. Options (left softkey) to edit or delete contacts on the list. To allow sending SMS: 1. From the Home screen, press Menu (center softkey) > Settings > Device > Call setup >... -
Page 42: Recent Calls
Recent Calls The recent calls list displays your recent incoming, outgoing, and missed calls history at a glance. View Recent Calls ► From the Home screen, press Menu (center softkey) > Recent calls. – or – From the Home screen, press –... -
Page 43: Delete Recent Calls
Contact details to display information about the entry if it has already been saved in your Contacts. Add to contact to save a phone number. See Save a Phone Number. Delete to delete the entry. Delete Recent Calls You can delete individual or all entries in your recent calls list. -
Page 44: Contacts
Contacts Display Contacts ► From the Home screen, press Menu (center softkey) > Contacts. You will see the Contacts list. Contacts List The Contacts list shows the Contacts entries stored in your phone. ● Favorites tab: Highlight to display your favorite contacts. ●... -
Page 45: Contacts Details
Customize to select whether to display all the contacts saved in your phone or SIM card and to select contact types for each account. Highlight Phone or SIM, press Select (center softkey), make your selection and then press Done (left softkey). -
Page 46: Save A Phone Number
Note: To add more phone numbers, email addresses, etc., select Add new under the current numbers or addresses. 3. When you have finished adding information, press Save (left softkey) and then Save a Phone Number You can save a phone number to Contacts directly from the phone keypad. 1. -
Page 47: Assign A Ringtone To A Contact
3. Tap the contact icon to the left of the name and press 4. To assign a new picture, select Take photo and take a picture. – or – To assign a stored picture, select Choose photo and select a picture. 5. -
Page 48: Delete Single Or Multiple Contacts
Delete Single or Multiple Contacts You can delete existing entries from your Contacts. 1. From the Home screen, press Menu (center softkey) > Contacts > Contacts tab. 2. Press Options (left softkey) > Delete. 3. Highlight the entry you want to delete and press Select (center softkey). A check mark will appear in the box next to the selected entry. -
Page 49: Delete A Group Contact
2. Highlight the group you want to edit, press , and then press Options (left softkey) > Edit. 3. The following options are available: Highlight Add new contact and press to add members to the group. Highlight button next to the entry you want to remove from the group, and ... -
Page 50: Find An Entry Using The Phone Keypad
Highlight an entry and press to display the contact details screen. Find an Entry Using the Phone Keypad You can search Contacts entries for the numbers that contain a specific string of numbers. 1. Enter three or more digits of the number from the Home screen. (The more numbers you enter, the more specific the search becomes.) 2. -
Page 51: Share A Contact
To enter or edit your personal information: 1. From the Home screen, press Menu (center softkey) > Contacts > Contacts tab. 2. Highlight ICE- In Case of Emergency and press 3. Highlight My emergency information, press , and then press Edit (left softkey). -
Page 52: Accounts And Messaging
Accounts and Messaging Email Use the Mail application to send and receive email from your webmail or other accounts, using POP3 or IMAP, or access your Exchange ActiveSync account for your corporate email needs. Add an Email Account You can add several types of personal email accounts, such as POP3 and IMAP accounts, on your phone. -
Page 53: Send An Email Message
Note: Before setting up a Microsoft® Exchange ActiveSync® account, contact your company's Exchange Server administrator for required sign-in information. 1. From the Home screen, press Menu (center softkey) > Settings > Personal > Accounts > Add accounts > Corporate. 2. Enter the your Exchange email address and password, press , and then press Next (right softkey). -
Page 54: View And Reply To Email
8. To add an attachment, press Options (left softkey) > Add Cc/Bcc > Attach, and choose an option from Pictures, Take picture, Videos, Record video, Audio, or Others. 9. After composing your message, press , and then press Send (right softkey). 10. -
Page 55: Manage Your Email Messages
Manage Your Email Messages View Your Email Messages 1. From the Home screen, press Menu (center softkey) > Email. 2. If Inbox is not displayed, press Options (left softkey) > Folder. 3. Highlight the folder you want to display and press >... -
Page 56: Email Settings
Star: To mark the message as starred. Sort: To sort the messages by Date, Sender, Read/Unread, Attachment, or Size. Email Settings General Email Settings 1. From the Home screen, press Menu (center softkey) > Email > Options (left softkey) >... -
Page 57: Email Account Settings
Email Account Settings 1. From the Home screen, press Menu (center softkey) > Email > Options (left softkey) > Settings > Account settings. 2. Highlight the account you want to configure and press 3. Configure the following settings: Basic settings: ●... -
Page 58: Text And Multimedia Messaging
● Outgoing settings: Adjust the outgoing email parameters such as username, password, and other outgoing connection parameters (ex: SMTP server). Note: While highlighting an account, you can remove it by pressing Remove (right softkey). To add a new email account, press Add (left softkey). Text and Multimedia Messaging Messaging allows you to stay connected 24 hours a day anywhere on the network. -
Page 59: New Messages Notification
Audio: Select an audio file to attach. Record audio: Record an audio file to attach. Contact (vCard): Opens Contacts to select one or more contact entries and attach them. Event (vCalendar): Select an event entry to attach. ... -
Page 60: Delete A Message Thread
Note: If you are replying to a message with multiple recipients, you can reply only to the sender by pressing Options (left softkey) and selecting Reply to sender only. Delete a Message Thread 1. From the Home screen, press Menu (center softkey) > Messaging. 2. -
Page 61: Emergency Alerts
Manage SIM card messages: Select this option to manage messages stored on your SIM card. Group messaging: Select On to enable group messages. Auto-retrieve: Select On to automatically retrieve messages. MMS Creation mode: Select Restricted if you want to restrict the ... - Page 62 Presidential to deliver a national Presidential alert. Presidential Alerts is always grayed out (not selectable) and cannot be excluded. Imminent Threat - Extreme to deliver emergency alerts in an extreme emergency situation (an extraordinary threat to life or property). Imminent Threat - Severe to deliver emergency alerts in a severe emergency ...
-
Page 63: My Apps
My Apps My Apps allows you to access your installed apps and manage them. Launch an Installed App 1. From the Home screen, press Menu (center softkey) > My apps. 2. Highlight an app you want to manage and press to launch it. -
Page 64: Web And Data
Web and Data Your phone’s data capabilities let you wirelessly access the Internet or your corporate network through a variety of connections including Wi-Fi, 4G LTE, 4G, EDGE, GPRS, and Virtual Private Networks (VPN). The following topics address your phone’s data connections and the built-in Web browser. -
Page 65: Connect To A Different Wi-Fi Network
2. Highlight wireless network that the phone is currently connected to and press > Show details. You will see a message box showing the Wi-Fi network name, status, signal strength, speed, and other details. Note: If you want to remove the wireless network settings, select Forget network. You need to enter the settings again if you want to connect to this wireless network. -
Page 66: Data Services
Wi-Fi frequency band to specify the frequency band for Wi-Fi. Install certificates to install the certificates for communicating via Wi-Fi. WPS Push Button to set up a Wi-Fi Protected Setup connection by pressing the set up button on the router. ... -
Page 67: Virtual Private Networks (Vpn)
Icon Description Your phone is connected to the GPRS network. Virtual Private Networks (VPN) From your phone, you can add, set up, and manage virtual private networks (VPNs) that allow you to connect and access resources inside a secured local network, such as your corporate network. -
Page 68: Connect To Or Disconnect From A Vpn
4. Press Save (left softkey). The VPN is then added to the VPNs section of the VPN settings screen. Connect to or Disconnect from a VPN Connect to a VPN 1. From the Home screen, press Menu (center softkey) > Settings > Wireless & networks >... -
Page 69: Keypad Shortcut
► Press a softkey. (If an additional pop-up menu is displayed when you press the softkey, select the menu items using your keypad [if they’re numbered], or by highlighting the option and pressing Scrolling As with other parts of your phone’s menu, you’ll have to scroll up and down to see everything on some websites. -
Page 70: Browser Menu
: Zoom in ● : Scroll page left ● : Overview screen ● : Scroll page right ● : Previous tab ● : Page down ● : Next tab ● : Bookmarks ● : Search/Enter URL ● : Page operation ●... -
Page 71: Adjust Browser Settings
● Zoom in to zoom in on a Web page. ● Zoom out to zoom out on a Web page. ● Overview screen to display the entire Web page. ● Page operation: Send to send the URL to the Email, Notepad, Bluetooth, Messaging, etc. ... - Page 72 ● Privacy & security Clear cache to delete all currently cached data. Clear history to clears the browser navigation history. Show security warnings to notify you if there is a security issue with the current website. Accept cookies to allow sites that require cookies to save and read cookies ...
-
Page 73: Tethering And Mobile Hotspot
● Bandwidth management Search result preloading to preload high confidence search results in the background. Web page preloading to preload linked Web pages in the background. Load images to display images on Web pages. Tethering and Mobile Hotspot Tethering You can share your phone's Internet connection via a USB cable or Bluetooth. - Page 74 Set Up Mobile Hotspot 4. From the Home screen, press Menu (center softkey) > Settings > Wireless & networks > More > Tethering & Mobile Hotspot > Mobile Hotspot. 5. Select On to turn Mobile Hotspot on. If your phone's mobile data access is not enabled, you will be prompted to turn it ...
- Page 75 Important: Write down the passkey (password) for this communication (shown onscreen). To set the timer for turning Mobile Hotspot off: 1. From the Home screen, press Menu (center softkey) > Settings > Wireless & networks > More > Tethering & Mobile Hotspot > Mobile Hotspot settings >...
-
Page 76: Camera And Videos
Camera and Videos Take a Picture or Record a Video Activate Camera or Video Mode ► From the Home screen, press Menu (center softkey) > Camera > Camera or Video. Deactivate the Camera or Video Mode ► On the Camera screen, press Take a Picture 1. -
Page 77: Record A Video
Details/Edit to edit your picture or video, or to display their details. See Edit a Picture. Record a Video 1. From the Home screen, press Menu (center softkey) > Camera > Video. 2. Press Options (left softkey) to change the video settings as desired. See Configure Camera Settings for more information. -
Page 78: Camera And Video Settings
Details/Edit to edit the currently displayed image, or to display its details. See Edit a Picture. 4. To return to camera mode to take another picture, press Camera (right softkey). 5. To return to video mode, press Options (left softkey) from camera mode, press right navigation key to open Others tub, and then select Video mode. -
Page 79: Configure Video Settings
Brightness to select a brightness mode from Auto or Manual. Press the navigation key right or left to set brightness when selecting Manual. White balance to select a white balance mode from Auto, Sunny, Cloudy, Tungsten, or Fluorescent. Quality to select the picture quality setting from Fine, Normal, or Economy. -
Page 80: View Pictures And Videos In Photos & Videos
Video light to turn the light on or off while recording a video. Zoom to zoom in on a subject. You can adjust the zoom from +1 to +12 by pressing the navigation key right or left, or the volume button up or down. Self-Timer to choose a timer setting. -
Page 81: View Pictures And Videos
View Pictures and Videos 1. From the Home screen, press Menu (center softkey) > Photos & Videos. – or – From the picture mode or video mode, press Review (right softkey). 2. Select an image by moving the blue frame with the navigation key left, right, up, or down. -
Page 82: Assign Pictures
This to delete the currently selected image. All to delete all images. Details/Edit to edit the selected picture or display the detailed information of the selected image. The following options are available: Effect (for pictures) to choose an effect to add to the picture. Select from Normal, Sepia, Black &... - Page 83 2. Highlight the pictures or videos you want to send and press Press Options (left softkey) > Select multiple to select multiple pictures or videos. 3. Press Options (left softkey) > Send > Bluetooth. 4. In the next few steps, you will be asked to turn Bluetooth on and connect to the receiving Bluetooth device so the files can be sent.
-
Page 84: Tools & Calendar
Tools & Calendar Calendar Use Calendar to create and manage events, meetings, and appointments. Your Calendar helps organize your time and reminds you of important events. Add an Event to the Calendar 1. From the Home screen, press Menu (center softkey) > Calendar. 2. -
Page 85: Add A Task
To add another reminder, select Add reminder and a new REMINDERS field will appear. Select it, select Change period, and choose from the options. 11. Select your status to be displayed on your calendar. 12. Set the privacy status of this event. 13. -
Page 86: Invite Guests To Your Calendar Event
Invite Guests to Your Calendar Event Note: The invite guests feature is available for Exchange ActiveSync accounts only. You can set to invite guests to your event and an email invitation will be sent to your guests. If the people to whom you send invitations use Exchange account, they’ll receive an invitation in Calendar and by email. -
Page 87: View Calendar Events
Press Dismiss (right softkey) to dismiss the reminder. Press View (center softkey) to display the Calendar notification screen. Press Dismiss (right softkey) to dismiss the reminder. Press Options (left softkey) and select Snooze to postpone the event reminder for the set duration, or select Set snooze duration to set snooze interval. -
Page 88: Edit Calendar Events
The current day will appear highlighted. Highlight a day to view the events of that day and press Press the navigation key up or down to view earlier or later months. ● Agenda: Agenda view shows a list of all your events in chronological order. ●... -
Page 89: Clock
Refresh to update the calendar data. Calendars to display to choose which calendars you want to display. Settings to access to calendar settings menu. Clock Alarm Your phone comes with a built-in alarm that has multiple alarm capabilities. 1. -
Page 90: Stopwatch
+1 min (right or left softkey) to add an additional minute to the timer. Dismiss (left softkey) to clear the alarm. Stopwatch You can record split times or lap times with the built-in stopwatch. 1. From the Home screen, press Menu (center softkey) > Tools > Stopwatch. 2. -
Page 91: Tip Calculator
Press to enter a decimal point. Press to change the sign for a number to a negative. Press Clear (right softkey) to clear all numbers. 3. Press for the total. Tip Calculator This feature allows you to calculate tip and split the bill. 1. -
Page 92: Voice Services
5. Highlight the To field and press the navigation key left or right to choose the unit to convert to. 6. The Unit Converter automatically displays the converted values below the To field. Tip: Pressing the navigation key left or right, you can change conversion feature on the Unit Converter screen too. - Page 93 Check <Item> to check your phone’s status. See Check Phone Status Using ASR details. Tip: Use ASR in a quiet environment so it can accurately recognize your commands. Tip: During ASR operation, press Info (left softkey) or Help (right/left softkey) to get instructions for using the software.
-
Page 94: Signal Strength
Open Menus Using ASR You can jump directly to many menu items or applications by saying “Go to” followed by a menu option. 1. Press and hold or the external speaker key. 2. When you hear “Say a command,” say “Go To.” 3. - Page 95 2. Press Settings (right softkey) > Confirmation > Name confirmation or Music confirmation. 3. Highlight an option and press Automatic to ask for confirmation only when the system is not sure what you said. Always confirm to always ask for confirmation. Never confirm to never ask for confirmation.
-
Page 96: Manage Voice Memos
Manage Voice Memos Use your phone’s Voice Memo to record brief memos to remind you of important events, phone numbers, or grocery list items. Record Voice Memos To record an audio memo: 1. From the Home screen, press Menu (center softkey) > Tools > Voice Memo > Record. -
Page 97: Bluetooth
Details to display information about a memo. Sort by to sort memos by time recorded, name, or file size. Send to send a memo by Bluetooth, Email, or Messaging. Go to SD card/Go to Phone to switch between memos recorded on the SD ... -
Page 98: Pair Bluetooth Devices
Rename my device to rename your phone for Bluetooth access. Pair Bluetooth Devices 1. From the Home screen, press Menu (center softkey) > Settings > Wireless & networks > Bluetooth. 2. Highlight the device you want to pair with and press Disconnect a Bluetooth Device 1. -
Page 99: Remove The Microsd Card
5. Lower the flap of the card holder, gently press the card and the card holder ( and then slide the holder in the direction of the arrow to lock it ( 6. Place the battery back into its compartment and replace the battery door. See Install Battery. -
Page 100: View The Microsd Card Memory
6. Place the battery back into its compartment and replace the battery door. Warning: Press all around the edges of the battery door ensuring it is properly sealed to maintain the phone's waterproof capability. View the microSD Card Memory 1. With the microSD card inserted, from the Home screen, press Menu (center softkey) >... -
Page 101: Notepad
Notepad Your phone offers a simple notepad to allow you store your notes. Write a Note 1. From the Home screen, press Menu (center softkey) > Tools > Notepad > Add New…. 2. Enter a title and a note and press >... -
Page 102: Sim Toolkit
Warning: Do not shine the LED flashlight into anyone’s eyes, as doing so may compromise their vision and cause an accident. To turn the LED flashlight on or off: 1. From the Home screen, press Menu (center softkey) > Tools > Flashlight. 2. -
Page 103: Settings
Settings Wireless & Networks Settings Wi-Fi Turn Wi-Fi On or Off 1. From the Home screen, press Menu (center softkey) > Settings > Wireless & networks > Wi-Fi. 2. Press Turn on (left softkey) to turn Wi-Fi on. Access the Wi-Fi Settings Menu 1. -
Page 104: Tethering & Mobile Hotspot Settings
Tethering & Mobile Hotspot Settings Use the settings menu to configure your Mobile Hotspot settings which allow you to share your phone’s data service with multiple Wi-Fi capable devices. You can also share your phone's Internet connection via a USB cable or Bluetooth. For details on your phone’s tethering and Mobile Hotspot settings, see USB Tethering and Mobile Hotspot. -
Page 105: Device Settings
Network Operators 1. From the Home screen, press Menu (center softkey) > Settings > Wireless & networks > More > Cellular networks > Network operators. 2. Select an option: Search networks to search available networks. Choose automatically to select a preferred network automatically. ... -
Page 106: Sound & Notification Settings
1. From the Home screen, press Menu (center softkey) > Settings > Device > Display > Font size. 2. Select a font size. Notification This option allows you to enable or disable notification pop-up when you receive a new notification (except for incoming call and alarm) while an application is running. 1. - Page 107 Phone Ringtone 1. From the Home screen, press Menu (center softkey) > Settings > Device > Sound & notification > Phone ringtone. 2. Select a ringtone. Vibration Settings To turn on or off the vibration for phone calls: 1. From the Home screen, press Menu (center softkey) > Settings > Device > Sound &...
- Page 108 1. From the Home screen, press Menu (center softkey) > Settings > Device > Sound & notification > Key tone. 2. Select Type 1 or Type 2. To turn on or off the battery charging tone: 1. From the Home screen, press Menu (center softkey) > Settings > Device > Sound &...
-
Page 109: Programmable Key Settings
Programmable Key Settings You can assign your favorite behavior to the programmable key. Press and hold the key to call up the assigned function. To use as a PTT key: 1. From the Home screen, press Menu (center softkey) > Settings > Device > Programmable key /PTT >... -
Page 110: Storage Settings
On press 2 keys to temporarily disable the keyguard by pressing the external speaker key and the external end key sequentially while the phone is closed. Off to disable the keyguard. Storage Settings View Memory Information 1. From the Home screen, press Menu (center softkey) > Settings > Device > Storage. -
Page 111: Security Settings
1. From the Home screen, press Menu (center softkey) > Settings > Personal > Location. 2. Select On or Off to turn the location settings on or off. Security Settings Lock Screen Settings To set the lock type: 1. From the Home screen, press Menu (center softkey) > Settings > Personal > Security >... -
Page 112: Accounts Settings
Unknown sources: Allow installation of apps from unknown sources. Trusted credentials: Allows you to see the trusted credentials on your phone’s system. Install from SD card: Allows you to install encrypted certificates from the microSD card. Clear credentials: Clear all the credentials on your phone. ... -
Page 113: Reset Your Phone And Phone Content
2. The following settings are available: Word complete to suggest possible words based on letters you have entered. Next word complete to automatically display the word that may follow the current text input. Word choice list to select whether to display the word choice list. ... -
Page 114: System Settings
System Settings Date & Time Settings Your phone obtains date and time information from the network. These values also can be manually set. 1. From the Home screen, press Menu (center softkey) > Settings > System > Date & time. 2. - Page 115 Note: When the Media volume is set to Volume off, Voice Guide does not work. (See Volume Settings.) Tip: To change the language used for Voice Guide, see Language Settings. Adjust the Speech Rate You can adjust the rate at which onscreen text is spoken by the phone. 1.
- Page 116 2. Select On or Off to turn the color inversion on or off. Sound Balance 1. From the Home screen, press Menu (center softkey) > Settings > System > Accessibility > Sound balance. 2. Move the slider to adjust the balance by pressing the navigation key left or right. A sound clip will play when you move the slider.
-
Page 117: About Phone
Warning: 9-1-1 Emergency Calling It is recommended that TTY users make emergency calls by other means, including Telecommunications Relay Services (TRS), analog cellular, and landline communications. Wireless TTY calls to 9-1-1 may be corrupted when received by public safety answering points (PSAPs), rendering some communications unintelligible. -
Page 118: Copyrights
® The Bluetooth word mark and logos are registered trademarks owned by Bluetooth SIG, Inc. and any use of such marks by Kyocera Corporation is under license. Other trademarks and trade names are those of their respective owners. ® Nuance, the Nuance logo, VSuite and XT9 are trademarks or registered trademarks of Nuance Communications, Inc. -
Page 119: Index
Index Accessibility, 113 Barring, 38 Account Call Waiting, 38 Corporate, 51 End, 31 Emai, 51 Fixed Dialing Numbers (FDN), 39 Alarm, 88 Forward, 37 Answer In-call Options, 33 Call, 30 Make, 27 Apps Settings, 35 Launch, 62 Timer, 40 Call Answer Mode, 35 Settings, 93 Call Waiting, 33 Auto-Answer Mode, 35... - Page 120 Assign a Ringtone to a Personal Entry, View Messages, 53 Email Assign a Vibration to a Personal Entry, Reply, 53 Email Delete an Entry, 47, 48 View and Reply Messages, 53 Delete Multiple Entry, 47, 48 Email Edit an Entry, 45, 46 Manage, 54 Remove a Group Entry, 47 Email...
- Page 121 Using ASR, 92 Insert, 16 Using Speed Dial, 29 Remove, 98 Using the Phone Keypad, 27 My Apps Using the Plus (+) Code, 29 Launch an App, 62 With Pauses, 28 Options, 62 Menu Notepad, 100 Navigation, 17 Phone Messaging Key Functions, 9 Corporate Reset, 112...
- Page 122 Save SIM Card Number Using Keypad, 45 Toolkit, 101 Number With Pauses, 28 SIM Toolkit, 101 Security Speed Dial, 29 Reset Phone, 112 Assign Numbers, 36 Set Up Stopwatch, 89 Voicemail, 17 Text and Multimedia Messaging, 57 Settings Compose Messages, 57 About Phone, 116 Delete a Message, 59 Accessibility, 113...
- Page 123 Automatic Speech Recognition (ASR), Launch, 65 Navigation, 67 Voice Memos, 95 Status and Indicators, 65 Voicemail, 31, 40 Wi-Fi, 63 Notification, 32 Check the Status, 63 Retrieve Messages, 32 Connect, 63 Set Up, 17 Connect to a Different Network, 64 Settings, 40 Options, 64 Web, 63, 65...
Need help?
Do you have a question about the duraxe and is the answer not in the manual?
Questions and answers