Table of Contents
Advertisement
Quick Links
Advertisement
Table of Contents

Related Manuals for Uniden HD9000UPVR


Summary of Contents for Uniden HD9000UPVR
- Page 1 HD9000UPVR HIGH DEFINITION DIGITAL RECEIVER Set Top Box with Freeview™ EPG...
-
Page 3: Safety First
Protect other equipment: Unplug the receiver before connecting any other equipment, especially the antenna. Connect all equipment to the receiver before plugging any power cords to the power source. - 1 - © 2010 Uniden Australia Pty Ltd/Uniden New Zealand Ltd. - Page 4 HDMI, the HDMI logo and High-Definition Multimedia Interface are trademarks or registered trademarks of HDMI Licensing LLC. DVB and the DVB logo are registered trademarks of the DVB project. - 2 - © 2010 Uniden Australia Pty Ltd/Uniden New Zealand Ltd.
-
Page 5: Table Of Contents
Main Menu ............................25 Channels............................. 25 Settings ............................27 Setup............................30 System ............................31 Trouble Shooting..........................38 Glossary............................... 40 Product Specification: .......................... 42 One Year Limited Warranty........................43 - 3 - © 2010 Uniden Australia Pty Ltd/Uniden New Zealand Ltd. -
Page 6: Introduction
Introduction The Uniden HD9000UPVR Set-Top-Box is an MPEG-4 compliant High Definition (HD) receiver, capable of receiving and recording high definition and standard definition (SD) TV programmes from free-to-air terrestrial broadcasts (DVB-T) in accordance with the FREEVIEW specification phase two. The user friendly On-Screen-Display (OSD) allows you to setup your receiver to enjoy both high and standard definition channels with crystal clear picture and stereo sound quality. -
Page 7: Key Features
AFD 16:9 Wide, AFD 4:3 Letter Box and AFD 4:3 Centre Cut • Channel Locked Function Parental Rating with PIN code access • USB 2.0 support for software upgrade - 5 - © 2010 Uniden Australia Pty Ltd/Uniden New Zealand Ltd. -
Page 8: Parts Of The Uniden Hd9000Upvr System
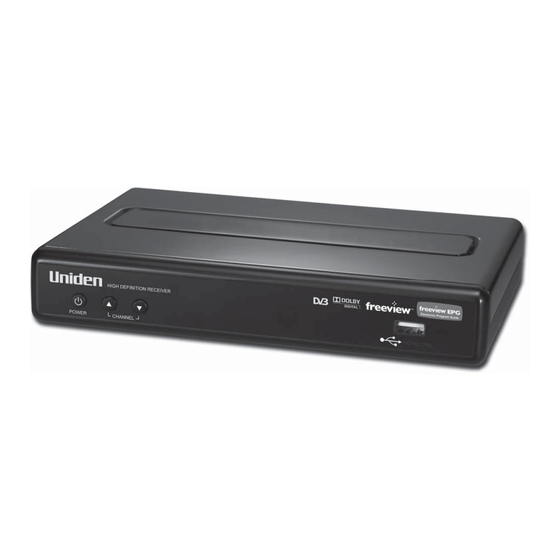
Parts of the Uniden HD9000UPVR System Front Panel Power button: Toggles the HD9000UPVR between power-on (green LED) and standby (red LED) modes. Channel button: Switch to the next channel. Channel button: Switch to the previous channel. USB Port: For connection of a USB Storage Drive (USB Flash Drive, USB single SD card reader or USB Hard Disk Drive). -
Page 9: Rear Panel
For connection to an amplifier equipped with a Dolby Digital decoder. ENET: For connection to Internet of Interaction channel “Catch up TV” service. Power Supply: Power Adapter DC5V 3A input (100~240 VAC, 50~60 Hz). - 7 - © 2010 Uniden Australia Pty Ltd/Uniden New Zealand Ltd. -
Page 10: Remote Control
Note the “+” and “-“ signs on the batteries to ensure that the batteries are inserted with the correct polarity into the remote control. To avoid damage to the remote control, discard any depleted or old batteries. - 8 - © 2010 Uniden Australia Pty Ltd/Uniden New Zealand Ltd. - Page 11 26. PAUSE: Pause the video in playback mode. 27. PLAY/STOP: Play or Stop the video in playback mode. Stop programme recording. 28. RWD/FWD: Execute Rewind and Forward in playback mode. - 9 - © 2010 Uniden Australia Pty Ltd/Uniden New Zealand Ltd.
-
Page 12: System Installation
System Installation Connecting To TV Monitor And Audio & Video Devices - 10 - © 2010 Uniden Australia Pty Ltd/Uniden New Zealand Ltd. -
Page 13: Aspect Ratio Setting
'shot and protected' to allow for this, so that cutting off the edges won't lose important action in the scene. Recommended Settings The HD9000UPVR offers the following options through the A.Ratio (aspect ratio) button on the remote control: 4:3 Letter Box... -
Page 14: Switching On For The First Time
Switching on for the First Time Your HD9000UPVR needs to be tuned to channels in your region. When it is connected and switched on for the first time the HD9000UPVR will start in Quick Scan mode. 1. Turn on your TV set. -
Page 15: Viewing Channels
• Logical Channel Number (LCN) • Date • TV Channel name • Current Time Programme time • TV Programme name • Parental rating, HD, CC if available • - 13 - © 2010 Uniden Australia Pty Ltd/Uniden New Zealand Ltd. -
Page 16: Selecting Subtitle Tracks
Some programmes are broadcast with subtitle tracks in one or more languages. Press SUBT, the subtitle menu will display on your screen. Once you select a subtitle track, the subtitle will be displayed. - 14 - © 2010 Uniden Australia Pty Ltd/Uniden New Zealand Ltd. -
Page 17: Freeview Epg: Electronic Programme Guide
Freeview EPG: Electronic Programme Guide This HD9000UPVR comes with a 7-day Freeview Electronic Programme Guide (EPG). Never miss your favourite TV programmes; simply select upcoming TV programmes and press Green to active Reminder feature of your preferable TV programmes. When the time is near the receiver will switch to the reminder channel. -
Page 18: Recording Tv Programmes
Recording TV Programmes The HD9000UPVR can record television programmes onto a USB mass storage drive. The storage drive must be formatted before it can be used to store recorded content. For this reason Uniden recommends using a dedicated USB mass storage NOTE drive for recording and playback of TV programmes. -
Page 19: Scheduled Recording
• Booking preference programme from MHEG5 EPG Scheduled Recording allows you to book preference programmes in advance. To access the Record Schedule Menu press MENU then select “Record Schedule” from the “Channels” menu. - 17 - © 2010 Uniden Australia Pty Ltd/Uniden New Zealand Ltd. - Page 20 The Recording Schedule Menu tables the schedule of recording for your favourite TV programmes. Starting (Scheduled) Recording When the scheduled record time comes “Start Recording” displays and recording starts. - 18 - © 2010 Uniden Australia Pty Ltd/Uniden New Zealand Ltd.
-
Page 21: Approximate Recording Times
MPEG2 HD Channel 2 hours MPEG2 SD Channel 5 hours 10GB MPEG2 HD Channel 5 hours 20GB MPEG4 SD Channel 1 hour 1.7GB MPEG4 HD Channel 1 hour 5.4GB - 19 - © 2010 Uniden Australia Pty Ltd/Uniden New Zealand Ltd. -
Page 22: Playback Recorded Tv Content
Playback Recorded TV Content The HD9000UPVR can only playback content that has been recorded to the USB Storage Drive. NOTE File Menu Press FILE to open the “Select File Type” menu. Select “Video” to open of the “PVR File Management” menu. - Page 23 If the recorded programme is longer than 10 minutes then you can Skip forward or Skip backward in 10 minute steps by selecting the I I options on the playback display and pressing ENTER. - 21 - © 2010 Uniden Australia Pty Ltd/Uniden New Zealand Ltd.
-
Page 24: Deleting Files
Selecting your unwanted file through file paths, e.g. “video” for TV recordings. Select your unwanted file, e.g."Martin Morning", and press Red Key. “Martin Morning” is removed from “video” to the "recycle" folder. - 22 - © 2010 Uniden Australia Pty Ltd/Uniden New Zealand Ltd. - Page 25 Red Key to delete the file and when the message “Do you want to delete the file(s)?” appears, select “yes”. Unwanted files is deleted from your USB Storage Drive - 23 - © 2010 Uniden Australia Pty Ltd/Uniden New Zealand Ltd.
-
Page 26: Main Menu Map
Main Menu Map - 24 - © 2010 Uniden Australia Pty Ltd/Uniden New Zealand Ltd. -
Page 27: Main Menu
Main Menu Press MENU to display the Main Menu screen. Use the directional keys to move through the menu and press ENTER to select the chosen option. Channels - 25 - © 2010 Uniden Australia Pty Ltd/Uniden New Zealand Ltd. - Page 28 Green key: Sort lists alphabetically, by Logical Channel Number (LCN) or by network frequency. File Menu: - see page 20 Record Schedule: - see page 18 Current Record Info: - see page 19 - 26 - © 2010 Uniden Australia Pty Ltd/Uniden New Zealand Ltd.
-
Page 29: Settings
A pop-up message will show that the channel is locked. To see the channel, you have to enter the PIN code before viewing the channel. - 27 - © 2010 Uniden Australia Pty Ltd/Uniden New Zealand Ltd. - Page 30 Aspect Ratio:16:9, AFD 16:9 Wide, Full screen, 4:3 Letter Box, 4:3 Centre Cut, AFD 4:3 Letter Box and AFD 4:3 Centre Cut Picture Setup: Brightness, Contrast, Saturation, Hue, Sharpness and DNR (Digital Noise Reduction) - 28 - © 2010 Uniden Australia Pty Ltd/Uniden New Zealand Ltd.
- Page 31 Auto Subtitle: Enabling this setting automatically shows subtitles in programmes if available. Hearing Impaired: Enabling this setting automatically shows sound subtitles for the hearing impaired if available. Menu Timeout: Timeout interval for OSD menus. - 29 - © 2010 Uniden Australia Pty Ltd/Uniden New Zealand Ltd.
-
Page 32: Setup
Channel No. and Frequency, and select Start Scan to scan a specific channel. “Scan Complete” shows after scanning is finished. Note: These parameters vary between different regions. Please refer to the details provided by your local broadcast service. - 30 - © 2010 Uniden Australia Pty Ltd/Uniden New Zealand Ltd. -
Page 33: System
Select the region and press ENTER to start the channel search. Once a digital TV/Radio channel is found, the channel number and the programme name will be displayed. “Scan Complete” shows after scanning is finished. System - 31 - © 2010 Uniden Australia Pty Ltd/Uniden New Zealand Ltd. - Page 34 PIN Code: The PIN Code setting menu allows you to change the 4 digit PIN Code for the HD9000UPVR using the numeric keys (0-9). Enter the Current PIN Code. Enter the New PIN Code. Confirm the new PIN Code. Note: The default password of this receiver is 0000.
- Page 35 Select to restore the factory default settings. All current settings and data will be eliminated. The USB Storage Data remains unchanged. Note: The default password of this receiver is 0000. Software Upgrade: The software for the HD9000UPVR may be upgraded in future. Please contact your local distributor or visit the website; www.uniden.com.au for latest information.
- Page 36 Note: S/W Upgrade: S/W Upgrade is enabled in the System menu: Root Folders Select USB Upgrade Select the file from the disk and press ENTER. - 34 - © 2010 Uniden Australia Pty Ltd/Uniden New Zealand Ltd.
- Page 37 “yes”. Please wait until “Erasing Flash” and “Programming Flash” is completed. Note: Do not switch off the power or remove the USB Storage Drive during this process. - 35 - © 2010 Uniden Australia Pty Ltd/Uniden New Zealand Ltd.
- Page 38 The Auto Upgrade function is enabled from default. When there is a new SW available through OTA (Over the Air), the HD9000UPVR will implement it automatically when it is in standby mode. OTA Software Upgrade (SSU Upgrade – check now): 1.
- Page 39 5. System will automatic restart after the software upgrade is completed (Don’t power Off) - 37 - © 2010 Uniden Australia Pty Ltd/Uniden New Zealand Ltd.
-
Page 40: Trouble Shooting
Some parameters can be changed by operators. Make sure you have the most updated ones. *Note: Please contact your local distributor for any technical problems - 38 - © 2010 Uniden Australia Pty Ltd/Uniden New Zealand Ltd. - Page 41 4. If the programme reception is adversely affected by heavy winds, you can stabilize the antenna mount with cables. - 39 - © 2010 Uniden Australia Pty Ltd/Uniden New Zealand Ltd.
-
Page 42: Glossary
Stands for "Phase Alternating Line", the European video standard which has the image format of 4 by 3, 625 horizontal lines, 50 Hz and a total 8 MHz of video channel width. - 40 - © 2010 Uniden Australia Pty Ltd/Uniden New Zealand Ltd. - Page 43 1080i. 720p is a progressive system with 1280x720 Pixels in each frame. 1080i is an integrated system where the 1920 Pixels are divided into two fields for more efficient transmission. - 41 - © 2010 Uniden Australia Pty Ltd/Uniden New Zealand Ltd.
-
Page 44: Product Specification
3 keys (Standby/On, CH+, CH-) Front Panel Indicator Red LED (Standby), Green LED (On) Remote Control 40 Keys(NEC Code) General Data: Operating Temperature 5C~ 40C Storage Temperature -40C ~ 65C - 42 - © 2010 Uniden Australia Pty Ltd/Uniden New Zealand Ltd. -
Page 45: One Year Limited Warranty
Uniden warrants to the original retail owner for the duration of this warranty, its UNIDEN HD9000UPVR SET TOP BOX (herein after referred to as the Product), to be free from defects in materials and craftsmanship with only the limitations or exclusions set out below. - Page 46 - 44 - © 2010 Uniden Australia Pty Ltd/Uniden New Zealand Ltd.
- Page 48 © 2010 Uniden Australia Pty. Limited. Uniden New Zealand Limited. Printed in PRC.
Need help?
Do you have a question about the HD9000UPVR and is the answer not in the manual?
Questions and answers