Advertisement
Introduction
Authored by Radio Reference Member NYRHKY94
The Wi-Fi functionality of the BCD536HP in conjunction with the Web Server feature in ProScan allows you to stream (feed) audio & data wirelessly and remotely control the scanner via a web browser on a PC, Tablet and/or Phone inside and outside your home network. Please refer to the ProScan manual for a more detailed description of the Web Server. The manual can be found under Support in the top menu bar in ProScan.
 NOTE: The instructions below work with the author's wireless router, ISP & home network setup. The respective configuration of these items may vary for others. It is also assumed readers have a basic understanding of PC's, wireless routers, networking terminology, the Uniden BCD536HP scanner/wireless dongle (latest firmware installed) and ProScan software. Your mileage may vary and the author assumes no responsibility for issues that may arise when following these instructions. They are offered as a guide only.
Uniden BCD536HP Wi-Fi Configuration
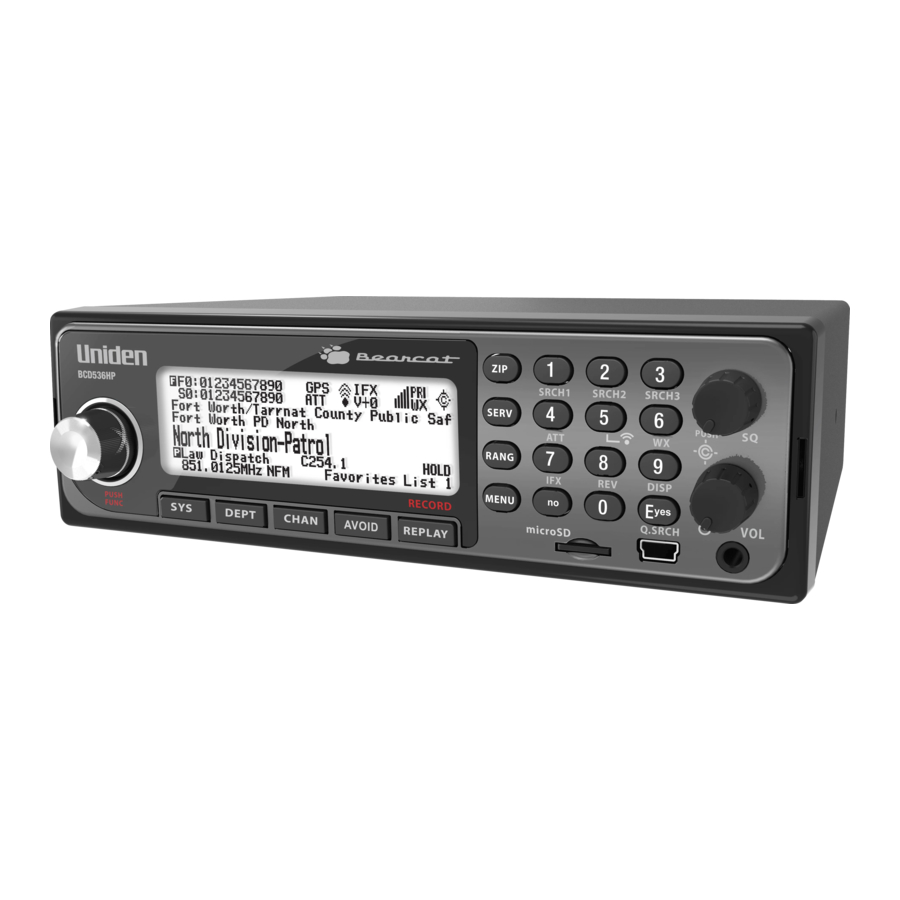
- With the BCD536HP powered on and the Wi-Fi dongle attached, push the MENU button on the BCD536HP and scroll to "Wi-Fi" Setup. Press E on the keypad or the FUNC knob.
- In Wi-Fi Setup, scroll down to "Set Connection" and press E or the FUNC knob
- Highlight "Infrastructure Mode" (see image below) and press E or the FUNC knob.

- The BCD536 will now look for available wireless networks (see image below).

- Highlight the wireless network you want to establish a connection with (would typically be your own home network SSID name). You will be asked to enter the password you use on your home wireless network (using the keypad on the BCD536HP).
- Once you have successfully established a connection to your home wireless network, scroll to "Show Wi-Fi Information" (see image below) and press E or the FUNC knob.

- You will now see 4 items listed on the BCD536HP LCD window. The second item is the IP address that has been assigned to the BCD536HP by your home router. Write this number down as it will be needed later when setting up the Wi-Fi stream (feed) in ProScan.


NOTE: It is a good idea to "reserve" the IP address assigned to the BCD536HP so that it always retains the same IP number, even after turning off the scanner or rebooting your router. Refer to your router's user guide documentation to see how this can be configured.
ProScan Audio Configuration
- Open the latest version of ProScan software (30-Day Trial or Licensed Copy).
- On the top menu bar in ProScan, click on Scanner Type and select BCD536HP from the drop down and click OK.
- Click on the Audio Control tab in ProScan and then click on the Web Server tab on the row below that (see image below).

- Click on the drop-down arrow for Input Sound Device and select URL (see image below).

![warning]() NOTE: This will allow the audio coming from the BCD536HP to be sent with your stream (feed) without having to use any physical audio cable connection between the scanner and your PC. The audio quality using the Wi-Fi method above is superior.
NOTE: This will allow the audio coming from the BCD536HP to be sent with your stream (feed) without having to use any physical audio cable connection between the scanner and your PC. The audio quality using the Wi-Fi method above is superior. - Leave the check mark in Wi-Fi Audio Gain and click on the URL Setup button. If you see a RED highlighted TCP Not Connected & UDP Not Connected (see image below), the IP address shown in the URL box is NOT correct. That IP address must match the IP number assigned to the Uniden BCD536HP. That is the number you wrote down in Uniden BCD536HP Wi-Fi Configuration Section, step 7.

- Change the IP number in the URL box to match the IP assigned to your BCD536HP and be careful not change any other part of the URL and do not add any spaces. Click on the Reconnect button and you should now see something similar to the image below.

- Assuming the above step was successful and your BCD536HP Wi-Fi connection is established & working, you are now ready to configure the data portion of your stream (feed).


ProScan Data Configuration
- On the top menu bar in ProScan, click on Comm Port. When the Comm Port Settings screen appears, click on the drop-down arrow for port and choose URL (see image below).

- Click on the URL Setup button. If you see a RED highlighted UDP Not Connected (see image below), the IP address shown in the URL box is NOT correct. That IP address must match the IP number assigned to the Uniden BCD536HP. That is the number you wrote down in Uniden BCD536HP Wi-Fi Configuration Section, step 7.

- Change the IP number in the URL box to match the IP assigned to your BCD536HP. Click on the Reconnect button and you should now see something similar to the image below.

- In the Web Server Configuration tab, click on the Metadata Source button located at the bottom of the page. In the Metadata Source page (see image below) highlight Scanner at the top left and fill in the Custom Format box using the syntax on the right-hand side. Example below will show the Channel Name & Talk Group ID. Click on Text To Show During Scanning and enter what you want shown in between transmissions.


ProScan Web Server Configuration
- Click on the Web Server tab in ProScan (see image below). The server port defaults to 5000. You can leave this number or change it to something else. Do NOT use port 80 however. Write the port number down. It will be needed later.

- Click on the Get My IP button in the lower right-hand corner of this screen. This will populate with the local IP address for the PC on your home network that you have ProScan running on and the outside IP being provided by your ISP (also known as the WAN IP address). Write both of these down. They will be needed later.
- If you want to have a Stream Description show on the browser when you connect, fill in that box with something that describes your feed.
- The Serve Audio Stream and Serve Scanner Monitor Mode both default to "on" as shown on the Web Server configuration page. If you want to also remotely control the scanner when you connect to it, then you need to fill in a password in the Serve Scanner Control Mode box. Write the password down.
- Click the Start button. If everything has been configured correctly up to this point, the Web Server should now be started. To verify this, click on the Status Log button that is just to the right of Client Connections (see image below). The alpha tags coming from the BCD536HP will also show in the Metadata Source box.

- The last thing you need to do before you can access & remotely control the Web Server stream (feed) from outside your home network, is to set-up port forwarding on your home router. Most makes & models of current home routers have a port forwarding feature. Please refer to your router's user guide documentation for instructions.
- basic example of port forwarding is provided below using a Netgear router. It is offered for guidance only and no responsibility is assumed by the author for issues that may arise when configuring port forwarding in your own specific router.
- Login in to the Router's web page (Typically 192.168.1.1 for Netgear)
- Go to Advanced / Advanced Setup
- Go to Port Forwarding/Port Triggering
- Select the Port Forwarding Radio Button
- Click Add Custom Service
- In the Service Name box type in ProScan Web Server (for example)
- In the Protocol drop down, choose TCP
- In the External Port Range box, type in the same port number you choose during the ProScan Web Server configuration (see ProScan Web Server Configuration section, step 19)
- Use the exact same port number for the Internal Port Range
- For the internal IP address, use the IP number for the PC on your home network that you have ProScan running on (see ProScan Web Server Configuration section, step 20)
- Save and/or apply these changes in your router
- You should now be able to connect to the BCD536HP via a web browser from inside and outside the home network. Google Chrome works very well. If at home, in the URL section of a browser type the IP number of the PC that is running ProScan followed by a colon and the port number you set in the Web Server configuration screen. EXAMPLE: 192.168.1.4:5000. Hit enter and you should now see something similar to the image below on your browser.

- In the password box, type in what you used in the Serve Scanner Control Mode box in the Web Server (see ProScan Web Server Configuration section, step 22) and then click Log In. Click on the play button under Listen Live to hear audio and remote control using the ProScan virtual scanner.
- To access the BCD536HP from outside the home network, the process is the same except you will be using the outside IP number provided by your ISP (see ProScan Web Server Configuration section, step 20) - also known as the WAN IP address - followed by a colon and the port number you set in the Web Server configuration screen.
EXAMPLE: 71.165.76.211:5000.


NOTE: When using the Web Server feature, a lag between the audio and data showing in the virtual scanner may occur. Per the author of ProScan, this is produced by the media player network buffer. An option was added to the browser web page to set a delay for the text so the audio and metadata can be more in sync.
ALTERNATE METHOD: The Remote Scanner Over IP (RSOIP) feature in ProScan streams audio is "near real time". RSOIP can also be used to access & remotely control a BCD536HP Wi-Fi stream (feed) from outside your home network (see image below).
This method involves a Server and Client (no browser). The scanner side is the Proscan Software running in Server mode and the remote side is the Proscan Software Client (full version for remote control or the free client for monitor only) running on a Windows PC. The majority of the instructions in this document can be mimicked to configure & start the RSOIP feature (replace Web Server with RSOIP where applicable).

Documents / ResourcesDownload manual
Here you can download full pdf version of manual, it may contain additional safety instructions, warranty information, FCC rules, etc.
Advertisement


Need help?
Do you have a question about the BCD536HP and is the answer not in the manual?
Questions and answers