Table of Contents
Advertisement
Quick Links
Advertisement
Table of Contents

Subscribe to Our Youtube Channel
Summary of Contents for Oricom IP-7
- Page 1 IP-7 USB Internet Phone User Guide...
-
Page 2: Table Of Contents
• LOCATION OF CONTROLS ... 3 • INTENDED USE ... 4 • STARTING UP ... 4 • APPLICATION SOFTWARE ... 5 • INSTALLING THE SOFTWARE ... 6 • CONTACT DETAILS ... 7 • TELEPHONING USING ENGIN SOFTPHONE ... 7 • SETTINGS ... -
Page 3: Location Of Controls
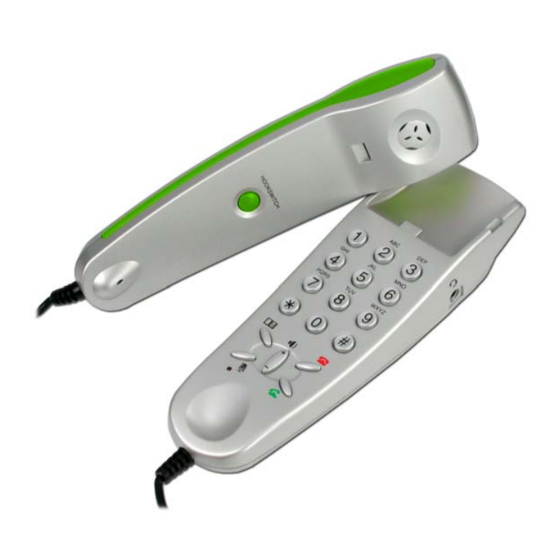
3. Microphone 4. Ringer LED 5. Dialling keys Checking the package contents The material supplied consists of the IP7 telephone, a CD containing drivers and this user guide. 6. Function keys 7. LED for muting function status 8. USB plug 9. -
Page 4: Intended Use
This telephone has been developed for use via a USB port on a PC. Power failure The telephone cannot be used to make calls in the event of a power failure. Always have a standard corded telephone close at hand, which can be used without connection to a PC and Internet, for emergencies. -
Page 5: Application Software
1. Click on the Start button. Select Settings , Control Panel and then Sounds and Audio Devices . 2. Click on the Audio tab control. 3. Select Oricom USB Phone from the Default device pull down menu. Complete this process for both the Sound playback as well as the Sound recording . -
Page 6: Installing The Software
INSTALLING THE SOFTWARE To install the software please follow the steps below: 1. Insert the CD ROM into your computers CD ROM Drive, the setup should now start automatically. If the CD Install does not start automatically, browse to the CD ROM Drive on your computer using My Computer or Windows Explorer and click engin_step1.html . -
Page 7: Contact Details
Making calls 1. Lift the receiver. The engin Softphone window appears on the PC screen. 2. Enter the relevant phone number using the telephone keypad. And always enter the relevant area code even if you are calling within the same region/ area. -
Page 8: Settings
Ending calls To end a call, press Muting function • To deactivate the microphone (muting), press the lights up. • To reactivate the microphone, press the goes out. Volume control Use the button to adjust the receiver volume during a call. The value set is automatically stored. -
Page 9: Using A Headset
USING A HEADSET It is possible to connect a headset to your IP7. The headset must have a 2.5 mm, 3-pin phone jack. Plug the phone jack in the socket on the right-hand side of the receiver cradle. The headset can only be used for listening and talking while the plug is connected in the socket. -
Page 10: Warranty Information
The warranty does not extend to damage caused by misuse, negligence, excessive voltage, faults on the telephone line or lightning. This warranty in no way affects your statutory rights. Full details of the warranty are contained in the enclosed warranty card. -
Page 11: System Requirements
SYSTEM REQUIREMENTS A PC running Microsoft Windows 2000, or XP Pentium II or higher compatible (CPU). 128MB RAM. 10MB Free Hard Disk Space. One Free USB port (USB1.1 or USB2.0). A broadbrand Internet connection Minimum 256/64k speed Page 11 of 11...


Need help?
Do you have a question about the IP-7 and is the answer not in the manual?
Questions and answers