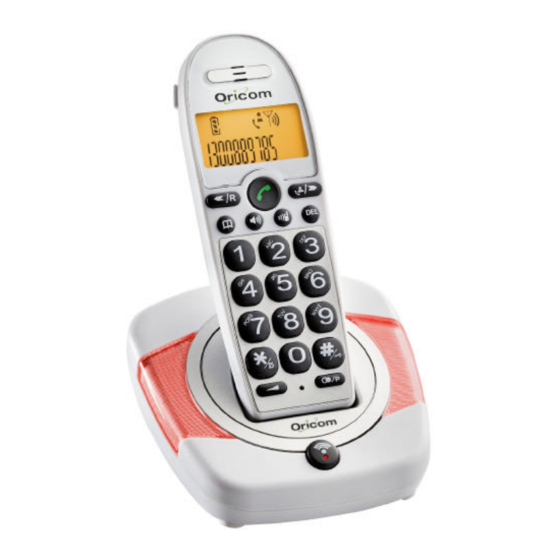
Summary of Contents for Oricom BB200
- Page 1 Oricom BB200 DECT Cordless Telephone User Guide Keep this user guide for future reference...
-
Page 2: Table Of Contents
CONTENTS Getting Started…………………………………………………………………………. 3 Handset and base unit………………………………………………………………… 3 Handset Display Guide………………………………………………………………... 4 Safety Information……………………………………………………………………… 5 Installation……………………………………………………………………………... 6 Power supply…………………………………………………………………………… 6 Fitting batteries…………………………………………………………………………. 6 Recharging your cordless phone……………………………………………………… 6 Replacing batteries…………………………………………………………………….. 6 Basic Operation………………………………………………………………………… 7 To answer a call………………………………………………………………………… 7 Making a call……………………………………………………………………………. -
Page 3: Getting Started
Unpacking your Oricom BB200 Retain all packing materials in a safe place, in case you later need to transport it or return it for servicing. In the box, you will find: - 1 cordless handset, 1 Base Unit , 2 AAA rechargeable 600mAh batteries, 1 AC adaptor, telephone line cord and adaptor plug, warranty card and this user manual. -
Page 4: Handset Display Guide
HANDSET DISPLAY GUIDE Legend & Memory/Store (to store a number in memory or to make a call to a stored number) Battery level Battery level (Battery low) Handset Ringer “ON” Handset Ringer “OFF” Speakerphone “ON” Keypad locked On steady: telephone line is busy. Flashing: incoming call The “X”... -
Page 5: Safety Information
Avoid exposure of this telephone to moisture or liquid. To prevent electric shock, do not open the handset or base cabinet. Avoid metallic contact (e.g. metal clips, keys) between the battery contacts and charging conductors. Do not use the handset in an explosive hazard area such as where there is gas leaking. -
Page 6: Installation
POWER SUPPLY IMPORTANT! The mains power adaptor must be installed near the equipment and must be easily accessible. Power must be turned on at all times for the phone to work 1. Connect the output plug of the mains adaptor to the adaptor socket on the back of the base unit and the mains adaptor to the wall mains supply. -
Page 7: Basic Operation
Introduction When the phone is in standby mode, the LCD displays the handset name. The battery icon reflects the current battery level and the signal icon indicates the handset is linked to the base. TO ANSWER A CALL When you receive a call, both handset and base will ring, the the display, and both the red led on the handset locator button and the big red led on the phone base will start flashing. -
Page 8: Pre-Dialling
PRE-DAILLING Pre-dial allows you to enter a telephone number and verify it on the screen before you place the call. The screen displays the last 12 digits dialled but you can enter up to 2 digits. In standby mode enter the phone number you wish to dial. To enter a pause, press the If you make a mistake, press DEL to erase one digit at a time. -
Page 9: Handset Ringer Volume
HANDSET RINGER VOLUME While the handset is in the standby mode Press the to decrease the volume level and The display shows the current volume level: the less “0’s” is the lowest level and more “00000” is the highest level.); the % symbol indicates the ringer is turned off. -
Page 10: Using Your Cordless On A Pbx
TURNING OFF THE HANDSET RINGER When the handset is in the standby mode press and hold for a few seconds the * button, the symbol % will appear on the display. To turn the ringer back on, press and hold again the button * , the symbol % will disappear from the display. -
Page 11: Phonebook Memories And Caller Id
PHONEBOOK MEMORIES AND CALLER ID MEMORIES You can store up to 10 numbers in the phonebook memory. Each stored number can be up to 25 digits. TO STORE A NUMBER IN THE PHONEBOOK Make sure the handset is in the standby mode. button and hold it until the symbol &flashes on the display. -
Page 12: Caller Id
CALLER ID If you subscribe to your network providers Caller ID service (charges may apply) your phone automatically stores the numbers of the last 20 incoming calls. When the phone rings and caller information is received, the display will show the last 14 digits of the callers number. -
Page 13: To Return A Call
TO RETURN A CALL In standby mode, press the Phone Use the - To call back a number when the call details (date and time or telephone number) are displayed, just press three TO DELETE A CALLER ID RECORD A simple operation allows you to delete a record from the list: In standby mode, press the Use the and the... -
Page 14: Troubleshooting
Check with your local phone cannot be company and select the correct answered recall duration The empty battery Replace the Rechargeable icon appears batteries with new ones. soon after the Contact Oricom for batteries are Replacement batteries. charged TROUBLESHOOTING - 14 -... -
Page 15: Notes For Operation In New Zealand
Notes for operation in New Zealand The grant of a Telepermit for any item of terminal equipment indicates only that Telecom has accepted that the item complies with the minimum conditions for connection to its network. It indicates no endorsement of the product by Telecom, nor does it provide any sort of warranty. -
Page 16: Warranty
In the unlikely event of a fault developing, please contact us for assistance. If the product is then found to be faulty you will be asked to return it directly to us with a copy of the purchase receipt. Australia Oricom International Pty Ltd Locked Bag 568 South Windsor, NSW 2756 Customer support Email: support@oricom.com.au...


Need help?
Do you have a question about the BB200 and is the answer not in the manual?
Questions and answers