Table of Contents
Advertisement
Available languages
Available languages
Quick Links
Advertisement
Table of Contents

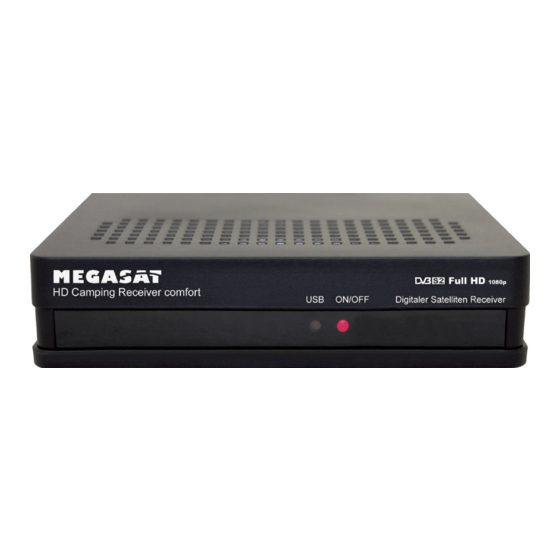
Summary of Contents for Megasat Megasat HD Camping Receiver comfort
- Page 1 Megasat HD Camping Receiver comfort Bedienungsanleitung Version: 2.2 Juli 2012...
- Page 9 Start Schnell Installation Schließen Sie den Receiver und den Fernseher entsprechen der Verbindungen an. Stecken Sie den Netzstecker ein und drücken Sie die rote Power Taste um den Receiver zu starten. Drücken Sie [MENU] Taste um das Hauptmenü zu öffnen. Verwenden Sie [CH▲/▼] Tasten und wählen Sie Werkzeuge aus und drücken Sie [OK] Taste.
- Page 13 4.5 USB Speichern Speicher Modus: All Code/Radioback/Defaultdb Save File Start: Mit [OK] Taste die Sicherung starten. 4.6 USB Die Option USB ist nur aktiv, wenn ein USB Gerät angeschlossen und erkannt worden ist. Wählen Sie den gewünschten Abspieltyp und bestätigen Sie die gewählte Datei mit OK. Die Formate MP3, JPEG und BMP werden unterstützt.
-
Page 17: User Manual
Megasat HD Camping Receiver comfort USER MANUAL Please read this user manual before using or connecting this product. And keep it handy for future reference. -
Page 18: Table Of Contents
Contents Safety Instructions----------------------------------------------------------3 Precautions---------------------------------------------------------------------4 Features----------------------------------------------------------------------------4 Accessories-----------------------------------------------------------------------5 Front Panel------------------------------------------------------------------------5 Rear Panel--------------------------------------------------------------------------5 About Remote Control --------------------------------------------------------6 Start----------------------------------------------------------------------------7-9 Battery Installation-----------------------------------------------------------------------7 Service Life of Batteries----------------------------------------------------------------7 Operation Range of Remote Control------------------------------------------------7 Basic connections------------------------------------------------------------------------8 Preparation-----------------------------------------------------------------------------------------8 C o n n e c t i n g T V - S e t - - - - - - - - -- - - - - - - - - - - - - - - - - - - - - - - - - - - - - - - - - - - - - - - - - - - - - - - - - - - - - - - - - - - - 8 Fast Installation ---------------------------------------------------------------------------9 Advanced Operation------------------------------------------------------9-14 Main Menu -----------------------------------------------------------------------------------------------9... -
Page 19: Safety Instructions
Safety Instructions Dear customer, Thank you for purchasing this DVB Satellite Receiver. Please read this manual carefully before operating your product and pay close attention to the precautions which are mentioned below. This product only can be operated where the mains supply is ~230V, 50Hz. To avoid fire and electric shock, do not expose this equipment to rain or moisture. -
Page 20: Precautions
Precautions Keep water and magnetic things away Peruse the following precautions before using. Contact with liquid may cause serious Power Cord Protection damage, please keep the product away from Please complaint the following regulations to avoid malfunction, fire and electric shock or other Keep product far away from magnetic things, damage to human body. -
Page 25: Start
Start Fast Installation Connect this unit and other apparatus according to “BASIC CONNECTIONS”. Plug the power cord, press [STANDBY] button(no need for first connection)to start. Press [MENU] button to enter in main menu setup interface. Use [CH▲/▼] buttons to select ”Tool” and press [OK] button to enter in its interface. Use [CH▲/▼] buttons to select “Factory Setting”... -
Page 27: System Setup
Search: Start search. 2.5 TP List (Transponder Search) Move cursor to “TP List” and press [OK] button to enter in its submenu. Press [EXIT] button to quit. Refer to “Satellite List” for detail operations of Edit/Add/Delete/Search. 3. System Setup Move cursor to “System Setup” and press [OK] button to enter in its interface. There are 9 options which are listed below. -
Page 30: Appendix
Appendix Maintenance ◆ Unplug the power cord before maintenance. ◆ Keep the product surface clean. Please use a piece of soft cloth to clean the outer if it’s dirty. ◆ Do not use any chemical products like Alcohol or dilution to clean the product. ◆... -
Page 31: Specifications
Appendix Specifications Items Features Input Frequency Range 950~2150 MHz (C/Ku Compatible) High Input Signal Level -65~-30dBm Frequency IEC169-2, Female RF Input Connector Tuner Input Impedance 75Ω QPSK,Compatible SCPC & MCPC Demodulation Demodulation Symbol Rate 2~45 Mbit/s Mode Code Rate 1/2, 2/3, 3/4, 5/6, 7/8 ISO/IEC 13818-2 MPEG2(MP@ML)... -
Page 32: Troubleshooting
Appendix Troubleshooting Look through the following table about the possible troubles and you may find answers before request service. It may help you to resolve the problems with some easy operations according to this table. If something goes wrong with the receiver and can’t back to normal, please cut off the power for few minutes and restart the product.


Need help?
Do you have a question about the Megasat HD Camping Receiver comfort and is the answer not in the manual?
Questions and answers