Sign In
Upload
Download
Table of Contents
Contents
Add to my manuals
Delete from my manuals
Share
URL of this page:
HTML Link:
Bookmark this page
Add
Manual will be automatically added to "My Manuals"
Print this page
×
Bookmark added
×
Added to my manuals
Manuals
Brands
Phonak Manuals
Hearing Aid
AUDEO B-R B90
User manual
Phonak AUDEO B-R B90 User Manual
Hide thumbs
1
2
3
4
5
Table Of Contents
6
7
8
9
10
11
12
13
14
15
16
17
18
19
20
21
22
23
24
25
26
27
28
29
30
31
32
33
34
35
36
37
38
39
40
41
42
43
44
45
46
47
48
49
50
51
52
53
54
55
56
57
58
59
60
61
62
63
64
65
66
67
68
69
70
71
72
page
of
72
Go
/
72
Contents
Table of Contents
Troubleshooting
Bookmarks
Table of Contents
Table of Contents
Quick Guide
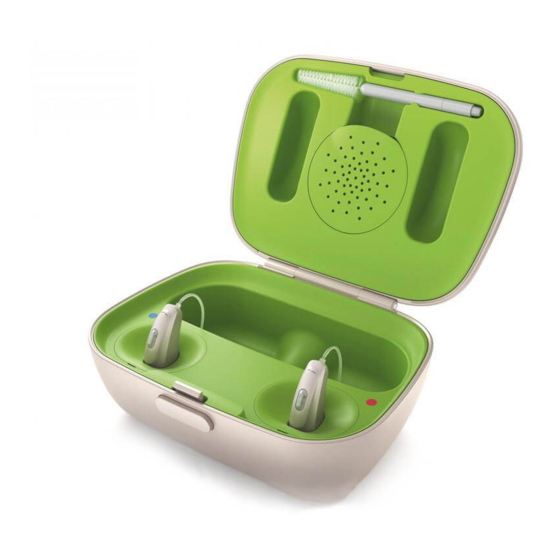
Parts of the Hearing Aid & Charger
Preparing the Charger
Charging the Hearing Aids
Left & Right Hearing Aid Markings
Push Button
On/Off
Putting on the Hearing Aid
Removing the Hearing Aid
Operating Conditions
Care and Maintenance
Exchanging the Earwax Protection
Wireless Accessories
Service and Warranty
Warranty Limitation
Compliance Information
Information and Description of Symbols
Troubleshooting
Important Safety Information
Hazard Warnings
Information on Product Safety
Important Information: Cell Phones
For the US Market Only, Complies with the
Advertisement
Quick Links
1
Quick Guide
2
Parts of the Hearing Aid & Charger
3
Charging the Hearing Aids
4
Push Button
5
On/Off
6
Wireless Accessories
7
Troubleshooting
Download this manual
Phonak Audéo
B-R
TM
(B90/B70/B50)
User Guide
Table of
Contents
Previous
Page
Next
Page
1
2
3
4
5
Advertisement
Table of Contents
Need help?
Do you have a question about the AUDEO B-R B90 and is the answer not in the manual?
Ask a question
Questions and answers
Related Manuals for Phonak AUDEO B-R B90
Hearing Aid Phonak AUDEO B-R B50 User Manual
(72 pages)
Hearing Aid Phonak AUDEO B-R B70 User Manual
(72 pages)
Hearing Aid Phonak Brio 4 I User Manual
(68 pages)
Hearing Aid Phonak Behind-the-Ear hearing aids User Manual
Behind-the-ear hearing aids (52 pages)
Hearing Aid Phonak Virto B-Titanium Series Training Manual
(137 pages)
Hearing Aid Phonak Audéo B90-10 User Manual
(52 pages)
Hearing Aid Phonak Phonak Audéo B90-10 User Manual
(56 pages)
Hearing Aid Phonak Audéo B90-R User Manual
(32 pages)
Hearing Aid Phonak B90 User Manual
(21 pages)
Hearing Aid Phonak Sky B User Manual
(33 pages)
Hearing Aid Phonak Naida B Series User Manual
(52 pages)
Hearing Aid Phonak audeo B90-direct User Manual
(56 pages)
Hearing Aid Phonak Bolero Q90-M312 User Manual
Hearing aid (56 pages)
Hearing Aid Phonak Bolero B-PR User Manual
(15 pages)
Hearing Aid Phonak Bolero M Series User Manual
(76 pages)
Hearing Aid Phonak BTD500 User Manual
(68 pages)
This manual is also suitable for:
Audeo b-r b50
Audeo b-r b70
Table of Contents
Save PDF
Print
Rename the bookmark
Delete bookmark?
Delete from my manuals?
Login
Sign In
OR
Sign in with Facebook
Sign in with Google
Upload manual
Upload from disk
Upload from URL


Need help?
Do you have a question about the AUDEO B-R B90 and is the answer not in the manual?
Questions and answers