Table of Contents
Advertisement
Advertisement
Table of Contents

Related Manuals for Phonak Audéo B90-10


Summary of Contents for Phonak Audéo B90-10
- Page 1 Phonak Audéo (B90/B70/B50/B30) User Guide...
- Page 2 This user guide is valid for: Wireless models CE mark applied Phonak Audéo B90-10 2016 Phonak Audéo B90-312 2016 Phonak Audéo B90-312T 2016 Phonak Audéo B90-13 2016 Phonak Audéo B70-10 2016 Phonak Audéo B70-312 2016 Phonak Audéo B70-312T 2016 Phonak Audéo B70-13 2016 Phonak Audéo B50-10...
- Page 3 Your hearing aid details If no box is checked and you do not know the model of your hearing aid, please ask your hearing care professional. Model Battery type Audéo B-10 (B90/B70/B50/B30) Audéo B-312 (B90/B70/B50/B30) Audéo B-312T (B90/B70/B50/B30) Audéo B-13 (B90/B70/B50/B30) Earpiece Dome SlimTip...
- Page 4 Your hearing aids have been developed by Phonak – the world leader in hearing solutions based in Zurich, Switzerland. These premium products are the result of decades of research and expertise and are designed to keep you connected to the beauty of sound! We thank you for making such a great choice and wish you many years of listening pleasure.
-
Page 5: Table Of Contents
Contents Your hearing aid Quick guide Parts of the hearing aid Using the hearing aid Left & right hearing aid markings On/Off Batteries Putting on the hearing aid Removing the hearing aid Push button Volume control Further Information 10. Care and maintenance 11. -
Page 6: Quick Guide
1. Quick guide Left & right hearing aid markings Audéo B-10, B-312, Audéo B-13 Audéo B-10, B-312, B-312T B-312T, B-13 Blue marking for left hearing aid. Red marking for right hearing aid. Changing batteries Remove the Open the Place battery in sticker from the battery door. - Page 7 On/Off Push button The push button on your hearing aid can have various functions. The function for your hearing aid is indicated in your individual instructions. Volume control To increase the volume, press the volume control upwards. To decrease the volume, press the volume control downwards.
-
Page 8: Parts Of The Hearing Aid
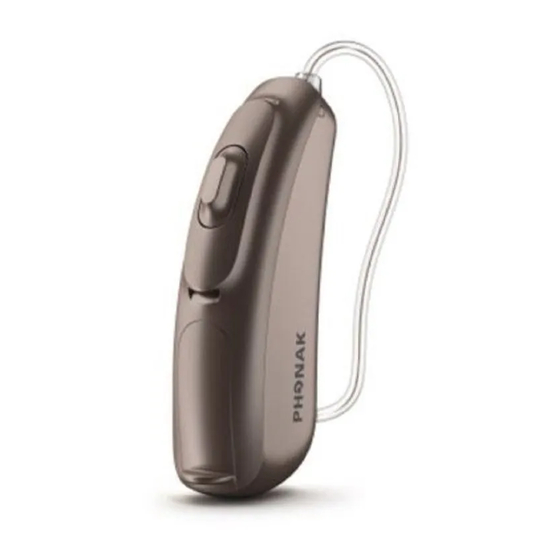
2. Parts of the hearing aid The pictures below show the models described in this user guide. You can identify your personal model by: • Checking “Your hearing aid details” on page 3. • Or comparing your hearing aid with the following shown models. - Page 9 Audéo B-10 Push button Tube Battery door Anchor (optional) Speaker (without earpiece attached) Audéo B-312 & B-312T Push button Tube Anchor (optional) Battery door Speaker (without earpiece attached) Audéo B-13 Push button Tube Volume control Anchor (optional) Battery door Speaker (without earpiece attached)
-
Page 10: Left & Right Hearing Aid Markings
3. Left & right hearing aid markings Open the battery door. To do this, pull down on the ridge at the bottom of the hearing aid. There is a red or blue marking inside the battery door and on the speaker. This will tell you if it is a left or a right hearing aid. -
Page 11: On/Off
4. On/Off The battery door is also the on/off switch. Closed battery door = hearing aid is on Open battery door = hearing aid is off When you switch on the hearing aid you may hear a start-up melody. -
Page 12: Batteries
5. Batteries Remove the Open the Place battery in sticker from the battery door. the battery door new battery and with the “+” wait two minutes. symbol facing upwards. If it is difficult to close the battery door: Check that the battery is inserted correctly and the “+”... - Page 13 • Checking the marking on the inner side of the battery door. • Or checking the following table. Model Zinc air Color ANSI battery marking on code code size package Phonak Audéo B-10 yellow PR70 7005ZD B-312, B-312T brown PR41 7002ZD B-13 orange PR48 7000ZD Please ensure you use the correct type of battery in your hearing aids (zinc-air).
-
Page 14: Putting On The Hearing Aid
6. Putting on the hearing aid Place the hearing aid behind your ear. Insert the earpiece into your ear canal. If there is an anchor attached to the earpiece, tuck it into the bowl of your ear to secure your hearing aid. -
Page 15: Removing The Hearing Aid
7. Removing the hearing aid Pull on the bend of the tube and remove the hearing aid from behind the ear. In very rare cases, your earpiece can remain in your ear canal when removing the hearing aid from the ear. -
Page 16: Push Button
8. Push button The push button on your hearing aid can have various functions or is not active. This depends on the programming of the hearing aid, which is indicated in your individual “Hearing aid instructions”. Please ask your hearing care professional for this printout. -
Page 17: Volume Control
9. Volume control To increase the volume, press the volume control upwards. To decrease the volume, press the volume control downwards. The volume control can be disabled by the hearing care professional. -
Page 18: Care And Maintenance
10. Care and maintenance Diligent and routine care of your hearing aid contributes to outstanding performance and a long service life. Please use the following specifications as a guideline. Further information regarding product safety, see chapter 17.2. General information Before using hair spray or applying cosmetics, you should remove your hearing aid from your ear, because these products may damage it. - Page 19 Your hearing aids are resistant to water, sweat and dust under the following conditions: • The battery door is fully closed. Ensure that no foreign object such as hair is caught in the battery door when it is closed. • After exposure to water, sweat or dust, the hearing aid is cleaned and dried.
- Page 20 Daily Inspect the earpiece for earwax and moisture deposits. Clean the surfaces with a lint-free cloth or use the small brush provided in the hearing aid hard case. Never use cleaning agents such as household detergents, soap, etc. for cleaning your hearing aid. It is not recommended to rinse with water.
-
Page 21: Exchanging The Earwax Protection
11. Exchanging the earwax protection Your hearing aid is equipped with an earwax protection to protect the speaker from earwax damage. Please check the earwax protector regularly and exchange it if it looks dirty or if the hearing aid volume or sound quality is reduced. - Page 22 Gently pull on the earpiece to remove. Clean the speaker with a lint-free cloth.
- Page 23 11.2 Exchanging the earwax protection Insert the removal side of the exchange tool into the used earwax protector. The shaft of the holder should touch the rim of the earwax protector. Carefully pull and remove the earwax protector straight out of the speaker. Please do not twist the earwax protector when removing.
- Page 24 To insert the new earwax protector, gently push the insertion side of the exchange tool straight into the hole of the speaker until the outer ring is perfectly aligned. Pull the tool straight out. The new earwax protector will remain in place. Now attach your earpiece to the speaker.
- Page 25 11.3 Attaching the earpiece to the speaker Hold the speaker in one hand and the earpiece in the other. Slide the earpiece over the speaker sound outlet. The speaker and the earpiece should fit perfectly together.
-
Page 26: Wireless Accessories
Phonak DECT II phone Phonak TVLink II connected to TV * The Phonak ComPilot II with neckloop or ComPilot Air II with clip to attach to clothing. They also have basic remote control functionalities. For advanced control they can be used with the Phonak RemoteControl App. -
Page 28: Service And Warranty
International warranty Phonak offers a one year limited international warranty, valid starting from the date of purchase. This limited warranty covers manufacturing and material defects in the hearing aid itself, but not accessories such as batteries, tubes, earmolds, external receivers. - Page 29 Warranty limitation This warranty does not cover damage from improper handling or care, exposure to chemicals or undue stress. Damage caused by third parties or non-authorized service centers renders the warranty null and void. This warranty does not include any services performed by a hearing care professional in their office.
-
Page 30: Compliance Information
14. Compliance information Europe: Declaration of Conformity Hereby Phonak AG declares that this product meets the requirements of the Medical Devices Directive 93/42/EEC as well as the Radio Equipment Directive 2014/53/EU. The full text of the EU Declaration of Conformity can be... - Page 31 The wireless models listed on page 2 are certified under: Phonak Audéo B -10 (B90/B70/B50/B30) FCC ID: KWC-WHSRIC1 IC: 2262A-WHSRIC1 Canada Phonak Audéo B -312 (B90/B70/B50/B30) FCC ID: KWC-WHSRIC2 IC: 2262A-WHSRIC2 Canada Phonak Audéo B -312T (B90/B70/B50/B30) FCC ID: KWC-WHSRIC3...
- Page 32 Notice 2: Changes or modifications made to this device not expressly approved by Phonak may void the FCC authorization to operate this device. Notice 3: This device has been tested and found to comply with the limits for a Class B digital device, pursuant to Part 15 of the FCC Rules and ICES-003 of Industry Canada.
- Page 33 no guarantee that interference will not occur in a particular installation. If this device does cause harmful interference to radio or television reception, which can be determined by turning the equipment off and on, the user is encouraged to try to correct the interference by one or more of the following measures: •...
- Page 34 Radio information of your wireless hearing aid Antenna type Integrated ferrite coil antenna (inductive) Operation frequency 10.6 MHz Occupied bandwidth approx. 500 kHz (99% BW) Modulation DQPSK Channel Single channel radio Operating range 18 cm (7”) Use case Streaming of audio or command signal to receiving hearing aid on the other ear...
-
Page 35: Information And Description Of Symbols
15. Information and description of symbols With the CE symbol, Phonak AG confirms that this product – including accessories – meets the requirements of the Medical Devices Directive 93/42/EEC as well as the Radio Equipment Directive 2014/53/EU. The numbers after the... - Page 36 This symbol indicates that it is important for the user to read and take into account the relevant information in these user guides. This symbol indicates that it is important for the user to pay attention to the relevant warning notices in these user guides.
- Page 37 The product is designed such that it functions Operating conditions without problems or restrictions if used as intended, unless otherwise noted in these user guides. The hearing aids are classified IP68 (depth of 1 meter for 60 minutes) and designed to be used in all daily life situations.
- Page 38 Temperature during transportation and storage: –20° to +60° Celsius (–4° to +140° Fahrenheit). Humidity during transportation: Up to 90% (non condensing). Humidity during storage: 0% to 70%, if not in use. See instruction in chapter 17.2 regarding drying the hearing aid after use. Atmospheric pressure: 200 hPA to 1500 hPa The symbol with the crossed-out garbage bin is to make you aware that this hearing...
-
Page 40: Troubleshooting
16. Troubleshooting Problem Causes Hearing aid not functioning Dead battery Blocked speaker/earpiece Battery not inserted correctly Hearing aid switched off Hearing aid whistles Hearing aid not inserted correctly Earwax in ear canal Hearing aid not loud enough Volume too loud or distorted Low battery Speaker/earpiece blocked... - Page 41 What to do Change battery (chapter 1 + 5) Clean speaker opening/earpiece Insert battery correctly (chapter 1 + 5) Switch hearing aid on by completely closing the battery door (chapter 4) Insert hearing aid correctly (chapter 6) Contact your ENT/GP or hearing care professional Decrease volume (chapter 1 + 8 + 9) Change battery (chapter 1 + 5) Clean speaker opening/earpiece...
-
Page 42: Important Safety Information
17. Important safety information Please read the information on the following pages before using your hearing aid. A hearing aid will not restore normal hearing and will not prevent or improve a hearing impairment resulting from organic conditions. Infrequent use of a hearing aid does not permit a user to attain full benefit from it. - Page 43 If batteries are Changes or modifications swallowed, consult your to the hearing aid that physician immediately! were not explicitly approved by Phonak are not permitted. Such changes may damage your ear or the hearing aid.
- Page 44 If you feel pain in or that warning signals or behind your ear, if it is noises coming from inflamed or if skin behind, e. g. cars, are irritation and accelerated partially or entirely accumulations of earwax suppressed. occur, please check with your hearing care This hearing aid is not for professional or physician.
- Page 45 Keep magnets (i.e. battery is strongly recommended to see a medical specialist handling tool, EasyPhone magnet, etc.) at least for safe removal. 15 cm (6 inches) away from the active implant. If using a Phonak wireless accessory, consult the...
- Page 46 Never immerse a window or in the car). your hearing aid in water! Never use a microwave or Phonak hearing aids are not other heating devices to specifically designed for dry your hearing aid. Ask extended periods of water...
- Page 47 tube spout during insertion a new one to avoid any into or removal from skin irritation. You can the ear. return used batteries to your hearing care When you are not using professional. your hearing aid, leave the battery door open so that The batteries used in these any moisture can hearing aids should not...
- Page 48 Special medical or dental Do not use your hearing examination including aid in areas where radiation described below, electronic equipment may adversely affect the is prohibited. correct functioning of your hearing aids. Remove and keep them outside the examination room/area before undergoing: Medical or dental examination with X-ray...
- Page 50 Notes...
- Page 52 Your hearing care professional: Manufacturer: Phonak AG Laubisrütistrasse 28 CH-8712 Stäfa Switzerland www.phonak.com...
Need help?
Do you have a question about the Audéo B90-10 and is the answer not in the manual?
Questions and answers