
Related Manuals for Rotex HPSU compact (V5)


Summary of Contents for Rotex HPSU compact (V5)
-
Page 1: Installation And Maintenance
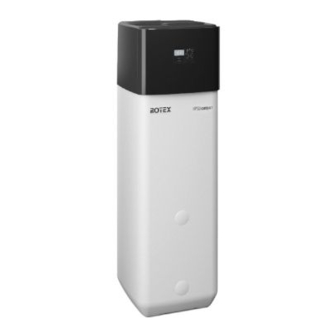
For the qualified installer ROTEX HPSU compact (V5) Installation and maintenance manual Solar tank with integrated interior heat pump unit For the types HPSU compact 304 HPSU compact 308 HPSU compact 508 HPSU compact 516 Edition... -
Page 3: Table Of Contents
Open controller housing and making the 10.1.1 ROTEX HPSU compact 304/308... . . 72 electrical connections ..... 29 10.1.2 ROTEX HPSU compact 508/516. -
Page 4: General Information
– When connecting to a ROTEX solar system; the associated installation and operating instructions. – If a ROTEX HP convector is connected; the associated instal- lation and operating instructions. – In the case of connection to a control component offered as an accessory (room controller, mixer module etc.);... -
Page 5: Safety
Heat pump indoor unit HPSU compact WARNING! HP convector Indicates a potentially dangerous situ- ation. Only valid for ROTEX HPSU compact with cooling function (see also section 2.3) Disregarding this warning can result in serious injury or death. Pay attention to the stipulated tightening torque (See chapter 10.3 "Tightening... -
Page 6: Avoid Danger
Not all the equipment mentioned here is offered in some countries because of dications in this manual. the various different country-specific connection conditions. Tab. 2-1 Permissible combinations of ROTEX HPSU compact internal Only use of a suitable external unit approved by units and ROTEX heat pump external units ROTEX is permitted. -
Page 7: Instructions For Operating Safety
Equipment covers and service panels must be replaced as soon as the work is completed. 2.4.1 Before working on the hydraulic system Work on the ROTEX HPSU compact (such as setup, servicing, connection and initial start- up) is only to be carried out by persons who... -
Page 8: Working On Cooling Systems (Heat Pump)
15 60 16). closed rooms or work pits. Do not let refrigerant come into contact with If the ROTEX HPSU compact is connected to a open fire, embers or hot objects. heating system with steel pipes, radiators or non- Never allow refrigerant to escape into the... -
Page 9: Requirements For The Heating Water
2.4.6 Requirements for the heating water 2.4.8 Instructing the user/owner Observe the current technological regulations to Before you hand over the ROTEX HPSU prevent corrosion products and deposits. compact, explain to the user/owner how to operate and check the system. -
Page 10: Product Description
Connection for electrical Backup Heater BUxx (R 1½" IG) (Accessory) Plate heat exchanger (PWT) Connection refrigerant fluid line ROTEX HPSU compact 30x/508: Cu Ø 6.4 mm (1/4"), ROTEX HPSU compact 516: Cu Ø 9.5 mm (3/8") Connection to coolant gas line Cu Ø 15,9 mm (5/8") -
Page 11: Equipment External And Internal Structure Rotex Hpsu Compact 304/308 Db
Product description 3.1.2 Equipment external and internal structure ROTEX HPSU compact 304/308 DB Fig. 3-2 Structure and constituents ROTEX HPSU compact 304/308 DB (External appearance and internal structure) Designations of key see tab. 3-1 FA ROTEX HPSU compact (V5) •... -
Page 12: Equipment External And Internal Structure Rotex Hpsu Compact 304/308 Biv
Product description 3.1.3 Equipment external and internal structure ROTEX HPSU compact 304/308 BIV Fig. 3-3 Structure and constituents ROTEX HPSU compact 304/308 BIV (External appearance and internal structure) Designations of key see tab. 3-1 FA ROTEX HPSU compact (V5) •... -
Page 13: Equipment External And Internal Structure Rotex Hpsu Compact 508/516 Db
Product description 3.1.4 Equipment external and internal structure ROTEX HPSU compact 508/516 DB Fig. 3-4 Structure and constituents ROTEX HPSU compact 508/516 DB (External appearance and internal structure) Designations of key see tab. 3-1 FA ROTEX HPSU compact (V5) •... -
Page 14: Equipment External And Internal Structure Rotex Hpsu Compact 508/516 Biv
Product description 3.1.5 Equipment external and internal structure ROTEX HPSU compact 508/516 BIV Fig. 3-5 Structure and constituents ROTEX HPSU compact 508/516 BIV (External appearance and internal structure) Designations of key see tab. 3-1 FA ROTEX HPSU compact (V5) •... - Page 15 Ball cock (1" IG) is supplied with the equip- Optional: Electrical backup heater 3-way diverter valve (internal heat genera- ment (BUxx) tor circuit) 3UV DHW 3 way diverter valve (hot water/heating) Tab. 3-1 Legend from fig. 3-2 to fig. 3-5 FA ROTEX HPSU compact (V5) •...
-
Page 16: Set-Up And Installation
Work on the ROTEX HPSU compact (such as setup, servicing, connection and initial start-up) is only to be carried out by persons who are authorised and who have success-... -
Page 17: Dimensions And Connections
Solar - feed (only type …Biv) Hot water Solar - return flow (only type …Biv) Heating feed Heating return flow Front Connection coolant gas line Back Fig. 4-1 Connections and dimensions ROTEX HPSU compact 304/308 (in general) FA ROTEX HPSU compact (V5) •... -
Page 18: Rotex Hpsu Compact 508/516
Solar - feed (only type …Biv) Hot water Solar - return flow (only type …Biv) Heating feed Heating return flow Front Connection coolant gas line Back Fig. 4-2 Connections and dimensions ROTEX HPSU compact 508/516 (in general) FA ROTEX HPSU compact (V5) •... -
Page 19: Scope Of Delivery
WARNING! – ROTEX HPSU compact The plastic wall of the storage tank on – Bag of accessories (see fig. 4-3) the ROTEX HPSU compact may melt C (1x) due to the effects of external heat A (2x) (>80 °C) and, in the extreme case, can catch fire. - Page 20 Set-up and installation Install the ROTEX HPSU compact at the installation site. – Recommended clearances (fig. 4-5): To the wall: (s1) 100 mm, (s2) 500 mm. From the ceiling (X): 1200 mm, minimum 480 mm. – Carefully transport the ROTEX HPSU compact, use the handles.
-
Page 21: Remove Cover Hood And Heat Insulation
– Pull away the rear insulation element (fig. 4-9, item B) ver- tically. Fig. 4-7 ROTEX HPSU compact without cover hood CAUTION! The thermal insulation (fig. 4-7, item A) consists of pressure sensitive shaped EPP components that can easily be damaged by inappropriate handling. -
Page 22: Water Connection
ROTEX HPSU compact. There should be no hydraulic blocking elements between the heat genera- Flush the feed pipes before filling the tor and the diaphragm expansion vessel. -
Page 23: Connecting Hydraulic Lines
4.4.2 Connecting hydraulic lines Requirement: Optional accessories (e.g. Solar, backup heater) mounted on the ROTEX HPSU compact according to the specifi- cations of the instructions included. Check cold water pressure (maximum 6 bar). -
Page 24: Installation Of Db Connection Kit ( 141590)
20 mm). Fig. 4-13 Installation of drain hose at safety overflow – Water shortage protection: The pressure and temperature monitoring of the control unit safely switches off the ROTEX 4.4.3 Installation of DB connection kit ( 141590) HPSU compact in the event of a water shortage. No addi- tional water shortage protection is needed in the construction. -
Page 25: Installation Of P Connection Kit ( 141589)
The equipment covers and mainte- nance opening covers must be re- fitted immediately after completion of the work. FA ROTEX HPSU compact (V5) •... -
Page 26: Overall Connection Plan Rotex Hpsu Compact
Set-up and installation 4.5.1 Overall connection plan ROTEX HPSU compact Explanation of symbols and abbreviations in this chapter see tab. 4-2 and tab. 4-3. Fig. 4-16 Overall connection diagram - for electrical connection during device installation FA ROTEX HPSU compact (V5) •... -
Page 27: Position Of The Circuit Boards
Fig. 4-19 Circuit board RTX-AL4 (interface) 4.5.5 Terminal assignment for the RTX-EHS circuit board Fig. 4-20 Circuit board RTX-EHS (Backup Heater) - see section 4.5.13 Fig. 4-18 Circuit board A1P (basic control of the heat pump) FA ROTEX HPSU compact (V5) •... -
Page 28: Connection Assignment, Circuit Board Rocon Bm128
The exterior unit and optional accessories must be connected separately to the regulator on the ROTEX HPSU compact. To do so, the cover panel of the ROTEX HPSU compact must be re- moved (see section) and, if necessary, the control housing opened (see section 4.5.8). -
Page 29: Open Controller Housing And Making The Electrical Connections
4.5.10 Connection of external temperature sensor tion. electrical connections. RoCon OT1 The exterior heat pump unit of the ROTEX HPSU compact has a built-in exterior temperature sensor which is used to regulate the inflow temperature depending on the weather, with frost pro- tection function. -
Page 30: Connection Of An External Switching Contact
After connecting the exterior temperature sensor RoCon OT1 to By means of the function [HZU] integrated into the the regulator RoCon HP of the ROTEX HPSU compact, the pa- RoCon HP HZU control unit (see operating manual for rameter [Outside Config] must be set to "On". -
Page 31: Connection Of The Electrical Rotex Backup
X1 of the switch board RTX-EHS (fig. 4-20) in the regulation housing of the ROTEX HPSU compact. Insert the plug XBUH1 of the Backup Heater on the back of the regulation housing of the ROTEX HPSU compact. Set parameter [Function Heating] to "1" (see controller operating instructions RoCon HP). -
Page 32: Connection Of An External Heat Generator
Heater (see section 4.5.13) you can connect an external heat ment (BUH1 / BUH3), the parameter [Function Heat- generator (e.g. gas or oil boiler) to the ROTEX HPSU compact. ing]=2 must be set. The heat supplied by the external heat generator must be added to the unpressurised storage tank water in the ROTEX HPSU compact hot water storage tank. -
Page 33: Connection Of The Rotex Room Thermostat
Set-up and installation 4.5.15 Connection of the ROTEX room thermostat This component has a separate manual attached, including among other things instructions for installation and operation. Fig. 4-38 Connection with cabled room thermostat (RT = ROTEX RKRTW, 14 10 03) -
Page 34: Connection Optional Rotex Rocon System Components
Ensure power cables, sensor cables and data bus cables are laid separately from each other. Use only cable trunking with sep- – Electrical connection of the ROTEX HP convector with the fol- arate trays or cable trunking with separators that ensure at least lowing accessories in accordance with fig. -
Page 35: Connection Switch Contacts (Aux Outputs)
If the ROTEX HPSU compact is in the [Cooling] operating mode, nected. the switch contact B-B1 closes. The switch contact B-B1 is used, –... -
Page 36: Connection Intelligent Controller (Smart Grid
Terminal rail Plug and socket connection 2-core cabling (non-screened) 3-core cabling (non-screened) 4-core cabling (non-screened) 5-core cabling (non-screened) 6-core cabling (non-screened) Shielded cabling (for example 3-strand) Tab. 4-2 Symbol explanations for connection and circuit diagrams FA ROTEX HPSU compact (V5) •... - Page 37 Storage tank temperature sensor plug connection switching DHW1 Fuse 250 V T 2 A (RoCon BM1) Plug connection HT/NT switching contact EVU Tab. 4-3 Key names for connections and circuit diagrams - Part 1 FA ROTEX HPSU compact (V5) •...
- Page 38 Terminal block for mains connection to backup heater X2_1 X2_2 Plug connection internal cabling (to XBUH1) X2_3 Plug connection internal cabling to J3 (RTX-AL4) Tab. 4-4 Key names for connections and circuit diagrams - Part 2 FA ROTEX HPSU compact (V5) •...
-
Page 39: Laying Coolant Lines
80 cm. DHW2 4.8 Filling the system with water Do not fill the ROTEX HPSU compact until all installation activ- Exterior heat pump unit (RRLQ) ities have been completed, in the order shown as follows. -
Page 40: Filling The Hot Water Heat Exchanger
4.8.3 Filling the storage tank See chapter 7.3. 4.8.4 Filling the heating system See chapter 7.4. FA ROTEX HPSU compact (V5) •... -
Page 41: Start-Up
The settings of the optional components such the room ther- CAUTION! mostat or ROTEX solar installation must be configured on the re- spective components themselves. A ROTEX HPSU compact not put into operation properly can lead to damage 5.1.1 Requirements... -
Page 42: Set The Commissioning Parameters
Language Date 5.1.4 Venting the hydraulics If the storage temperature falls below a certain minimum value, the safety settings of the ROTEX HPSU compact prevent the operation of the heat pump Access Rights Setup in the case of low external temperatures: –... -
Page 43: Check The Minimum Flow Rate
3-way must check the actual flow rate in the active operating diverter valve integrated into the ROTEX HPSU compact. mode and rectify any possible causes of the error. Existing air can leak from the automatic venting valve during the venting function and the hydraulic circuit connected to the 5.1.6 Configuring Screed Program parameters... -
Page 44: Re-Commissioning
1. Check the cold water connection and, where necessary, fill the potable water heat exchanger. 2. Turn power supply to ROTEX HPSU compact on. 3. Wait for the start phase. 4. After the start phase has completed, in heating mode, vent the heating system, check the system pressure and adjust if necessary (max. -
Page 45: Decommissioning
Without solar installation Remove the cover plate If the ROTEX HPSU compact is not needed for a long time, it can from the filling and be temporarily decommissioned. emptying fitting. ROTEX therefore recommends that you do not disconnect the When using the KFE system from power supply, but rather only place it in "Stand-By... -
Page 46: Draining The Heating Circuit And Hot Water Circuit
Disconnect the heating flow and return flow as well as the cold Fig. 6-3 Complete KFE filling Fig. 6-4 Screw the KFE filling water inflow and the hot water outflow from the ROTEX HPSU connection connection into the fill- compact. ing and draining fitting... -
Page 47: Final Shutdown
Proper disposal in compliance with the respective reassembled in another location. national regulations of the country of use is the respon- The ROTEX HPSU compact is designed to be environmentally sibility of the user/owner. friendly and easy to install: the jobs described above can therefore be carried out in an efficient and environmentally- friendly manner. - Page 48 – Disposal may only be carried out by an organi- zation that specialises in reuse, recycling and recovery. Further information is available from the installation company or the responsible local authorities. FA ROTEX HPSU compact (V5) •...
-
Page 49: Service And Maintenance
All installation, maintenance and repair work on the cooling circuit must be documented e.g. in the operating manual. Operators of ROTEX heat pump systems are subject to the following obligations: FA ROTEX HPSU compact (V5) •... -
Page 50: Activities To Be Performed Annually
In pits or in badly ventilated rooms Improperly carried out work on the it can collect in high concentrations. ROTEX HPSU compact and its compo- Breathing in high concentrations of nents that have been connected as an gaseous refrigerant leads to feelings option can endanger human life and of faintness and suffocation. - Page 51 > 60 °C (see section 4.3). arise. 2. Carry out a functional inspection of the ROTEX HPSU compact, as well as all installed accessory components – Touching components during or after (backup heater, solar installation) by checking the operation leads to a risk of burns.
-
Page 52: Filling And Topping Up The Storage Tank
13. Check minimum flow rate (see section 5.1.5). drain valve, a temporary filling loop must 14. Clean plastic surface of ROTEX HPSU compact with a soft be used with the appropriate backflow cloth and mild cleaning agent. Do not use any cleaners with... -
Page 53: Filling And Topping Up The Heating System
DANGER! item 1). During the filling procedure, water can Fill the storage tank on the ROTEX HPSU compact until water comes out of the connection (fig. 7-1, item 23), that leak from potential leaking sites, which, has been connected as the safety overflow. - Page 54 KFE cock (fig. 7-2, item. 2). Filler hose Unlocking button of the drive KFE cock lock Ball cock Automatic bleeder Water cock 3UVB1, 3UV DHW Valve drive 3-way diverter valve Fig. 7-2 Filling the heating circuit FA ROTEX HPSU compact (V5) •...
-
Page 55: Errors, Malfunctions And Messages
Manual Operation FA failure 8.1 Recognising errors, correcting malfunctions Electronic control of the ROTEX HPSU compact: – signals an error by means of the background of the display Special Level lighting up red and shows an error code in the display FA failure (see tab. -
Page 56: Malfunctions
The parameter [SMART GRID] is active and the connections are set incorrectly. The power company has sent the high-cost Wait for the repeat off-peak rate signal which reacti- signal. vates the power supply. FA ROTEX HPSU compact (V5) •... - Page 57 Thermal protection switch (STB) on backup heater Optional backup heater (BUxx) or alternative (BUxx) was triggered. Unlock. heater not switched on. Check the parameters [Function Heating] and [BUH s1 power] and [BUH s2 power]. FA ROTEX HPSU compact (V5) •...
- Page 58 If the quantity of coolant is too great, recycle the coolant and refill the system with the correct vol- ume. FA ROTEX HPSU compact (V5) •...
-
Page 59: Fault Codes
E9004 / 7H. function error (PHE) – Failure of the frost protection function of the plate heat exchanger because there is a lack of coolant in the system. See error code E9015 / E4. FA ROTEX HPSU compact (V5) •... - Page 60 With optional backup heater: check its power supply and fuses. Check the fuses in the control housing of the ROTEX HPSU compact (pump fuse (FU1) on circuit board A1P and printed circuit board fuse (F1) on the RoCon BM1 circuit board).
- Page 61 – High pressure switch S1PH defective. High pressure switch – Main board in the heat pump exterior unit defective. E9021 HPS-System S1PH in the heat pump – Cabling, poor contact. exterior unit Check, replace. FA ROTEX HPSU compact (V5) •...
- Page 62 R4T in the heat pump E9028 Aircoil sensor temp exterior unit (only in 11-16 kW systems) Temperature sensor liq- Fault cold sensor E9029 uid-side R6T in the heat pump exterior unit FA ROTEX HPSU compact (V5) •...
- Page 63 – Temperature sensor on inverter board defective, plug connec- systems) tion X111A not correct. Check, correct cause, replace. If necessary contact ROTEX service technician. a) If the fault < 15x occurs, the functional safety of the HPSU compact still remains. Sporadic message during the continuous self-monitoring of the unit.
- Page 64 E9039 Under/over voltage – Inverter board in the heat pump exterior unit defective. Check, replace. If necessary contact ROTEX service technician. Communication between the heat pump exterior equipment and heat pump interior equipment malfunctioning. – Cabling or connections, poor contact.
- Page 65 – Drain water to reduce the system pressure. Tab. 8-2 Error codes on the main control unit of HPSU compact Respect the maximum tightening torque of the temper- ature sensor (see chapter 10.3 "Tightening torque"). FA ROTEX HPSU compact (V5) •...
-
Page 66: Monitoring And Configuration Dip Switch
"Manual Operation" function on the control unit (see op- fatal injuries and burns. erating manual for the control unit). If the 3-way valves are intact, the ROTEX HPSU compact Before beginning work on live parts, switches to Heating mode. The necessary flow temperature can disconnect all of the systems circuits be adjusted with the rotary switch. -
Page 67: Hydraulic System Connection
Hydraulic system connection Hydraulic system connection The ROTEX units can also be optionally fitted with WARNING! gravity breaks ( 16 50 70) made of plastic to prevent High temperatures can occur in the solar thermal losses caused by gravity flow. These are suita- ble for operating temperatures of maximum 95 °C and... - Page 68 Hydraulic system connection Fig. 9-2 ROTEX HPSU compact (BIV types) with pressurised solar (for legend see tab. 9-1) Fig. 9-3 HPSU compact (DB types) parallel bivalent with A1 boiler without solar support (for legend, see tab. 9-1) FA ROTEX HPSU compact (V5) •...
- Page 69 HPSU compact (DB types) alternative bivalent with A1 boiler without solar support (for legend, see tab. 9-1) Fig. 9-5 HPSU compact (BIV types) parallel bivalent with A1 boiler and DrainBack Solar (for legend, see tab. 9-1) FA ROTEX HPSU compact (V5) •...
- Page 70 Hydraulic system connection Fig. 9-6 ROTEX HPSU compact 508/516 (DB) with wood-burning boiler <8 kW without solar support (for legend, see tab. 9-1) Fig. 9-7 ROTEX HPSU compact 508/516 BIV with wood-burning boiler <8 kW and Drain-Back solar (for legend see tab. 9-1)
- Page 71 Secondary circuit pump W Circulation pump Panel heat exchanger (condenser) RDS2 Pressure station RoCon BF A1 condensing boiler RoCon HP Control unit for ROTEX HPSU compact RoCon M1 Mixer circuit control RPS4 Solar regulation and pump unit RPWT1 Plate heat exchanger RRLQ...
-
Page 72: Technical Data
90 l = 3660 Wh (Ø shower draw-off quantity) Cold and hot water inches 1" AG Heating flow and return flow inches 1" IG Pipe connections inches 1" IG Solar connections inches — 3/4" IG + 1" AG FA ROTEX HPSU compact (V5) •... - Page 73 3G (1-phase) / 5G (3-phase) heating (BUxx) Heating/cooling function 14 15 30 14 15 34 14 15 31 14 15 35 Order number Heating function only 14 15 39 14 15 40 14 15 42 14 15 43 FA ROTEX HPSU compact (V5) •...
- Page 74 The cross-section of the individual lines is dependent on the current (charge state before drawing off) load, the length of the connection cable and the respective legal provi- sions. Tab. 10-1 Basic data ROTEX HPSU compact 304/308 FA ROTEX HPSU compact (V5) •...
-
Page 75: Rotex Hpsu Compact 508/516
90 l = 3660 Wh (Ø shower draw-off quantity) Cold and hot water inches 1" AG Heating flow and return flow inches 1" IG Pipe connections inches 1" IG Solar connections inches — 3/4" IG + 1" AG FA ROTEX HPSU compact (V5) •... - Page 76 4.65 / 4.6 4.47 / 4.27 / 4.65 / 4.6 4.47 / 4.27 / Nominal COP A7/W35 4.95 / 4.9 4.6 / 4.41 / 4.95 / 4.9 4.6 / 4.41 / Nominal COP A10/W35 4.31 4.31 FA ROTEX HPSU compact (V5) •...
-
Page 77: Characteristic Lines
Hot water storage tank only to be charged using a heat pump, without a Storage target temperature (charge state before draw- backup heater. ing off) With a reference spacing of 1 m. Tab. 10-2 Basic data ROTEX HPSU compact 508/516 10.2 Characteristic lines 10.2.1 Sensor characteristic lines Temperature sensor Measured temperature in °C Sensor resistance in kOhm according to standard or manufacturer's indications —... - Page 78 External temperature sensor RoCon OT1 Storage tank temperature sensor DHW1 Fig. 10-2 Characteristics of the NTC temperature sensor ROTEX HPSU compact - Part 2 Frequency Flow Fig. 10-3 Characteristics of the flow sensor FLS (V1) ROTEX HPSU compact FA ROTEX HPSU compact (V5) •...
-
Page 79: Characteristic Curves For Pumps
Residual pumping height of internal heat circulation pump Flow rate of heating system Fig. 10-7 Residual feed height of internal heating circulation pump ROTEX HPSU compact 516 with heating support heat ex- changer 10.3 Tightening torque Component Thread... -
Page 80: Circuit Diagram Rotex Hpsu Compact
Technical data 10.4 Circuit diagram ROTEX HPSU compact Fig. 10-8 Circuit diagram ROTEX HPSU compact - For legend see tab. 4-3 FA ROTEX HPSU compact (V5) •... -
Page 81: Notes
Notes 11 Notes FA ROTEX HPSU compact (V5) •... - Page 82 Notes FA ROTEX HPSU compact (V5) •...
-
Page 83: List Of Keywords
Connections ..11 Important information ..10 Installation ....23 FA ROTEX HPSU compact (V5) •...
Need help?
Do you have a question about the HPSU compact (V5) and is the answer not in the manual?
Questions and answers