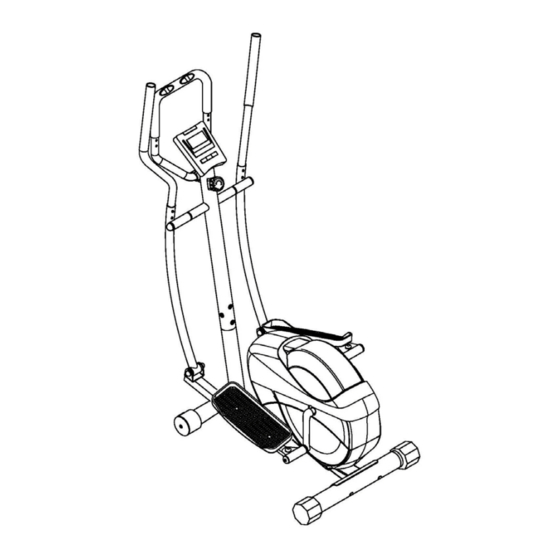
Summary of Contents for Marcy ER3000D
- Page 1 Motion Elliptical Product Code: ER3000D Escalade International Limited Pleasant Road, Penllergaer, Swansea. SA4 9GE Tel: 00 44 1792 222 550 Fax 00 44 1792 895 781 www.escaladesports.co.uk info@escaladesports.co.uk 19/01/2010-5...
- Page 2 Important Safety Information Weight Limit Capacities Hardware Parts List Pre Assembly Check List Assembly Instructions 6 - 9 Transport/Tension Control Computer Instructions Exercise Instructions Fault Finding Chart Exploded Diagram Parts List Additional Information Care Maintenance Limited Warranty Supplied by Escalade International Ltd Pleasant Road Penllergaer Swansea...
-
Page 3: Important Safety Information
IMPORTANT SAFETY INFORMATION READ ALL INSTRUCTIONS BEFORE USING THIS OWNER’S MANUAL CONTAINS ASSEMBLY, OPERATION, MAINTENANCE AND SAFETY INFORMATION. IN THE INTEREST OF SAFETY, PLEASE MAKE CERTAIN THAT YOU READ AND UNDERSTAND ALL THE INFORMATION BELOW. 1. This elliptical is intended for class H (H=Domestic) use only. It is not designed for commercial use. -
Page 4: Hardware Parts List
HARDWARE PARTS LIST PART NO. DESCRIPTION Q’TY Carriage Bolt M8*65mm Domed Nut M8 Curve Washer Φ22 Allen Bolt M8*15mm Hex Bolt M8*45mm Nylon Lock Nut M8 Flat Washer Φ25 23L & R Pedal Hinge Bolt (Left & Right) Nylon Lock Nut 1/2 inch Plastic Nut Cap M8 Allen Bolt M6*12mm Carriage Bolt M8*22mm... -
Page 5: Pre-Assembly Check List
PRE-ASSEMBLY CHECK LIST PART NO. DESCRIPTION Q’TY Main Frame Front Stabilizer Rear Stabilizer Front Post 05&07 Left Lower Handlebar w/ Pedal Arm 06&08 Right Lower Handlebar w/ Pedal Arm Left Upper Handlebar Right Upper Handlebar Front Upper Handlebar Computer 13&14 Pedal Plastic Spacer User Manual... -
Page 6: Assembly Instruction
ASSEMBLY INSTRUCTION STEP 1 Attach the front stabilizer (2) to the main frame (1), tighten with two sets of carriage bolts (15), curve washer (17) and domed nut (16). Now repeat this procedure for the rear stabilizer (3), tighten with two sets of carriage bolts (15), curve washer (17) and domed nut (16). - Page 7 HOW TO CONNECT TENSION CONNECTOR Slide the Cable wire from the Upper Tension Connector in between the opening on the wire holder on the Lower Tension Connector. Pull Upper Tension Connector backward and slide the wire through the slot on the bracket.
- Page 8 STEP 3 (a) Insert plastic spacer (25) and left lower handlebar (5) on the front post (4), tighten with one hex bolt (26), one D shape washer (19) and one washer (27), then place plastic nut cap (28) on to hex bolt (26). Repeat this procedure for the right lower handlebar (6). (b) Put pedal hinge bolt (23L) through two wave washer (36) and the left pedal arm (7) then attach it to the left crank (42) tighten with one set of flat washer (33) and nylon lock nut (24).
- Page 9 STEP 5 Fix the left upper handlebar (9) to the left lower handlebar (5), tighten with two carriage bolt (30) and two domed nut (29). Repeat this procedure for the right upper handlebar (10). CHECK ALL BOLTS AND NUTS ARE TIGHTENED BEFORE USING THE MACHINE...
-
Page 10: Tension Control
TRANSPORT TENSION CONTROL Decrease Increase... -
Page 11: Computer Instructions
COMPUTER INSTRUCTIONS BUTTON: To select functions of time, speed, distance, calories and pulse. Hold this MODE: button for 2 seconds to reset the computer. To adjust each function value of time, distance, calorie, pulse. SET: The user may use reset key to reset each function individually: time, distance, RESET: calorie, and pulse. -
Page 12: Exercise Instructions
EXERCISE INSTRUCTIONS Using your MAGNETIC ELLIPTICAL will provide you with several benefits, it will improve your physical fitness, tone muscle and in conjunction with a calorie controlled diet help you lose weight. 1. The Warm Up Phase This stage helps get the blood flowing around the body and the muscles working properly. It will also reduce the risk of cramp and muscle injury. -
Page 13: Muscle Toning
3. The Cool Down Phase This stage is to let your Cardio-vascular System and muscles wind down. This is a repeat of the warm up exercise e.g. reduce your tempo, continue for approximately 5 minutes. The stretching exercises should now be repeated, again remembering not to force or jerk your muscles into the stretch. -
Page 14: Exploded Diagram
EXPLODED DIAGRAM... -
Page 15: Parts List
PARTS LIST PART NO. DESCRIPTION Q’TY Main Frame Front Stabilizer Rear Stabilizer Front Post Left Lower Handlebar Right Lower Handlebar Left Pedal Arm Right Pedal Arm Left Upper Handlebar Right Upper Handlebar Front Upper Handlebar Computer Left Pedal Right Pedal Carriage Bolt M8*65mm Domed Nut M8 Curve Washer Φ22... -
Page 16: Additional Information
ADDITIONAL INFORMATION Packaging Disposal Government guidelines ask that we reduce the amount of waste material disposed of in land fill sites. We therefore ask that you dispose of all packaging waste responsibly at public recycling centres. End of Life Disposal We at Escalade hope you enjoy many years of enjoyable use from your Elliptical. -
Page 17: Limited Warranty
LIMITED WARRANTY Escalade warrants this product to be free from defects in workmanship and material, under normal use and service conditions, for a period of one year from the date of purchase. This warranty extends only to the original purchaser. Escalade’s obligation under this Warranty is limited to replacing damaged or faulty parts at Escalade’s option.


Need help?
Do you have a question about the ER3000D and is the answer not in the manual?
Questions and answers