Table of Contents
Advertisement
Quick Links
Advertisement
Table of Contents

Subscribe to Our Youtube Channel
Related Manuals for Lilin PDR-3160


Summary of Contents for Lilin PDR-3160
- Page 1 16CH Stand Alone Digital Video Recorder PDR-3160 INSTRUCTION MANUAL...
- Page 2 Executive Summary PDR-3160 is a high performance stand-along digital video recorder (DVR) with 32-bits RISC processor which can perform multiplex DVR features simultaneously including Recording, Live Monitoring, Playback, and Network Monitoring. It is designed by the most advanced technologies of Merit Lilin. These technologies enable users to enjoy extreme flexibilities including Jog &...
- Page 3 Trademarks and registered trademarks Microsoft 2000 is registered trademark of Microsoft Corporation in the U.S. and/or other countries. Other names of companies and their products mentioned in this manual may be trademarks or registered trademarks of their respective owners. PDR-3160 User Manual...
-
Page 4: Table Of Contents
TABLE OF CONTENTS Chapter 1. SYSTEMS OVERVIEW ..............6 Chapter 1-1. BEFORE USING PDR-3160 ..........9 Chapter 1-2. SURVEILLENCE MODE.............12 Chapter 2. PTZ CONTROLS.................15 Chapter 2-1. INSTANT PTZ CONTROLLABLE MODE......15 Chapter 2-2. REMOTE CONTROLLER & PTZ........15 Chapter 2-3. RECALL PRESETS ............16 Chapter 3. RECORDING ................16 Chapter 3-1. - Page 5 Chapter 6-5-7. PASSWORD...............33 Chapter 6-5-8. FIRMWARE UPDATE..........35 Chapter 6-6. NETWORK .................36 Chapter 6-6-1. NETWORK ENABLE..........37 Chapter 6-7. PTZ SETUP ................37 Chapter 6-7-1. CAMERA SELECT .............38 Chapter 6-7-2. FAST DOME TYPE ............38 Chapter 6-7-3. PRESET ADJUST ............38 Chapter 6-7-4. PRESET..............39 PDR-3160 User Manual...
- Page 6 Chapter 7-1-1. How to Get NetworkViewer Program......45 Chapter 7-1-2. Network Live Monitoring..........46 Chapter 7-1-3. Network Remote Playback .........46 Chapter 7-1-4. File Output..............47 Chapter 7-2. Access PDR-3160 via Internet browser .......48 Chapter 7-2-1. Before Using Internet ..........49 Chapter 7-2-2. Logon .................49 Chapter 7-2-3. Show Frame Size ............50 Chapter 7-2-4.
-
Page 7: Chapter 1. Systems Overview
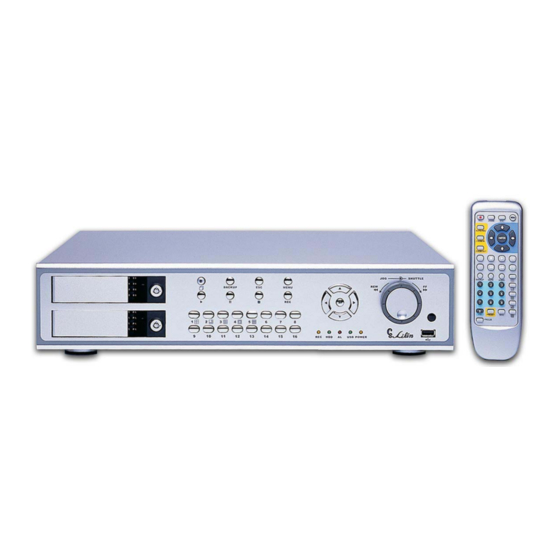
HDD LED (green) Pause button AL LED (red) Backup button USB LED (green) Stop button POWER (yellow) ESC button Jog & shuttle REC button USB connector Menu button IR receiver Up, down, left, right, and enter buttons PDR-3160 User Manual... -
Page 8: Rear View
Buttons are separated in regions based on their features including PDR-3160 operational keys, pan, tilt, and zoom camera device (PTZ) operational keys, numerical keys, and hybrid keys of PDR-3160 and PTZ. The details are described in the following table. - Page 9 Sequential display Mute MUTE AUDIO Audio on BACKUP Video backup PTZ features (yellow area) PDR-3160 & PTZ hybrid keys (blue area) Perform auto pan AUTO PAN Move up/tilt up feature Move down/tilt Zooming in of a fast ZOOM IN down...
-
Page 10: Chapter 1-1. Before Using Pdr-3160
JOG & SHUTTLE PDR-3160 adopts Jog & Shuttle mainly in menu system and video playback modes. In menu setup mode, rolling Jog is to move the cursor of the menu system up or down. Shuttle moves the cursor of the menu system left and right. - Page 11 Most of the time, the menu systems including menu setup and playback menu contain the operating usage at the bottom of each menu. User can use the menu help to operate PDR-3160 if the user manual is not handy. SYSTEM LED STATUS PANEL System LEDs are meaningful while operating PDR-3160.
- Page 12 HDD tray in clockwise. PDR-3160 resumes recording, if PDR-3160 was in recording mode. To pull the HDD out of PDR-3160, first unlock the HDD tray in counter clockwise. If PDR-3160 is in recording mode, the recording operation will be stopped.
-
Page 13: Chapter 1-2. Surveillence Mode
Chapter 1-2. SURVEILLENCE MODE Most of the time, PDR-3160 is operated at the surveillance mode. The information of screen layout and symbols are described in this section. SCREEN LAYOUT ① Date ② Day of the week ③ Time ④ HDD recording percentage and master (M)/slave (S) HDD indicator ⑤... -
Page 14: Sequential Display
SPLIT DISPLAY MODES PDR-3160 can provide various split display modes on live and playback monitoring using remote controller and keypad. 16-Channel Split Display 13-Channel Split Display 9-Channel Split Display 8-Channel Split Display 4-Channel Split Display Full Screen Mode SEQUENTIAL DISPLAY PDR-3160 provides the multiplexing feature displaying each full screen in a sequence with specific time period. - Page 15 Press CH- button that each camera channel gets called in descending sequence. AUDIO & MUTE Once the audio channel is properly setup, PDR-3160 can output the live audio. To disable live audio, one can press Mute button. To enable live audio, press Audio button again.
-
Page 16: Chapter 2. Ptz Controls
③ Panning the PTZ device left ④ Panning the PTZ device right ⑤ Perform auto panning of the PTZ device ⑥ Perform zooming in of the PTZ device ⑦ Perform zoom out of the PTZ device ⑧ Calling presets PDR-3160 User Manual... -
Page 17: Chapter 2-3. Recall Presets
To call preset, please follow the following instructions: Press Preset button to enable the calling preset mode. The blinking “Preset” text on live monitoring screen indicates that PDR-3160 is in Preset mode. In Preset mode, preset 01 to 16 directly to recall preset points of the PTZ device. -
Page 18: Chapter 3-4. Motion Detection Recording
Chapter 3-4. MOTION DETECTION RECORDING Motion detection is very important feature of PDR-3160 that the intrusion detection of a camera’s view can be detected. Motion detection recording sensors motion variation, and it triggers PDR-3160 to perform recording task. Once motion detection is active, the motioned channel activates an alarm symbol (little man in yellow) on the screen to inform users. -
Page 19: Chapter 4. Playback Search
To perform the searching, simply press Left or Right button and move the ● cursor above the red block at desired date and time specified. Press Enter to choose the date and time information ● Press Up or Down to setup year, month, date, hour, and minute. ● PDR-3160 User Manual... -
Page 20: Chapter 4-2. Event Search
To play the REC Search list, please choose Record Search item. A list of start and end recording shows up accordingly. Press Up or Down to select the date and time for playing. PDR-3160 User Manual... -
Page 21: Chapter 4-4. Play Entire Hdd
PAUSE & STEPPING: press Pause key during playing video can pause the video. Once the video is in pausing stage, one can press Left or Right on PDR-3160’s keypad or remote controller to play the video step-by-step. Roll the Jog to see the slow motion of the video. -
Page 22: Chapter 5. System Start-Up
HDD information shows blank if no HDD detected If both HDDs are not present, PDR-3160 can still perform its function except features related to HDD operations. 4) Once all above stages are correctly present, PDR-3160 finishes the booting sequence. PDR-3160 User Manual... -
Page 23: Chapter 6. Menu System
Chapter 6-2. CAMERA SETUP One can setup individual camera’s settings such as camera name, camera name displaying, video attributes, sequential displaying, and boarder color. To setup above, please select Camera menu item in setup main menu. PDR-3160 User Manual... -
Page 24: Chapter 6-2-1. Camera Name
Chapter 6-2-3. Video Setup Video setup can adjust contrast, brightness, hue, and saturation for each camera. ① Press Left or Right to switch item ② Press Up or Down to change value. ③ Press ESC to exit this menu. PDR-3160 User Manual... -
Page 25: Chapter 6-2-4. Sequence
Mode1 aligns the last row’s camera names at the bottom of the camera channels. Mode2 aligns the last row’s camera names at the top of the camera channels. This feature provides the flexibility which allows PDR-3160’s output to fit different monitor’s output. -
Page 26: Chapter 6-2-7. V/H Adjust
Chapter 6-2-7. V/H ADJUST V/H ADJUST allows adjusting PDR-3160’s video output vertically and/or horizontally. A user can use this feature to adjust video to fit monitor output. Chapter 6-3. RECORD SETUP Record setup menu can setup features related to recording features such as scheduled recording, HDD over written recording, recorded image resolution settings, recorded video speed settings, and audio channel setting. -
Page 27: Chapter 6-3-1. Schedule
Chapter 6-3-1. SCHEDULE Once the schedule has been setup, PDR-3160 records camera video based on the schedule table. PDR-3160’s timer detects every second to check if it should start to record. ① Press “Enter” to enter edit mode ② Press Up or Down to enable or disable schedule. -
Page 28: Chapter 6-3-4. Record Quality
To record audio to its video channel, please first define the audio channels. Next, please enter the REC AUDIO channel. ☞ ☞ Caution There are only one audio can be monitored and one audio channel can be recorded at a given moment. PDR-3160 User Manual... -
Page 29: Chapter 6-4. Alarm Setup
Press Left or Right button to switch to different camera channel. Chapter 6-4-2. ALARM ENABLE PDR-3160 has 16 alarm inputs which can be configured as normal open (N/O), normal close (N/C), or disabled. Sixteen alarm inputs numbered from 1 to 16 are one-to-one mapped to camera 1 to 16 respectively. -
Page 30: Chapter 6-4-5. Motion Area Set
0 (Off) to 99 sec. To setup the recording time, please press left or right on Alarm Rec Time menu item. Chapter 6-4-8. BUZZER ENABLE In case, the warning buzzer requires to be turned off. A user can disable the buzzer under System->Buzzer Enable menu item. PDR-3160 User Manual... -
Page 31: Chapter 6-5. System Setup
To setup above features, please follow the following instructions: Chapter 6-5-1. DATE/TIME PDR-3160 has built-in timer to record time information. One can choose different time format or disable the timer. ① Press Left or Right to adjust date or time. -
Page 32: Chapter 6-5-2. Hdd Format
“FORMAT COMPLETED” message shows up after the process is done. Caution ☞ ☞ To format HDD, it erases event lists and may damage the stored video data of the HDDs permanently. PDR-3160 User Manual... -
Page 33: Chapter 6-5-3. Hdd Info
Start—Starting time of stored video End—E nding time of stored video ecorded Video Overwritten PDR-3160 adopts circular fram e-by-frame overwritten technology to save storage space. To explain above figure, please see the following chart: Master HDD Slave HDD Start: 08/16 22:43... -
Page 34: Chapter 6-5-4. Factory Reset
Left or Right button at System->Video System. Chapter 6-5-6. LANGUAGE PDR-3160 provides multi-language OSD support. A user can change his/her preferred language to operate PDR-3160. Press on Left or Right button to change the Language setting. Chapter 6-5-7. PASSWORD PDR-3160 has one set of password protection preventing unauthorized access. - Page 35 1. Enter current password 2. Enter new password 3. Enter confirmed password ☞ ☞ Note In case of forgetting password, please contact your local dealer. PDR-3160 User Manual...
-
Page 36: Chapter 6-5-8. Firmware Update
START UPDATE FIRMWARE To perform firmware update, please plug in the USB flash disk into PDR-3160. Select Start Update Firmware menu item and press Enter button. It will automatically transfer the firmware into PDR-3160. After transferring firmware, wait until “Please Reboot System”... -
Page 37: Chapter 6-6. Network
Version menu item indicates the current version number of PDR-3160. Chapter 6-6. NETWORK PDR-3160 allows a user to access the video via Internet or LAN. In order to connect to LAN or Internet, subnet mask, gateway, and IP address should be configured. -
Page 38: Chapter 6-6-1. Network Enable
③ Press ESC to exit the menu Chapter 6-7. PTZ SETUP PDR-3160 can control up to 16 PTZ cameras. Using PDR-3160 keypad or remote controller can access all these cameras. To setup PTZ connection, please follow the following instructions: PDR-3160 User Manual... -
Page 39: Chapter 6-7-1. Camera Select
PTZ camera is connected at camera #5 of PDR-3160. Please adjust the PTZ camera’s device ID to 5 to response PTZ’s protocol sent by PDR-3160. (To setup fast dome camera ID please refer to fast dome camera Installation / Operation Manual) Chapter 6-7-2. -
Page 40: Chapter 6-7-4. Preset
Preset menu item. To define other preset point, please repeat chapter 6-7-4. In live monitoring mode, this preset can be recalled at any time. To recall a preset, please read Call Preset section for detail. PDR-3160 User Manual... -
Page 41: Chapter 6-7-9. Clear All Preset
☞ ☞ WARNNING Please make sure that the RS-485 wires are properly installed and connected to PDR-3160. The PTZ device ID is adjusted to PDR-3160’s camera number accordingly. ☞ ☞ Note The screen keypad of Adjust POS acts as a reminder. -
Page 42: Chapter 6-8. Backup
4. USED PER: The file usage percentage rate of the portable USB device VIDEO BACKUP PDR-3160 allows a user to backup stored video via USB flash disk or NetworkViewer. PDR-3160 adopts video capturing technology. PDR-3160 can convert the captured video into USB flash disk. There is no need to enter date or time values to perform the backup task. - Page 43 Note #1: Press first backup button. PDR-3160 transfers video into its internal memory .Note #2: Press second backup button. PDR-3160 transfers video from internal memory into USB flash disk. Note #3: To erase the USB Full message, please press ESC button.
-
Page 44: Chapter 7. Network
Network IP address, subnet mask, and gateway are setup correctly. Always, consult your network administrator before installing PDR-3160. You can “ping” PDR-3160 to see if the DVR is accessible in your local network before connecting PDR-3160 in the Internet. PORT NUMBER To access PDR-3160 via Internet using a router, please make sure that IP Ports of the router and/IP sharing device are set. -
Page 45: Chapter 7-1. Pdr-3160 Networkviewer
Chapter 7-1. DVR NetworkViewer To access PDR-3160 via LAN, one can use NetworkViewer application. NetworkViewer allows: (1) Accessing remote live video (2) Retrieving remote event & recording lists (3) Capturing PDR-3160’s remote video into local PC (4) Exporting video into AVI file format or standard JPEG (5) USB portable disk video files or local PC video files playback. -
Page 46: Chapter 7-1-1. How To Get Networkviewer Program
USB flash disk. c. After finishing USB flash disk backup, unplug the USB flash disk from PDR-3160 and plug the USB flash disk into a PC’s USB socket. d. Open the root folder of the USB flash disk on a PC. -
Page 47: Chapter 7-1-2. Network Live Monitoring
Chapter 7-1-2. Network Live Monitoring Connect PDR-3160 To connect PDR-3160, please click on Connect DVR button. Type IP address at IP Address edit box. To record live video into local PC, please specify the directory at Local record path. Click OK button to connect to the PDR-3160. -
Page 48: Chapter 7-1-4. File Output
NetworkViewer. Select the menu item to capture the video into JPEG file. Saving File to Local PC To save remote PDR-3160 video into local PC, please click on Saving File to Local PC button. It saves the video into local PC. Click the button again to stop the process. -
Page 49: Chapter 7-2. Access Pdr-3160 Via Internet Browser
Chapter 7-2. Access PDR-3160 via Internet browser To access DVR, a user can use Internet browser to retrieve live and stored video. PDR-3160’s web interface provides features of PTZ access, split window display, and system configurations. PDR-3160’s web interface is... -
Page 50: Chapter 7-2-1. Before Using Internet
Prompt. Chapter 7-2-2. Logon To logon PDR-3160, please type in the IP address in the HTTP address box via Internet browser. By default, type “192.168.1.111” in the HTTP address box to access the logon page. Use default password “1111” for Administrator and password “2222”... -
Page 51: Chapter 7-2-3. Show Frame Size
13 split display 8 split display 16 split display Chapter 7-3. Hyper Link Panel Hyper Link Panel contains major features allowed in PDR-3160 that it provides features including video source, video size, configuration, and NetworkViewer download page. Video Size PDR-3160 provides two different video browsing HTML pages in which a user can view the video in CIF (Medium) or VGA (Large) resolution. -
Page 52: Chapter 7-4. Playback Over Network
NetworkViewer hyper link allows a user to download NetworkViewer via Internet. To use NetworkViewer, please refer to chapter 7-1. Chapter 7-4. Playback Over Network PDR-3160 allows a user to perform Play, FR, FF, Pause/Step, and Stop operations. The buttons are described in the following figure: Play... -
Page 53: Chapter 7-5. Save Avi Or Jpeg File
Step 2. Check CAM check boxes for camera channels. Step 3. Type frame rate in Frame/Sec edit box. Step 4. Click on Start button to start the AVI capturing process. Step 5. Click on OK button to finish the AVI saving process. PDR-3160 User Manual... -
Page 54: Chapter 7-6. Configure Pdr-3160 Via Web Page
Language: PDR-3160 web interface language selection combo box. Software Reboot: Click on Software Reboot hyper link. PDR-3160 gets restarted remotely. Note: The language of PDR-3160’s menu system and the language of the HTML pages can be set independently. PDR-3160 User Manual... -
Page 55: Chapter 7-6-2 Pdr-3160 User Settings
3160’s web server. To change password, please specify the old password, new password, and confirm password. Chapter 7-6-3. Timer Settings PDR-3160 allows a user to set its timer via HTML web interface. However, once the PDR-3160’s system timer gets changed, the consequence may affect the accuracy of searching recorded video. -
Page 56: Chapter 7-6-5. Ptz Settings
Chapter 7-6-5. PTZ Settings To set Fast Dome preset of PDR-3160, please follow the following steps: Step 1. Select Fast Dome camera. Step 2. Select and define preset of the Fast Dome device. Step 3. Adjust Fast Dome camera’s position. -
Page 57: Appendix
APPENDIX EXTERNAL ALARM SWITCHES PDR-3160 has a D-SUB 25 Pins IO connector which contains 16 alarm switch inputs, one RS-485, and two alarm outputs. The detail description of the pin assignment is in the following charts. Pin Assignment Table Pin 1... -
Page 58: Pdr-3160 Storage Media Supporting List
PDR-3160 Storage Media Supporting List USB Portable Disk PRETEC 256MB RiDATA EZDRIVE ™ USB 2.0 FLASH DRIVE 512 MB Note: Please make sure that the USB Portable Disk is Linux USB 1.1 compatible. Hard Disk Seagate Barracuda 80GB Seagate Barracuda... -
Page 59: 120 Gb Hard Disk Recording Table
265 hrs 720 * 240 175 hrs 206 hrs 411 hrs 636 hrs 291 hrs 343 hrs 685 hrs 1059 hrs 434 hrs 514 hrs 1028 hrs 1589 hrs 874 hrs 1028 hrs 2056 hrs 3178 hrs PDR-3160 User Manual... -
Page 60: Pdr-3160 Specifications
Chinese, English, Spanish, Italian, Japanese, French, Germany Consumption AC 90V~260V Max., 135W Operation Condition Temp: -10℃ ~ +60℃ / Humidity: 0%~80% Dimension 434 x 414 x 88 mm (2U) Weight 8Kg (HDD not included) Design and specifications are subject to change without notice. PDR-3160 User Manual... - Page 61 DISTRIBUTOR: 66-3160CSE-2 PDR-3160 User Manual...
Need help?
Do you have a question about the PDR-3160 and is the answer not in the manual?
Questions and answers