
Related Manuals for Faber CLAS30SS600-B


Summary of Contents for Faber CLAS30SS600-B
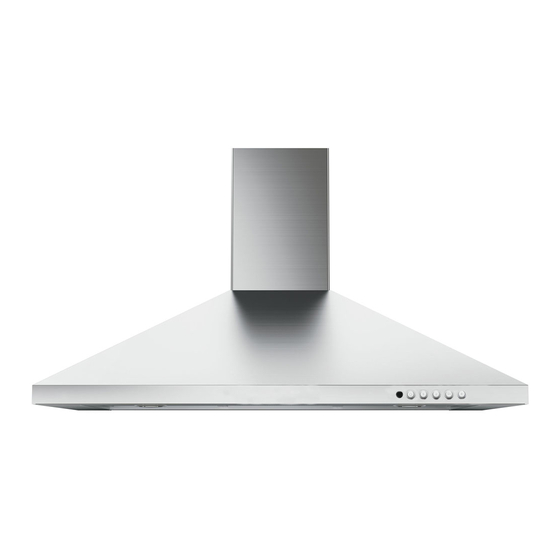
- Page 1 CLASSICA PLUS Installation Instructions Use and Care Information Instructions d'installation Utilisez et d'entretien CLAS30SS600-B CLAS36SS600-B CLAS30SS300-B CLAS36SS300-B...
- Page 2 READ AND SAVE THESE INSTRUCTIONS BEFORE YOU START INSTALLING THIS RANGEHOOD WARNING: - TO REDUCE THE RISK OF A RANGE TOP GREASE FIRE: a) Never leave surface units unattended at high settings. Boilovers cause smoking and greasy spillovers that may ignite. Heat oils slowly on low or medium setting. Suzette, Cherries Jubilee, Peppercorn Beef Flambé).
-
Page 3: Venting Requirements
When cutting or drilling into wall or ceiling, do not damage electrical wiring and other hidden utilities. Ducted fans must always be vented to the outdoors. ALL WALL AND FLOOR OPENINGS WHERE THE RANGEHOOD IS INSTALLED MUST BE SEALED. This rangehood requires at least 24" of clearance between the bottom of the rangehood and the cooking surface or countertop. - Page 4 WARNING • Electrical ground is required on this rangehood. • If cold water pipe is interrupted by plastic, nonmetallic gaskets or other materials, DO NOT use for grounding. • DO NOT ground to a gas pipe. • DO NOT have a fuse in the neutral or grounding circuit. A fuse in the neutral or grounding circuit could result in electrical shock.
-
Page 5: Rangehood Dimensions
RANGEHOOD DIMENSIONS Min. 24"... -
Page 6: Main Parts
MAIN PARTS Components Ref. Qty. Product Components Hood Body, complete with: Con- trols, Light, Filters, Blower. Telescopic Chimney comprising: 7.2.1 Upper Section Lower Section Damper ø 5 " Ref. Qty. Installation Components 7.2.1 Upper Chimney Section Fixing Brackets Screws 3/16" x 1 "... - Page 7 Only for Ducted Venting Installation Install Damper that is included with the Hood before connecting to the ductwork. Choose your ducting method Ducted Venting Options Installation Non Ducted - Recirculation Option 6" Vertical Requires Horizontal purchase of Activated Charcoal Accessory...
-
Page 8: Installation Instructions
Installation Instructions Draw a vertical line on the supporting wall as high as practical, at the center of the area in which the hood will be installed. that is a minimum of 24" above cooking surface. > 7.2.1 1/2” 1/2” Draw a horizontal line where indicated at the bottom edge of the vent hood at the desired height above the cooking surface. - Page 9 I = 6x O K ! L = 2x Installation screws provided must be secured Insert not completely the two screws 12a with wall plugs (purchase separately). shown. Ø Hook the hood body onto the screws and From inside the Hood body, mark the security screw completely.
- Page 10 Non-Ducted Recirculation Option Vertical or Horizontal Ducting Installation Only for the recirculation Install Roof or Wall Cap purchased the connection separately. Con- Ductless Divert- nect the 6" metal er (purchased separately) ductwork to the onto the Roof or Wall Cap hood body air and then attach outlet.
- Page 11 ELECTRICAL INSTALLATION WITH OPTIONAL WIRING BOX Direct Connect Wiring Box Accessory sku # WIREBOX with Listed rangehood Wiring Box kit (purchased separately) sku # WIREBOX, manufactured by Faber. For Non-Ducted Recirculation Option Attach each charcoal black grid on each side of the blower.
-
Page 12: For Best Results
USE AND CARE INFORMATION For Best Results rangehood to operate for several minutes after cooking is complete to clear all smoke and odors from the kitchen. T1. Fan Off Button:Turn the blower Off. The fan can be operated by pressing any of the fan setting buttons. - Page 13 • backwards) until it unlocks from the motor housing and pull off sideways. • the side of the blower and push it inward. Then LED LIGHTING UNIT • LED lights must be replaced by Faber factory authorized service.
- Page 14 Wiring Diagram 991.0379.495 H90_285 r1...
- Page 15 To obtain warranty service, contact the dealer from whom you purchased the range hood, or the local Faber distributor. If you cannot identify a local Faber distributor, contact us at (508) 358-5353 for the name of a distributor in your area.
- Page 16 VEUILLEZ LIRE ET CONSERVER LA PRÉSENTE NOTICE AVANT DE COMMENCER L'INSTALLATION DE LA HOTTE DE CUISINE AVERTISSEMENT:-POUR RÉDUIRE LE RISQUE D'UN FEU DE GRAISSE SUR LA TABLE DE a) Ne laissez jamais sans surveillance les éléments de la surface de cuisson à température élevée. Les bouillonnements excessifs peuvent provoquer de la fumée et les débordements de graisse b) Assurez-vous de toujours mettre en marche le ventilateur de la hotte lorsque vous cuisinez c) Nettoyez régulièrement les ventilateurs d'aspiration.
- Page 17 Lorsque vous faites une ouverture ou percez dans un mur ou le plafond, veillez à ne pas en- Un espace libre d'au moins 24 " est requis entre le bas de la hotte et la surface de d'installation de la surface de cuisson ou de la hotte fournie par le fabricant avant de pratiquer des ouvertures.
- Page 18 AVERTISSEMENT...
- Page 19 DIMENSIONS DE LA HOTTE Min. 24"...
-
Page 20: Pièces Principales
PIÈCES PRINCIPALES Composants Réf. Qté Composants du produit Bâti de la hotte, avec : Com- Cheminée télescopique comprenant : 7.2.1 Section supérieure Section inférieure Registre ø 5 " Réf. Qté Composants d'installation supérieure de la cheminée Vis 3/16" x 1 "... - Page 21 Pour installation avec ventilation canalisée uniquement Installez le registre inclus avec la hotte avant de la raccorder aux conduits. Choisissez la méthode de canalisation Sans canalisation - Option de Options d'installation avec recirculation ventilation canalisée 6" Verticale Exige Horizontale actif...
-
Page 22: Notice D'installation
Notice d'installation où la hotte sera installée. > 7.2.1 1/2” 1/2” " du plafond ou de la limite supérieure, en alignant les centres (encoche) avec la ligne de référence " de la ligne verticale). - Page 23 I = 6x O K ! L = 2x Insérez partiellement les deux vis 12a renforcées par des chevilles (achetées séparément). de la hotte, comme illustré. Ø...
- Page 24 Installation avec Option non canalisée avec canalisation verticale ou recirculation d'air horizontale Pour la version à recirculation Installez le clapet d'air uniquement, de toiture ou le cla- poussez à fond pet mural acheté séparément. Rac- recyclage (acheté cordez le conduit séparément) métallique de 6"...
- Page 25 INSTALLATION ÉLECTRIQUE AVEC BOÎTIER DE CONNEXION EN OPTION Boîtier de connexion directe, uniquement la trousse de boîtier de connexion (acheté séparément) fabriquée par Faber. Pour option non canalisée avec recirculation d'air noire de chaque côté du ventilateur. contre la grille noire de chaque côté...
-
Page 26: Pour De Meilleurs Résultats
INFORMATIONS POUR L'UTILISATION ET L'ENTRETIEN Pour de meilleurs résultats absorber toute la fumée et les odeurs de la cuisine. Tenez ce bouton enfoncé pendant 2 secondes pour activer la fonction de désactivation la vitesse sélectionnée précédemment. Utile pour contrer les émanations maximales de cuisson. - Page 27 • les sur le côté du ventilateur et poussez-les bien installé. Système D'éclairage À Del • Les ampoules DEL doivent être remplacées par un service d'entretien autorisé Faber.
- Page 28 Schéma de câblage 991.0379.495 H90_285 r1...
- Page 29 état de marche. Pour bénéficier de services prévus par la garantie, veuillez communiquer avec le détaillant auprès duquel vous avez acheté la hotte de cuisine, ou encore avec le distributeur Faber de votre région. Si vous n'êtes pas en mesure de localiser un distributeur Faber dans votre région, veuillez communiquer avec nous au 508-358-5353 pour connaître le nom d'un distributeur à...
Need help?
Do you have a question about the CLAS30SS600-B and is the answer not in the manual?
Questions and answers