
Related Manuals for Grundig Varixx UMS 4810 SPCD


Summary of Contents for Grundig Varixx UMS 4810 SPCD
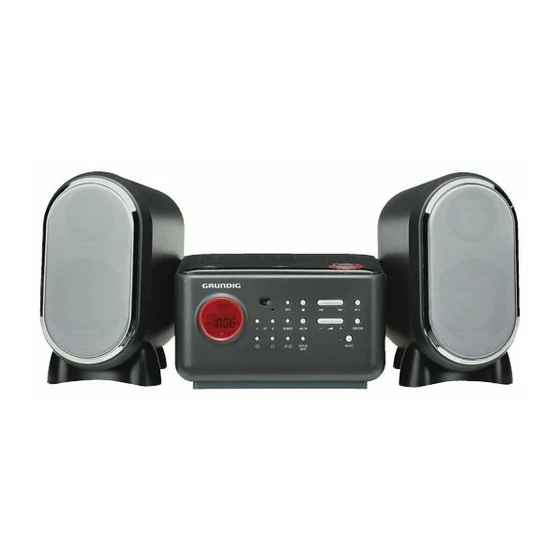
- Page 1 HIFI STEREO MICRO SYSTEM Varixx UMS 4810 SPCD DEUTSCH ENGLISH FRANÇAIS ITALIANO PORTUGUÊS ESPAÑOL...
- Page 2 CONTENTS ______________________________________________________ Set-up and safety Overview The hi-fi system controls Displays The back of the hi-fi system The bottom of the hi-fi system The remote control Connection and preparation Connecting the antennas Connecting the loudspeakers Connecting headphones Connecting the power cord Inserting back-up batteries Inserting batteries in the remote control Switching on and off...
-
Page 3: Table Of Contents
CONTENTS ______________________________________________________ Other modes Alarm mode Sleep timer mode Information Cleaning the CD unit Technical data General instructions for laser devices Troubleshooting... - Page 4 SET-UP AND SAFETY _____________________________________ Please note the following information when setting up the system: The hi-fi system is designed for the playback of audio signals. Any other use is expressly prohibited. If you want to set up the hi-fi system on wall shelves or in cupboards, please ensure that the device is adequately ventilated.
-
Page 5: General Information
OVERVIEW ______________________________________________________ The hi-fi system controls Controls on the front General information Switches the hi-fi system to and from standby mode. ON/OFF • Standby indicator. Lights up red in standby mode. Switches between the TUNER and CD input sources. FUNCTION Adjust the volume. - Page 6 OVERVIEW ______________________________________________________ CD mode Starts and pauses playback. Ends playback. 5 a s 6 Press briefly to select the next or previous file or track. Press and hold down to start a forward or reverse search. In MP3 mode: Quickly press twice to switch the files in steps of ten backwards or forwards.
- Page 7 OVERVIEW ______________________________________________________ Controls on the sides Headphone jack for connecting a headphone set with a jack plug (ø 3.5 mm) on the left side of the device; the speakers of the hi-fi system are automatically switched off. Displays In MP3 mode: shows the total number of files or the current file.
- Page 8 OVERVIEW ______________________________________________________ The back of the hi-fi system Socket for connecting the AM (medium wave) antenna. AM ANT Telescopic antenna for FM (VHF) reception. FM ANT ON OFF Switches the hi-fi off and from »OFF« to standby. The only way to fully disconnect the hi-fi from the mains supply is to pull the plug out.
-
Page 9: The Remote Control
OVERVIEW ______________________________________________________ The remote control Switches the hi-fi system to and from standby ON/OFF mode. FUNCTION Switches between the TUNER and CD input sources. In MP3 and CD-DA mode: opens and closes the CD compartment. In MP3 and CD-DA mode: starts and pauses playback. -
Page 10: Connecting The Antennas
CONNECTION AND PREPARATION ___________ Connecting the antennas The wire antenna provides adequate reception of local FM (VHF) regional stations. Do not shorten the wire antenna. A frame antenna is available for the reception of MW (medium wave) stations. Plug the wire frame antenna into the »AM ANT«... -
Page 11: Inserting Batteries In The Remote Control
CONNECTION AND PREPARATION ___________ Inserting batteries in the remote control Open the battery compartment by pressing the catch and removing the lid of the battery compartment. When inserting the batteries (2 x 1.5 V, type Mignon R6/UM3/AA), observe the polarity marked on the base of the battery compartment. -
Page 12: Additional Information For Units Sold In The Uk
“E”, earth symbol “ ”, coloured green, or green & yel- low. Replacement mains lead sets can be obtained from your local dealer, or by contacting Grundig Consumer Relations (01788 570088) Moulded 3-pin lead set, suitable for UK use: Ref: Leadset UK 8290-991-224... -
Page 13: Setting The Time
SETTINGS _________________________________________________________ Setting the time The first time you connect the hi-fi system to the mains, »0 : 00« appears in the display, prompting you to set the time. Press » « on the device. – Display: the hours flash. Set the hours using »–... - Page 14 SETTINGS _________________________________________________________ Press »FUNCTION« to select TUNER as the input source. Press »AM/FM« on the device to select the frequency band, press » « TUNING to select the station, and press » +« to select the alarm volume. – Press »ON/OFF« to switch the hi-fi system to standby. Note: You will be woken with the radio station at the set time.
-
Page 15: Selecting The Input Source
GENERAL FUNCTIONS __________________________________ Selecting the input source Press »FUNCTION« to select the input source (TUNER, or TAPE). – Display: » « or » «. TUNER Adjusting the volume Adjust the volume with » +«. – Muting This function enables you to mute the connected speakers. Press »p«... -
Page 16: Selecting The Cd Input Source
CD MODE ________________________________________________________ The hi-fi system is suitable for music CDs bearing the logo shown here (CD-DA), and for CD-Rs and CD-RWs with audio data or MP3 formats. In MP3 mode, the terms “album” and “file” are very important. “Album” corresponds to a folder on a PC, “File”... -
Page 17: Repeating The Current File Or Track
CD MODE ________________________________________________________ CD playback Press » II« to start playback. – Display: briefly »PLY«. – Playback always starts with the first file of the first album (MP3) or with the first track (CD-DA). – Display in MP3 mode: the number of the current file, the elapsed playing time of the file. -
Page 18: Creating A Track Memory
CD MODE ________________________________________________________ Repeating a file or a title (Repeat One) During playback, press » « on the remote control once. – Display: »REP ONE« is displayed in short intervals. – The current track is repeated. Press » « twice on the remote control to quit the function. –... - Page 19 CD MODE ________________________________________________________ Repeating the track memory Start the track memory by pressing » II«. – Display: »PRO PLAY« is displayed in short intervals. – Playback begins with the first programmed track. Press » « once on the remote control. –...
-
Page 20: Other Modes
OTHER MODES _______________________________________________ Alarm mode Checking the alarm time Check the alarm time (in stand-by, tuner or CD mode) by pressing and holding down »DISPLAY MODE« on the device until the set alarm time flashes. – Display: » « flashes. To end the display of the alarm time, press »DISPLAY MODE«... -
Page 21: Sleep Timer Mode
OTHER MODES _______________________________________________ Sleep timer mode The sleep timer switches the hi-fi system off at a preset time. The sleep timer works for the TUNER and CD input sources. Setting the sleep timer Call up the function by pressing » «... -
Page 22: Information
INFORMATION _______________________________________________ Cleaning the CD unit If the device is unable to scan CDs perfectly, use a standard, commer- cially available cleaning CD to clean the laser optics. Other cleaning methods may damage the laser optics. To clean CDs use a lint-free cloth and wipe them in a straight line from the centre of the disc outwards. -
Page 23: General Instructions For Laser Devices
INFORMATION _______________________________________________ General instructions for laser devices Your system is a CLASS 1 LASER PRODUCT. This means that the laser is designed in such a way as to ensure that the maximum permissible emission value cannot be exceeded under any circumstances. CLASS 1 Caution: LASER PRODUCT...
Need help?
Do you have a question about the Varixx UMS 4810 SPCD and is the answer not in the manual?
Questions and answers