Table of Contents
Advertisement
Advertisement
Table of Contents

Related Manuals for Grundig CIRFLEXX UMS 4100


Summary of Contents for Grundig CIRFLEXX UMS 4100
- Page 1 HIFI STEREO MICRO SYSTEM CIRFLEXX UMS 4100 ENGLISH...
-
Page 2: Table Of Contents
Special CD mode features Creating a track memory – playing back tracks in selected order Timer mode Switch-on timer Sleep timer Information Cleaning the CD unit, Technical data Additional information for units sold in the U.K. Rectifying minor problems GRUNDIG Service... -
Page 3: Set-Up And Safety
SET-UP AND SAFETY ______________________________________________ Please note the following information when setting up the system: This stereo system is designed for the playback of audio signals. Any other use is expressly prohibited. U M S 4 1 0 0 S T E R E O M I C R O H I F I S Y S T E M If you want to set up the stereo system on wall shelves or in cupboards, please V O L U M E ensure that the device is adequately ventilated. -
Page 4: Overview
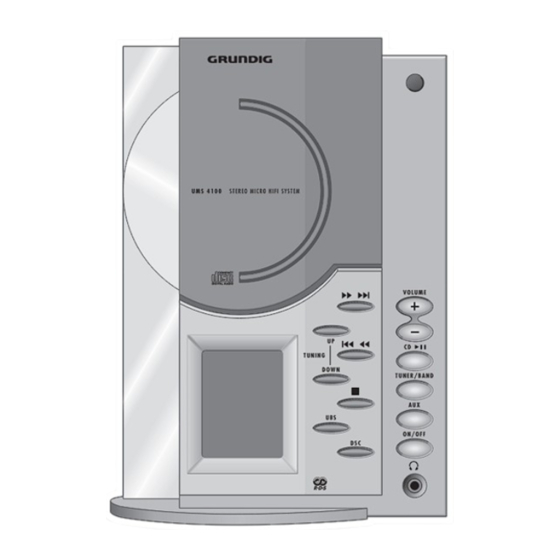
OVERVIEW _______________________________________________________________________ Operating controls of the stereo system Operating controls on the front General Switches the stereo system to and from ON/OFF stand-by mode. Infrared receiver for remote control sig- nals. U M S 4 1 0 0 S T E R E O M I C R O H I F I S Y S T E M Headphone jack for connecting a stereo headphone set with a jack plug (ø... - Page 5 OVERVIEW __________________________________________________________________________________ Select stored s s s 6 5 a § radio stations. CD mode Selects the »CD« input source. Starts and interrupts CD playback. Press briefly to select the next track. s s s 6 Hold down to look for a particular pas- sage.
- Page 6 OVERVIEW __________________________________________________________________________________ PROGR/RANDOM For setting the time manually. TIME Tuner mode Hold down to start the automatic PROGR/RANDOM TIME station search (ASP). Press briefly to stop the automatic station search. P R O G . / R A N D O M Press briefly to store a radio station.
-
Page 7: The Display On The Stereo System
OVERVIEW ________________________________________________________________________________ The display on the stereo system Displays the time and the RDS time update. 8888:888 The »JAZZ« sound setting is activated. JAZZ PRESET The bass boost is activated. -< TRACK In tuner mode it displays the frequency band, fre- 8888.888 quency, RDS time and radio text. - Page 8 OVERVIEW __________________________________________________________________________________ In CD mode: displays the total playing time and the 8888:888 current playing time. Displays playback of a CD. The CD playback is interrupted (Pause). PRESET Displays the number of CD tracks, the number of the 88 TRACK current track and the number of stored tracks.
-
Page 9: The Back Of The Stereo System
OVERVIEW __________________________________________________________________________________ The back of the stereo system FM ANTENNA Antenna socket for the rooftop antenna or the wire aerial supplied. AM ANTENNA Aerial terminals for the wire frame antenna supplied. Audio signal input for an external device. SPEAKER Connections for the loudspeakers supplied. -
Page 10: The Remote Control
OVERVIEW __________________________________________________________________________________ The remote control Switches the stereo system to and from stand-by mode. ON/OFF Selects the »CD« input source. Starts and interrupts CD play- ON/OFF back. In tuner mode: deletes individual preset stations. In CD mode: ends playback of the CD. TUNER/ BAND In tuner mode: selects stored radio stations. - Page 11 OVERVIEW __________________________________________________________________________________ In CD mode: plays a brief extract of all tracks on the CD. INTRO/REPEAT TIMER For repeating a track or the whole CD. For setting the ON/OFF timer. ON/OFF PROG./RANDOM In tuner mode: for storing radio stations. In CD mode: for storing a track memory. For playing TIME back titles in random order.
-
Page 12: Connection And Preparation
CONNECTION AND PREPARATION _______ Connecting the antenna Insert the rooftop antenna in the antenna socket » ANTENNA« on the stereo system. Note: If no rooftop antenna is available, use the auxiliary antenna supplied. This aerial provides reasonably good reception of local FM (VHF) stations. Do not shorten the auxiliary antenna. -
Page 13: Connecting Headphones
CONNECTION AND PREPARATION _______________________________________ Connecting headphones A U X U B S Insert the headphone plug (ø 3.5 mm) into the »0« socket on the front of O N / O F F D S C the stereo system. – The loudspeakers of the stereo system are switched off. Connecting the power cord Note: Check that the mains voltage on the type plate (on the back of the device) -
Page 14: Settings
SETTINGS ____________________________________________________________________________ Setting the clock The following settings can only be carried out in stand-by mode. To set the 12-hour format, briefly press » TIME«. – Display: »12HR« briefly, then the current time e.g. »PM 1:25« (»AM« for 1 2 5 the morning, »PM«... - Page 15 SETTINGS ____________________________________________________________________________________ The CT time signal is transmitted once every minute by the station. You must receive the RDS station for several minutes before the time information can be transferred to the stereo system. However, not every RDS station transmits the time signal.
-
Page 16: Tuning And Storing Radio Stations
SETTINGS ____________________________________________________________________________________ Tuning and storing radio stations Automatic station search (ASP) After the stereo system has been connected to the mains for the first time, the device searches in tuner mode on the FM waveband for the 40 stations with the PRESET strongest reception strength and stores them. - Page 17 SETTINGS ____________________________________________________________________________________ Manual station search To move the frequency forward in steps, briefly press »TUNING UP/DOWN« on the device several times. – The frequency changes in steps of 50 kHz. 8 7 6 5 Saving stations on channel positions Select the frequency band (FM or MW) by pressing the »TUNER/BAND« button.
-
Page 18: Deleting Settings
SETTINGS ____________________________________________________________________________________ Storing your favourite stations (Favourite Station Memory) Press »TUNING UP/DOWN« on the device to tune to the station you PRESET want to store. Press »PROGR« to activate the storing function. – Display: »PRESET« flashes for approximately 10 seconds. E N E R Select channel position 01 with »FSM«... -
Page 19: General Functions
GENERAL FUNCTIONS _________________________________________ Switching on and off Switch on the stereo system out of stand-by mode with »ON/OFF« – The last input source used is automatically selected. Note: The following buttons on the device can also be used to switch on the stereo system: »TUNER /BAND«... -
Page 20: Sound Settings
GENERAL FUNCTIONS ______________________________________________________________ Sound settings You can select between five different sound settings: You can select between » FLAT«, » CLASSIC«, » POP«, » JAZZ« and » ROCK« according to the type of music you are listening to. The basic setting is »FLAT«. PRESET Select the sound setting by pressing »DSC«. -
Page 21: Tuner Mode
TUNER MODE ________________________________________________________________ Selecting the tuner as the source PRESET Select the input source using the » /BAND« button. TUNER – The most recently selected station can be heard (Last Station Memory). – Display: e.g. »FM 100.60« or »ENERGY«. E N E R Selecting the preset position Select the frequency band (FM or MW) by pressing the »... - Page 22 TUNER MODE _____________________________________________________________________________ Automatic station search (ASP) By starting the automatic station search, you can delete all the existing preset stations and at the same time allocate new radio stations to them. Start the automatic search in tuner mode by pressing and holding down »PROGR«.
-
Page 23: Rds Station Service
TUNER MODE _____________________________________________________________________________ RDS station service RDS (Radio Data System) is an information system which is transmitted additio- nally by most FM stations. If the device is currently receiving an RDS station, it displays the station name, for example » FANTASY«, and » «. - Page 24 TUNER MODE _____________________________________________________________________________ Radiotext Some RDS stations provide Radiotext as additional information. Radiotext appe- ars as ticker text in the display. As this information is transmitted character by character, it may take some time before the text is received in full. PRESET Call up the radiotext by pushing »TEXT«...
- Page 25 TUNER MODE _____________________________________________________________________________ Radio traffic news Some RDS stations broadcast additional traffic news. If a such a station is being received, the » « symbol appears in the display. PRESET The EON (Enhanced Other Network) function is an additional RDS service with the help of which a station with traffic news is switched to automatically.
-
Page 26: Cd Mode
CD MODE ___________________________________________________________________________ Basic CD mode functions The stereo system is suitable for music CDs displaying the logo shown here or for CD-Rs with audio data. Always keep the CD compartment closed to prevent dust from collecting on the laser optics. Do not attach adhesive labels to CDs. Keep the surfaces of CDs clean. You can play standard 12 cm CDs as well as 8 cm CDs on your stereo system. - Page 27 CD MODE ____________________________________________________________________________________ CD playback Press »CD « to start playback. – Playback begins with the first track. TRACK – Display: » «, the current track number and the elapsed playing time of -< the title. The current track number flashes in the number field. 0 0 4 Playback stops at the end of the CD.
-
Page 28: Special Cd Mode Features
CD MODE ____________________________________________________________________________________ Special CD mode features Searching for a passage within a track During playback, press » « or » « and hold it down until 5 a § s s s 6 you find the passage you want to hear. Playback begins as soon as you let go of the »... - Page 29 CD MODE ____________________________________________________________________________________ Repeating a track (Repeat one) Press »CD « to start playback. Select the track you want to hear by pressing » « or » «. 5 a § s s s 6 Select the repeat function by pressing »REPEAT« once. TRACK -<...
-
Page 30: Creating A Track Memory - Playing Back Tracks In Selected Order
CD MODE ____________________________________________________________________________________ Creating a track memory – playing back tracks in selected order You can create a track memory of up to 32 tracks for the current CD in any order you choose and then play them back in that sequence. A track may be stored more than once. - Page 31 CD MODE ____________________________________________________________________________________ Changing the track selection To replace a stored track, keep pressing »PROGR« until its number appears in the display. TRACK -< Select the new track number with » « or » «. 5 a § s s s 6 p - - 0 4 Press »PROGR«...
-
Page 32: Timer Mode
TIMER MODE __________________________________________________________________ Your stereo system has two timer modes: – The switch-on timer, which switches the stereo system on and off at a pre-set time. – The sleep timer, which switches off the stereo system at a pre-set time. Switch-on timer Setting the switch-on timer Note:... -
Page 33: Sleep Timer
TIMER MODE ______________________________________________________________________________ If you select tuner as the input source, set the desired channel position with » « or » «. 5 a § s s s 6 Press »TIMER«. Set the desired volume using »+ VOLUME –«. Quit the settings with »TIMER«. Deactivating the switch-on timer To deactivate the switch-on timer, press »TIMER«... -
Page 34: Information
INFORMATION _____________________________________________________________ Cleaning the CD unit If the device is unable to scan CDs perfectly, use a standard commercially available cleaning CD to clean the laser optics. Other cleaning methods may damage the laser optics. To clean CDs use a lint-free cloth and wipe them in a straight line from the centre of the disc outwards. Do not use cleaning fluid for vinyl records or other solvents or scouring agents. -
Page 35: Additional Information For Units Sold In The Uk
In no circumstance must any of the wires be connected to the terminal marked with the letter “E”, earth symbol “ ”, coloured green, or green & yellow. Replacement mains lead sets can be obtained from your local dealer, or by contacting Grundig Consumer Relations (01788 570088) Moulded 3-pin lead set, suitable for UK use:... -
Page 36: Rectifying Minor Problems
INFORMATION __________________________________________________________________________ Rectifying minor problems Not every kind of sound interference is caused by a defect in your HiFi system. Impairment can also be caused by leads having been accidentally pulled out, damaged CDs and worn out batteries in the remote control. If the following measures do not bring about satisfactory results, consult an authorised dealer. -
Page 37: Grundig Service
GRUNDIG Service GRUNDIG Deutschland Ihre regionale Kundendienst-Stelle in Deutschland erreichen Sie unter: Telefon 0180/5 23 18 52* • Telefax 0180/5 23 18 46* *gebührenpflichtig GRUNDIG BELUX N.V. GRUNDIG IRELAND LTD. GRUNDIG PORTUGUESA GRUNDIG DANMARK A/S GRUNDIG AUSTRIA Ges.m.b.H. Deltapark, Weihoek 3, Unit 3G 2 Waverley Office Park, Old Comércio de Artigos Electróni-... - Page 38 Grundig AG Beuthener Str. 41 D-90471 Nürnberg http://www.grundig.com • • •...
Need help?
Do you have a question about the CIRFLEXX UMS 4100 and is the answer not in the manual?
Questions and answers