Table of Contents
Advertisement
Classic
F1100S/F3100L
™
Owners &
Installation Manual
Freestanding Woodstoves
F1100 Video
www.regency-fire.com
MODELS:
F1100S
F3100L
Tested by:
Installer: Please complete the details on the back cover
and leave this manual with the homeowner.
Homeowner: Please keep these instructions for future reference.
FPI FIREPLACE PRODUCTS INTERNATIONAL LTD. 6988 Venture St., Delta, BC Canada, V4G 1H4
919-537
09.14.15
Advertisement
Table of Contents

Related Manuals for Regency Fireplace Products F1100S


Summary of Contents for Regency Fireplace Products F1100S
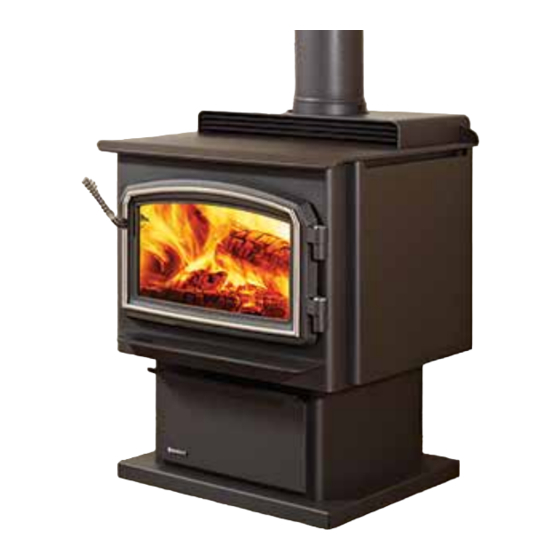
- Page 1 Classic F1100S/F3100L ™ Owners & Installation Manual Freestanding Woodstoves F1100 Video www.regency-fire.com MODELS: F1100S F3100L Tested by: Installer: Please complete the details on the back cover and leave this manual with the homeowner. Homeowner: Please keep these instructions for future reference.
- Page 2 Thank-you for purchasing a REGENCY FIREPLACE PRODUCT. The pride of workmanship that goes into each of our products will give you years of trouble-free enjoyment. Should you have any questions about your product that are not covered in this manual, please contact the REGENCY DEALER in your area. Keep those REGENCY FIRES burning. “This wood heater has a manufacturer set minimum low burn rate that must not be altered.
- Page 3 Modular Parts F1100 Video Regency F1100/F3100 Freestanding Woodstove...
-
Page 4: Table Of Contents
SAFETY LABEL Optional Accessories ...........20 Copy Of Safety Label For F1100S .........5 OPERATING INSTRUCTIONS Copy Of Safety Label For F3100L .........6 Seasoned wood ............22 DIMENSIONS Draft Control ..............23 Operating Instructions ..............23 F1100S Unit Dimensions ..........7 First Fire ..............23 F3100L Unit Dimensions ..........8... -
Page 5: Copy Of Safety Label For F1100S
COPY OF SAFETY LABEL FOR F1100S This is a copy of the label that accompanies We have printed a copy of the contents here NOTE: Regency units are constantly being each Regency Small Freestanding Woodstove for your review. -
Page 6: Copy Of Safety Label For F3100L
safety decal COPY OF SAFETY LABEL FOR F3100L This is a copy of the label that accompanies We have printed a copy of the contents here NOTE: Regency units are constantly being each Regency Large Freestanding Woodstove for your review. improved. -
Page 7: Dimensions
F1100S UNIT DIMENSIONS Classic Door Contemporary Door Regency F1100/F3100 Freestanding Woodstove... -
Page 8: F3100L Unit Dimensions
installation F3100L UNIT DIMENSIONS Classic Door Contemporary Door Regency F1100/F3100 Freestanding Woodstove... -
Page 9: Residential Installation
installation RESIDENTIAL 12) A chimney connector cannot pass through an fuels. For other types of chimneys check with attic or roof space, closet or similar concealed your local building code officials. Do not con- INSTALLATION space, or a floor, ceiling, wall or partition of fuse a chimney with a type “B”... -
Page 10: Minimum Clearance To Combustible Materials
NOTE: Be aware that local Codes and Regulations may override some clearances listed in this manual. Check with your local inspector. Residential Installation “C” Vent (Single Wall) Unit From Unit From Corner From Flue Center-line Small F1100S with Airmate 13" 11" 8" 25" 17.5"... -
Page 11: Floor Protection
NOTE: This clearance is also required for air space between the appliance and wall/ ceiling. From From Flue Min. Min.Hearth Unit Unit Center-line Width to Rear Wall Small F1100S with Airmate 11" 7" 23" 13.5" 46" 39" with Rear Deflector 13" 5"... -
Page 12: Stove Assembly Prior To Installation
installation Pedestal Assembly STOVE ASSEMBLY Small 073-925 PRIOR TO Large 063-925 INSTALLATION 1) For easier assembly, tip the stove on its back (onto a soft surface to prevent scratch- ing). All units require either the pedestal or 4 legs at- tached to the base. -
Page 13: Step By Step Chimney And Connector Installation
installation Leg and Bottom Shield Assembly STEP BY STEP 8) To complete your chimney installation, install the double wall connector pipe from the Bottom Shield CHIMNEY AND stove’s flue collar to the chimney support Small 850-121 device. Large 850-321 CONNECTOR 9) If you are using a horizontal connector, INSTALLATION Legs (set of 4) -
Page 14: Masonry Chimney
installation MASONRY CHIMNEY Ensure that a masonry chimney meets the mini- mum standards of the National Fire Protection Association (NFPA) by having it inspected by a professional. Make sure there are no cracks, loose mortar or other signs of deterioration and blockage. -
Page 15: Combustible Wall Chimney Connector Pass-Throughs
installation COMBUSTIBLE WALL CHIMNEY CONNECTOR PASS-THROUGHS Minimum chimney clearance to brick and combustibles 2 in. (50.8mm) Method A: 12" (304.8 mm) Clearance to Combustible Wall Member: Using a minimum thickness 3.5" (89 mm) brick and a 5/8" (15.9 mm) Minimum clearance minimum wall thickness clay liner, construct a wall pass-through. -
Page 16: Recommended Heights For Woodstove Flue
installation Draft is the force which moves air from the appliance up TABLE 1 through the chimney. The amount of draft in your chim- MINIMUM RECOMMENDED FLUE HEIGHTS IN FEET ney depends on the length (Measured from the top of the unit) of the chimney, local geog- raphy, nearby obstructions # OF ELBOWS... -
Page 17: Listed Components For Mobile Home Installation
installation LISTED COMPONENTS FOR MOBILE HOME INSTALLATION The Regency Small and Large Freestanding pedestal units are approved for installation in a Mobile Home if one of the following pipe systems is used. U.S. Installation* Canadian Installations* AMERI-TEC HS Qty.Part # Description 6DCC Connector... -
Page 18: Stainless Steel Smoke Deflector Adjustment / Replacement
installation STAINLESS STEEL SMOKE DEFLECTOR ADJUSTMENT / REPLACEMENT The stainless smoke deflector is located in the upper front area of the firebox. The deflector is held in place with 2 bolts Prior to the first fire, ensure deflector is seated properly and secured with 2 hand tightened bolts. Ensure defector is seated so bolts are situated at the top of the keyhole before tightening. -
Page 19: Brick Flue Baffle & Secondary Air Tube Installation
BRICK FLUE BAFFLE & Small Stove F1100S SECONDARY AIR TUBE 1) If the two air tubes are installed continue on to Step 2), if not, follow the instructions below. INSTALLATION Install the air tube into the holes in the side channels. -
Page 20: Screen Door
installation BRICK INSTALLATION Firebrick is included to extend the life of your stove and radiate heat more evenly. Check to see that all firebricks are in their correct positions and have not become misaligned during shipping. Handle The "AD" brick in the drawings above is the brick covering the Ash Dump hole that is used when the Ash Drawer Kit is installed (refer to Handle at 10 o'clock position. - Page 21 installation Pedestal Ash Drawer Kit (850-100) Blower/Fan (846-515) 1) Remove the bricks from the floor of the 1) Remove the two screws from the top of the fan firebox. housing. 2) If using ashdrawer, discard cover plate. 2) Slide the fan up into the rear heat shield. 3) Remove the ash dump cover plates (one 3) After aligning holes, secure the fan to the rear inside the firebox and one on the underside...
-
Page 22: Operating Instructions
operating instructions SEASONED WOOD Whether you burn wood in a fireplace, stove or insert, good quality firewood is the key to convenience, efficiency and safety. Wet wood and pieces that are not the right size and shape for your wood burner can be frustrating, burn inefficiently and deposit creosote that can fuel a dangerous chimney fire. Good planning, seasoning and storage of the firewood supply are essential to successful wood burning. -
Page 23: Draft Control
operating instructions OPERATING 8) Do not place anything on the stove top during WARNING the curing process. This may result in damage INSTRUCTIONS Fireplace Stoves equipped with to your paint finish. doors should be operated only with doors fully closed. If doors are left With your unit now correctly installed and safety 9) During the first few days it may be more difficult partly open, gas and flame may be... -
Page 24: Fan Operation
operating instructions 6) Do not permit creosote or soot build-up in the removed through the door opening. 17) If you burn the unit too slowly or at too low chimney system. Check and clean chimney at a setting your unit will not be operating as regular intervals. -
Page 25: Maintenance
maintenance DOOR GASKET LATCH ADJUSTMENT MAINTENANCE If the door gasket requires replacement 7/8" diameter The door latch may require adjustment as the door It is very important to carefully maintain your fire- material must be used. Regency uses AMATEX # 10- gasket material compresses after a few fires. -
Page 26: Parts List
parts list F1100 & F3100 STOVE MAIN ASSEMBLY WITH CLASSIC DOOR Part # Description Part # Description 910-157/P Fan/Blower Motor (120 V) 850-141 Door Assy - Black F1100 063-954 Air Tube - 1" F3100 (Qty:1) 850-143 Door Assy - Nickel Accent F1100 074-954 Air Tube - 1"... -
Page 27: F1100 & F3100 Stove Main Assembly With Contemporary Door
parts list F1100 & F3100 STOVE MAIN ASSEMBLY WITH CONTEMPORARY DOOR Part # Description Part # Description 850-161 Door Assy - Black F1100 074-954 Air Tube - 1" F1100 (Qty: 1) 850-171 Door Assy - Black F3100 033-953 Air Tube - 3/4" F1100 (Qty: 1) 063-953 Air Tube - 3/4"... -
Page 28: Pedestal, Bottom Shield & Leg Options
parts list PEDESTAL, BOTTOM SHIELD & LEG OPTIONS Part # Description 073-925 Pedestal - Small 063-925 Pedestal - Large 904-257 Large Magnet Catch Knockout - Pedestal 850-100 Ashdrawer Kit - Pedestal Ashdrawer - Pedestal Ashdrawer Lid Assy 942-110 Ash Plug 820-249 Ash Plug Tool Handle 850-121... -
Page 29: Firebrick
parts list FIREBRICK Part # Description 073-960 F1100 Brick Set - Complete 063-960 F3100 Brick Set - Complete 902-111 Brick - Regular Full Size: 1-1/4" x 4-1/2" x 9" Brick Partial: 1-1/4" x 4" x 9" Brick Partial: 1-1/4" x 2" x 4-1/2" Brick Partial: 1-1/4"... - Page 30 notes 30 | Regency F1100/F3100 Freestanding Woodstove...
-
Page 31: Warranty
Wood Stoves and Inserts Warranty 2015 Regency Fireplace Products are designed with reliability and simplicity in mind. In addition, our internal Quality Assurance Team carefully inspects each unit thorough- ly before it leaves our door. FPI Fireplace Products International Ltd. is pleased to extend this limited lifetime warranty to the original purchaser of a Regency Product. - Page 32 Register your Regency warranty online ® www.regency-fire.com Reasons to register your product online today! • View and modify a list of all your registered products. • Request automatic email notification of new product updates. • Stay informed about the current promotions, events, and special offers on related products.
Need help?
Do you have a question about the F1100S and is the answer not in the manual?
Questions and answers