
Subscribe to Our Youtube Channel
Related Manuals for Rinnai REU-V1616WF


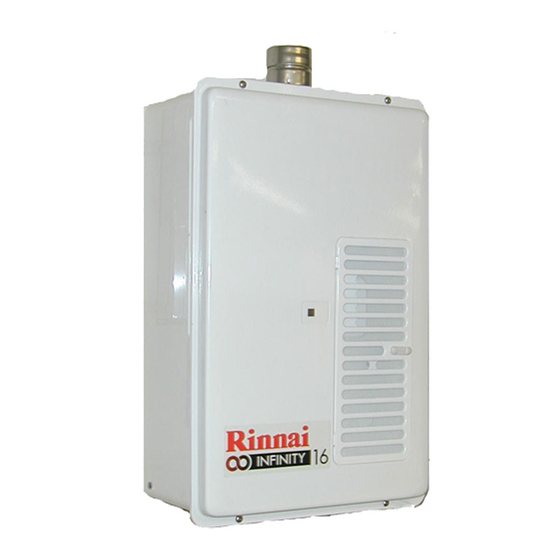
Summary of Contents for Rinnai REU-V1616WF
- Page 1 REU-V1616WF INFINITY 16 FE Internal SERVICE MANUAL Rinnai High Capacity Continuous Flow Gas Hot Water System...
- Page 2 All Rinnai products are certified by the Australian Gas Association as compliant to relevant Australian Standards. Rinnai Australia Head Office is certified as complying with ISO 9001 by SAI Global. Rinnai New Zealand has been certified to ISO 9001 Quality Assurance by Telarc.
- Page 3 Produced by Technical Services Department September 2003 - Issue 1. No portion or part of this manual may be copied without prior permission from Rinnai Australia. Rinnai Australia takes no responsibility for the accuracy or otherwise of information contained in this manual, and reserves the right to make modifications and change specifications without notice.
-
Page 4: Table Of Contents
18. Gas Pressure / Gas Conversion Procedure ............. 33 19. Dismantling for Service ..................34 20. Exploded Diagram ....................42 21. Parts List ........................ 46 SERVICE CONTACT POINTS ................50 Infinity REU-V1616WF Issue 1 - 21/11/03 ©Rinnai - iv -... -
Page 5: Glossary Of Terms And Symbols
ø diameter ∆ temperature rise above ambient modulating valve thermal efficiency thermistor temperature of incoming water temperature of outgoing water Infinity REU-V1616WF Issue 1 - 21/11/03 ©Rinnai - v -... -
Page 6: Introduction
1. Introduction The Rinnai V-Series hot water units represents the latest technology in continuous flow, temperature controlled hot water. Features • The Infinity 16 NEVER RUNS OUT of hot water. Whilst electricity, water and gas supplies are connected, hot water is available whenever hot water taps are open. -
Page 7: Specifications
Max. / Min.) Note 1: The default factory setting is 55ºC for REU-V1616WF. The unit can be ordered from Rinnai to be pre-set to any of the other temperatures listed. The unit can be pre-set to any of the temperatures listed by a suitably qualified person. -
Page 8: Sensors And Safety Devices
0.22 0.92 * * The TPP is measured with the cover off the appliance at the regulator test point with supply pressures of 1.13 kPa (NG) and 2.75 kPa (Propane). Infinity REU-V1616WF Issue 1 - 21/11/03 ©Rinnai - 3 -... -
Page 9: Water Flow Rates And Pressures
Water Flows can also be calculated by the following formula : Q = Heat energy available in kW = 28 kW for the REU-V1616WF °... - Page 10 Table 1: Approximate Water Flows and Gas Usage Table - REU-V1616WF Infinity REU-V1616WF Issue 1 - 21/11/03 ©Rinnai - 5 -...
-
Page 11: Water Pressure
As seen in the table below a minimum supply pressure of 90 kPa is required to operate at the rated flow of 16 L/min. In an actual installation, pressure losses in the plumbing system also need to be considered to determine the minimum supply pressure. Infinity REU-V1616WF Issue 1 - 21/11/03 ©Rinnai - 6 -... -
Page 12: Dimensions
4. Dimensions 10 ~ 45 (adjustable) 24.5 CABLE ACCESS COLD WATER INLET HOT WATER OUTLET GAS CONNECTION A DIMENSION CONNECTION (mm) (20mm) COLD (15mm) (15mm) CABLE ACCESS Infinity REU-V1616WF Issue 1 - 21/11/03 ©Rinnai - 7 -... -
Page 13: Installation
Install the Rinnai Infinity WF (FE) Flueing system in accordance with the instructions supplied with the flue terminal. The Rinnai REU-V1616WF can only be installed with the Rinnai approved WF Flue system. Non Rinnai Flueing systems must not be used. -
Page 14: Important Installation Notes
200°C. The flue terminal is to terminate in a location, not to cause a nuisance. The Rinnai REU V1616WF is a fan-assisted appliance; use the fan-assisted clearances in AS5601/AG601 Clause 5.13.6.5 All Flue MUST be supported and be independent of the appliance in accordance with AS5601/AG601 Clause 5.13.4.2 and 5.13.4.3. -
Page 15: Condensate Drain
The condensate trap will collect condensate from the flue system. This condensate must be drained to the outside of the building via a condensate drain pipe. In accordance with the installation instructions supplied with the flue terminal. Infinity REU-V1616WF Issue 1 - 21/11/03 ©Rinnai - 10 -... -
Page 16: Remote Controls
Controllers are supplied with 15 m of electrical cable. The cable wires for connection to the appliance are fitted with spade terminals. Extension cables are available from Rinnai. Alternatively, a two core sheathed (double insulated) flex with minimum cross-sectional area of 0.5 mm² can be used. Maximum cable length is 50 m. - Page 17 Connect cord anchorage clip to controller wire. 5. Replace cover of the appliance, ensuing that the screw with the star washer is placed at the bottom right hand corner for earthing purposes. fig.1. Infinity REU-V1616WF Issue 1 - 21/11/03 ©Rinnai - 12 -...
- Page 18 STEP 1 for the controller moved from the kitchen to the bathroom. Then perform STEP 1 for the controller moved from the bathroom to the kitchen. Infinity REU-V1616WF Issue 1 - 21/11/03 ©Rinnai - 13 -...
-
Page 19: Cutaway Diagram
7. Cutaway Diagram Infinity REU-V1616WF Issue 1 - 21/11/03 ©Rinnai - 14 -... -
Page 20: Operational Flow Chart
8. Operational Flow Chart Infinity REU-V1616WF Issue 1 - 21/11/03 ©Rinnai - 15 -... -
Page 21: Operation Principles
When water flow stops, the water flow sensor stops rotating and the pulse signal to the PCB stops. The PCB then causes the main solenoid and solenoid valves to close and the burner is extinguished. The combustion fan will continue to operate for some time to purge the combustion chamber. Infinity REU-V1616WF Issue 1 - 21/11/03 ©Rinnai - 16 -... -
Page 22: Main Components
• The three changeover solenoid valves direct gas to each of the two burner banks independantly. Any one or two or both of the solenoid valves may be open during operation. • Gas flow is modulated between 20 and 125 MJ/hr for REU-V1616WF by a combination of the modulating valve and changeover solenoid positions. - Page 23 Valve heater 92094010 U250-1552 Heater mounting bracket 92086123 AU100-721 Heater mounting bracket 92076123 AU195-675 *Note: Anti-frost wiring loom is supplied with two factory fitted heating elements. Fig. 1. Fig. 2. Infinity REU-V1616WF - 18 - Issue 1 - 21/11/03 ©Rinnai...
-
Page 24: Time Charts
11. Time Charts Normal Combustion Mis-Ignition / Flame Failure Abnormal Pre-Purge (Air Supply/Exhaust Blockage) IInfinity REU-V1616WF Issue 1 - 21/11/03 ©Rinnai - 19 -... -
Page 25: Wiring Diagram
12. Wiring Diagram Infinity REU-V1616WF Issue 1 - 21/11/03 ©Rinnai - 20 -... -
Page 26: Dip Switch Settings
13. Dip Switch Settings Dip Switch Settings REU-V1616WF Dip Switches explained Gas Pressure Settings Bank 1 Bank 2 Gas Type Temperatures Forced Low Combustion Bank 2 Bank 2 Computer programming 60 Minute Timer operation Gas Pressure Settings Forced High Combustion... -
Page 27: Fault Finding
(page 25) (page 31) Dismantling for Service Detailed information on how to remove and replace components. (page 34) Infinity REU-V1616WF Issue 1 - 21/11/03 ©Rinnai - 22 -... - Page 28 Cannot adjust the hot water temperature via the controller(s) - only if 4. Check water flow servo. controller(s) fitted. 1. Check anti-frost heater components Anti-frost heater does not operate. 2. Check frost sensing switch Infinity REU-V1616WF Issue 1 - 21/11/03 ©Rinnai - 23 -...
-
Page 29: Component Circuit Value Table
Over Heat Switch R-Bk Igniter Gy-Gy AC90~110V DC80~100V Main Solenoid Valve P-Bk 1.3~1.6k DC80~100V Solenoid Valve 1 B-Bk 1.7~2.1k DC80~100V Solenoid Valve 2 Y-Bk 1.7~2.1k AC90~110V 11~13k Transformer B-Br 31~36k Infinity REU-V1616WF Issue 1 - 21/11/03 ©Rinnai - 24 -... -
Page 30: Component And Circuit Checks
Faulty: Replace PCB. b.) Disconnect connector (J ) and measure resistance between both terminals of the sparker. Ω Normal: 1M If not sparking, adjust or replace ignition plug. Faulty: Replace Sparker. Infinity REU-V1616WF Issue 1 - 21/11/03 ©Rinnai - 25 -... - Page 31 If normal,, proceed to Faulty: Replace Solenoid Valve 2. Measure voltage between Orange and Black of Solenoid Valve connector. Normal: DC80~100V If normal, proceed to Thermal fuse Circuit. Faulty: Replace PCB. Infinity REU-V1616WF Issue 1 - 21/11/03 ©Rinnai - 26 -...
- Page 32 Normal: Voltage AC100~160V If normal, replaced PCB Faulty: Replace Flame Rod. c.) Check if the Flame Rod is securely fitted. Normal: replace the PCB Faulty: Adjust the fitting of the Flame Rod Infinity REU-V1616WF Issue 1 - 21/11/03 ©Rinnai - 27 -...
- Page 33 Measure voltage between Yellow - Black of relay connector (B Normal: DC 4~7V Faulty: Replace water flow sensor. Note: For controller readout of water flow whilst operational refer maintenance monitor. Infinity REU-V1616WF Issue 1 - 21/11/03 ©Rinnai - 28 -...
- Page 34 Faulty: Replace the Hot water Outlet Thermistor. Note: For controller readout of thermistor temperature whilst operational refer maintenance monitor (chapter 17) No. 2. Disconnect relay connector (B ) and measure resistance White -White. Infinity REU-V1616WF Issue 1 - 21/11/03 ©Rinnai - 29 -...
-
Page 35: Remote Control
Faulty: Because normal voltage is not given due a short circuit, despite the PCB being in normal state, check Water Flow Servo circuit. If solution is not given from the above replace PCB. Infinity REU-V1616WF Issue 1 - 2/12/03 ©Rinnai - 30 -... -
Page 36: Maintenance Monitor / Error History
(rpm) = (Hz) x15 Remote control connection none 0 or 1 *Note 2 *Note 2 Remote Control Connections Bathroom Remote Controls connected Display “0” Additional remote Kitchen remote “1” “0 1” Infinity REU-V1616WF - 31 - Issue 1 - 21/11/03 ©Rinnai... - Page 37 Clock display. To return to normal operation. • Press the ON/OFF button again while holding the Water Temperature “UP” (Hotter) button. • This feature will automatically shut down after 3 minutes. Infinity REU-V1616WF - 32 - Issue 1 - 21/11/03 ©Rinnai...
-
Page 38: Gas Pressure / Gas Conversion Procedure
15. Restore the plastic PCB cover. 92095462 Damper A (Prop.): U243-314-A 92095470 Damper E (NG): U243-314-E 16. Check for leaks from gas control (assy), manifold connection and pressure test point. Infinity REU-V1616WF Issue 1 - 2/12/03 ©Rinnai - 33 -... -
Page 39: Dismantling For Service
13. “Removal of the Thermal Fuse”......... 41 Unless otherwise stated, re-assembly is the reverse of dismantling. Infinity REU-V1616WF Issue 1 - 21/11/03 ©Rinnai - 34 -... -
Page 40: Removal Of The Front Panel
Removal of PCB Unit a. Disconnect earth (1 screw). b. Disconnect harness from the terminal (2 screws). c. Dislodge hook and remove the PCB unit 1 screw). • EMC sub board Infinity REU-V1616WF Issue 1 - 21/11/03 ©Rinnai - 35 -... -
Page 41: Remove Of Transformer
Remove the transformer from bracket (2 screws) Removal of the Manifold & Burner unit. a. Remove ignition lead (black) and flame rod (Yellow). b. Remove the manifold (9 screws + 2 ignition leads). • Transformer Infinity REU-V1616WF Issue 1 - 21/11/03 ©Rinnai - 36 -... -
Page 42: Removal Of The Gas Control
Take out the gas control from body and remove connector of modulation valve, (Pink-Pink). • Main valve (Pink-Blk). • Solenoid valve 1 (Blue-Blk) and solenoid valve 2 (Ylw-Blk). • Gas Control (Assy). Infinity REU-V1616WF Issue 1 - 21/11/03 ©Rinnai - 37 -... -
Page 43: Removal Of The Flame Rod And Ignition Plug
Remove thermistor screws (1 screw). b. Disconnect and remove the connector. (White- White). • Flame rod • Electronic gasket • Electrode holder • Ignition lead • Ignition target • Outgoing water thermistor. Infinity REU-V1616WF Issue 1 - 21/11/03 ©Rinnai - 38 -... -
Page 44: Removal Of The Water Flow Servo
Pull off 6 pin connector of the water flow servo. (Red, Black, Yellow, Brown, Blue). e. Take out water flow servo with sensor. • Water Flow servo with flow sensor. Infinity REU-V1616WF Issue 1 - 21/11/03 ©Rinnai - 39 -... -
Page 45: Removal Of The Heat Exchanger
Remove inlet water connection tube (1 screw). c. Remove outgoing water connection tube. (1 screw). a. Remove top panel sealing plate (2 screws). d. Take out heat exchanger. b. Remove heat exchanger mounting screws. (2 screws). Infinity REU-V1616WF Issue 1 - 21/11/03 ©Rinnai - 40 -... -
Page 46: Removal Of The Thermal Fuse
Remove the thermal fuse. Heat Exchanger Centre Note: After replacing, install the thermal fuse as in the following diagrams. Heat Exchanger Right c. Remove one (1) screw of the bi-metal overheat switch. Infinity REU-V1616WF Issue 1 - 21/11/03 ©Rinnai - 41 -... -
Page 47: Exploded Diagram
20. Exploded Diagram Infinity REU-V1616WF Issue 1 - 21/11/03 ©Rinnai - 42 -... - Page 48 Infinity REU-V1616WF Issue 1 - 21/11/03 ©Rinnai - 43 -...
- Page 49 Infinity REU-V1616WF Issue 1 - 21/11/03 ©Rinnai - 44 -...
- Page 50 Infinity REU-V1616WF Issue 1 - 21/11/03 ©Rinnai - 45 -...
-
Page 51: Parts List
202-128-000 116 ELECTRODE AU168-321 92072917 202-129-000 117 ELECTRODE, Fr U243-216 92093913 230-056-000 118 HOLDER, Electrode AH43-262 506-153-000 119 SLEEVE, Electrode AU206-218 92087030 518-035-000 125 HEAT EXCHANGER, Assy U243-903-S 92093921 314-469-000 - 46 - Issue 1 - 20/07/05 ©Rinnai Infinity REU-V1616WF... - Page 52 705 LEAD, High Tension U243-1167 537-0163000 706 SENSOR, MR M8D1-10-4 92092279 243-072-000 ET-293-2 92093970 224-333-000 708 BRACKET, Transformer U243-1166 537-0162000 709 EMC BOARD, Assy U250-1602 92093699 210-605-000 710 HARNESS, Solenoid Valve U243-604 290-0213000 - 47 - Issue 1 - 20/07/05 ©Rinnai Infinity REU-V1616WF...
- Page 53 827 O-RING M10B-2-12.5 92072800 520-255-010 828 O-RING M10B-2-14 92062207 520-193-010 829 O-RING M10B-2-16 92062199 520-048-010 830 O-RING M10B-2-18 92071182 520-049-010 888 CUSTOMER INST. U243-1190 623-915-600 889 INSTALLATION INST. U243-1185 K23-915-600 - 48 - Issue 1 - 20/07/05 ©Rinnai Infinity REU-V1616WF...
- Page 54 Notes Infinity REU-V1616WF Issue 1 - 21/11/03 ©Rinnai...
-
Page 55: Service Contact Points
NEW ZEALAND LTD. Internet: www.rinnai.co.nz E-mail: sales@rinnai.co.nz Head Office, New Zealand 691 Mt. Albert Road, Royal Oak, Auckland P O Box 24-068 Tel: (09) 625 4285 Fax: (09) 624 3018 24 hr Service Tel: 0800 746624 (0800 Rinnai) REU-V1616WF 2003...
Need help?
Do you have a question about the REU-V1616WF and is the answer not in the manual?
Questions and answers