Rinnai RH180 Operation And Installation Manual
Automatic circulating tank water heater
Hide thumbs
Also See for RH180:
- Installation fundamentals (70 pages) ,
- Operation and installation manual (44 pages) ,
- Technical data sheet (8 pages)
Table of Contents
Advertisement
Quick Links
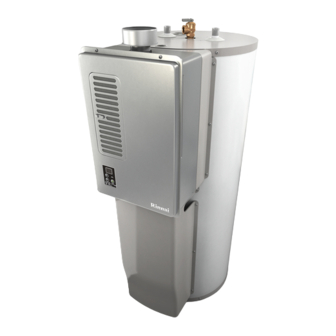
Hybrid Tank-Tankless Water Heater
READ ALL OF THE INSTRUCTIONS THOROUGHLY BEFORE INSTALLING OR OPERATING THIS WATER HEATER.
This manual provides informa on on the installa on, opera on, and maintenance of the water heater. For proper opera on and
safety, it is important to follow the instruc ons and adhere to the safety precau ons.
A licensed professional must install the water heater according to the exact instruc ons on pages 4-30.
The consumer must read the en re manual to properly operate the water heater and to have regular maintenance performed.
WARNING
— Do not store or use gasoline or other flammable vapors and liquids in the vicinity of this or any other
appliance.
— WHAT TO DO IF YOU SMELL GAS
Do not try to light any appliance.
Do not touch any electrical switch; do not use any phone in your building.
Immediately call your gas supplier from a neighbor's phone. Follow the gas supplier's instruc ons.
If you cannot reach your gas supplier, call the fire department.
— Installa on and service must be performed by a licensed professional.
AVERTISSEMENT
— Ne pas entreposer ni u liser d'essence ou ni d'autres vapeurs ou liquids inflammables à proximité de
cet appareil ou de tout autre appareil.
— QUE FAIRE SI VOUS SENTEZ UNE ODEUR DE GAZ :
• Ne pas tenter d'allumer d'appareil.
• Ne touchez à aucun interrupteur ; ne pas vous servir des téléphones se trouvant dans le bâ ment.
• Appelez immédiatement votre fournisseur de gaz depuis un voisin. Suivez les instruc ons du
fournisseur.
• Si vous ne pouvez rejoindre le fournisseur, appelez le service des incendies.
—L'installa on et l'entre en doivent être assurés par un installateur ou un service d'entre en qualifié ou
par le fournisseur
This en re manual must be le for the consumer. The consumer must read and
refer to this manual for proper opera on and to maintain the water heater.
If the informa on in these instruc ons is not followed exactly, a fire or explosion
may result causing property damage, personal injury or death.
Assurez-vous de bien suivre les instruc ons données dans ce e
no ce pour réduire au minimum le risque d'incendie ou d'explosion
ou pour éviter tout dommage matériel, toute blessure ou la mort.
Automa c Circula ng Tank Water Heater
(Chauffe-eau
à circula on automa que
Opera on and Installa on Manual
RH180 (REU-VA1320WF-US)
FOR INDOOR APPLICATIONS ONLY
ANSI Z21.10.3 ● CSA 4.3-(2011)
)
Advertisement
Table of Contents

Related Manuals for Rinnai RH180


Summary of Contents for Rinnai RH180
- Page 1 à circula on automa que Hybrid Tank-Tankless Water Heater Opera on and Installa on Manual RH180 (REU-VA1320WF-US) FOR INDOOR APPLICATIONS ONLY ANSI Z21.10.3 ● CSA 4.3-(2011) This en re manual must be le for the consumer. The consumer must read and refer to this manual for proper opera on and to maintain the water heater.
-
Page 2: Table Of Contents
If you have any ques ons or feel that the manual is incomplete contact Rinnai at 1-800-621-9419 Safety Defini ons This is the safety alert symbol. -
Page 3: Safety Behaviors And Prac Ces For The Consumer And Installer
Force or a empted repair may result in Code d’installa on du gaz natural et du propane, CSA- a fire or explosion. B149.1.) WARNING—Follow instruc ons for proper installa on. (AVERTISSMENT—Suivre les instruc ons pour une installa on appropriée.) RH180 Manual... - Page 4 (INFLAMMABLE) of this or any other appliance POUR VOTRE SECURITE Ne pas entreposer ni u lizer d’essence ni d’autres vapeurs ou liquids inflammables à proximité de cet appareil ou de tout autre Flammable Vapors appareil. (Les Vapeurs Inflammables) RH180 Manual...
- Page 5 Failure to properly vent this appliance can result in death, personal injury and/or property damage. Every home should have a carbon monoxide (CO) alarm in the hallway near bedrooms in each sleeping area. Check ba eries monthly and replace them annually. RH180 Manual...
-
Page 6: Installa On Instruc Ons
A licensed professional must install the appliance, DO NOT inspect it, and leak test it before use. The warranty Do not install the RH180 outdoors. will be voided due to improper installa on. Do not install the appliance in an area where water... - Page 7 Single gang electrical as chlorine or bleach that produce fumes. These fumes can damage components and reduce the life Pipe insula on of your appliance. Wire nuts Electrical wire and conduit per local code Unions and drain valves RH180 Manual...
-
Page 8: Determine Installa On Loca On
* Source: Part 143 Na onal Secondary Drinking Water Regula ons If you install this water heater in an area that is known to have hard water or that causes scale build- up the water must be treated and/or the heat exchanger flushed regularly. RH180 Manual... -
Page 9: Installa On Loca On
Do not obstruct the opera on of the pressure relief valve. e. Obtain new warning labels from the manufacturer to place on the blanket, directly over the exis ng labels. Frequently inspect the blanket to ensure the insula on blanket has not been disturbed. RH180 Manual... -
Page 10: Checklist To Determine Loca On
Fuel Gas Code, ANSI Z223.1/NFPA 54, or the Natural Gas and Propane Installa on Code, CSA B149.1. □ Leave the en re manual taped to the water heater or give the en re manual directly to the consumer. RH180 Manual... -
Page 11: Minimum Clearances
Clearance to be in accordance with local installa on codes and the requirements of the gas supplier. (Dégagement conforme aux codes d’installa on locaux et aux exigencies due foumisseunde gaz.) 0” Min 0” Min 0” Min 12” Min 4” Min RH180 Manual... -
Page 12: Typical Installa On Illustra On
Drain Pan M Temperature-Pressure Relief Valve Discharge Pipe (do not cap, plug, or reduce ) MIXING VALVE INSTALLATION Drip Leg (Sediment Trap) Gas Union Gas Control Valve Thermosta c Mixing Valve Non-Tempered Return Line Non-Tempered Supply Line Field Supplied RH180 Manual... -
Page 13: Combus On Air Requirements
Outside air openings should be sized the same as for a confined space. (10.6m) (7.6m) (7.6m) Unconfined Space Unconfined Space 91,300 BTU Water Heater and a 100,000 BTU Furnace RH180 Manual... - Page 14 Outdoor air can be provided to a confined space Combus on air provided to the appliance should not be taken from any area of the structure that may produce a nega ve pres- sure (i.e. exhaust fans, powered ven la on fans). RH180 Manual...
- Page 15 1 in /4000 Btu/hr (550 mm kW) of total input ra ng of all appliances in the confined space. Combus on air to the appliance can be provided from a well ven lated a c or crawl space. RH180 Manual...
-
Page 16: Ven Ng Requirements
Exis ng gas vent or chimney is to be checked to ensure they meet clearances and local codes. The RH180 can ONLY be connected to a manufactured chimney or vent that complies with a recognized standard. Ven ng into a masonry or concrete chimney... - Page 17 MIN. ¼ inch rise Double Walled, B-Vent: It is acceptable to pass per foot through walls or par ons with double walled, B- Vent. Slope: Vent connectors must pitch ¼ inch per foot (21mm per meter) upward. RH180 Manual...
- Page 18 All gas vents shall extend through the roof flashing, roof jack, or roof thimble and terminate with a listed cap or listed roof assembly. The gas vent shall terminate at least 3 (0.9m) above any forced air inlet located within 10 (3.0m) RH180 Manual...
- Page 19 CSA-B149.1 & .2 for proper installa on prac ces. If you are unsure or need assistance in correct applica on of a common vent installa on consult the local gas authority for assistance in the vent system design. RH180 Manual...
-
Page 20: Checklist For Combus On Air And Ven Ng
All horizontal vent runs must be sloped up away from the water heater a minimum of 1/4 “ (6 mm) per foot. □ Verify that the vent termina on clearances are followed. □ Verify that there is adequate combus on air. RH180 Manual... -
Page 21: Installa On Of Plumbing
Follow local codes. Water discharged from the relief valve could cause severe burns instantly, scalds, or death. The Temperature-Pressure Relief Valve must be manually operated once a year to check for correct opera on. RH180 Manual... -
Page 22: Checklist For Plumbing
Check for proper water pressure to the water sure all fi ngs are ght. It is impera ve that open heater. Minimum water pressure is 20 psi. Rinnai flame is not applied to the inlet and outlet fi ngs, recommends 30-50 psi for maximum as heat will damage or destroy the plas c lined performance. -
Page 23: Massachuse S-Required Plumbing
Massachuse s - Required Plumbing RH180 Manual... -
Page 24: Installa On Of Gas Supply
fi ng and visually inspect for bubble forma on. Rinse off soapy water and wipe dry. INFORMATION Gas Connec on (1/2” MNPT) Refer to an approved pipe sizing chart if in doubt about the size of the gas line. RH180 Manual... - Page 25 The hea ng value of natural gas for your loca on is 1000 — BTU/FT . The gas input of the RH180 is 91,500 BTU/HR. Pipe Sizing Table - Propane Gas Addi onal appliances at the loca on require 65,000 BTU/ Schedule 40 Metallic Pipe hr.
-
Page 26: Connect Electricity
□ Confirm that the electricity is supplied from 120 VAC, 60 Hz power source and is in a properly grounded circuit. □ An extension cord or an adapter plug has not been used with the water heater. RH180 Manual... -
Page 27: Final Checklist
Damage due to freezing □ Check for proper water pressure to the water is not covered by the warranty. heater. Minimum water pressure is 20 psi. Rinnai □ Confirm that the electricity is supplied from a 120 recommends 30-50 psi for maximum VAC, 60 Hz power source, is in a properly performance. -
Page 28: Technical Data
Combus on Air Co Sensor Bi-Metal Overheat Switch Rinnai is con nually upda ng and improving products. Therefore, specifica ons are subject to change without prior no ce. The maximum inlet gas pressure must not exceed the value specified by the manufacturer. The minimum value listed is for the purpose of input adjustment. -
Page 29: Dimensions
Dimensions Inches (millimeters) 23.8 (605) (203) 18.7 (475) 24.8 (630) 25.8 (655) 27.5 (698) (254) (508) RH180 Manual... -
Page 30: Wire Diagram
Wire Diagram Wire Color Legend W:..WHITE BK:….BLACK BR:….BROWN R:…...RED RH180 Manual... -
Page 31: Parts Breakdown
T & P VALVE ANODE J-TUBE DIPTUBE OUTLET NIPPLE DRAIN VALVE THERMOSTAT BRACKET THERMOSTAT BRACKET FLEXIBLE HOSE FLEXIBLE HOSE FRONT COVER SIDE TRIM THERMISTOR SHOE-HORSE GROMMET HEXAGONAL REDUCING BUSHING CLOSE NIPPLE 18 17 (Op onal aluminum anode part # is 107000127) RH180 Manual... -
Page 32: Consumer Opera On Guidelines For The Safe Opera On Of Your Water Heater
1.Set the thermostat to lowest setting. 2.Turn off all electric power to the water heater if service is to be performed. 3.Turn the manual gas valve at the gas inlet of the appliance clockwise to the “OFF” position. RH180 Manual... -
Page 33: How To Use The Temperature Controller
To display the temperature supplied to the storage tank in degrees Fahrenheit, press the DOWN bu on for 3 seconds followed by ON/OFF. (Note: temperature will display only one or two digits, Examples: 8 = 80 to 89 and 14 = 140 to 149) RH180 Manual... - Page 34 floor. flushed regularly. Rinnai provides a “Scale Control System” that offers superior lime scale preven on and Keep the area around the appliance clear and free...
-
Page 35: Diagnos C Codes And Remedies
If “FE” con nues to flash a er area is determined to be free from flammable vapors, contact a qualified service technician. RH180 Manual... - Page 36 Replace flame rod. Burner Sensor Circuit Check sensor wiring and PCB for damage. Replace sensor. No hot water, no light Confirm the water heater is plugged in and 120 volts is available code or error code on the display RH180 Manual...
-
Page 37: Air Screen
Slide the door latch to the right Swing the door open and pull the door off the water heater front panel. 3. Clean the Air Screen With mild dish soap and a so bristle brush, scrub the screen area of the Air Screen Door. RH180 Manual... -
Page 38: Water Filter
8. Close the drain valve and open the cold water supply valve leaving the hot water fixture open un l all air is out of the system 9. Power ON the water heater and set to desired temperature. 10. Close the hot water fixture when finished. RH180 Manual... -
Page 39: Required Maintenance
If hydrogen gas is present, there will be an unusual sound, such as air escaping through the pipe, as the hot water faucet is opened. DO NOT smoke or introduce an open flame near the faucet when it is opened. RH180 Manual... - Page 40 1. 12.Open the cold water supply valve un l water flows from the hot water fixture (See Step DRAIN 13.Close the hot water fixture and inspect the appliance and plumbing for leaks. RH180 Manual...
-
Page 41: Consumer Support
The Rinnai Standard Limited Warranty covers any defects in materials or workmanship when the product is installed and operated according to Rinnai wri en installa on instruc ons, subject to the terms within this Limited Warranty document. This Limited Warranty applies only to products that are installed correctly. - Page 42 What will Rinnai do? Rinnai will repair or replace the covered product or any part or component that is defec ve in materials or workmanship as set forth in the above table. Rinnai will pay reasonable labor charges associated with the repair or replacement of any such part or component during the term of the labor warranty period.
- Page 43 Limita on on warran es No one is authorized to make any other warran es on behalf of Rinnai America Corpora on. Except as expressly provided herein, there are no other warran es, expressed or implied, including, but not limited to warran es of merchantability or fitness for a par cular purpose, which extend beyond the descrip on of the warranty herein.
- Page 44 100000319...
Need help?
Do you have a question about the RH180 and is the answer not in the manual?
Questions and answers