Table of Contents
Advertisement
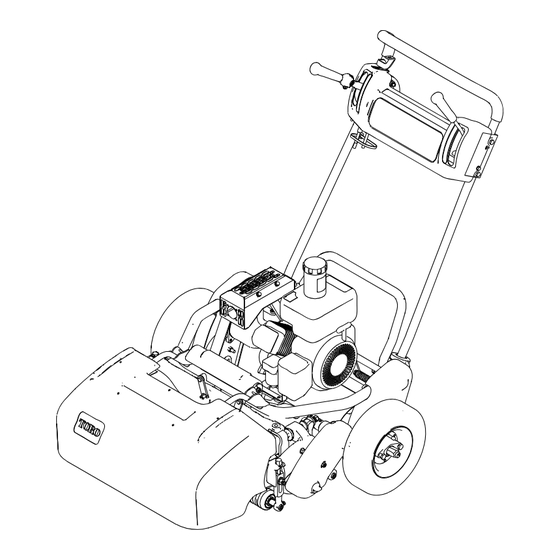
Form No. 3357-158 Rev C
Greensmaster
®
Flex 18 or Flex 21
Walk-Behind Mower
Model No. 04018 (Traction Unit)—Serial No. 260003001
and Up
Model No. 04206 (Cutting Unit)—Serial No. 260000001
and Up
Model No. 04022 (Traction Unit)—Serial No. 260003001
and Up
Model No. 04202 (Cutting Unit)—Serial No. 260000001
and Up
G000507
Register at www.Toro.com.
Original Instructions (EN)
Advertisement
Table of Contents

Related Manuals for Toro 04018 Greensmaster Flex 18


Summary of Contents for Toro 04018 Greensmaster Flex 18
- Page 1 Model No. 04018 (Traction Unit)—Serial No. 260003001 and Up Model No. 04206 (Cutting Unit)—Serial No. 260000001 and Up Model No. 04022 (Traction Unit)—Serial No. 260003001 and Up Model No. 04202 (Cutting Unit)—Serial No. 260000001 and Up G000507 Register at www.Toro.com. Original Instructions (EN)
-
Page 2: Introduction
Whenever you need service, genuine Toro parts, or additional information, contact an Authorized Service Dealer or Toro Customer Service and have the model This manual identifies potential hazards and has and serial numbers of your product ready. Figure 1 and... -
Page 3: Table Of Contents
Unit..............31 Safe Operating Practices ........4 Adjusting the Rear Roller ........31 Toro Mower Safety ..........5 Adjusting the Bedknife to the Reel ...... 32 Sound Pressure for a Flex 18......... 6 Adjusting the Height of Cut ........ 33 Sound Power for a Flex 18 ........ -
Page 4: Safety
Safety – Refuel outdoors only and do not smoke while refuelling. This machine meets or exceeds CEN standard – Add fuel before starting the engine. Never EN 836:1997, ISO standard 5395:1990, and ANSI remove the cap of the fuel tank or add fuel while B71.4-2004 specifications in effect at the time of the engine is running or when the engine is hot. -
Page 5: Toro Mower Safety
• Slow down and use caution when making turns The following list contains safety information specific and crossing roads and sidewalks. Stop reels if not to Toro products or other safety information that you mowing. must know that is not included in the CEN, ISO, or •... -
Page 6: Sound Pressure For A Flex 18
• To transport mower from one area to another: • To ensure safety and accuracy, have an Authorized – Install transport wheels. Toro Distributor check the maximum engine speed – Disengage reel drive. with a tachometer. Maximum governed engine speed –... -
Page 7: Sound Pressure For A Flex 21
Sound Pressure for a Flex 21 Vibration for a Flex 21 This unit has a maximum sound pressure level at the This unit does not exceed a hand/arm vibration level of operator’s ear of 85 dBA, based on measurements of 2.50 m/s , based on measurements of identical machines identical machines per EN 11094 and EN 836. - Page 8 93-8064 1. Warning—read the instructions before servicing or performing maintenance. 2. Cutting hazard of hand or foot—stop the engine and wait for moving parts to stop. 93-9886 1. Use unleaded gasoline. 104-2617 1. Traction drive 4. Forward 2. Reel drive 5.
- Page 9 104-2621 1. Read the Operator’s Manual.
-
Page 10: Setup
Setup Loose Parts Use the chart below to verify that all parts have been shipped. Procedure Description Qty. Handle Install the handle. Kickstand assembly Spring Small spacer Large spacer Install the kickstand for Flex 18 Mowers Only. Large bolt (M8–1.25 x 100) Small bolt (M8–1.25 x 030) Locknut (M8 x 1.25) Washer (M8) -
Page 11: Installing The Handle
4. Secure the handle to the bolt and pivot pin with the flange lock nut (Figure 5). 5. Locate cable tie loosely securing throttle cable to wire harness. Position cable tie approximately one Installing the Handle inch behind transmission and tighten cable tie. Parts needed for this procedure: Handle Installing the Kickstand for... -
Page 12: Adjusting The Handle
Adjusting the Handle No Parts Required Procedure 1. Remove hairpin cotters from ring pins on each side of mower (Figure 8). Figure 6 1. Left handle end 5. Large bolt (M8–1.25 x 100) 2. Locknut (M8–1.25) 6. Spring 7. Large spacer 3. -
Page 13: Checking Fluid Levels
Checking Fluid Levels No Parts Required Procedure 1. Check the engine oil level, refer to Checking the Engine Oil Level in Engine Maintenance , page 22. 2. Check the transmission fluid level, refer to Checking Figure 9 the Transmission Fluid Level in Drive System 1. -
Page 14: Product Overview
Product Overview throttle linkage to carburetor. Engine speed can be varied from 2400 RPM to 3600 RPM. Traction and Reel Drive Engagement Lever The traction and reel drive engagement lever (Figure 13) is located on front right side of control panel. Traction lever has two positions: Neutral and Forward. -
Page 15: Specifications
or transporting machine. Open valve before starting engine. Recoil Starter Pull recoil starter handle (Figure 15) to start engine. Figure 16 1. Kick stand Specifications Flex 21 Flex 18 Figure 15 Width 35-1/2 inches (90.1 32 inches (81.3 cm) 1. Recoil starter 3. -
Page 16: Attachments/Accessories
Contact your Authorized Service Dealer or Distributor or go to Check the engine oil level before each use or every 8 www.Toro.com for a list of all approved attachments operating hours, refer to Checking the Engine Oil Level and accessories. -
Page 17: Checking The Interlock Switch Operation
Checking the Interlock Switch Operation In certain conditions, gasoline is extremely flammable and highly explosive. A fire or explosion from gasoline can burn you and others and can damage property. If safety interlock switches are disconnected • Fill the fuel tank outdoors, in an open area, or damaged the machine could operate when the engine is cold. -
Page 18: Transport Operation
Starting the Engine Preparing to Mow Note: Make sure spark plug wire is installed on spark 1. Return traction control lever to Disengage, throttle plug. to Slow and stop engine. 1. Make sure traction and reel drive levers are in 2. - Page 19 Figure 19 1. Alignment stripes Control Operation To operate the controls while mowing: 1. Start the engine, set the throttle at reduced speed, Figure 20 push down on handle to raise cutting unit, move 1. Traction drive -neutral 3. Traction drive-engaged traction lever to Engaged position and transport (transport) mower onto collar of green (Figure 20).
-
Page 20: Maintenance
Maintenance Note: Determine the left and right sides of the machine from the normal operating position. Recommended Maintenance Schedule(s) Maintenance Service Maintenance Procedure Interval • Change the engine oil. After the first 8 hours • Clean the fuel filter. After the first 25 hours •... -
Page 21: Daily Maintenance Checklist
Daily Maintenance Checklist Important: Duplicate this page for routine use. Maintenance For the week of: Check Item Mon. Tues. Wed. Thurs. Fri. Sat. Sun. Check the safety interlock operation. Check the parking brake operation. Check that pivot joints operate freely. Check the fuel level. -
Page 22: Engine Maintenance
Engine Maintenance Engine Oil The crankcase must be filled with approximately 20 fluid ounces of proper viscosity oil before staring. The engine uses any high-quality oil having the American Petroleum Institute - APl - “service classification" SF, SG, SH or SJ. Oil viscosity - weight - must be selected according to ambient temperature. -
Page 23: Replacing The Spark Plug
4. When servicing foam element, check condition of paper element. Clean or replace every 100 hours or as required. 5. Install foam element, paper element, and air cleaner cover. Important: Do not operate the engine without the air cleaner element because extreme engine wear and damage will likely result. -
Page 24: Fuel System Maintenance
Fuel System Electrical System Maintenance Maintenance Cleaning the Fuel Filter Servicing the Interlock Switch Service Interval: After the first 25 hours Service Interval: Every 1,500 hours Every 50 hours Use the following procedure if the switch needs adjustment or replacement. 1. -
Page 25: Drive System Maintenance
Drive System Maintenance Checking the Transmission Fluid Level Service Interval: Every 50 hours The transmission is filled at the factory with approximately 94 fluid ounces of Mobil Dexron lll automatic transmission fluid. Note: The seals used in the transmission are internally lubricated with grease. -
Page 26: Changing The Transmission Fluid
Changing the Transmission Brake Maintenance Fluid Adjusting the Service/Parking Service Interval: After the first 25 hours Brake Every 1,500 hours (Or 2 years, whichever occurs first) If service/park brake slips when operated, an adjustment is required. Important: Use only Mobil Dexron lll or equivalent transmission fluids. -
Page 27: Belt Maintenance
Belt Maintenance Adjusting the Belts Make sure belts are properly tensioned to assure proper operation of the machine and unnecessary wear. Check belts frequently. Reel Drive Belt (Reel) 1. Remove the belt cover mounting fasteners and belt cover to expose belt (Figure 32). Figure 34 1. -
Page 28: Traction Drive Belt
Figure 38 Figure 36 1. Reel drive belt 2. Bearing housing mounting 1. Belt cover nuts 2. Check tension by depressing belt (Figure 37) at mid B. Using a 3/8 inch drive torque wrench, rotate the span of pulleys with 4 ± 1 lb. of force. Belt should bearing housing with 35-40 in.-lb. - Page 29 Figure 40 Figure 42 1. Traction drive belt cover 1. Tang washer 2. Idler bracket bolt 2. Check tension by depressing belt (Figure 41) at mid B. Using a 3/8 inch drive torque wrench, rotate the span of pulleys with 4 ± 1 lb of force. Belt should idler bracket with 35-40 in.-lb.
-
Page 30: Controls System Maintenance
Controls System Maintenance Adjusting the Traction Control If traction control does not engage or it slips during operation, an adjustment is required. 1. Move traction control to Disengaged position. Figure 45 2. To increase cable tension, loosen front cable jam 1. -
Page 31: Cutting Unit Maintenance
Cutting Unit Maintenance Separating the Cutting Unit from the Traction Unit 1. Place the mower on its drums on a level surface. 2. Lower kick stand. Insert a 1/4" dia. pin or equivalent into frame hole above kick stand mounting bolt (Figure 46). -
Page 32: Adjusting The Bedknife To The Reel
Figure 50 1. Spacer 3. Roller bracket 2. Sideplate mounting flange Figure 52 • Position the spacer below the sideplate mounting 1. Sideplate mounting bolts flange when height of cut settings range from 1/8" to 1" (Figure 51). Important: Whenever the cutting unit has to be tipped to expose bedknife/reel, prop up rear of cutting unit to make sure nuts on back end of bedbar adjusting screws are not resting on... -
Page 33: Adjusting The Height Of Cut
Should excessive reel drag be evident it will be either necessary to backlap or regrind the cutting unit to achieve the sharp edges needed for precision cutting (see Toro reel sharpening manual). Figure 56 Adjusting the Height of Cut 3. -
Page 34: Adjusting The Cut-Off Bar
Figure 57 Figure 58 1. Cut-off bar 4. Rotate adjusting screw until roller contacts front of gauge bar. Adjust both ends of roller until entire 2. Insert .060 inch feeler gauge between top of reel and roller is parallel to the bedknife. bar and tighten screws. -
Page 35: Setting The Machine To Match Turf Conditions
Setting the Machine to Match Turf Conditions Use the following table to set the machine to match turf conditions. Flex Greensmower Cutting Unit Set-up Matrix Bedbars: Standard and Optional Part Number Description Mower Aggressiveness Comments 106-2468-01 Standard Flex 21 Less Standard 99-3794-03 Aggressive... -
Page 36: Servicing The Bedbar
Use the following table and Figure 59 to set the rate of clip. Clip (Refer to Figure 59 for pulley locations.) Drive pulley number of teeth Driven pulley number of teeth 11 Blade Clip 8 Blade Clip .14 inches (standard) .19 inches .16 inches .24 inches... -
Page 37: Backlapping The Reel
1. Reel drive cover plug 2. Insert a 18 mm socket onto hex flange nut on left end of reel shaft. 3. Backlap according to the procedure in the Toro Sharpening Reel and Rotary Mowers Manual, Form No. 80-300 PT. -
Page 38: Storage
Storage 1. Remove grass clippings, dirt, and grime from the external parts of the entire machine, especially the engine. Clean dirt and chaff from the outside of the engine’s cylinder head fins and blower housing. Important: You can wash the machine with mild detergent and water. - Page 40 If for any reason you are dissatisfied with your Distributor’s service or have difficulty obtaining guarantee information, contact the Toro importer. If all other remedies fail, you may contact us at Toro Warranty Company.
Need help?
Do you have a question about the 04018 Greensmaster Flex 18 and is the answer not in the manual?
Questions and answers