Table of Contents
Advertisement
If you are requested by the manufacturer to return the item for
repair please complete the enclosed section and send it together
with your product and your receipt (proof of purchase) to the
service address shown below.
Name:
Address:
Contact Telephone No.:
E-mail:
Location of purchase:
Fault Description:
In order to deal with your enquiry as quickly and efficiently as possible, we ask you to send your
enquiry by email (technical@omegawolf.co.uk). Do not forget to include your name, address and a
daytime telephone number.
Alternatively, you can contact our freephone service hot-line on the number given below.
Office hours are as follows:
Mon - Fri: 8 am - 6 pm, Sat: 10 am - 2 pm, Sun: 10 am - 4 pm
UK / NORTHERN IRELAND HELPLINE:
0870 7323023
REPUBLIC OF IRELAND HELPLINE:
1800 481005
WEB SUPPORT:
www.omegawolf.com/powercraft
Omega, Interex House, Prospect Close, Lowmoor Business Park
NG17 7LF Kirkby In Ashfield, England
Replacements or repairs under guarantee regulations are free of charge.
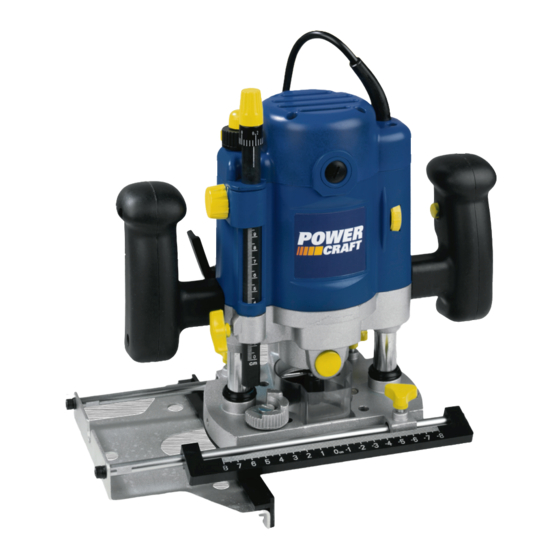
1200W ROUTER
PBF-1200
GB/IRE-0706-07
User Guide & Warranty
1200W Router
After Sales Support
Now you have purchased a Power Craft
product you can rest assured in the
knowledge that as well as your 3 year
parts and labour warranty you have
the added peace of mind of dedicated
helplines and web support.
AFTER SALES SUPPORT
UK / NORTHERN IRELAND HELPLINE:
0870 7323023
REPUBLIC OF IRELAND HELPLINE:
1800 481005
WEB SUPPORT:
WWW.OMEGAWOLF.COM/POWERCRAFT
MODEL NUMBER: PBF-1200
Advertisement
Table of Contents

Summary of Contents for Power Craft Power Craft 1200W Router
- Page 1 1200W ROUTER PBF-1200 If you are requested by the manufacturer to return the item for repair please complete the enclosed section and send it together with your product and your receipt (proof of purchase) to the service address shown below.
-
Page 2: Warranty
- Mounting the guide bush - Mounting the adapter for dust extraction - The ON/OFF switch - Usage tips Operation - Height setting of the router column - Setting the plunge depth - Adjustment using the revolver- depth stop Maintenance Exploded view Warranty Helpline No. -
Page 3: Exploded View
Keep this instruction manual in a safe place for future use. Introduction The router has been designed for professional routing of wood and wood pro- ducts. Check the machine, for loose parts and accessories from transport damage. Position... -
Page 4: Machine Specifications
Machine specifications Technical specifications Voltage 230 V~ Frequency 50 Hz Power input 1200 W No load speed 9000-30000/min Max. cutter diameter 30 mm Cutting depth 30 mm Collet 6 & 8 mm Weight 4.7 kg Lpa (sound pressure) 90.9 dB(A) Lwa (sound power) 101.9 dB(A) Vibration value... - Page 5 • Wires in the mains not working plug or in the socket are loose • The switch is faulty • Router runs slowly • Blunt or damaged cutter • Variable speed set • Motor is overloaded • Excessive vibration •...
-
Page 6: Safety Instructions
Preparation: • Place the desired cutter in the tool. • Loosen the clamping lever (11). The router can then be pushed down against the spring force. • Push the tool down until the cutter touches the workpiece, then relock it using the clamping lever (11). - Page 7 • Hold button (14) between your thumb and index finger. • Push the grey button (14) and use your other hand to push the router down at the same time. • Release the button. The router is now locked and will no longer return to its original position.
- Page 8 Safety instructions your finger on the switch when carrying the machine or if you connect the running machine to the socket, this may lead to accidents. Remove the adjusting tools or the spanners before switching on the machine. A tool or a key which is located in a revolving part of the machine may lead to injuries.
- Page 9 • Wait until the router has come to a complete stop before removing any bloc- ked or routed material around the cutter. Use a long stick for this and not your finger.
- Page 10 (11, Fig A1, page 4). • Place the router onto the workpiece in such a manner that the cutter touches the side of the workpiece. Please ensure that the furthest protruding part of the cutter touches the workpiece (by turning the cutter if necessary).


Need help?
Do you have a question about the Power Craft 1200W Router and is the answer not in the manual?
Questions and answers