Table of Contents
Advertisement
Thank you very much for purchasing the ZOOM
Please read this manual carefully to learn about all the functions of the
be able to use it fully for a long time.
Keep this manual in a convenient place for reference when necessary.
Usage and safety precautions ....................... 2
Introduction ................................................... 3
Terms Used in This Manual ............................ 3
Part Names .................................................... 4
Turn the power on and play ........................... 6
Adjusting effects ............................................ 8
Selecting Patches ........................................ 10
Storing Patches ............................................ 12
Setting specific patch parameters ............... 14
Changing Various Settings ........................... 18
Using the Tuner ............................................ 22
Copying or reproduction of this document in whole or in part without permission is prohibited.
OPERATION MANUAL
Contents
© ZOOM CORPORATION
.
Using Rhythms ............................................ 24
Using the Looper ......................................... 26
Updating the firmware ................................. 30
default settings. ....................................... 31
Using Audio Interface Functions ....................... 32
Effect Types and Parameters ....................... 33
Troubleshooting ........................................... 49
Specifications .............................................. 50
Rhythm List ................................................. 51
so that you will
Advertisement
Table of Contents

Subscribe to Our Youtube Channel
Related Manuals for Zoom G3


Summary of Contents for Zoom G3
-
Page 1: Table Of Contents
OPERATION MANUAL Thank you very much for purchasing the ZOOM Please read this manual carefully to learn about all the functions of the so that you will be able to use it fully for a long time. Keep this manual in a convenient place for reference when necessary. -
Page 2: Usage And Safety Precautions
Use only a ZOOM AD-16 AC adapter with this unit. to minimize external electromagnetic interference. However, Do not use do anything that could exceed the ratings of outlets and other electrical wiring equipment. -
Page 3: Introduction
Edit & Share software, which is a patch editor and librarian, on a computer to back up patches and change the order of effects. See the ZOOM website (http://www.zoom.co.jp/) for further information about Edit & Share. Terms Used in This Manual Patch The ON/OFF status and the parameter settings of each effect are stored as "patches."... -
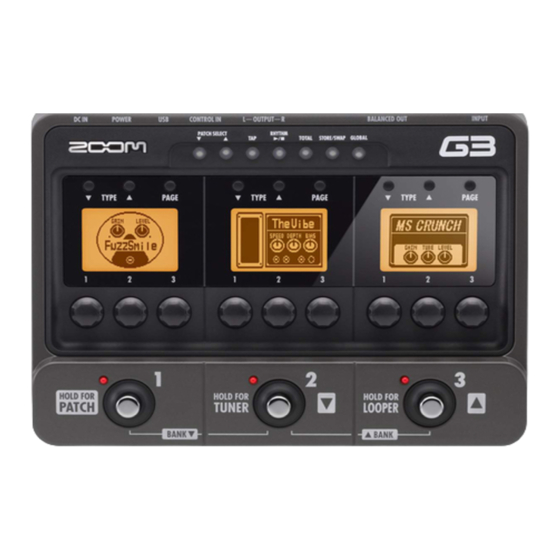
Page 4: Part Names
Part Names Top Panel TOTAL key RHYTHM [ ] key TAP key PATCH SELECT keys TYPE keys Display Rear Panel INPUT jack Guitar BALANCED OUT connector Headphones OUTPUT jack Guitar amplifier... - Page 5 (not pushed in) to output the signal before effects. GROUND switch Use this switch to connect or disconnect the ZOOM AC adapter (AD-16) BALANCED OUT connector with the ground. USB connector Set it to “LIFT” (pushed in) to separate the signal path from the grounding pin.
-
Page 6: Turn The Power On And Play
Turn the power on and play To turn the power on Lower the amplifier s volume all the way. ’ When using batteries When using an adapter Insert batteries into the batter y Connect the AC adapter and set the compartment POWER switch to ON. - Page 7 Display information Home Screens show the current patch Graphic for selected effect Virtual knob HINT • The positions of the virtual knobs change with the parameter values. Edit Screens show parameters being edited Page tabs Parameter names Parameter values HINT • If there are 4 or more parameters that can be adjusted, multiple page tabs will be shown.
-
Page 8: Adjusting Effects
Adjusting effects Confirm that the Home screens are shown. To turn effects ON and OFF • Press , and . • Turns the effect ON/OFF . NOTE • An effect is ON when its footswitch LED is lit. • An effect is OFF when its footswitch LED is not lit. To select an effect type • Press . • The effect type changes. HINT • See page 33 for information about effect types and parameters. - Page 9 EDIT To adjust parameters • Turn , and . • The editing screen opens where you can adjust parameters. NOTE • Time, rate and some other effect parameters can be set in note durations that are synchronized to the tempo. To change the page • Press . • The next page opens. Effect processing capacity allows you to combine three effects as you like.
-
Page 10: Selecting Patches
Selecting Patches Confirm that the Home display is shown. To activate patch selection • Press and Hold for 1 second to activate patch selection. • The screens show the patch bank, number and name. To change the patch • Press to select the next lower patch. • Press to select the next higher patch. • Turn of the middle effect. • The patch number and name changes. HINT • You can also change patches using... - Page 11 PATCH SELECT To change the bank • Press at the same time to select the next lower bank. • Press at the same time to select the next higher bank. • Turn of the middle effect. • The patch bank and name changes. NOTE • When pressing two footswitches at the same time, the sound could be affected by the footswitch that is pressed slightly earlier.
-
Page 12: Storing Patches
Storing Patches automatically saves settings when parameters are adjusted. To store a patch or swap with a different patch • Press . • blinks and the screens appear as below. To select whether to store or swap the patch • Turn of the left effect. Store Swap... - Page 13 STORE/SWAP To set where to store or swap the new patch To change the patch number where stored/swapped • Turn of the right effect. Change the patch number To change the bank where stored/swapped • Turn of the right effect. NOTE • The currently active patch cannot be selected as the destination.
-
Page 14: Setting Specific Patch Parameters
Setting specific patch parameters To activate the TOTAL menu • Press . NOTE • Settings made for total p a r a m e t e r s a r e s ave d separately for each patch. PATCH CHAIN/NAME CTRL PDL/CTRL SW To adjust the patch level • Turn of the left effect. - Page 15 TOTAL To change the patch name • Press of the middle effect. : Turn to move the cursor. : Turn to change the type of character/ symbol. : Turn to change the character. NOTE • The following characters and symbols can be used. ! # $ % & ' () +, -. ; = @ [] ^ _ ` { } ~A-Z, a-z, 0-9, (space) NEXT...
- Page 16 Setting specific patch parameters To set an expression pedal function Set the control destination. • Turn of the right effect. NOTE • INPUT VOL: Use this to control the input level. • OUTPUT VOL: Use this to control the output level. • NO ASSIGN: No function is assigned. HINT • Turn to show the different parameters that can be controlled by the expression pedal. • See “Effect types and parameters” for details about the parameters that can be controlled for each effect. • Rhythm and looper output levels are not affected when controlling the Output Volume with an expression pedal.
- Page 17 TOTAL To set an optional footswitch function • Press on the right effect. • Turn of the right effect. BYPASS/MUTE Sets the effect to bypass or mute. TAP TEMPO Press the footswitch repeatedly at the desired tempo to set the tempo used for rhythms, the looper and effects. NO ASSIGN No function is assigned to the footswitch.
-
Page 18: Changing Various Settings
Changing Various Settings To activate the GLOBAL menu • Press . NOTE • Global parameter settings affect all patches. MASTER/1-2-3 BATTERY USB AUDIO/VERSION To adjust the master level • Turn of the left effect. NOTE • The setting range is 0-120. To set the master tempo • Turn of the left effect. HINT • You can also set the tempo using . - Page 19 GLOBAL Setting the tempo by tapping • Press two or more times at the desired tempo. HINT • You can also set the tempo using an FS01 footswitch (sold separately). (See page 17 .) To select the connected equipment • Turn of the left effect. Parameter value Meaning DIRECT Use when connected to headphones or monitor speakers COMBO FRONT Use when connected to an ordinary combo amp input STACK FRONT Use when connected to an ordinary stack amp input COMBO POWER AMP...
- Page 20 Changing Various Settings To set the amount of time until the backlight dims • Turn of the middle effect. NOTE • The setting options are ON and 1–30 seconds. HINT • The amount of power consumed can be reduced by dimming the backlight. To select the battery type • Turn of the middle effect to set the battery type to ALKALINE or Ni-MH (nickel-metal hydride). : Operating on batteries : Operating on adapter power : Operating on USB bus power...
- Page 21 GLOBAL To adjust the recording level • Turn of the right effect. NOTE • This adjusts the level of the signal sent to the computer. • The setting range is ±6 dB. To view the firmware versions • Press of the right effect. HINT • Check the ZOOM website (http:// www.zoom.co.jp) for the latest firmware versions. To exit the GLOBAL menu • Press .
-
Page 22: Using The Tuner
Using the Tuner To activate the tuner • Press for 1 second. NOTE • Pressing for 1 second will bypass the effects. • Pressing for 2 seconds will mute the output. To change the tuner’s standard pitch • Turn of the right effect. NOTE • The standard pitch for middle A can be adjusted to 435-445 Hz. - Page 23 TUNER String number/Note name Display Meaning GUITAR Standard tuning for guitars, including 7-string guitars OPEN A In open A tuning, the open strings make an A chord OPEN D In open D tuning, the open strings make a D chord OPEN E In open E tuning, the open strings make an E chord OPEN G...
-
Page 24: Using Rhythms
Using Rhythms To activate a rhythm • Press . • The rhythm pattern starts to play automatically and the rhythm setting screens open. HINT • You can use a rhythm pattern while using the looper. RHYTHM PATTERN TEMPO LEVEL To select the rhythm pattern • Turn of the left effect. NOTE • See page 51 for types of patterns To adjust the tempo... - Page 25 RHYTHM To adjust the rhythm level • Turn of the right effect. NOTE • The setting range is 0-100. To stop the rhythm • Press . HINT • Press again to start playback of the rhythm again. To complete setting the rhythm The rhythm stops and the previous screen reappears • Press . To select a patch (and keep the rhythm playing) • Press .
-
Page 26: Using The Looper
Using the Looper To activate the Looper • Press for 1 second. To set the recording time • Turn on the left unit. Manual Use the footswitch to start and stop recording. Note mark Set the recording time by setting the tempo and the number of quarter notes. - Page 27 LOOPER To record a phrase and play it back • Press . Recording Playing If set to “Manual” • When is pressed again or the maximum recording time (about 40 seconds) is reached, loop playback starts (and “PLAY” appears on the display). If set to a note mark • Recording continues for the set time and then loop playback starts (and “PLAY” appears on the display).
- Page 28 Using the Looper To overdub a recorded loop To start overdubbing • During loop playback, press . Playing Overdubbing To end overdubbing • Press again. Overdubbing Playing To stop loop playback To erase the loop • Press . • Press for 1 second. • “CLEAR” appears on the display.
- Page 29 LOOPER To return to the Home Screens • Press . HINT • You can return to the Home Screens while the loop is playing. NOTE • Returning to the Home Screens will not erase the loop. • Turning the power OFF will erase the loop. To change the Looper settings • Press of the right unit. • To activate the Undo function NOTE Turn of the right unit. • When Undo is ON, the maximum loop recording time is limited to 20 seconds. HINT • When Undo is ON, you can cancel the last overdubbing by pressing for 1 second.
-
Page 30: Updating The Firmware
Updating the firmware To download the latest firmware version Update application: • Visit the ZOOM Website (http://www.zoom.co.jp). HINT • Open the GLOBAL menu to check the current firmware versions. (See page 21.) To prepare to update the firmware version • Confirm that the POWER switch is set to OFF . • While pressing both , connect the unit to a computer using the USB cable. • The VERSION UPDATE screen appears. To update the firmware • Launch the version update application on your computer, and execute the update. -
Page 31: Restoring The To Its Factory Default Settings
VERSION UPDATE To complete updating • When the has finished updating, “COMPLETE!” appears on the display. • Disconnect the USB cable. HINT • Updating the firmware version will not erase saved patches. Restoring the to its factory default settings. 1. To use the All Initialize function • While pressing , set the POWER switch to ON. • The All Initialize screen appears. 2. To execute the All Initialize function. • Press . NOTE • Press any key other than to cancel. -
Page 32: Using Audio Interface Functions
Using Audio Interface Functions This unit can be used with computers running the following operating systems Compatible OS Windows ® Windows XP SP3 (32bit) or newer ® Windows Vista SP1 (32bit, 64bit) or newer ® Windows 7 (32bit, 64bit) ® ®... -
Page 33: Effect Types And Parameters
1–50 P Curve 0–10 Level 0–150 Page01 Set the curve of volume change during Adjusts the attack time. Adjusts the output level. attack. Page02 ZOOM's unique noise reduction cuts noise during pauses in playing without affecting the tone. Knob1 Knob2 Knob3 THRSH 1–25 P DETCT GtrIn, EfxIn Level 0–150 Page01 Adjusts the effect sensitivity. - Page 34 Effect Types and Parameters NoiseGate This is a noise gate that cuts the sound during playing pauses. Knob1 Knob2 Knob3 THRSH 1–25 P Level 0–150 Page01 Adjusts the effect sensitivity. Adjusts the output level. Page02 DirtyGate This vintage style gate features a characteristic way of closing. Knob1 Knob2 Knob3...
- Page 35 This effect varies the sound like a talking modulator. Knob1 Knob2 Knob3 Range 1–10 Reso 0–10 Sense -10–-1, 1–10 Page01 Adjusts the frequency range processed Adjusts the intensity of the modulation Adjusts the sensitivity of the effect. by the effect. resonance sound.
- Page 36 Effect Types and Parameters Simulation of the Ibanez TS808, which is loved by many guitarists as a booster and has T Scream inspired numerous clones. Knob1 Knob2 Knob3 Gain 0–100 P Tone 0–100 Level 0–150 Page01 Adjusts the gain. Adjusts the tone. Adjusts the output level.
- Page 37 Gain 0–100 P Tone 0–100 Level 0–150 Page01 Adjusts the gain. Adjusts the tone. Adjusts the output level. Page02 Z Clean ZOOM original unadorned clean sound. Knob1 Knob2 Knob3 Gain 0–100 P Tone 0–100 Level 0–150 Page01 Adjusts the gain.
- Page 38 Effect Types and Parameters Lead Lead a bright and smooth distortion sound. Knob1 Knob2 Knob3 Gain 0–100 P Tone 0–100 Level 0–150 Page01 Adjusts the gain. Adjusts the tone. Adjusts the output level. Page02 ExtremeDS This distortion effect boasts the highest gain in the world. Knob1 Knob2 Knob3...
- Page 39 HW STACK Modeled sound of the legendary Hiwatt Custom 100 all-tube amplifier from the UK. Knob1 Knob2 Knob3 Gain 0–100 P Tube 0–100 Level 0–150 Page01 Adjusts the gain. Adjusts tube amp compression. Adjusts the output level. Trebl 0–100 Middl 0–100 Bass 0–100 Page02...
- Page 40 Effect Types and Parameters This crunch sound uses the drive channel of a Two Rock Emerald 50, an American TW ROCK boutique amplifier. Knob1 Knob2 Knob3 Gain 0–100 P Tube 0–100 Level 0–150 Page01 Adjusts the gain. Adjusts tube amp compression. Adjusts the output level.
- Page 41 DuoPhase This effect combines two phasers. Knob1 Knob2 Knob3 1–50, RateA 1–50 P RateB Level 0–150 SyncA, RvrsA Page01 Adjusts speed of LFO A modulation. Adjusts speed of LFO B modulation. Adjusts the output level. ResoA 0–10 ResoB 0–10 Link Seri, Para, STR Page02 Adjusts resonance of LFO A modulation.
- Page 42 Effect Types and Parameters VinFLNGR This analog flanger sound is similar to an MXR M-117R. Knob1 Knob2 Knob3 Depth 0–100 Rate 0–50 P Reso -10–-1, 0,1–10 Page01 Adjusts the intensity of the modulation Sets the depth of the modulation. Sets the speed of the modulation. resonance. PreD 0–50 0–100 Level 0–150 Page02...
- Page 43 This intelligent pitch shifter outputs the effect sound with the pitch shifted according to scale and key settings. Knob1 Knob2 Knob3 -6, -5, -4, -3, -m, m, C, C#, D, D#, E, Scale 3, 4, 5, 6 F, F#, G, G#, A, 0–100 (See Table 2) A#, B Page01 Sets the pitch of the pitch-shifted...
- Page 44 Effect Types and Parameters Delay This long delay has a maximum length of 5000 mS. Hold, InputMute Knob1 Knob2 Knob3 Time 1–5000 F .B 0–100 0–100 Page01 Adjusts the amount of effected sound Sets the delay time. Adjusts the feedback amount. that is mixed with the original sound.
- Page 45 FilterDly This effect filters a delayed sound. InputMute Knob1 Knob2 Knob3 Time 1–2000 F .B 0–100 0–100 Page01 Adjusts the amount of effected sound Sets the delay time. Adjusts the feedback amount. that is mixed with the original sound. Rate 1–50 P Depth 0–100...
- Page 46 Effect Types and Parameters Room This reverb effect simulates the acoustics of a room. InputMute Knob1 Knob2 Knob3 Decay 1–30 Tone 0–10 0–100 Page01 Adjusts the amount of effected sound Sets the duration of the reverberations. Adjusts the tone. that is mixed with the original sound. PreD 1–100 Level...
- Page 47 Comp+Phsr This effect combines compressor and phaser. Knob1 Knob2 Knob3 Comp 0–10 Rate 1–50 P Level 0–150 Page01 Sets compressor strength. Sets the speed of the modulation. Adjusts the output level. 4 STG, 8 STG, Color inv 4, inv 8 Page02 Sets phaser color.
- Page 48 Effect Types and Parameters PDL Pitch Use an expression pedal to change the pitch in real time with this effect. Knob1 Knob2 Knob3 1–9 Color Tone 0–10 Bend 0–100 (See Table 3) Page01 Sets the type of pitch change control Adjusts the tone.
-
Page 49: Troubleshooting
→ input and output are disabled. There is a lot of noise • Check the shielded cables that you are using for defects. • Use only a genuine ZOOM AC adapter. The sound distorts strangely/has an odd timbre • Set the OUTPUT parameter according to the output equipment. • Set the Active/Passive switch according to the type of guitar pickups or the device... -
Page 50: Specifications
For FP01/FP02/FS01 S/N (equivalent input noise) 120dB Noise floor (residual noise) -100dBm Power AC adapter DC9V (center minus plug), 500 mA (ZOOM AD-16) Batteries 6 hours of continuous operation using 4 AA alkaline batteries Bus power Dimensions 170mm(D) x 234mm(W) x 54mm(H) -
Page 51: Rhythm List
Rhythm List PatternName TimSig PatternName TimSig GUIDE Pop3 8Beat1 Dance1 8Beat2 Dance2 8Beat3 Dance3 8SHFFL Dance4 16Beat1 3Per4 16Beat2 6Per8 16SHFFL 5Per4_1 Rock 5Per4_2 Hard Latin Metal1 Ballad1 Metal2 Ballad2 Thrash Blues1 Punk Blues2 Jazz1 Funk1 Jazz2 Funk2 Metro3 Hiphop Metro4 R'nR Metro5... - Page 52 For more detailed information about recycling of this product, please contact your local city office, your household waste disposal service or the shop where you purchased the product. ZOOM CORPORATION 4-4-3 Surugadai, Kanda, Chiyoda-ku, Tokyo 101-0062 Japan http://www.zoom.co.jp G3-5000-1...
- Page 53 This lead tone uses Two Rock modeling. The combination of analog delay and hall reverb harmonizes perfectly. UNDERWORLD Combination of Parametoric EQ, Resonance and LEAD ZOOM 9002. Auto-wah effect with super-low sub-bass tracking. Play a rhythmic pattern or hit one sustaining chord for interesting overtones. Guitar1&2 Who needs another guitar player? This patch will fatten things up nicely.
- Page 54 Such as product names and company names are all (registered) brand names or trade marks of each respective holders, and Zoom Corporation is not associated or affiliated with them. All product names, explanation and images are used for only purpose of identifying the specific products that were referenced during product development.
- Page 55 Audio Connection. steps. In the "Sound" window, verify that "ZOOM G Series Audio" is listed To launch Sequel LE, click Sequel LE icon in the Applications folder. under the Play and Record devices and that the device is checked. (To Insert the CD-ROM.
- Page 56 Continued from front Sequel LE installation Connections and preparation Use Sequel LE to record Windows MacOS X Select "New Project" from the "Project" menu. Set the recording level. Record to a track. Check the recording. This will close the currently open project and create a new empty Use the track "Volume"...
Need help?
Do you have a question about the G3 and is the answer not in the manual?
Questions and answers