Table of Contents
Advertisement
Quick Links
Advertisement
Table of Contents

Related Manuals for Gossen MetraWatt Starlite 2


Summary of Contents for Gossen MetraWatt Starlite 2
- Page 1 Starlite 2 Operating Instructions - 15390...
-
Page 2: Table Of Contents
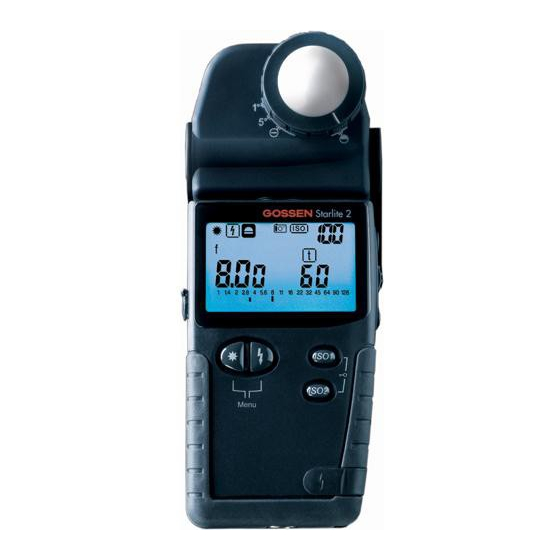
3.5 Measuring head with optical viewfinder 1 ° or 5° PHOTOMETRY Flat dome- spherical dome……..………………… 9.1 Preselecting the Cine speeds…………………… This is how the Starlite 2 works 9.2 Taking measurements in the CINE function…… 29 4.1 Incident and reflected light measuring………….. 9.3 Setting the shutter angle…………………………. 30 Meas. - Page 3 Dome ring for setting of reflected/incident light measuring Retractable dome Reflected light measuring 1° Reflected light measuring 5° Measuring head with optical viewfinder Incident light measuring, flat dome Incident light measuring, spherical dome Display panel Description on page 9 Menu buttons ISO1 button ISO2 button Socket for...
- Page 4 Optical viewfinder Measuring button Setting wheel Service- Measuring button interface Eyelet for connection cord Gossen Foto- und Lichtmesstechnik GmbH...
- Page 5 Serial number DIP Switches Battery Battery compartment cover Gossen Foto- und Lichtmesstechnik GmbH...
- Page 6 Your STARLITE 2 is the top device in the GOSSEN Characterising of the STARLITE 2: product range and represents a real all-in-one light meter. It combines a light meter for ambient and flash - Splashwaterproof housing light, a CINE meter for cinematographers as well as a...
-
Page 7: Battery
Preparation As soon as the self-test is complete, the factory preset standard settings are activated. Battery The STARLITE 2 works with a 1.5 V AA battery ISO1 100/21° 0/1,0 (Alkaline-manganese. ISO2 50/18° When the battery is running low, the display... -
Page 8: Selecting The Function Groups
Selecting the function groups: DIP switches in the battery compartment In addition to the standard functions, your STARLITE 2 features a range of additional characteristics and functions which can be selected using the "DIP switches" in the battery compartment. DIP 4... -
Page 9: Display Panel
Display panel left digital displays for - f-stop (f) The display panel and ist elements - Exposure value (EV) - Correction values Menu - Multiple flash calculation - Average (f) – Number of measurings - Ambient light - Flash light - Zone Measuring head - Ready for flash (F) -
Page 10: Display Duration
OFF, ISO and IS02 appear for 3 seconds on the display. Then the instrument switches off automatically. If the STARLITE 2 display panel is idle for about 2 minutes, it is switched off automatically. The measuring values and the preset values remain stored in memory. -
Page 11: Operating Elements
- Set the desired ISO value using the setting wheel. When another operating function is selected, the preset film speed is retained in the STARLITE 2 memory. The film speed you have selected, either ISO1 or IS02, appears in the top right corner of the display panel (IS02... -
Page 12: Menu
3.2 Menu With the function buttons you can select the measuring modes ambient light or flash light Keep the menu button pressed and select the sub- functions time preselection t, f-number preselection f or exposure value EV using the setting wheel Menu- Setting wheel Buttons... -
Page 13: Measuring Head With Optical Viewfinder 1 ° Or 5° Flat Dome- Spherical Dome
Flat dome- spherical dome measuring 5° The measuring head is the optical control center of the STARLITE 2. The 270° rotating measuring head provides the basis for effective working in practice. Caution: Never try to overwind the built-in lock by force. -
Page 14: Incident And Reflected Light Measuring
Even under very difficult photographing conditions, as for example with subjects which have a lot of contrast, Your STARLITE 2 is designed for the enthusiastic the incident light measuring method is a much more amateur as well as for professional use. - Page 15 9 measuring values. The different contrast measuring values are displayed on the analogue aperture scale. Subject contrast is measured with the reflected light measuring method and displayed by the STARLITE 2 on the analogue scale. Gossen Foto- und Lichtmesstechnik GmbH...
-
Page 16: Aperture Priority
Measuring functions – Ambient light Note: - Select with the left menu button ambient When preselecting f-stop, the stored values light (the last stored measuring value of the last measurement are displayed in 1/10 stop appears in the display). increments. These are, however, irrelevant, since a - Keep the function button pressed down and new reading has to be taken. -
Page 17: Exposure Time Priority
Exposure time priority Exposure value - Press the measuring button to take a - Press the button to measure. measurement. - The measured exposure value EV appears on - The measured f/stop appears on the left digital the left digital display (resolution in 1/10 stop display (resolution in 1/10 stop increments) and is increments) and the f/stop is marked additionally marked an the analogue scale, rounded to 1/2 stop... -
Page 18: Contrast Measuring In The T And Ev Functions
Contrast measuring in the t and EV functions Illumination contrast with flat or spherical dome Contrast of the subject reflected light - Keep the measuring button pressed to measure measuring through the viewfinder the different light sources. - Keep the measuring button pressed - The first measuring value appears an the left digital and focus on the various areas of the subject to be... -
Page 19: Averaging Value Avr In The T And Ev Functions
Averaging value AVR in the t and EV functions Reflected light measuring Incident light through the viewfinder with flat or spherical dome - The first measurement is to be taken with the Correspondingly, you can determine the average value measuring button M. of the illumination of the various lights with the above - With the average measuring button you can... -
Page 20: Selecting The Exposure Time Values
Selecting the exposure time values In addition to the standard full time values, also half time values (1/2 TV) can be set at some cameras. For this reason, the STARLITE 2 can also be set DIP 2 additionally to half time values. -
Page 21: Taking Measurements In The Zone System
- Using the setting wheel, place the measuring value in 5.7.1 The STARLITE 2 and the zone system the zone where the value should be, e.g. zone III. The STARLITE 2 allocates different brightness ranges - Now you can measure up to 8 further spots in the to predefined graduated zones of grey. - Page 22 After each measurement using the measuring button lf, by mistake, you take a zone measurement in the the following data are stored and displayed: incident light mode (flat or spherical diffuser), you are - the symbol ZONE and the last measured value are reminded by the flashing diffusor symbol displayed on the left that you have to set the diffuser ring to 1 °...
-
Page 23: Measuring Functions- Flash Light
The measuring times range from 1 s to 1/1000 s. Press the measuring button M. The STARLITE 2 is ready to measure for about 45 s (as long as F is displayed on the display panel). Gossen Foto- und Lichtmesstechnik GmbH... -
Page 24: Flash Calculation For Changed Meas. Times
In the event of altered measuring times, you must indicated, (e.g. F4 = 4 flashes) The STARLITE 2 will ensure that the flash light duration is not longer calculate up to a max. of 9 flash sequences. -
Page 25: Average Value
Average value - Take first measurement using measuring button - Messure up to a further 8 flashes using the average value measuring button The individual measurements are shown an the analogue scale (identical values are only displayed once, but are taken into account in the calculation of the average value). -
Page 26: Taking A Measuring Outside The
- There is no usable measuring result outside the is outside the display range. measuring range of the STARLITE 2. - Use setting wheel to move into the display range - If it is too dark or too bright during the measurement, Err (= Error) appears in the left digital display. -
Page 27: Setting And Measuring Correction Values
By pressing one of the menu buttons - The last valid correction value appears in the ( or ) the correction value is stored in the memory of the STARLITE 2. The symbol appears in the display. - The desired correction value can be entered or display. - Page 28 27) you have two possibilities of deleting pre- programmed correction values: are required. - by manually resetting using the setting wheel to Use the STARLITE 2 in the reflected light mode at EV 0 and extension factor 1.0 or 1 ° or 5°. In the function...
-
Page 29: Cine Meter For Cinematographers - Photometry
9.2 Taking measurements in the CINE function - PHOTOMETRY - Take a measurement by pressing the measuring By actuating the DIP 1 switch, the STARLITE 2 can be button converted easily and quickly into a fully functional - The measured f-stop appears both in the left digital CINE meter. -
Page 30: Setting The Shutter Angle
9.3 Setting the shutter angle A shutter angle other than 180° has a direct influence The shutter angle in the STARLITE 2 is preset at the on all measuring functions in the CINE function; factory to 180°. corrected measuring values are shown directly in the If you are working with other angles which vary from display. -
Page 31: Photometry
Photometry 10.2 Measuring the illumination Lux (Ix) or footcandle (fc) 10.1 Selecting the photometric display unit - Set the measuring head to incident light measuring Use the DIP1 switch to change over to the functions - flat diffuser. CINE/Photometry. With the DIP 3 switch, you can select When setting the dome at the measuring head either the standardized measuring units or special to spherical, an error indication will appear... -
Page 32: Measuring The Luminance Candela/M² (Cd/M²) Or Footlambert (Fl)
10.3 Measuring the luminance 10.4 Measuring time-integral values candela / m (cd/m ) or footLambert (fL) (Ixs, fcs, cds/m , fLs) - Set the measuring head to reflected light measuring - Set measuring head to reflected light or incident light measuring. -
Page 33: Practical Tips
2. The first image is recorded with the exposure value Your STARLITE 2 ascertains precise exposure data in displayed by the STARLITE 2. This exposure value is accordance with DIN 19010. In the event that you’re increased or reduced by up to one f-stop for the not satisfied with the results, keep in mind that there following images, depending upon lens resolution. - Page 34 With the STARLITE 2, you can determine lighting thus better to overexpose a bit rather than to contrast with the incident light measurement method underexpose.
- Page 35 STARLITE 2, in order to assure that the image exposure standpoint such that (adapted to the output doesn’t look like a daytime recording. There are no medium) an adequate tonal range and sufficient detail fixed rules in this case.
- Page 36 Definitions According to Ansel Adams Bright zones Shadow zones VII Very light gray, I Nearly black: very light skin colors, blackening without detail, bright textiles, snow with light from the side noticeable differences to zone 0 VIII White with detail, II Gray-black: brightest parts of the motif which still show detail, insinuated detail,...
-
Page 37: Technical Data
Technical data Measuring range, at flash light (for ISO 100/21°) Incident f/1.0 to f1128 Measuring capabilities Reflected 1° f/2.8 to f/128 Incident light measuring Reflected 5° f/1.4 to f/128 (option of flat or spherical dome) Measued value processing Reflected light measuring, digital (measuring angle 1°or 5°, viewing field ca. - Page 38 CINE speeds Included accessories Standard values: Case, strap, battery Instruction manual 8,12,16,18, 24, 25, 30, 32, 50, 64 Brief operating instructions adjustable additionally: 2, 3, 4, 6, 36, 40, 48, 60, 72, 96, 120, 128, 150, Operating temperature range 200, 240, 255, 300, 360 -10°C to +50°C Other measuring ranges and display values in Storage temperature range...
-
Page 39: Service Interface
Service Interface The STARLITE 2 has a built-in serial port on the outside of the housing. The devices are calibrated at the factory via this interface. Service No special maintenance is required, if the STARLITE 2 is handled correctly. Keep the outside surface clean. - Page 40 Printed in Germany – 15390 – 2/08.14 Subject to change without notice GOSSEN Foto- und Lichtmesstechnik GmbH Lina-Ammon-Str.22 D-90471 Nürnberg I Germany Telefon: +49 911 8602-181 Fax: +49 911 8602-142 E-Mail: info@gossen-photo.de www.gossen-photo.de Gossen Foto- und Lichtmesstechnik GmbH...
Need help?
Do you have a question about the Starlite 2 and is the answer not in the manual?
Questions and answers