Table of Contents
Advertisement
Quick Links
Advertisement
Table of Contents

Related Manuals for Ikegami PCS-400P Series


Summary of Contents for Ikegami PCS-400P Series
- Page 1 Installation & Setup Guide...
-
Page 3: Table Of Contents
Table of contents Table of contents 1 Introduction 2 Disposal Instructions 2 List of Contents 3 Wall Mounting Bracket 6 External / Internal Wall Mount Dome 7 Mounting 7 Address Switches Access 8 Electrical Connections 8 Internal Tile Mount Dome 9 Mounting 9 Address Switches Access 10 Electrical Connections 10... -
Page 4: Introduction
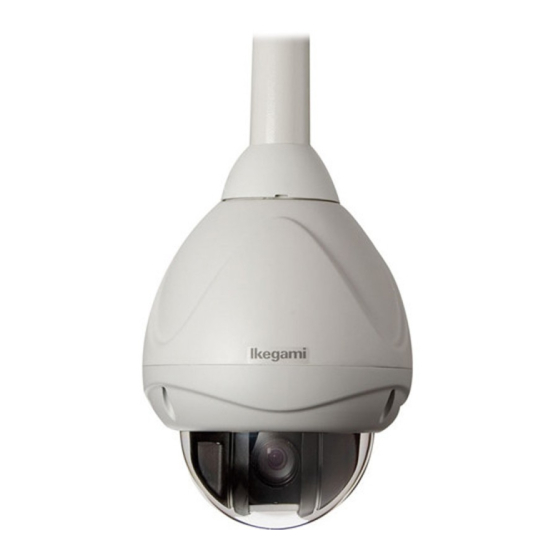
PCS-400P Series Dome Installation & Setup Guide Introduction Introduction Thank you very much for choosing the Ikegami Fully Functional Dome Camera. Please carefully read this Instruction Manual to keep your camera at full capacity. Handling precautions Features: ü Do not open the case of camera and never touch... -
Page 5: List Of Contents
List of Contents List of Contents Tile Mount Dome Wall Mount Dome Components supplied: Components supplied: 1. Tile mount dome unit 1. Wall mount dome unit 3. Installation and Setup Guide CD 3. Installation and Setup Guide CD 4. Cable assembly 5. - Page 6 PCS-400P Series Dome Installation & Setup Guide Technical Specifications Menu System The PCS-400P on screen menu system offers a simple, intuitive and powerful interface to the complete set of dome features, with password protection for increased security. Password protection: Built in...
- Page 7 Installation :: Technical Specifications Video Lift: 8 steps Communication Protocols RS-485: Ikegami i-LAN 485 Pelco P Pelco D Phillips Samsung Dennard Kalatel Sensormatic Ultrack Co-axial: Pelco Coaxitron™ Mechanical Features Housing Construction: Vandal resistant die-cast aluminium Bubble Construction: Vandal resistant polycarbonate...
-
Page 8: Wall Mounting Bracket
PCS-400P Series Dome Installation & Setup Guide Installation :: Wall Mounting Bracket Wall Mounting Bracket ing to the mounting surface. 3. Screw the Cover to the Base Casting using the 4 x trilobular thread forming screws supplied. screws. 5. Slide the Plastic Cover down the arm, align the two brass pegs in the base casting with the corresponding holes in the plastic cover and push down. -
Page 9: External / Internal Wall Mount Dome
Installation :: External / Internal Wall Mount Dome :: Mounting External / ount Dome Internal Wall M Mounting Fitting of the Safety Cable: Connecting the Power Cable: 1. Connect power cable to the socket on the top of the the wall bracket. Dome unit. -
Page 10: Address Switches Access
PCS-400P Series Dome Installation & Setup Guide Installation :: External / Internal Wall Mount Dome :: Address Switch Access Address Switch Access Removal of Internal Mechanism: Accessing the Address Switches: 1. Un-screw the three M5 cap head screws in the lower 1. -
Page 11: Internal Tile Mount Dome
Installation :: Internal Tile Mount Dome :: Mounting Internal Tile Mount Dome – Mounting Hole Cutting Template: Disassemble of Ceiling Mount: 1. Unclip the Cover Ring from the Ceiling Mount Dome. ing the Dome into. 2. Unscrew the Locking Screw, it is captive in the Locking Ring and should not completely fall out. -
Page 12: Address Switches Access
PCS-400P Series Dome Installation & Setup Guide Installation :: Internal Tile Mount Dome :: Address Switch Access Address Switch Access Electrical Connections 1. Remove internal mechanism as shown in section 1. Please see below the electrical connections for the Ceiling Mount Dome. -
Page 13: Address Switches Setting And Controller Protocols
Unit Id Table Protocol address switches on a unit. Ikegami PCS i-LAN Dennard 485 are used to set up the unit ID and the controller proto- Pelco P 9600 col. S1 and S2 are hex switches used to set the unit ID... -
Page 14: Unit Id Switch Setting Table A
PCS-400P Series Dome Installation & Setup Guide Installation :: Address Switches Settings and Controller Protocols :: Unit ID Switch Settings Table A Unit ID Switch Settings Table A Hex Switch Hex Switch Settings Settings using the following controller protocols: Camera ID Camera ID •... -
Page 15: Unit Id Switch Settings Table B
Hex Switch Hex Switch Settings Settings using the following controller protocols: Camera ID Camera ID • Ikegami i-LAN 485 • Pelco P 9600 • Phillips 9600 • Kalatel DP • Ultrack • VTC Scorpio • BBV Table 3. Unit ID switch settings Table B... -
Page 16: Menu Structure - Introduction
PCS-400P Series Dome Installation & Setup Guide Menu Structure :: Introduction Menu Structure - Introduction PCS-400P Series Dome uses a straightforward, simple, intuitive conventional menu structure which features: ü Multilingual: menu can be displayed in English, French, German, Italian and Spanish. -
Page 17: Run Menu
Menu Structure :: Run menu Run Menu Start up screen Run menu screen Selecting RUN from the MAIN MENU allows When a programmed position or tour is selected a user to go to a pre-set position or start a tour. the menu will be cleared from the screen and the There are 62 pre-set positions, 8 slow tours (S unit will execute the appropriate function. -
Page 18: Setup Menu
PCS-400P Series Dome Installation & Setup Guide Menu Structure :: Setup :: Motion Setup Menu Start up screen Setup menu Password screen The SETUP menu gives the operator full access The default password is “AAAAAA”; once entered to set up presets and tours as well as other features 6 stars displays on the screen and the SETUP menu of the unit. -
Page 19: Motion Menu - Formatting Position
Menu Structure :: Setup :: Motion :: Format Position Motion Menu - Formatting a Position Motion menu screen Motion menu screen Access to preset positions 32-62 is possible by Access to preset positions 1-31 is possible by clicking on the FORWARD arrow located under clicking on the BACKWARD arrow located above position 24. -
Page 20: Motion Menu - Setting Up A Tour
PCS-400P Series Dome Installation & Setup Guide Menu Structure :: Setup :: Motion :: Set Up Tour Motion Menu - Setting Up a Tour Setup menu screen Motion menu screen Selecting MOTION from SETUP menu allows an Selecting a slow (SX operator to set up tours. -
Page 21: Motion - Setting Up A Mimic Tour
Menu Structure :: Setup :: Motion :: Set Up Mimic Tour Motion Menu - Setting Up a Mimic Tour Setup menu screen Motion menu screen Selecting MOTION from SETUP menu allows an Selecting a mimic (MX MOTION operator to set up mimic tours. menu takes the operator to the SET UP MIMIC TOUR menu. -
Page 22: Video Settings
PCS-400P Series Dome Installation & Setup Guide Menu Structure :: Setup :: Video settings Video Settings Setup menu screen Video Settings menu screen Selecting VIDEO from the SETUP menu takes From the VIDEO SETTINGS menu the operator the operator to the VIDEO SETTINGS menu. -
Page 23: Joystick Settings
Menu Structure :: Setup :: Joystick settings Joystick Settings Setup menu screen Joystick Settings menu screen From the JOYSTICK menu the following features Selecting JOYSTICK from the SETUP menu can be adjusted: takes the operator to JOYSTICK SETTINGS menu, which allows them to adjust the control settings of the dome. -
Page 24: Privacy Menu
PCS-400P Series Dome Installation & Setup Guide Menu Structure :: Setup :: Privacy :: Set Up Privacy Zone Privacy Menu Set Up Privacy Zone menu screen Setup menu screen Selecting PRIVACY from the SETUP menu takes The dome can store 24 privacy zones, however the operator to the SET UP PRIVACY ZONE menu. -
Page 25: Alarms Menu
Menu Structure :: Setup :: Alarms :: Alarm Setup Alarms Menu - Alarm Setup Alarm Setup menu screen Setup menu screen Selecting ALARMS from the SETUP menu takes Selecting an alarm takes the operator to the the operator to the ALARM SETUP menu where FORMAT ALARM menu. -
Page 26: Alarms Menu - Alarm Mask Setup
PCS-400P Series Dome Installation & Setup Guide Menu Structure :: Setup :: Alarms :: Alarm Mask Setup Alarms Menu - Alarm Mask Setup Setup menu screen Alarm Setup menu screen Selecting ALARMS from the SETUP menu Selecting an alarm mask from the ALARM... -
Page 27: Alarms Menu - Alarm Holiday Setup
Menu Structure :: Setup :: Alarms :: Alarm Holiday Setup Alarms Menu - Alarm Holiday Setup Setup menu screen Alarm Setup menu screen Selecting ALARMS from the SETUP menu takes Selecting an alarm holiday from the ALARM the operator to the ALARM SETUP menu where SETUP menu takes the operator to the FORMAT alarm actions, masks and holidays can be format- ALARM HOLIDAY menu. -
Page 28: Display Options
PCS-400P Series Dome Installation & Setup Guide Menu Structure :: Setup :: Display Options Display Options Setup menu screen Display Options menu screen From the DISPLAY OPTIONS menu the following Selecting DISPLAY OPTIONS from the SETUP features can be adjusted:... -
Page 29: Display Options - Editing Default Position Text
Menu Structure :: Setup :: Display Options :: Edit Default Position Text/Display Error List Display Options - Editing Default Position Text Display Options menu screen Edit Default Position Text screen Selecting EDIT DEFAULT POS TEXT from the This text is used when a preset position has no DISPLAY OPTIONS menu takes the operator to the display text of its own and is accompanied by the menu, where the default position text can be edited. -
Page 30: Display Options - Setting Up Date & Time
PCS-400P Series Dome Installation & Setup Guide Menu Structure :: Setup :: Display Options :: Date and Time Setup :: Edit Date / Edit Time Display Options - Setting Up Date & Time Display Options menu screen Date and Time menu screen... -
Page 31: Special Settings
Menu Structure :: Setup :: Special Settings Special Settings Setup menu screen Special Settings menu screen From the SPECIAL SETTINGS menu the following SPECIAL SETTINGS menu gives access to the features can be adjusted: technical features of the dome. POWER FAIL: toggles between P/T/JOY, P/T and OFF and controls what type of action is stored when the dome is powered down. -
Page 32: Special Settings - Setting Timout Time
PCS-400P Series Dome Installation & Setup Guide Menu Structure :: Setup :: Special Settings :: Timeout Time / Timeout Action Special Settings - Setting Timeout Time Special Settings menu screen Timeout Time screen By selecting TIMEOUT TIME from the SPECIAL SETTINGS menu, the operator can set the time after which the dome executes its timeout action. -
Page 33: Change Password
Menu Structure :: Setup :: Change Password Changing the Password Setup menu screen Change Password screen CHANGE PASSWORD menu allows the user If the wrong password is entered at any point to change the password used to enter the SETUP the current CHANGE PASSWORD screen will be re- menu displayed. -
Page 34: Index
PCS-400P Series Dome Installation & Setup Guide Index Environmental max. temperature 5 Address Switches min. temperature 5 access - tile mount dome 10 access - wall mount dome 8 S1 11, 12, 13 S2 11, 12, 13 Features 2 S3 11... - Page 35 formatting position 16, 1 moves 4 Video number of 4, 14, 15 digital zoom 20 Privacy Zones effects 4 deleting 22 format 4 number of 4, 22 freeze frame 20 setup 22 gain 4, 14, 20 lift 5, 14, 20 near focus 20 RS-485 4, 5, 8, 10 output 5...
- Page 36 Technical Support Ikegamistr. 1 D-41460 Neuss Germany E: info@ikegami.de USA Office Ikegami Electronics Europe UK Ikegami Electronics (USA) Inc. Unit E1, Cologne Court Brooklands Close 37 Brook Avenue, Maywood, NJ 07607 USA Windmill Road Sunbury-on-Thames Tel: 1-201-368-9171 United Kingdom Fax: 1-201-569-1626 engineering1@ikegami.com...
Need help?
Do you have a question about the PCS-400P Series and is the answer not in the manual?
Questions and answers