Advertisement
Available languages
Available languages
Quick Links
Download this manual
See also:
User Manual
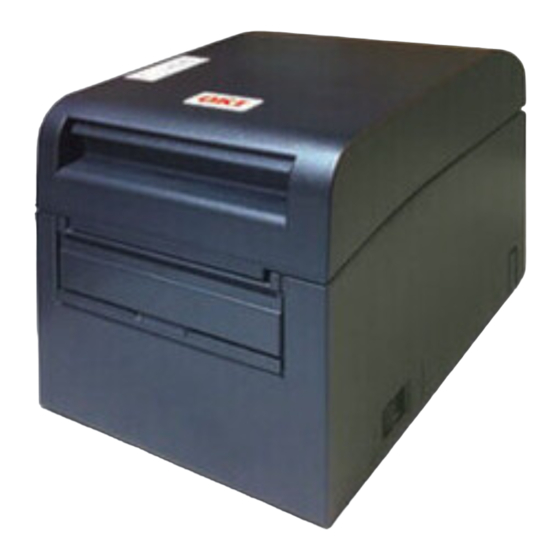
Unpacking the printer
Open the carton, and pull out the printer and its components.
Please confirm that the following things are enclosed
• Printer (1)
• Safety sheet (1)
Setting up
1.
Connecting Inter face Cable
Note 1: Refer to '3. Preparations' of the manual, except the Dual interface model.
Open the connector cover at the rear of the printer with lifting it , and connect the interface cable to its rear Connector socket.
Close the cover after connecting the cable.
Note 2: If cables are arranged so that they extend from the rear or from the rear on the right side, remove the notch of the
connector cover or the cover with nippers or a similar tool. Otherwise, the cables may be damaged and it may cause
a failure.
For a unit with Dual interface
Notch
2.
Connecting the drawer kick cable
Open the connector cover at the rear of the printer by lifting it, and connect the drawer kick cable to its rear connector socket.
Close the cover after connecting the cable.
Note 1: If the cable is arranged so that it extends from the rear, remove the notch of the connector cover with nippers or a
similar tool. Otherwise, the cable may be damaged and it way cause a failure.
Note 2: The drawer kick cable must not be used for a purpose other than for control of the drawer.
Connector cover Notch
Drawer kick cable
3.
Connecting the AC Ada p ter
(1) Connect the AC adapter to the AC adapter power cable.
Note 1:
To connect or disconnect the AC adapter, turn off the power switches of the printer and all the devices to be
connected to the printer. And, unplug the plug of the AC adapter power cable from the electrical outlet.
WARNING [Warning for Safety]
This printer must use the AC Adapter specified below. Otherwise, there may be dangers of fire and/or electrification
occurrence. Please be sure to use our company specifying AC Adapter below.
Part Number:KA02951-0120
LD670 Instruction sheet
• Thermal Paper (1)
• AC adaptor (1)
Connector
Cover notch
USB Interface Cable Type-B
* Connect the printer to a PC with
this connector.
Serial interface cable
* Secure the connector with
screws after making the
connection.
• CD (1)
• Power cable (1)
Drawer kick connector
• Instruction sheet (This paper)
Interface Connector
(USB Interface Type-B)
* Connect the printer to a PC
with this connector.
Power Connector
Interface connector
(Serial interface)
(1)
Advertisement

Related Manuals for Oki LD670


Summary of Contents for Oki LD670
- Page 1 LD670 Instruction sheet Unpacking the printer Open the carton, and pull out the printer and its components. Please confirm that the following things are enclosed • Printer (1) • Thermal Paper (1) • CD (1) • Instruction sheet (This paper) •...
-
Page 2: Turning On The Power
(2) Open the connectors cover at the rear of the printer by lifting it, and connect the AC adapter cable to the power socket. Close the cover after connecting the cable. Note 1: To connect the AC adaptor, place the printer on its side to make the connection operation easier to perform. Note 2: Remove notch of connector cover with Nipper, to maintain the space for the cable of AC adapter. - Page 3 Metho d o f roll pa per se tting form (1) Hold the release lever between your thumb and other fingers. Note 1: When manipulating the top cover, note that the cover seems to lock in position before it is open completely. Make sure that the cover is open completely as shown in the picture below.
- Page 4 Note 3: The roll paper must have no deformities. Using roll paper such as shown in the figure (Fig.d) below may cause a paper jam, uneven printing, or other printing problems. Note 4: If the loaded roll paper is loose (slack) as shown in the figure (Fig.e) tight up the slack before printing on the paper.
-
Page 5: Déballage De L'imprimante
Mode d’emploi de la LD670 Déballage de l'imprimante Ouvrez la boîte et retirez l’imprimante est ses composants. Veuillez confirmer que tous les articles suivants sont présents : • Imprimante (1) • Papier thermique (1) • CD (1) • Mode d’emploi (cette feuille) (1) •... -
Page 6: Mise Sous Tension
(2) Ouvrez le couvercle de connecteurs à l’arrière de l’imprimante en le soulevant et connectez le câble de l’adaptateur CA dans la prise d'alimentation. Fermez le couvercle après avoir branché le connecteur. Remarque 1 : Pour connecter l’adaptateur CA, placez l’imprimante sur le côté afin de faciliter le branchement. Remarque 2 : Découpez l'entaille du couvercle de connecteurs avec une pince coupante afin de créer de l’espace pour le câble de l’adaptateur. - Page 7 Ins tallation du rouleau de papier (1) Tenez le levier de déverrouillage entre le pouce et les autres doigts. Remarque 1 : Lorsque vous manipulez le capot, veuillez noter que le capot semble se verrouiller avant d’être complètement ouvert. Assurez-vous que le capot est complètement ouvert comme le montre l’illustration ci-dessous. Remarque 2 : Si le capot n’est pas complètement ouvert, il peut se refermer seul.
- Page 8 Remarque 3 : Le rouleau de papier ne doit pas être déformé. Utiliser un rouleau comme ceux montrés dans l’illustration Fig. d ci-dessous peut causer du bourrage, de l'inégalité dans l'impression et d'autres problèmes. Remarque 4 : Si le rouleau de papier chargé est desserré (lâche) comme le montre l’illustration Fig. e, resserrez le jeu dans le papier avant d’imprimer.
-
Page 9: Instalación
Hoja de Instrucciones de LD670 Desembalaje de la impresora Abra la caja y saque la impresora y sus componentes. Asegúrese de que la caja contiene los siguientes ítems: • Impresora (1) • Papel térmico (1) • CD (1) • Hoja de instrucciones (esta hoja) (1) •... - Page 10 (2) Levante la tapa del conector en la parte posterior de la impresora para abrirla, y conecte el cable del adaptador de AC al tomacorriente. Cierre la tapa después de conectar el cable. Nota 1: Para conectar el adaptador de CA, coloque la impresora sobre el costado para facilitar la conexión. Nota 2: Retire la muesca de la tapa del conector con un alicate para tener más espacio para el cable del adaptador de CA.
- Page 11 Instalación del papel en rollo (1) Sostenga la palanca liberadora entre el pulgar y otro dedo. Nota 1: Cuando manipula la tapa superior, notará que la tapa parece calzar en una posición antes de abrirla completamente. Asegúrese de abrir completamente la tapa como se muestra en la siguiente figura. Nota 2: Si la tapa superior no está...
- Page 12 Nota 3: El papel en rollo debe estar libre de deformidades. Si coloca el papel de la manera que se muestra en la figura siguiente (Fig.d) el papel se atascará, la impresión será desigual o tendrá otros problemas. Nota 4: Si el papel está...
- Page 13 Folha de Instruções da LD670 Remoção da impressora da embalagem Abra a caixa e retire a impressora e seus componentes. Verifique se os seguintes componentes estão incluídos. • Impressora (1) • Papel térmico (1) • CD(1) • Folha de instruções (esta folha de papel) (1) •...
- Page 14 (2) Abra a tampa dos conectores atrás da impressora e conecte o cabo do adaptador de CA à tomada elétrica. Feche a tampa depois de conectar o cabo. Nota 1: Para conectar o adaptador de CA, coloque a impressora de lado para facilitar o processo. Nota 2: Remova o entalhe da tampa dos conectores com um alicate para que haja espaço para o cabo do adaptador de CA.
- Page 15 Méto do de colocação do rolo de pa pel (1) Segure a alavanca de liberação entre o polegar e os demais dedos. Nota 1: Quando mover a tampa superior, note que ela parece travar numa posição intermediária antes de abrir completamente.
- Page 16 LD670_StatusMonitorGuide_en.pdf MANUAL ONLINE DA PLACA LAN DA Manuais PR-LN1_Manual_en.pdf IMPRESSORA (PR-LN1) Se você não tiver o Adobe Acrobat Reader, o programa está disponível no web site da Adobe, no endereço www.adobe.com. ©2012 OKI Data Americas, Inc. All rights reserved. 58410901...
Need help?
Do you have a question about the LD670 and is the answer not in the manual?
Questions and answers