Oki Pro1040 User Manual
Hide thumbs
Also See for Pro1040:
- Setup manual (46 pages) ,
- Maintenance manual (118 pages) ,
- User manual (76 pages)
Table of Contents
Advertisement
Quick Links
Advertisement
Table of Contents

Related Manuals for Oki Pro1040


Summary of Contents for Oki Pro1040
- Page 1 Pro1040/Pro1050 User's Guide...
-
Page 2: Manual Configuration
This manual describes details about product functions and operations. z Maintenance Guide This manual describes how to replace consumables, and how to clean and maintain the product. The latest versions of the manuals can be downloaded at the Oki Data website. https://www.oki.com/printing/ Technical DTM Print Support... -
Page 3: Reading The Manual
Reading the Manual Symbols Note z These are cautions and restrictions for the correct operation of the device. Make sure to read to avoid misoperation. Memo z These are references and information that are useful when using the device. We recommend reading them. Reference z These are the reference pages. -
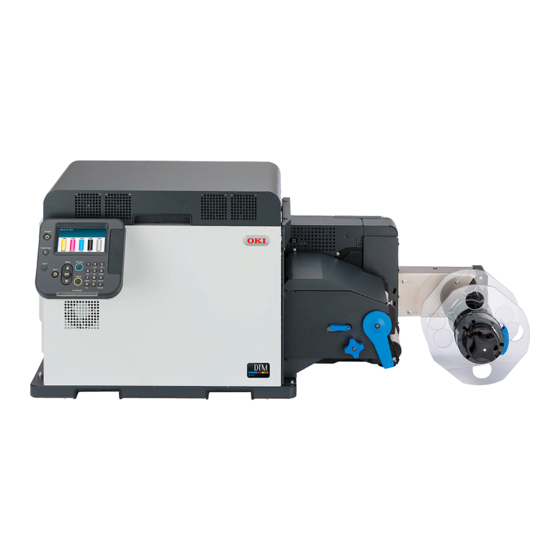
Page 4: Illustrations
Illustrations Unless otherwise specified, the printer illustrations used herein show the printer with the unwinder mounted. Illustrations may differ from the actual product. Screens The images of the control panel and PC used herein are examples. The images may differ from actual products and screens. -
Page 5: Table Of Contents
Table of Contents Table of Contents Manual Configuration ................2 Reading the Manual .................3 Symbols ........................3 Keys, Buttons, and Symbols ..................3 Illustrations ......................4 Screens ........................4 Inscriptions ......................4 Paper Settings ..............11 Printing on Various Papers ..............12 Usable Media Types .................... - Page 6 Table of Contents [Print Information] ....................52 [Menus] ........................ 53 [Admin Setup] ......................63 [Print Statistics] ..................... 74 [Calibration] ......................75 [Boot Menu] ......................78 Saving Toner When Printing ..............79 Saving Toner When Printing (Toner Save Mode) ............79 Printing Using the Specified Print Cartridge Only (Lift Up) ..........
- Page 7 Table of Contents Adjusting the Color ............99 Adjusting Color with the Control Panel ........... 100 Correcting Color Drift Manually ................100 Configuring Settings for Auto Adjustment of Density and Gradation ......100 Adjusting Density Manually ..................101 Fine Tuning Density Adjustments ................102 Adjusting Color Balance (Density) ................104 Fine-tuning Color Balance ..................106 Adjusting Color with a Printer Driver ............
- Page 8 Table of Contents Demo Page ........................132 Error Log ........................133 Usage Report ........................133 Printing Print Lists ....................134 Color Profile List ......................134 User Media List ....................... 135 Test Print ........................135 Changing the Administrator Password ...............136 Checking the Print Count ..............138 Utility Software Usable with This Printer ..........139 Utility List ..................
- Page 9 Table of Contents Storage Manager Plug-in ..................187 OKI LPR Utility ..................190 Operating Environment ...................190 Starting Up ......................190 Downloading a File to the Printer ................190 Viewing, Deleting, and Transferring Jobs ..............191 Checking the Printer Status ..................191 Adding a Printer.....................192 Starting Up the Web Browser ...................192 Adding Comments ....................193...
- Page 10 Table of Contents - 10 -...
-
Page 11: Paper Settings
Paper Settings Printing on Various Papers ………… 12 Registering a Desired Paper Size with the Printer Driver ……………… 15 Note z The examples in this chapter use Windows WordPad for explanations. Depending on the application, the screens and operations procedures may differ. z For detailed explanations of the printer driver and utility setup items, see "Online Help". -
Page 12: Printing On Various Papers
For high-quality printing it is necessary to use paper that satisfies conditions regarding quality, thickness, paper finish, etc. If printing on paper not recommended by OKI, thoroughly test the print quality and paper traveling performance, etc., and check that there are no impediments before use. - Page 13 Printing on Various Papers z Die-cut labels that are used in Gap Mode must satisfy the following conditions. The transparency of the label part (including both the label and the label liner) must be below 25%. The liners must be within a range of 10% to 45% transparent. However, the transparency of the liners must be more than 1.8 times the transparency of the label part.
-
Page 14: Storing Media
Printing on Various Papers Storing Media Improper paper storage can cause absorption of moisture, discoloration, and warping. Note that printing on such paper can adversely affect print quality, feeding, etc. Leave packages of media unopened until you are actually ready to use them. -
Page 15: Registering A Desired Paper Size With The Printer Driver
Registering a Desired Paper Size with the Printer Driver Registering a Desired Paper Size with the Printer Driver Click [Start] and select [Control Panel] Select a Media Weight to match the in [Windows System]. paper thickness. Memo Click [View devices and printers]. z If you are unsure of the paper thickness, select [Medium Light]. -
Page 16: Using The Printer Driver To Fine-Tune The Print Position
Registering a Desired Paper Size with the Printer Driver Using the Printer Driver Memo to Fine-tune the Print z A blank piece of paper may be inserted after cut Position pages if the paper length, label length, or black mark interval is less than 4 inches. Click [Start] and select [Control Panel] Enter other information as required. - Page 17 Registering a Desired Paper Size with the Printer Driver Use the [Registered user-defined paper] Open the file to be printed. list to select the paper whose print position you want to correct. Specify the paper size, and then print. Memo z If the paper you want to use is not in the list, select [New paper] and add it.
-
Page 18: Using The Printer Driver To Fine-Tune The Cut Position
Registering a Desired Paper Size with the Printer Driver Using the Printer Driver to Use the [Registered user-defined paper] list to select the paper whose cut Fine-tune the Cut Position position you want to correct. Click [Start] and select [Control Panel] Memo in [Windows System]. - Page 19 Registering a Desired Paper Size with the Printer Driver Click [OK] or [Close] as many times as necessary to exit the “Printing preferences” screen. Open the file to be printed. Specify the paper size, and then print. - 19 -...
- Page 20 Registering a Desired Paper Size with the Printer Driver - 20 -...
-
Page 21: Printing
Printing Preparing Paper ………………………… 22 Loading Media …………………………… 24 Calibrating the Sensor ………………… 30 Detecting the Interval between Pages ……………………………………… 43 Printing …………………………………… 45 Canceling a Print Job ………………… 46 Note z The examples in this chapter use Windows WordPad for explanations. Depending on the application, the screens and operations procedures may differ. -
Page 22: Preparing Paper
Preparing Paper Preparing Paper This section describes how to load paper onto the holder of the unwinder. For paper sizes and types that can be loaded onto the unwinder, see “Roll Paper Specifications” (P.12). Remove the paper from the packaging. Check the leading edge of the paper and cut it off straight. - Page 23 Preparing Paper z Die-cut label paper (no black marks) 1.2 to 6.5 mm (0.0472 to 0.2559 inches) Length of leading liner when paper is loaded z Die-cut label paper (with black marks) 1.2 to 4.0 mm (0.0472 to 0.1575 inches) Length of leading margin when paper is loaded - 23 -...
-
Page 24: Loading Media
Loading Media Loading Media Load the paper onto the Unwinder. For paper sizes and types that can be loaded on the Unwinder, see “Roll Paper Specifications” (P.12). Note z When setting roll paper, be careful not to drop it. As roll paper is heavy, when you drop it, there is a risk of injury. z If you drop roll paper, it may roll on the floor and cause injury to the people around. - Page 25 Loading Media Slide roll paper onto the Roll Paper Aligning the Flange with the Roll Paper Holder shaft as far as it will go. Holder shaft as shown in the illustration, attach the Flange. Slide the Flange as far as it will go in accordance with the roll paper width.
- Page 26 Loading Media Close the Flange Locking Lever. Lower the Unwinder Cover Open Lever to open the Unwinder Cover. Open the Unwinder Cover manually in the direction indicated by the arrow until it locks. Note z After loading roll paper, take care not to rest your body weight on the top of the Roll Paper Holder shaft.
- Page 27 Loading Media Before loading the paper, rotate the Roll Pass paper below the Tension Bar and Paper Guide Adjustment Knob clockwise F0 Roller, and align the leading edge of and move the Roll Paper Guide towards the paper with the Roll Paper Guide and you.
- Page 28 Loading Media Rotate the Roll Paper Position Press down on the Tension Bar Open Adjustment Dial to adjust the paper Lever until it clicks. until it is straight. Roll Paper Position After loading the paper, rotate the Adjustment Dial Roll Paper Guide Adjustment Knob counterclockwise and align the Roll Paper Guide to the width of the paper.
- Page 29 Loading Media Close the Unwinder Cover. Note z When closing the Unwinder Cover, there is a risk of pinching your fingers or hands. Press the top of the Unwinder Cover to close it. Gap is too large This completes setting roll paper. Memo z If, even though the roll paper is set correctly, the paper separates from the Unwinder Paper Guide...
-
Page 30: Calibrating The Sensor
Calibrating the Sensor Calibrating the Sensor Note z Check the position of the sensor each time you load paper. Check the position of the sensor in the following cases especially. - When you load a different type of paper - When you switch the type of sensor from black mark sensor to gap sensor - When you switch the type of sensor from gap sensor to black mark sensor z If the sensor position settings do not match, paper feed jams may occur, you cannot adjust the black mark sensor or the gap... - Page 31 Calibrating the Sensor Confirm the sensor position. If the position of the black mark and the black mark sensor position Sensor Position Adjustment Dial do not align, rotate the Sensor Position Adjustment Dial to adjust the position (go to step 3). Position During Regular Usage Factory setting is this position.
- Page 32 Calibrating the Sensor If the position of the label and the Rotate the Sensor Position Adjustment gap sensor position do not align Dial to adjust the sensor position. in relation to the regular usage position, rotate the Sensor Position Adjustment Dial to adjust the position (go to step 3).
-
Page 33: Printer
Calibrating the Sensor Printer Confirm the sensor position. Sensor Position Adjustment Dial Grasping the Top Cover Open Lever, open the Top Cover. 65 mm from Position During edge of paper Edge Regular Usage Factory setting is this position. paper 58.5 mm from edge Remove the Print Cartridge Set and the of paper Belt Unit. - Page 34 Calibrating the Sensor Check the black mark sensor Rotate the Sensor Position Adjustment position Dial to adjust the sensor position. Confirm the center of the black mark on the media and the black mark sensor position on the device (number on the indicator). If the position of the black mark and the black mark sensor position do not align, rotate the Sensor...
-
Page 35: Sensor Calibration
Calibrating the Sensor Sensor Calibration Click [Sensor Adjustment]. Click [Start] and select [Control Panel] in [Windows System]. Click [View devices and printers]. Memo z [Sensor Adjustment] appears if the following conditions are met. - The Media Form is one of the following Continuous Paper (Black Mark) Die-cut Label (Gap) Die-cut Label (Black Mark) - Page 36 Calibrating the Sensor Select a registration location (a) for When the completion screen appears, the adjustment, and then enter a click [Complete]. registration name (b). Memo Memo z The results of adjusting the sensor are registered on the printer. In [Sensor settings] in [User-defined z You can enter up to eight alphanumeric English paper] in the printer driver, you can specify the characters for the registration name.
-
Page 37: If You Cannot Set The Sensors From The Printer Driver
Calibrating the Sensor If You Cannot Set the Sensors from the Printer Driver If you cannot set the sensors from the printer driver, then set them from the control panel. Black mark sensor Gap sensor Confirm the sensor position Configure the sensor type Configure the sensor type Media form = Continuous Paper (Black Mark) Die-cut Label (Black Mark) -
Page 38: Calibrating The Black Mark Sensor
Calibrating the Sensor Calibrating the Black Mark Press the <Fn> key, and then press the following buttons: <9>, <0>, <OK>. Sensor You can adjust the black marks on roll paper using the black mark sensor. Here, we will show the method when Continuous Label (Black Mark) are used. - Page 39 Calibrating the Sensor Press the <Fn> key, and then press Select the setting number of the sensor the following buttons: <8>, <9>, <0>, to be configured, and then press the <OK>. <OK> button. Select [Black Mark Interval] from Select [Execute Calibration], and then [Unwinder Config], and then press the press the <OK>...
-
Page 40: Calibrating The Gap Sensor
Calibrating the Sensor Calibrating the Gap Sensor After sensor calibration is complete, press the <OK> button. You can adjust the distance between die cut labels using the gap sensor. Press the <Fn> key. The numerical values input screen will be displayed. Press <8>, <9>, <1>... - Page 41 Calibrating the Sensor Press the <Fn> key, and then press the Press the <Fn> key, and then press the following buttons: <9>, <0>, <OK>. following buttons: <9>, <2>, <OK>. On the Paper Size menu, select Use the numeric keypad to enter the [Custom], press the <OK>...
- Page 42 Calibrating the Sensor Use the numeric keypad to enter the gap length, press the <OK> button, and then press the <ON LINE> button. The display will return to the standby screen. From here, perform the same steps as those under “Calibrating the Black Mark Sensor”...
-
Page 43: Detecting The Interval Between
Detecting the Interval between Pages Detecting the Interval between Pages When executing from the printer For [Paper settings], select the paper „ driver settings you registered, and then click [Paper interval detection]. You can use the following procedure, from the printer driver, to register the paper gap and black mark interval on the device. - Page 44 Detecting the Interval between Pages „ When executing from the control panel Detect the paper gap and black mark interval from the control panel. For black mark media, execute steps 1 to 11 in “Calibrating the Black Mark Sensor” (P.38). For gap media, execute steps 1 to 13 in “Calibrating the Gap Sensor”...
-
Page 45: Printing
Printing Printing After loading the paper, use the computer to open the file you want to print. Next, use the printer driver to select the [Paper Size] and [Paper Weight], and then print. Memo z When printing on label paper for the first time, execute [Sensor Adjustment] before printing. z When reprinting after an error occurs, if Cut Mode is set, the media may not be cut in the position you expect. -
Page 46: Canceling A Print Job
Canceling a Print Job Canceling a Print Job Use the procedure below to cancel a print job from the printer’s control panel. On the control panel, press the <CANCEL> button. If a verification message appears, select [Yes], and then press the <OK> button. - 46 -... -
Page 47: Print Function Settings
Print Function Settings Printer Driver Functions Table ……… 48 Table of Setting Items in the Control Panel Menu Screen … 50 Saving Toner When Printing ………… 79 Fine Quality Printing …………………… 81 Adjusting the Print Position on the Paper ……………………………… 84 Other Print Functions …………………... -
Page 48: Printer Driver Functions Table
Printer Driver Functions Table Printer Driver Functions Table This section explains the convenient functions when printing from a PC. Reference z For detailed explanations of the printer driver setup items, see "Online Help". Explanation of Functions [User-defined paper] Windows PCL Printer Driver Functions [Setup] Tab Item Description... - Page 49 Printer Driver Functions Table [Color] Tab [Extend] Tab Item Description Item Description Color Mode Selects either color printing Watermarks Sets when implementing or monochrome printing. stamp printing. When color is selected, Fonts Configures TrueType and clicking [Detail] displays the printer font settings. "Detail"...
-
Page 50: Table Of Setting Items In The Control Panel Menu Screen
Table of Setting Items in the Control Panel Menu Screen Table of Setting Items in the Control Panel Menu Screen Device Setup Screen Item Description Configuration View device information (total number of sheets, remaining consumable quantity, system information, etc.) Print Information Print the settings, usage report, error log, color profile list, and user media lists for this machine. - Page 51 Table of Setting Items in the Control Panel Menu Screen Item Description Network Printer Name ********** Shows the printer name used by the DNS and Network ********** PnP. *********** Short Printer Name ******* Displays the short printer name. ******** IPv4 Address xxx.xxx.xxx.
-
Page 52: [Print Information]
Table of Setting Items in the Control Panel Menu Screen [Print Information] Item Description Configuration Execute Prints the device setup details. Demo Page DEMO1 Execute Prints the demo pages. File List Execute Prints the file list. Usage Report Execute Prints the total print results. Error Log Execute Prints the error log. -
Page 53: [Menus]
Table of Setting Items in the Control Panel Menu Screen [Menus] „ Unwinder Config z Shaded areas are factory-set values. Item Value Description Media Form Continuous Paper Specifies the shape of the roll paper. Continuous Paper (Black Mark) Die-cut Label (Gap) Die-cut Label (Black Mark) Continuous Label... - Page 54 Table of Setting Items in the Control Panel Menu Screen z Shaded areas are factory-set values. Item Value Description Y Dimension 12.7 millimeter Sets the length of the custom paper sizes (0.50 inch) for the unwinder. Sets the same direction as for the 101.6 millimeter dimension in the paper feed direction.
- Page 55 Table of Setting Items in the Control Panel Menu Screen z Shaded areas are factory-set values. Item Value Description Media Type Plain Sets the type of the paper for the Plain Labels unwinder. Glossy Labels Film Labels1 Film Labels2 Film1 Film2 USERTYPE1 USERTYPE2...
- Page 56 Table of Setting Items in the Control Panel Menu Screen Item Value Description Sensor Set1 : Execute Calibration Execute Executes calibration of the gap sensor or Calibration Set2 : black mark sensor. Set3 : Adjust Reflective Fine tunes the sensitivity of the reflective Set4 : Slice Sensor in...
- Page 57 Table of Setting Items in the Control Panel Menu Screen „ Cutter Setup z Shaded areas are factory-set values. Item Value Description Cut Mode Specifies the cutting operation. Collation Job: Specified Interval Cuts at the end of a job. Collation: Cuts at the end of the job and at the end of the job collation.
- Page 58 Table of Setting Items in the Control Panel Menu Screen „ System Adjust z Shaded areas are factory-set values. Item Value Description Power Save Time 1 minute Sets the time until the printer enters power save 2 minutes mode. 3 minutes 4 minutes 5 minutes 10 minutes...
- Page 59 Table of Setting Items in the Control Panel Menu Screen „ Print Adjust z Shaded areas are factory-set values. Item Value Description Print Position X Adjust 0.00 millimeters Adjusts the overall image print position perpendicularly Adjust +0.1 millimeters (horizontally) in the direction of paper feed (0.1 mm intervals).
- Page 60 Table of Setting Items in the Control Panel Menu Screen z Shaded areas are factory-set values. Item Value Description SMR Setting Cyan Compensates for uneven print density due to temperature and humidity, and printing quantity, using cyan. Raise the setting value if it is blurred. Lower the setting value if the density darkens partially.
- Page 61 Table of Setting Items in the Control Panel Menu Screen z Shaded areas are factory-set values. Item Value Description BG Setting Cyan Compensates for print results variation due to differences in the temperature and humidity, using cyan. Lower the setting value if the underlay is dark. * Continued use with the setting value lowered has a risk of printing stains.
- Page 62 Table of Setting Items in the Control Panel Menu Screen z Shaded areas are factory-set values. Item Value Description Transfer Cyan Transfer Lower the setting value if lateral-stripe white dots and Setting Setting dark streaks appear for cyan, green and blue toner. Raise the setting value if the high-density portion of cyan, green and blue is thinner.
-
Page 63: [Admin Setup]
Table of Setting Items in the Control Panel Menu Screen [Admin Setup] Note z To enter this menu, it is necessary to enter the [Password]. z The factory default setting of the administrator password is [999999]. „ Network Setup z Shaded areas are factory-set values. Item Value Description... - Page 64 Table of Setting Items in the Control Panel Menu Screen „ USB Setup z Shaded areas are factory-set values. Item Value Description Enable Enables/disables access using a USB interface. Disable Speed 480Mbps Sets the maximum baud rate using a USB interface. 12Mbps Soft Reset Enable...
- Page 65 Table of Setting Items in the Control Panel Menu Screen „ Print Setup z Shaded areas are factory-set values. Item Value Description Personality Auto Select the print language. Print language switching is automatic when set to [Auto]. PostScript Copies Sets the copy quantity. This setting is ignored in case of local print.
- Page 66 Table of Setting Items in the Control Panel Menu Screen „ PS Setup z Shaded areas are factory-set values. Item Value Description Network Protocol ASCII Specifies the PS communication protocol mode for data from the network. USB Protocol ASCII Specifies the PS communication protocol mode for data from USB.
- Page 67 Table of Setting Items in the Control Panel Menu Screen z Shaded areas are factory-set values. Item Value Description Symbol Set Win 3.1 Cyr Select the symbol set. Win 3.1 Grk Win 3.1 Heb Win 3.1 L1 Win 3.1 L2 Win 3.1 L5 Wingdings Dingbats MS...
- Page 68 Table of Setting Items in the Control Panel Menu Screen z Shaded areas are factory-set values. Item Value Description Symbol Set Kamenicky Select the symbol set. Legal Math-8 MC Text MS Publish PC Ext D/N PC Ext US PC Set1 PC Set2 D/N PC Set2 US CR Function...
- Page 69 Table of Setting Items in the Control Panel Menu Screen „ Panel Setup z Shaded areas are factory-set values. Item Value Description Idle Display Supplies Life Sets the information displayed in the standby Unwinder Config screen. Panel Brightness During Operation Adjusts the brightness (backlight luminosity) of the control panel LCD.
- Page 70 Table of Setting Items in the Control Panel Menu Screen „ Others Setup z Shaded areas are factory-set values. Item Value Description RAM Setup Receive Buffer Size Auto Sets the incoming buffer size that is assured by the 0.5 MB local interface.
- Page 71 Table of Setting Items in the Control Panel Menu Screen z Shaded areas are factory-set values. Item Value Description Media Inquiry Display Specifies the operation when the <FEED> button or Operation the <UNLOAD> button is pressed. Setup In the cases below, a confirmation screen is displayed before the operation is executed.
- Page 72 Table of Setting Items in the Control Panel Menu Screen Item Font Name List CG Omega Bold CG Omega Italic CG Omega Bold Italic Coronet Clarendon Condenced Univers Medium Univers Bold Univers Medium Italic Univers Bold Italic Univers Medium Condensed Univers Bold Condensed Univers Medium Condensed Italic Univers Bold Condensed Italic...
- Page 73 Table of Setting Items in the Control Panel Menu Screen Item Font Name List Helvetica Bold Helvetica Oblique Helvetica Bold Oblique Helvetica Narrow Helvetica Narrow Bold Helvetica Narrow Oblique Helvetica Narrow Bold Oblique New Century Schoolbook Roman New Century Schoolbook Bold New Century Schoolbook Italic New Century Schoolbook Bold Italic Palatino Roman...
-
Page 74: [Print Statistics]
Table of Setting Items in the Control Panel Menu Screen [Print Statistics] Note z To enter this menu, it is necessary to enter the [Password]. z In the default factory settings, the password is [0000]. z Shaded areas are factory-set values. Item Value Description... -
Page 75: [Calibration]
Table of Setting Items in the Control Panel Menu Screen [Calibration] z Shaded areas are factory-set values. Item Value Description Auto Density Mode Sets whether to automatically compensate density and shade. Adjust Density Execute Implements density compensation. Implement when the device is in stand-by status. Adjust Registration Execute Implements auto color misalignment compensation... - Page 76 Table of Setting Items in the Control Panel Menu Screen z Shaded areas are factory-set values. Item Value Description Fine Color Cyan Tuning Highlight Matches the highlights (light areas) of the cyan Tuning shade characteristics. Mid-Tone Matches the intermediate areas of the cyan shading characteristics.
- Page 77 Table of Setting Items in the Control Panel Menu Screen z Shaded areas are factory-set values. Item Value Description Reset Color Tuning Execute Resets CMYK color matching. White Tuning Highlight Matches the highlights (light areas) of the white shading characteristics. Mid-Tone Matches the intermediate areas of the white shading characteristics.
-
Page 78: [Boot Menu]
Table of Setting Items in the Control Panel Menu Screen [Boot Menu] Note z This menu is displayed in English only. „ Boot Menu Note z To enter this menu, press and hold the <OK> button while turning ON the power supply. z Confirm that [Boot Menu] is selected and then press the <OK>... -
Page 79: Saving Toner When Printing
Saving Toner When Printing Saving Toner When Printing Saving Toner When „ Windows PCL printer driver Printing (Toner Save Open the file to be printed. Mode) Select [Print] in the [File] menu. You can print by economizing the toner consumption amount by reducing the page print Click [Preferences] (or [Properties]). -
Page 80: Printing Using The Specified Print Cartridge Only (Lift Up)
Saving Toner When Printing Printing Using the Specified Print Cartridge Only (Lift Up) The lifespan of an unused print cartridge can be prolonged by separating it from the belt unit. Setting combinations are shown in the table Turn the lift up lever on the print below. -
Page 81: Fine Quality Printing
Fine Quality Printing Fine Quality Printing Changing Print Quality Making Photograph (Resolution) Printing More Vivid (Photo Enhance) Set [Quality] by aligning to the environment in which it is used. You can print more natural and vivid images, such as photos, etc. Memo Note z Selecting [Fine/Detail(1200x1200 dpi)] prints at the... -
Page 82: Adjusting Fine Lines
Fine Quality Printing Adjusting Fine Lines Using Printer Fonts You can prevent misaligned lines being printed You can print by replacing TrueType fonts with when ultra-fine lines are specified from the printer built-in fonts. application. This function is normally ON. Note z The font replacement function stores the document Memo... -
Page 83: Using Computer Fonts
Fine Quality Printing Using Computer Fonts On the "Font" screen, select the [Font Substitution] check box. You can output TrueType fonts as they appear on For this printer, this check box is selected as the the screen. default setting. Note z Print time may be longer. -
Page 84: Adjusting The Print Position On The Paper
Adjusting the Print Position on the Paper Adjusting the Print Position on the Paper You can correct the print start position vertically and horizontally on the paper by the printer settings. Please refer to the following procedure. Using the roll paper Press the scroll button to select the item you want to adjust. -
Page 85: Adjusting The Position That Printing Starts
Adjusting the Print Position on the Paper Adjusting the Position Adjust the position using [Y Adjust] in [Menus]>[Print Adjust]>[Print That Printing Starts Position Adjust]. This section explains how to better align the When using a black When using a gap position at which printing starts for die-cut label mark sensor sensor... - Page 86 Adjusting the Print Position on the Paper If you are actually printing more than two sheets consecutively, then next, do the following adjustment. (Improve the accuracy of the function for learning the position that printing starts) In the driver’s print settings, set [To specify the number of pages per cut] in [Cut Mode] and set [20] in [Page(s) per cut].
-
Page 87: Other Print Functions
Other Print Functions Other Print Functions Specifying the Page Order Overlaying Stamps for Printing (Watermarks) Extracts by page order when printing documents with multiple pages. The details to be printed from the application can be independently printed overlaying [Samples], There are two methods. -
Page 88: Collating Printed Output (Sorted Printing)
Other Print Functions Collating Printed Output Click [New]. (Sorted Printing) You can store print jobs in the device memory and collate the printing. Printing by specifying batches x 2 sets Printing without specifying batches x 2 sets Note On the "Watermarks" screen, enter text into [Text], and configure [Size] and z Not usable with some applications. -
Page 89: Printing A Mirror Image
Other Print Functions Printing a Mirror Image Click [OK] to return to the "Print" screen. Print using mirror print when you want to print image to appear normal when the page is viewed Click [Print] in the "Print" screen to from the back. -
Page 90: Printing Registered Forms (Print Overlay)
Other Print Functions Printing Registered Forms On the [Overlays] tab, select [Register print document as a new form]. (Print Overlay) You can register forms, logos, etc., as forms to the device, and overlay for printing. Memo z To print an overlay, you need to create a form and register it in advance.It is possible to specify a maximum of four forms in one group.Forms are overlaid and printed in the order they are registered. - Page 91 Other Print Functions Input the [Form name] and [ID], and Perform the following operation to then click [OK]. close the “Printing Preferences” screen: [Apply] > [OK]. The form is sent to the device and registered with the specified ID. Print from the application. On the [Overlays] tab, select [Overlay Print].
-
Page 92: Outputting To A File Without Printing
Other Print Functions Outputting to a File Changing the Check Without Printing Unnecessary Print Cartridge Setting You can write and save to a file without printing the print data. You can have an error displayed and cancel the print job to prioritize the service life of a Note print cartridge that is detected to be down even though it is not being used as a specified color... -
Page 93: Saving Printer Driver Setups
Other Print Functions Saving Printer Driver Select [Print Setup], and then press the <OK> button. Setups You can save the details set using the printer drivers. If you save the changes to the settings for multiple locations, then the next and following times you change the settings, all you have to do is specify the driver settings so that those settings in the multiple locations are... -
Page 94: Recall A Saved Setup
Other Print Functions Delete a Saved Setup Enter the setting name into [Save Favorites as], and then click [OK]. Click [Start] and select [Control Panel] in [Windows System]. Click [View devices and printers]. Click [OK] to close the Print Setup dialog box. -
Page 95: Importing/Exporting A Printer Driver Print Setup
Other Print Functions Importing/Exporting a In the [List of favorite settings] on the "Export" screen, select the checkbox Printer Driver Print Setup next to the setup you want to export, and then click [Export]. You can convert printer driver print setup information to a file, and then export/import the file. -
Page 96: Changing Default Printer Driver Settings
Other Print Functions Changing Default Printer Click [Import]. Driver Settings It is convenient to set frequently used settings as the default settings. On the "Import" screen, click [Open the „ Windows PCL Printer Driver file]. Click [Start] and select [Control Panel] in [Windows System]. -
Page 97: Deleting Or Updating A Printer Driver
Deleting or Updating a Printer Driver Deleting or Updating a Printer Driver Deleting a Printer Driver Select the driver to be deleted, and click [Remove]. „ Windows PCL Printer Driver Note z PC administrator privileges are required. z Restart the computer, and then delete the driver. Click [Start] and select [Control Panel] in [Windows System]. -
Page 98: Updating A Printer Driver
Deleting or Updating a Printer Driver Updating a Printer Driver Restart the PC. For information about the latest driver versions, check the Oki Data website. Note z Network Extension and the Color Swatch Utility installed „ Windows PCL Printer Driver together with the printer driver are not deleted even if the printer driver is deleted. -
Page 99: Adjusting The Color
Adjusting the Color Adjusting Color with the Control Panel …………………………… 100 Adjusting Color with a Printer Driver …………………………… 109 - 99 -... -
Page 100: Adjusting Color With The Control Panel
Adjusting Color with the Control Panel Adjusting Color with the Control Panel Correcting Color Drift Configuring Settings Manually for Auto Adjustment of Density and Gradation The printer compensates color drift automatically according to the conditions of use. If the color The printer compensates density automatically drift is noticeable, you can also implement according to the conditions of use. -
Page 101: Adjusting Density Manually
Adjusting Color with the Control Panel Adjusting Density Select [On], and then press the <OK> button. Confirm there is a check mark Manually ( ) to the left of [On]. The printer can implement compensation periodically using auto density compensation mode, but if the print density is noticeable, it can also be compensated manually. -
Page 102: Fine Tuning Density Adjustments
Adjusting Color with the Control Panel Fine Tuning Density The display will return to the standby screen after density adjustment is Adjustments complete. You can finely adjust the densities of colors that are used as the references for density compensation. Adjust each color separately for the parts where the density is noticeable from the print results. - Page 103 Adjusting Color with the Control Panel Press the scroll button to specify Print. a value that is larger than the current If you are not satisfied with the density, value, and then press the <OK> button. repeat steps 1 to 6 of this procedure. Confirm there is a checkmark ( ) to the left of the selected value.
-
Page 104: Adjusting Color Balance (Density)
Adjusting Color with the Control Panel Adjusting Color Balance Use the print results for the color tuning pattern to check the current color (Density) balance. The printer can implement compensation periodically using auto density compensation mode. However, you can implement this adjustment when you want to adjust the gray balance of the halftones, which is not sufficiently adjusted by the auto density compensation. - Page 105 Adjusting Color with the Control Panel Select [Calibration], and press the The pattern number specified in <OK> button. each area will be displayed. If the pattern number is correct, select [Yes], and press the <OK> button. Select [Base Color Tuning], and press the <OK>...
-
Page 106: Fine-Tuning Color Balance
Adjusting Color with the Control Panel Fine-tuning Color Balance Check the color balance adjustment results. The printer can implement compensation Print the color tuning pattern. periodically using auto density compensation mode. However, you can implement this Use the print results for the adjustment when you want to finely adjust the gray balance of the halftones, which is color tuning pattern to check the... - Page 107 Adjusting Color with the Control Panel Use the print results for the color tuning Use the print results for the color tuning pattern to check the current color pattern to adjust the color balance. balance. If you are adjusting the color balance, use the control panel to specify the shade (Highlight, Dark, and Mid-Tone) of each color.
- Page 108 Adjusting Color with the Control Panel Select [Highlight], and press the <OK> button. Specify a larger value than the current set value, and press the <OK> button. Confirm there is a check mark ( ) to the left of the specified value.
-
Page 109: Adjusting Color With A Printer Driver
Adjusting Color with a Printer Driver Adjusting Color with a Printer Driver Color Matching Color Matching (Automatic) What Is Color Matching? The procedure below performs recommended color matching for general documents. Generally It is important to manage the work processes use the settings shown here. -
Page 110: Simple Color Matching (Simple Adjustment)
Adjusting Color with a Printer Driver Simple Color Matching „ Setup Items (Simple Adjustment) z [RGB Color Setting] Specifies the method for expressing the colors processed using color matching. Color matching is used on a printer for reproduction of the RGB colors required to print z Monitor - Auto from word processor, spreadsheet, presentation, During color matching, represents... -
Page 111: Color Matching (Graphic Pro)
Adjusting Color with a Printer Driver Color Matching „ Windows PCL Printer Driver (Graphic Pro) Open the file to be printed. Graphic Pro is the optimal choice for use with Select [Print] in the [File] menu. DTP software. It lets you specify simulation printing for any Click [Preferences] (or [Properties]). -
Page 112: Color Matching (No Color Matching)
Adjusting Color with a Printer Driver Color Matching Changing the Black Finish (No Color Matching) The finish for the black parts will be changed when printing in color. This can be used when Prints using the specified colors as is, without the printer driver's color mode setting is [Simple implementing color matching using the printer Adjustment] or [Graphic Pro]. -
Page 113: Monochrome (Black And White) Printing
Adjusting Color with a Printer Driver Monochrome „ Windows PCL Printer Driver (Black and White) Printing Open the file to be printed. The color data is printed using grayscale (shades On the [File] menu, select [Print]. of black and white) without touching the print data. -
Page 114: Suppressing White Lines Between Text And The Background (Black Overprint)
Adjusting Color with a Printer Driver Suppressing White Lines Correcting for Print Between Text and the Misalignment (Trapping) Background Use if there are white or colored lines (Black Overprint) between two overlapping objects due to print misalignment. If you are imaging 100% black text on a colored background, you can print (overprint) by „... -
Page 115: Simulating Print Results
Adjusting Color with a Printer Driver Simulating Print Results „ Windows PCL Printer Driver Open the file to be printed. The printer adjusts CMYK color data to simulate the characteristics of ink, such as that used in Select [Print] in the [File] menu. offset printing. - Page 116 Adjusting Color with a Printer Driver - 116 -...
-
Page 117: Spot Color Printing Setup (Pro1050 Only)
Spot Color Printing Setup (Pro1050 Only) Printer Driver Spot Color Function List ……………………………… 118 Printing on Color Papers ……………… 119 Fine-Tuning White Shading ………… 121 Note z The examples in this chapter use Windows WordPad for explanations. Depending on the application, the screens and operations procedures may differ. -
Page 118: Printer Driver Spot Color Function List
Printer Driver Spot Color Function List Printer Driver Spot Color Function List This section explains the Spot Color toner functions in the printer drivers. „ Windows PCL Printer Driver Click the [Color] tab to display the screen for setting the spot color toner. Item Description Usage Method... -
Page 119: Printing On Color Papers
Printing on Color Papers Printing on Color Papers Usable Color Papers Printing Using White Toner Only Use color paper that satisfies the following conditions. Printing text and illustrations using only white toner on color paper. z Pigment or ink used to color the paper heat- resistant to 230ºC Before printing, check that the white print cartridge has been mounted to the device, and... -
Page 120: Printing White Under Color
Printing on Color Papers Printing White Under Color „ Windows PCL Printer Driver Open the file to be printed. When printing on color paper, print a base with white toner, and then print in color on top of Select [Page Setup] in the [File] menu. that. -
Page 121: Fine-Tuning White Shading
Fine-Tuning White Shading Fine-Tuning White Shading Finely adjust the shade for each white highlight, dark, mid-tone gradation using the printer control panel. Here, we will show the procedure for slightly Select [Highlight], and press the <OK> darkening white highlights. button. - Page 122 Fine-Tuning White Shading - 122 -...
-
Page 123: Network Settings
Network Settings Initializing Network Settings ……… 124 Using DHCP ……………………………… 125 IPv6 ………………………………………… 127 - 123 -... -
Page 124: Initializing Network Settings
Initializing Network Settings Initializing Network Settings Select [Network Factory Defaults], and Note then press the <OK> button. z Implementing this operation will initialize all network settings. Press the scroll button Select [Admin Setup], and then press the <OK> button. When [Execute] appears, press the <OK>... -
Page 125: Using Dhcp
Using DHCP Using DHCP IP addresses can be acquired from a DHCP server. Note z PC administrator privileges are required for the setup. z Incorrectly allocating the IP address may cause major malfunctions such as crashing of the network. Thoroughly consult the network administrator before making the settings. - Page 126 Using DHCP „ To use the printer in a BOOTP environment To use the printer in a BOOTP environment, select [BOOTP] as the IP address setting method. Access the printer web page and log in as an administrator. Select [Admin Setup]. Select [Network Setup] >...
-
Page 127: Ipv6
IPv6 IPv6 Checking the IPv6 Address This printer is compatible with IPv6, and the IPv6 address is acquired automatically. IPv6 addresses cannot be set manually. IPv6 addresses are allocated automatically. The device is compatible with the following Access the printer web page and select protocols. - Page 128 IPv6 - 128 -...
-
Page 129: Viewing Machine Information
Viewing Machine Information Printing Configuration Information ……………………………… 130 Checking the Print Count …………… 138 - 129 -... -
Page 130: Printing Configuration Information
Printing Configuration Information Printing Configuration Information Printable Report List Reference List Name Description pages Configuration Prints the table of all menu category items and the current Page 131 settings. Further, the advanced printer settings are also printed in the page header. Demo Page Prints the demo print data stored in the printer. -
Page 131: Printing Printer Setup Lists
Printing Configuration Information Printing Printer Setup Lists „ Printing result samples Configuration Print the device information. Print to see the remaining quantity of consumables and other set values such as IP addresses and MAC addresses, and to check whether the printer is operating correctly, etc. „... -
Page 132: Printing Printer Information Lists
Printing Configuration Information Printing Printer Confirm that [Execute] is selected, and then press the <OK> button. Information Lists Demo Page Prints demonstration pages. „ To print Press the scroll button Select [Print Information], and then press the <OK> button. Select [Demo Page], and then press the <OK>... -
Page 133: Error Log
Printing Configuration Information Error Log Usage Report Prints the history of the errors that have Prints the total print results. occurred in the device. Memo „ To print z Not displayed if [Usage Report] of [Print Statistics] is set to [Disable]. Press the <Fn>... -
Page 134: Printing Print Lists
Printing Configuration Information Printing Print Lists Use the numeric keypad or the scroll buttons ( , ) to specify the number of copies, and then press the <OK> Color Profile List button. Prints the table of the ICC profiles registered on the printer. -
Page 135: User Media List
Printing Configuration Information User Media List Test Print Prints the table of the user media registered to Prints the print quality lists. the device. z Test Print-1 Prints the patterns for analyzing the print quality. Memo z Test Print-2 z Displayed when the user media is registered. Prints the patterns for analyzing CMYK print „... -
Page 136: Changing The Administrator Password
Printing Configuration Information Changing the When [Execute] appears, press the <OK> button. Administrator Password Change the administrator password. The factory default setting is [999999]. Press the scroll button Select [Admin Setup], and then press the <OK> button. Enter the administrator password, and then press the <OK>... - Page 137 Printing Configuration Information Enter the new password, and then press the <OK> button. Note z Specify a password that is at least six characters long. Re-enter the new password, and then press the <OK> button. Press the <ON LINE> button to return to the standby screen.
-
Page 138: Checking The Print Count
Checking the Print Count Checking the Print Count You can check the quantity of paper printed from the unwinder to date. Press the scroll button Press the <OK> button. Press the <ON LINE> button to return Select [Configuration], and then press to the standby screen. -
Page 139: Utility Software Usable With This Printer
Color Correct Utility …………………… 143 Using a Web Browser to Configure the Network Setup ……… 153 Configuration Tool ……………………… 184 OKI LPR Utility…………………………… 190 Network Extension …………………… 195 Color Swatch Utility …………………… 197 Status Monitor …………………………… 199 - 139 -... -
Page 140: Utility List
Windows Server 2012 R2/ Windows Server 2012/ Windows Server 2008 R2/ Windows Server 2008 OKI LPR Utility Can be used to print over a network Windows 10/Windows 8.1/ Page 190 connection, to manage print jobs, and Windows 8/Windows 7/ to check the printer status. -
Page 141: Installing A Utility
Installing a Utility Installing a Utility Use the procedure below to install the utility you Click [Custom Install]. want to use. Insert the "Software DVD-ROM" into the computer. On the "AutoPlay" screen that appears, click [Run Setup.exe]. When the "User Account Control" window is displayed, click [Yes]. - Page 142 Installing a Utility After installation is complete, click [Complete]. On the configuration screen of the device, click [Next]. On the completion screen, click [Exit] to exit installation. - 142 -...
-
Page 143: Color Correct Utility
Color Correct Utility Color Correct Utility Changing Palette Colors On the "Select Printer" screen that appears, select the printer to be used, and then click [Next]. The Color Correct Utility can be used to specify palette colors selected with Microsoft Excel, Word, and other applications within the adjustment range. - Page 144 Color Correct Utility Click [Next]. Compare the palette (screen colors) of the "Office Palette Tuning" screen with the printed "PALETTE COLOR SAMPLE". If the colors are different, adjust them. (This example below shows palette color adjustment of the color circled in red, below.) z PALETTE COLOR SAMPLE This displays the "Office Palette Tuning"...
- Page 145 Color Correct Utility (12) Use the X-value and Y-value On the "Adjustment values input" pulldown menus to check their screen, select the X-value and allowable setting ranges, and then Y-value you found in step (10) of click [CANCEL]. this procedure, and then click [OK]. The display will return to the "Office Memo Palette Tuning"...
-
Page 146: Changing The Gamma Value And Hue
Color Correct Utility (15) Changing the Gamma Click [OK]. Value and Hue You can use the Color Correct Utility to adjust the gamma value and/or hue for color matching. Note Note z For information about the Color Correct Utility setup, see "Installing a Utility"... - Page 147 Color Correct Utility On the "Select printer" screen that To adjust, move the [Gamma], appears, select the printer to be [Hue], and [Saturation] sliders. adjusted, and then click [Next]. Memo Memo z The [Gamma] slider can be used to adjust overall brightness, while the [Brightness/ z This displays a list of installed printer drivers.
- Page 148 Color Correct Utility Click [Print Test]. Use a printer driver to select a setup name, and then print. „ Windows PCL Printer Driver Open the file to be printed. Select [Print] in the [File] menu. Click [Preferences] (or [Properties]). On the [Color] tab, click [Detail], and then select [Simple Adjustment].
-
Page 149: Saving A Color Adjustment Setup
Color Correct Utility Saving a Color Adjustment Select the printer whose setup you want to save, and then click [Next]. Setup You can use the Color Correct Utility to save a setup to a file. Note z For information about the Color Correct Utility setup, see "Installing a Utility"... -
Page 150: Importing A Color Adjustment Setup
Color Correct Utility Importing a Color Save the setup. Adjustment Setup Click [Export]. You can use the procedure below to import a color adjustment setup from a file. Note z For information about the Color Correct Utility setup, see "Installing a Utility" (P.141). - Page 151 Color Correct Utility Select the printer whose setup In the folder where the setup you you want to import, and then click want to import is stored, select the [Next]. appropriate CCM file, and then click [Open]. On the "Import Settings" screen This displays the "Import/Export Color that appears, select the setup you Settings"...
-
Page 152: Deleting A Color Adjustment Setup
Perform the following operation to start After confirming that the setup has up the Color Correct Utility: [Start] > been deleted, click [Finish]. [Oki Data] > [Color Correct Utility]. Select [Import/Export Color Settings], and then click [Next]. Select the printer whose setup you want to delete, and then click [Next]. -
Page 153: Using A Web Browser To Configure The Network Setup
Using a Web Browser to Configure the Network Setup Using a Web Browser to Configure the Network Setup Operating Environment Starting Up Computer with Microsoft Internet Explorer, Start up the web browser. Safari, Google Chrome, or Firefox installed Computer running TCP/IP In the address bar, enter the following URL then press [Enter]: http://<printer Memo... -
Page 154: Logging In As An Administrator
Using a Web Browser to Configure the Network Setup Logging in as an Specify the configuration information that can be checked on the network, Administrator and then click [OK] or [SKIP]. Note z To change printer settings using a web browser, you need to log in as a printer administrator. -
Page 155: Item List
Using a Web Browser to Configure the Network Setup Item List „ Printer Menu ◎ ◎ : Appears for a person logged in as a printer administrator. „ View Information Item Description General Can be used to configure the printer name, asset Printer number, installation location, and other printer Settings... -
Page 156: Changing An Administrator Password
Using a Web Browser to Configure the Network Setup Changing an Administrator „ Calibration ◎ Password You can use the procedure below to change the password for logging in to the printer as an administrator. Click [Admin Setup] > [Management]. Item Description Normal Adjusts the density of each color and other print... -
Page 157: Checking Printer Settings From A Computer
Using a Web Browser to Configure the Network Setup Checking Printer Settings This saves the settings on the printer. From a Computer You do not need to re-start the printer. Use the new password the next time you log in as an administrator. -
Page 158: Changing Printer Settings From A Computer
Using a Web Browser to Configure the Network Setup Changing Printer Settings Encrypting Communication From a Computer (SSL/TLS) You can use the procedure below to change Communication between the computer (client) printer settings. and printer can be encrypted when configuring settings, performing IPP printing, and when receiving print data with FTP protocol. - Page 159 Using a Web Browser to Configure the Network Setup Select the type of the certificate to ‰ Self-signed Certificate create in [Step 1]. To create a CA certificate, advance to "CA Certificate" (P.160). This displays the input. Check the contents, and then click [OK]. This creates the certificate.
- Page 160 Using a Web Browser to Configure the Network Setup ‰ CA Certificate This installs the certificate issued by the CA (using the web). (For a CA This displays the input. certificate) Check the contents, and then click [OK]. Perform steps 1 through 3 of this procedure to display the encryption (SSL/TLS) setup screen.
-
Page 161: Printing With Ipp
Using a Web Browser to Configure the Network Setup Printing with IPP Select [Select a shared printer by name]. Printing can be performed using IPP. „ To enable IPP printing Access the printer web page and log in as an administrator. Select [Admin Setup]. -
Page 162: Encrypting Communication (Ipsec)
Using a Web Browser to Configure the Network Setup Encrypting Communication Click [OK]. (IPsec) Select the printer name, and then click [Next]. You can configure the settings in this section to encrypt and prevent tampering with communication between the computer (client) and printer at the network layer level. - Page 163 Using a Web Browser to Configure the Network Setup Under [STEP1], enable [IPsec]. Under [STEP3], configure the settings of the Phase1 Proposal parameters. Note For [IKE Encryption Algorithm], z Set "Enable" for IPsec to encrypt communications select one of the following settings: from the computer with the IP address you specified AES-CBC 256, AES-CBC 192, AES- in "STEP2".
- Page 164 Using a Web Browser to Configure the Network Setup Under [STEP5], set the Key PFS. Under [STEP6], configure Phase2 Proposal settings. For [Key PFS], select KEYPFS or z To configure [ESP] settings NOPFS. For [ESP Encryption Algorithm], select one of the following settings: AES-CBC 256, AES-CBC 192, AES- CBC 128, 3DES-CBC, DES-CBC.
- Page 165 Using a Web Browser to Configure the Network Setup „ To configure computer settings Settings are saved on the printer and the network function is restarted. Click [Start], and then select [Control panel] in [Windows System]. Click [System and Security]. Click [Administrative Tools].
- Page 166 Using a Web Browser to Configure the Network Setup Select [Windows Firewall with Advanced Select [Require authentication for Security] > [Windows Firewall with inbound connections and request Advanced Security - Local Group Policy authentication for outbound Object], right-click [Connection Security connections], and then click [Next].
- Page 167 Using a Web Browser to Configure the Network Setup Click [OK]. ‰ IPsec Setup Open the [Local Security Policy] of the [Administrative Tools]. Click [Next]. Click [Next]. Right-click [Windows Firewall with Advanced Security], and then select [Properties]. After confirming that all of the check boxes are selected, click [Next].
- Page 168 Using a Web Browser to Configure the Network Setup In the [Key exchange (Main Mode)] Configure the settings you want, and section, select [Advanced], and then then click [OK]. click [Customize]. Note z Support is provided only for time indicated by the key lifetime.
-
Page 169: Controlling Access By Ip Address (Ip Filter)
Using a Web Browser to Configure the Network Setup Controlling Access by IP Select [Preshared Key] and enter the key, and then click [OK]. Address (IP Filter) Access to the printer can be managed using IP addresses. Note z [IP Filtering] is set to [Disable] under the printer initial default settings. - Page 170 Using a Web Browser to Configure the Network Setup Under [STEP1], select [Enable] for [IP Under [STEP3], specify the Filtering]. [Administrator’s IP Address setting]. Even if the wrong settings are configured Note in [STEP2] due to administrator IP address entry in [Administrator’s IP Address z Enabling IP filtering disables all access from hosts setting], the administrator can re-configure that are outside the range of IP addresses specified...
-
Page 171: Controlling Access By Mac Address
Using a Web Browser to Configure the Network Setup Controlling Access by MAC Under [STEP1], select [Enable] for [MAC Address Filtering]. Address Access to the printer can be managed using MAC addresses. Note z Incorrectly entering a MAC address can make it impossible to access the printer using a network. -
Page 172: Sending Error Notifications By Mail
Using a Web Browser to Configure the Network Setup Sending Error Notifications Under [STEP3], specify the [Administrator’s MAC Address setting]. by Mail The printer comes with a mail sending function (SMTP) built-in. It can be configured to send a mail message whenever an error occurs. You can select whether to send a periodic mail message about errors, or to send a mail message as soon as an error occurs. - Page 173 Using a Web Browser to Configure the Network Setup Under [STEP1], select [Enable] for To configure more advanced settings [SMTP Send]. from this point, click [Set detail of the SMTP Protocol.] for [STEP3]. Under [STEP2], specify the required Otherwise, jump to step 16 of this addresses.
-
Page 174: Sending Error Notifications By Periodic Mail
Using a Web Browser to Configure the Network Setup Sending Error Notifications Select or enter the information you want to add to the end of the message by Periodic Mail text. „ To send periodic notifications Click [OK]. about problems Click [Others]. - Page 175 Using a Web Browser to Configure the Network Setup Enter the mail address of the Under [Setting Events Used for Sending malfunction notification recipient. Email Alerts], select the check boxes of the error types for you to be notified of. Click [Setting] of the mail address you want to specify.
- Page 176 Using a Web Browser to Configure the Network Setup „ To send alerts when problems z To compare the setting conditions of two recipients occur Use the list box to select each Click: [Email] > [Alert Settings]. of the recipients you want to compare.
- Page 177 Using a Web Browser to Configure the Network Setup Under [Setting Events Used for Sending Check the configuration of the Email Alerts], select the check boxes of malfunction notification conditions. the error types for you to be notified of. z To display as a list Click [Show current settings table].
-
Page 178: Using Snmpv3
Using a Web Browser to Configure the Network Setup Using SNMPv3 Select the check box of the SNMP version to be used in [STEP1], and then This printer implements an SNMPv3 compatible click [To STEP2]. agent. You can use an SNMPv3 compatible SNMP manager to encrypt printer administration with SNMP for greater security. -
Page 179: Using Ieee802.1X
Using a Web Browser to Configure the Network Setup Using IEEE802.1X Select [Algorithm]. Authentication is in accordance with IEEE802.1X. „ IEEE802.1X Setup Flow To configure IEEE802.1X settings on the printer, first connect the printer and computer via a normal hub for setup. After completing the IEEE802.1X setting configuration procedure, connect the printer to the authentication switch. - Page 180 Using a Web Browser to Configure the Network Setup „ To configure IEEE802.1 settings „ To use PEAP Log in as an administrator. For the [IEEE802.1X] setting, select [Enable]. Reference For [EAP Type], select [PEAP]. z See "Logging in as an Administrator" (P.154).
- Page 181 Using a Web Browser to Configure the Network Setup „ To use EAP-TLS Click [Import of CA Certificate]. For the [IEEE802.1X] setting, select Memo [Enable]. z If the [Not authenticate Server] check box is selected, import of a CA certificate is not required. For [EAP Type], select [EAP-TLS].
- Page 182 Using a Web Browser to Configure the Network Setup Enter the client certificate password, Enter the file name of the CA certificate, and then click [OK]. and then click [OK]. Memo z The imported CA certificate is a certificate of the server certificate issuing authority of the RADIUS server.
- Page 183 Using a Web Browser to Configure the Network Setup „ To connect the printer to an authentication switch Memo z Confirm that the printer is turned off. Plug a LAN cable into the printer's LAN (network) interface connector. Plug the LAN cable into the authentication switch's authentication port.
-
Page 184: Configuration Tool
Configuration Tool Configuration Tool is a utility for modifying and managing OKI device settings. Configuration Tool has the functions below for simple configuration and management of multiple OKI devices. z Device information display z ICC profile registration and management... -
Page 185: Device Info Tab
To update information, click [Update Device Information]. Note z The device status is displayed when the OKI device is connected to the network. Select the check box next to the OKI devices you want to set up or manage, and then click [Register]. -
Page 186: Network Setting Plug-In
Configuration Tool Network Setting Plug-in „ To specify search criteria On the [Plug-ins] menu, select [Network This plug-in makes it possible to configure Setting]. network settings with Configuration Tool. Before configuring settings, install the Network Setting plug-in. „ Icon Types The meaning of each icon is described below. -
Page 187: Storage Manager Plug-In
Configuration Tool Storage Manager Plug-in „ Registering an ICC Profile Printer profiles can be registered and edited as The Storage Manager plug-in can be used to required. The information below explains some manage jobs stored on the printer, to save forms of the profile functions. - Page 188 Configuration Tool „ Registering a Form (Form Overlay) ‰ Using Configuration Tool to Register a Form on the Printer You can register logos and other forms on the printer and overlay them for printing. Here, we On the [Plug-ins] menu, select [Storage will show how to register a form.
- Page 189 Configuration Tool „ To check the hard disk and flash memory free space You can use the procedure below to check hard disk and flash memory free space. In the device selection area at the bottom of the Storage Manager plug-in screen, click the printer name to display the resource screen of the selected printer.
-
Page 190: Oki Lpr Utility
Use of printing method function is not supported. Starting Up Perform the following operation to start up the OKI LPR Utility: [Start] > [Okidata] > [OKI LPR Utility]. This will display a screen like the one below. Select the file to be downloaded, and Shows the number of then click [Open]. -
Page 191: Viewing, Deleting, And Transferring Jobs
Next, on the [Job] menu, select the printer to transfer to in [Redirect]. This transfers the job to the destination printer. Note z The printer being transferred to must be set up beforehand using the OKI LPR Utility. - 191 -... -
Page 192: Adding A Printer
[Devices and Printers] folder. It does not appear when the printer is configured as a network Click [Details]. printer. Memo z You can search for Oki Data printers on the network by clicking [Discover]. The printer is added to the main window. - 192 -... -
Page 193: Adding Comments
Adding Comments For [Port Numbers], enter the web port number. You can use the procedure below to add comments to the printers added to the OKI LPR Utility. Memo z This can be used to enter information about the printer location, optional devices, etc. -
Page 194: Automatic Ip Address Setting
The search is performed in accordance with the search scope of the OKI LPR Utility. Memo Select [Start] > [Okidata] > [Uninstall OKI LPR Utility] to start the Uninstall z Enabled in the initial settings of the device. OKI LPR Utility. On the [Option] menu, select [Setup]. -
Page 195: Network Extension
Click [View devices and printers]. z Operation is supported only for the printer driver connection destinations shown below. - OKI LPR Port - Standard TCP/IP port z PC administrator privileges are required for the setup. Right-click the [Pro1050 PCL6] icon, and then select [Printer Properties]. -
Page 196: Uninstalling Network Extension
Click [Update]. Extension Click [Start], and then select [Control panel] in [Windows System]. Click [Uninstall a program]. Select [OKI Network Extension], and then click [Uninstall]. Follow the instructions on the screen to uninstall. The printer configuration is displayed under "Device Setting". -
Page 197: Color Swatch Utility
Perform the following operation to Adjust the positions of the three start up the Color Swatch Utility: bars until the desired color is [Start] > [Oki Data] > [Color shown on the monitor screen, and Swatch Utility]. then click [Close]. - Page 198 Color Swatch Utility (11) Click [OK] or [Print]. This causes a single page to be printed by the printer. (12) If you cannot find the color you want in the color sample, repeat steps (6) through (11) of this procedure. Use the application to print the desired color.
-
Page 199: Status Monitor
The printer must be connected to the computer, the printer driver must be installed, and [Ports] in the printer driver must be set to USB or standard TCP/IP port beforehand. Starting Up Displaying the Printer Status Select [Start] > [Okidata] > [OKI Pro1040_1050 Status Monitor] to start Check the screenshot below. up Status Monitor. Displays the name of the printer being monitored. -
Page 200: Changing The Display Mode
Status Monitor Changing the Display Mode The icon appears on the taskbar. Status Monitor has multiple display modes that you can change. „ Icon display Click the [Preferences] tab in the advanced display screen. Memo z Place the mouse cursor over the icon to display the status of the printer in a tooltip. -
Page 201: Switching Printers
Status Monitor Switching Printers „ Status panel display Click the [Preferences] tab in the Click the [Printer Setup] tab in the advanced display screen. advanced display screen. Select [Display Status Panel] under Click [Select Printer]. [Minimized View]. After selecting the printer you want to Click [-] in the title bar. -
Page 202: Acquiring Information In Reports As Csv Files
Status Monitor Acquiring Information in Click [Open Configuration], specify a file name and a location to save the file, Reports as CSV Files and then click [Save]. Click the [Printer Setup] tab in the advanced display screen. Select the report data that you want to The CSV file is saved in the specified save as a CSV file. -
Page 203: Exiting
Note z If Status Monitor is running on a USB connection Right click the icons on the title bar or and another OKI utility is using the same USB connection, the following message appears and the taskbar. Status Monitor closes itself. - Page 204 Status Monitor - 204 -...
-
Page 205: Index
Index - 205 -... - Page 206 Adjust Color Drift (Manual) ......100 Dark ..........105, 107 Adjust Density (Auto) ........ 100 Date ............69 Adjust Density (Manual) ......101 Density Fine Tuning ........102 Adjusting Ultra Fine Lines ......82 Device Setup Screen ........50 Administrator Password ......136 DHCP Server ..........
- Page 207 OKI LPR Utility ......... 190 Registered Form Printing ......90 Overlaying Stamps for Printing ..... 87 Returning the Network Setup to Its Factory Overlay Printing ......... 90 Default ............ 124 Page Order ..........87 Setting Resolution ........81 Paper SNMP ............63 Loading ..........
- Page 208 Watermarks ..........87 Web Browser ........... 153 Item List ......... 155 Login ..........154 White Toner ........119, 120 Writing Print Data to a File ......92 - 208 -...
- Page 209 - 209 -...
- Page 210 Oki Data Corporation 4-11-22 Shibaura, Minato-ku,Tokyo 108-8551, Japan March 2019 47232202EE Rev2 https://www.oki.com/printing/...
Need help?
Do you have a question about the Pro1040 and is the answer not in the manual?
Questions and answers